Ikegami HTM-1990R Operation Manual
Multi-format color monitor
Hide thumbs
Also See for HTM-1990R:
- Brochure (10 pages) ,
- Brochure & specs (6 pages) ,
- Service manual (109 pages)
Table of Contents
Advertisement
Advertisement
Table of Contents

Related Manuals for Ikegami HTM-1990R


Summary of Contents for Ikegami HTM-1990R
- Page 1 MODEL HTM-1990R MULTI-FORMAT COLOR MONITOR OPERATION MANUAL...
- Page 3 CAUTION RISK OF ELECTRIC SHOCK DO NOT OPEN SA 1965 SA 1966 CAUTION: TO REDUCE THE RISK OF ELECTRIC SHOCK, DO NOT REMOVE COVER (OR BACK). NO USER-SERVICEABLE PARTS INSIDE. REFER SERVICING TO QUALIFIED SERVICE PERSONNEL. The lightning flash with arrowhead inside a triangle is intended to warn the user that parts inside the product are dangerous and many cause electric hazards.
- Page 4 IMPORTANT SAFETY INSTRUCTION 3) When connecting and disconnecting the 1. General power cable, be sure to hold the plug. 1) Read all instructions provided. 4) Do not allow anything to rest on the power 2) Save these instructions for future use. cord.
- Page 5 3) Upon completion of any service or repairs to paint may peel away. this monitor, ask the service technician to perform routine safety checks to determine that the television is in safe operating condition. 4) For repair service, contact Ikegami’s authorized sales representative or Ikegami service desk directly.
- Page 6 In such cases, contact the Ikegami 4) If cabinet or screen is dirty, wipe with soft service desk.
-
Page 7: Precautions Upon Use
Malfunctions occurring in normal use within one year from the date of purchase will be repaired free of charge. This does not apply to the fuses. If no image is displayed after user adjustment or if malfunction is suspected, contact your nearest Ikegami dealer. Accessories This monitor is provided with the following accessories. -
Page 8: Table Of Contents
2-3 Options ..........(6) Adjusting the rotation ......28 2-4 External View ........(7) Adjusting the screen centering ....28 (1) HTM-1990R ..........(8) Adjusting the screen distortion ..... 29 (2) HTM-1990R (9) Adjusting the screen size ....... 29 (with DAM-504/508,MK-1905) .... -
Page 9: Outline
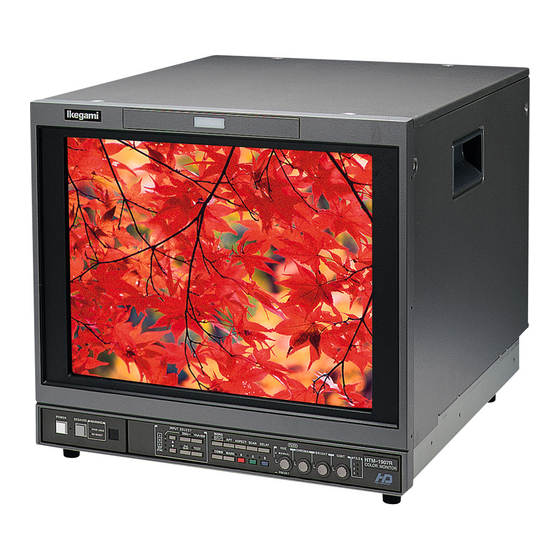
HTM-1990R Multi-Format Color Monitor HTM-1990R Multi-Format Color Monitor Multi-format SDI 1. Outline The Multi-format SDI module (DKM-501A/B 1-1. Outline (optional)) is capable of accepting both HD-SDI and SD-SDI (4:2:2) signals in the same input terminal. This monitor is designed to get HDTV signals The monitor automatically identifies HD-SDI or SD- formatted and mixed with SDTV signals. - Page 10 Structure with enhanced maintenance and Memory of 4 different of color temperatures expendability As the monitor is able to memorize other color The signal processing module (including optional temperatures in addition to the D93/D65 color modules) is of the plug-in type which can be easily temperatures set as default, the optimum white disconnected and reconnected from the back without balance can be set promptly, as well as, easily...
-
Page 11: General Specifications
(3) Brightness and Contrast 2. General Specifications 1. CRT 2-1. Common Specifications Dot trio pitch: 0.25mm 2. Horizontal resolution (1) General More than 950 lines (480i/575i/1080i) with 1. Power supply: YPbPr input and 120 cd/m in screen center AC single phase, 50/60 Hz 3. -
Page 12: Functions
(5) Functions 7. Menu assist • Input signal format setting 1. Marker function • RGB/YPbPr switching setting a) Center marker: Set to ON/OFF using MENU settings • Test signal format setting b) Safe title: • Marker center cross display ON/OFF setting The following markers are displayed according to •... -
Page 13: Multi-Format Sdi Input Module
3. Input level Video section a) HDTV (BTA S-001B) 1. Input/output terminal •Y, G, B, R input V: 700mVp-p Positive polarity Input: BNC 2 lines S: ±300mVp-p Output: BNC 1 line (Active loop through for only •Pb, Pr input V: ±350mVp-p Positive polarity one line selected) •Sync input: ±300mVp-p... -
Page 14: Sd-Sdi Input Module
(4) Decoder input module (Option) Analog audio output (AV type) • DE-801 NTSC decoder module * Analog audio level 0dbs 0.775Vrms • DE-811 NTSC/PAL-B decoder module 1. Output terminal: 1. Input/output terminal: BNC 3 lines (Loop through) XLR-5-32 type (Canon 5-pin male) 2. -
Page 15: Options
2-3. Options DE-801 DKM-511A NTSC 3-line comb decoder three-input module. Equipped with a high-performance post-filter to DE-811 make x/sin x corrections on the two-input module NTSC/PAL-B 3-line comb decoder three-input HDTV video signal of the Multi-SDI (HD-SDI/4:2:2). module. DKM-511B SRC-301Z Multi-SDI (HD-SDI/4:2:2) two-input module. -
Page 16: External View
2-4. External View (1) HTM-1990R... -
Page 17: Htm-1990R (With Dam-504/508,Mk-1905)
(2) HTM-1990R (with DAM-504/508,MK-1905) -
Page 18: Installation
3. Installation Caution: For your safety, turn off the power of each equipment before connection. 3-1. External connection (1) Standard module (MPU, VIDEO PROCESS) MPU module Option module *Refer to the pages that follow. VIDEO PROCESS module YPbPr/RGB A channel input REMOTE YPbPr/RGB •... -
Page 19: Multi-Format Sdi Input Module
(2) Multi-format SDI input module DKM-511* SDI A/B signal input • Input the HDTV or SDTV (4:2:2) signal here. HD / 4:2:2 • Input signal format is automatically identified to control the monitor. CH A CH B SDI signal output • Output the same selected channel signal from the A/B channel as channel select is made for monitoring. MONITOR DKM-511*AV (compatible with 2 embedded analog audio outputs) AUDIO LINE OUT AUDIO LINE OUT • Select one pair of channels out of four paired channels in the MENU, and output 2-channel analog ... -
Page 20: Sd-Sdi Input Module
(3) SD-SDI input module DK-801A SD-SDI A/B input 4:2:2 • Input the 4:2:2SD-SDI signal here according to the following module. • When this module and multi SDI module are mounted together, this module will be assigned to the 2nd slot. To select the 2nd slot, press the 2nd slot switch. CH A SD-SDI A output • The SD-SDI signal input to the A channel output here. SD-SDI B output CH B <Setting Method> • The SD-SDI signal input to the B channel is NORMAL (Default) MONITOR OUT output from here. • The signal selected at the monitor can also be MONITOR ... -
Page 21: Parallel Remote Connection
3-2. Parallel Remote Connection (1) Pin function CH-B ON CH-C ON Green TALLY ON YPbPr/RGB ON SD-SDI ON MONO ON RGB ON EXT-SYNC ON 16 : 9 ON MARKER ON <Connector Face View on Rear Panel> SHADOW ON Red TALLY ON HD-SDI/MULTI-SDI ON <Wiring of Remote Connector> Pin No. Function External Assignment for Function Connecting remote terminals to this pin enables ON control. -
Page 22: User Adjustment
4. User Adjustment 4-1. Power Supply ① FUSE Fuse for preventing over-current. FUSE When the fuse is blown, replace it with a rated 6.25A (250V) slow-blow fuse after 6.25A250V eliminating the cause. MAIN POWER ② MAIN POWER switch To operate the monitor, turn ON this MAIN POWER switch as well as the POWER switch on the front panel. ③ AC power input Insert the provided AC cable here to supply AC power. AC IN ④ Lock After inserting the AC plug, lock the AC plug with this lock to prevent it from disconnecting. ... -
Page 23: Names And Functions Of Front Controller Parts
4-3. Names and Functions of Front Controller Parts (1) Names and functions of front panel parts ① INPUT SELECT switch ② DIGITAL switch ③ YPbPr/RGB switch ⑦ MONO (SPLIT) switch ⑧ APT switch ⑨ ASPECT switch ⑩ SCAN switch ⑭ DELAY switch ⑲ FILE LED INPUT SELECT MONO FUSE HTM-1990R DIGI YPbPr/RGB SPLIT ASPECT SCAN DELAY CHROMA BRIGHT CONT FILE COLOR MONITOR MANUAL TEST COMB... - Page 24 ⑤ TEST switch ⑦ MONO (SPLIT) switch Turn ON to switch to the internal TEST signal. Set the MONO switch to ON when the color signal The following standard TEST signal formats are is to be viewed in the black/white state. provided.
- Page 25 ⑩ SCAN switch ⑮ HUE manual control Use the SCAN switch to switch between normal This control serves as a MANUAL/PRESET data scan and under-scan. selection switch as well as a manual data variable control. ⑪ SCREEN switch The control pops out and is switched to the When displaying the individual R, G, B screen MANUAL state with each press (the LED lights).
-
Page 26: Names And Functions Of Drawer Panel Controls
(2) Names and Functions of Drawer Panel Controls MENU switch ENT switch ESC switch STORE FILE switch U.DISPLAY switch CLEAR switch FILE 1 switch CHANGE PRESET switch FILE 2 switch FORCED COL/MONO switch FILE 3 switch CHROMA UP switch DISPLAY SELECT STORE CHANGE FORCED CHROMA MENU U.DISPLAY FILE 1 FILE 2 FILE 3 FILE CLEAR PRESET COL/MONO BACK GROUND BRIGHT ROTATION H.PHASE... - Page 27 ③ FORCED COL/MONO switch ’ PRESET FILE FORMAT SCAN ty of data (Functions only when the NTSC decoder is mounted) ● × × The function of this switch differs as follows CHROMA ● × × BRIGHT ● × × according to the state of the MONO switch on the CONT ●...
- Page 28 ⑧ H. CENT switch ⑬ H. PHASE switch Switch for adjusting the horizontal position of the Switch for adjusting the horizontal phase of the active screen. marker. Display the 100% marker and adjust so that the image fits inside the 100% frame. ⑨...
- Page 29 HUE PRESET switch ESC switch 2 1 3 1 Switch for adjusting the HUE PRESET data. Switch to exit MENU. This circuit operates only when the NTSC decoder module DE-811 is mounted and the analog/digital U. DISPLAY switch 3 2 (D2) NTSC composite signal input is selected.
-
Page 30: Storing And Changing Data In The Memory
4-4. Storing and Changing Data in the Memory (1) Storing and changing the PRESET data <Ex: 1> Changing the H.PHASE, H.CENT, V.CENT, WIDTH, HEIGHT, TRAPEZOID and SIDE PIN. Set the SCAN size to the UNDER SCAN mode using the SCAN switch, ... -
Page 31: Changing And Storing The File Data
<Ex: 2> Changing APT INPUT SELECT MONO FUSE DIGI YPbPr/RGB HTM1990R SPLIT ASPECT SCAN DELAY CHROMA BRIGHT CONT FILE COLOR MONITOR MANUAL Set the APT switch to ON. TEST COMB MARK SLOT STNC SCREENS PRESET D I S P L AY S E L E C T F I L E S TO R E CHANGE... -
Page 32: Types Of Markers
4-5. Types of Markers ⑬ 14 : 9 marker ① 80% marker Active screen area Active screen area 14 : 9 marker 100% area marker 80% area marker ② 88% marker ⑭ 14 : 9 marker + shadow Active screen area Active screen area 100% area marker 14 :... -
Page 33: Adjustment Procedure
(3) Adjusting the white balance 4-6. Adjustment Procedure a) White balance The following adjustments will be more precise if The monitor has four files to store white balance you dim the monitoring environment. data. The four files are set to the following color temperatures as default. - Page 34 ④ Initial adjustment of low light Set only the R.SCREEN switch to ON (red screen Set only the R.SCREEN switch to ON (red screen only), and adjust the R.BACKGROUND data so only), adjust the R.BACKGROUND data so that that the red line at Part B in the figure illuminates the red line at Part B in the figure 4-6-2 illuminates slightly.
-
Page 35: Adjusting The Color Balance
② Starting (4) Adjusting the color balance Set the screen to blue only using the SCREEN a) Color balance switch. For the component signal (YPbPr/RGB), adjust the * As the luminance difference is hard to discern color balance using CHROMA only. If the NTSC when the screen is bright, dim the decoder module DE-811 is mounted, input NTSC surroundings as much as practical and lower... -
Page 36: Adjusting The Rotation
b) Precautions (6) Adjusting the rotation As the H.PHASE and H/V.CENT settings are a) Rotation stored as the data for each signal format, do not ROTATION is the control for correcting changes perform the following operations during the in the purity caused by geomagnetic effects on the setting. -
Page 37: Adjusting The Screen Distortion
(8) Adjusting the screen distortion (9) Adjusting the screen size a) Screen distortion a) Screen size Set the screen size using HEIGHT and WIDTH. The SIDE PIN and TRAPEZOID controls are The following four sizes can be set for these two provided to adjust the screen distortion. -
Page 38: Adjusting The Moiré Effect
Adjust WIDTH so that the inner size of the 4:3 d) Adjustment procedure 2 area marker becomes the size in the following table. (NORMAL SCAN (HD 16:9, SD 4:3/16:9) Adjust HEIGHT and WIDTH for HDTV 16:9 and <HDTV 4:3 SCAN size guideline> SDTV 4:3/16:9 NORMAL SCAN as follows. -
Page 39: Menu Functions
4-7. MENU Functions (1) List of MENU All functions can be executed in the MENU screen. Table 4-1 List of MENU MENU MENU1 ① MULTI SDI FM Setting the format of SDI inputs <FORMAT> ② RGB/YPbPr FM Setting the format of YPbPr/RGB inputs ③ →1035/1080I Setting the format of YPbPr/RGB input line ④ →RGB/YPbPr Setting the format of YPbPr/RGB input signal ⑤ TEST SIG. FM ... -
Page 40: Flow Of Menu Operations
(2) Flow of MENU Operations MENU can be switched as follows using the MENU switch. < Normal Screen > MENU switch ON MENU1 <FORMAT>→ 1080I/60 Set the format of each input signal. 1.MULTI SDI FM AUTO 2.RGB/YPbPr FM HDTV 3. →1035/1080I 1080I/60 4. →RGB/YPbPr YPbPr 5.TEST SIG. FM 525I/60 6.INPUT DISP. ON 7.COLOR POINT P22 (EBU) ESC switch ON NEXT →(MENU) SELECT→(ENT) EXIT→(ESC) MENU switch ON Set each mode. - Page 41 MENU5 <LOCK> (UNLOCK) Set password to lock the data. -ENTER PASSWORD- ABCDEFGHIJKLMNOPQRSTUVWX YZ123456789 PASSWORD **** ESC switch ON NEXT →(MENU) SELECT→(ENT) EXIT→(ESC) MENU switch ON MENU6 <SETUP(ASP-80)> Perform settings related to the auto setup probe. 1.ZERO CARIBRATION 2.AWB(6500k) 3.AWB(9300k) 4.AWB(USER DATA) 5.MEASUREMENT & MEMORY 6.REAL TIME MEASUREMENT ESC switch ON NEXT →(MENU) SELECT→(ENT) EXIT→(ESC) MENU switch ON MENU7 <AUDIO> Perform settings related to the embedded audio. 1.LINE/OUT CH CH1/2 2.LED ENABLE CH1 TO 8 3.LED DIMMER HIGH ...
-
Page 42: Description Of Menu 1 Functions
(3) Description of MENU 1 Functions * Note the following description on the menu. The vertical deflection frequency “/60” includes both 60 Hz and 59.94 Hz. The vertical deflection frequency “/48” shows 24 sF (23.98 sF). 480i/59.94 and 575i/50 are displayed as “525I/60” and “625I/50”, respectively. MENU1 <FORMAT>→ 1080I/60 ... -
Page 43: Description Of Menu 3 Functions
② Setting of MARKER center cross ⑦ Setting of remote ID numbers Set the marker center cross display to ON/OFF. Set the monitor ID numbers ( 01 ~ 99 ). When performing remote control operations using wireless remote controller (RCT-30A) or serial remote controller (SRC-301Z), the monitors can be remote controlled individually with the ID numbers <... -
Page 44: Description Of Menu 4 Functions
If you forget your password, contact the ALL LOCK: Change of all PRESET data and switching of FILE nearest Ikegami dealer or Techno Ikegami. We will are disabled. provide a password to exit the LOCK mode. ④ LOCK MODE setting PRESET &... -
Page 45: Description Of Menu 6 Functions
(8) Description of MENU 6 Functions For operation details, refer to the ASP-80 manual. MENU6 <SETUP(ASP-80)> 1.ZERO CARIBRATION ① Zero calibration 2.AWB(6500k) ② Auto white balance (6500k) 3.AWB(9300k) ③ Auto white balance (9300k) 4.AWB(USER DATA) ④ Auto white balance (User data) 5.MEASUREMENT & MEMORY ⑤ Color temperature/luminance measurement and memory 6.REAL TIME MEASUREMENT ⑥ Real-time color temperature and luminance measurement NEXT →(MENU) SELECT→(ENT) EXIT→(ESC) ① Zero calibration ④ Auto white balance (User data) Perform the calibration of ASP-80. -
Page 46: Messages Displayed On The Screen
4-8 Messages Displayed on the Screen Message Explanation Cause: This message is displayed during the LOCK mode (see 4.7(7)) or when FILE 1 , FILE 2 or FILE 3 switch is pressed. ALL LOCK Action: Release the LOCK mode (UNLOCK), and resume the operation. Cause: This message is displayed when CHANGE PRESET switch or STORE FILE switch is pressed during the PRESET FILE setting in the LOCK mode (see 4.7(7)). -
Page 47: Installation Of Options
5. Installation of Options 5-1 Option Module <Notes> ① Modules should be inserted into the slots specified in the figure below. ② Optional modules should be inserted into the slot Nos. 2-5. (The figure below is an example. These modules may not be installed in the product you purchased.) ③... -
Page 48: Rack Mount Adapter
5-2 Rack Mount Adapter 1. RS-2020S Rack Mount Adapter for HTM-1907R/2005R/2050R/1980R/1990R/2070R *The parts marked are supplied with the slide rail. *Marks are attachments for the side rail. ① SLIDE RAIL (RACKSIDE) BRACKET * * * * ② MONITOR RACK METAL MCB4-12FZ N1H5FZ SLIDE RAIL (MONITOR SIDE) MCB4-8FZ HOLE CAP... -
Page 49: Remote Controller
5-3 Remote Controller (1) RCT-30A Infrared Remote Controller MONITOR SELECT CALL MONO INPUT DELAY SCAN COMB SYNC DEGAUSS FILE MENU MARKER WHITE BALANCE CHANGE CLEAR PRESET REMOTE CONTROL RCT-30A... -
Page 50: Src-301Z Serial Remote Controller
(2) SRC-301Z Serial Remote Controller... -
Page 51: Memo
6. Memo Although various PRESET DATA has data of the following kinds, write down customized PRESET DATA for your memorandum. If you have modified the PRESET DATA unintentionally, you can restore the default setting by executing LOAD FACTORY in MENU 3-4. DATA REF. - Page 53 © Apr. 2007 by Utsunomiya Factory of Ikegami Tsushinki Co., Ltd. ■ All right reserved. Reproduction or duplication, without permission of Ikegami Tsushinki Co., Ltd. of edition or contents in whole in part, any manner, is prohibited. ■ Specifications and design are subject to change without notice.
- Page 54 5-6-16, Ikegami, Ohta-ku, Tokyo, Japan 146-8567 Phone:(03)5700-1111 Fax:(03)5700-1137 Ikegami Electronics (U.S.A.), Inc. 37 Brook Avenue, Maywood, New Jersey 07607 Phone:(201)368-9171, Fax:(201)569-1626 Ikegami Electronics (Europe) GmbH Ikegami strasse 1, 41460 Neuss 1, F. R. Germany Phone:(02131)123-0, Fax:(02131)102820 Property of PRINTED IN JAPAN...
Need help?
Do you have a question about the HTM-1990R and is the answer not in the manual?
Questions and answers