
Subscribe to Our Youtube Channel
Related Manuals for DCS RGTC-305


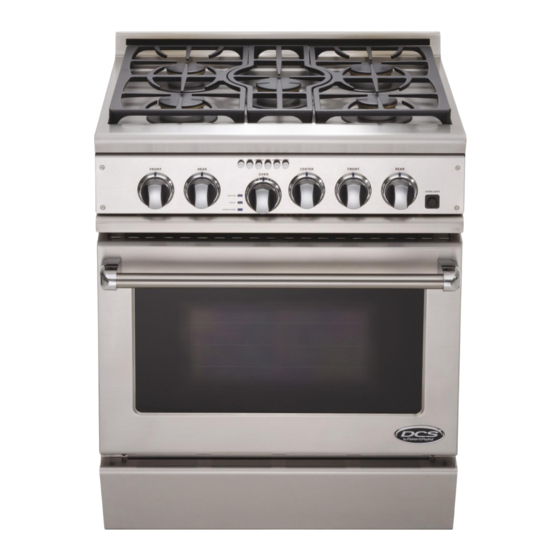
Summary of Contents for DCS RGTC-305
- Page 1 PROFESSIONAL 30” FIVE BURNER SELF-CLEAN GAS RANGE Installation Guide Installation Guide MODELS: RGTC-305 RGTC-305...
-
Page 3: For Your Safety
A MESSAGE TO OUR CUSTOMERS Thank you for selecting the DCS Professional 30” Self-Clean Gas Range. Because of this appliance’s unique features we have developed this Installation Guide. It contains valuable information on how to properly install your new appliance for years of safe and enjoyable cooking. -
Page 4: Table Of Contents
TABLE OF CONTENTS INTRODUCTION SAFETY PRACTICES AND PRECAUTIONS PLANNING THE INSTALLATION UNPACKING AND HANDLING VENTILATION REQUIREMENTS INSTALLING ANTI-TIP DEVICE CABINET PREPARATION BACKGUARD INSTALLATION ELECTRICAL CONNECTIONS GAS HOOK-UP TEST AND ADJUSTMENTS CLEANING EXTERIOR SURFACES INSTALLER FINAL CHECKLIST HOW TO OBTAIN SERVICE WARRANTY 8-10 13-14... -
Page 5: Introduction
LP (propane), depending on the specific model ordered. Verify that the range is compatible with gas supply at the installation site before proceeding further. Return range to dealer if unit is not set for the gas supplied at the site. -
Page 6: Safety Practices And Precautions
SAFETY PRACTICES AND PRECAUTIONS When properly cared for, your new DCS Appliance has been designed to be a safe, reliable cooking appliance. When using this restaurant caliber appliance, use it with extreme care, as this type appliance provides intense heat which can increase the accident potential. Basic safety precautions must be followed when using kitchen appliances, including the following: ■... - Page 7 SAFETY PRACTICES AND PRECAUTIONS ■ For personal safety, wear proper apparel. Loose fitting garments or hanging sleeves should never be worn while using this appliance. Some synthetic fabrics are highly flammable and should not be worn while cooking. ■ Do not use aluminum foil to line any part of the oven or cooktop. This will cause heat to be trapped underneath it.
-
Page 8: Safety Practices And Precautions
■ Be sure all the range and/or cooktop controls are turned off and the appliance is cool before using any type of aerosol cleaner on or around the appliance. The chemical that produces the spraying action could, in the presence of heat, ignite or cause metal parts to corrode. -
Page 9: Planning The Installation
Code ANSI / NFPA 70-1990. Be sure that the unit being installed is set up for the kind of gas being used. The gas range is shipped from the factory set and adjusted for Natural Gas or LP (propane), depending on the specific model ordered. Verify that the range is compatible with the gas type at the installation site before proceeding further. -
Page 10: Planning The Installation
7. Connect gas and electric connections and slide range into position. UNPACKING AND HANDLING CAUTION: Proper equipment and adequate manpower must be used in moving the range to avoid damage to the unit or the floor. The unit is heavy and rests on adjustable steel legs. WARNING:... - Page 11 (see pages 13). If installing a full backguard with the range, it should also be installed before the range is placed in its final position (refer to pages 15). For proper performance, the professional range should be level. To achieve a...
-
Page 12: Unpacking And Handling
DO NOT lift door by the handle - will cause damage! 4. Continue to lift and pull the door away from the range. Fig. 06... -
Page 13: Ventilation Requirements
For best smoke elimination, the lower edge of the hood should be installed a minimum of 30" to a maximum of 36" above the range cooking surface, (page 13). If the hood contains any combustible materials (i.e. a wood covering) it must be a minimum of 36" above the cooking surface. -
Page 14: Installing Anti-Tip Device
If it is not, there is a possible risk of the range tipping over and causing injury if you or a child stand, sit or lean on an open oven door. -
Page 15: Cabinet Preparation
(above the cooking surface) a DCS Low backguard or Full backguard must be installed (See Fig. 14). The range comes equipped with island Trim as standard. Fig. 14 indicates the space required for each type of backguard. -
Page 16: Cabinet Preparation
CABINET PREPARATION Dimensions: 0” clearance 29- 7/8" 35- 3/4" – 37" 27-1/2" 28-1/8" full backguard 10-1/8" low backguard 2" island trim 1-5/16" 30" 44-5/8" 36" min. to combustibles 24-1/4" 26-3/4" 12" min. to combustibles As defined in the 0” clearance “National Fuel Gas Code”... -
Page 17: Backguard Installation
See also page 8, “Planning The Instal- lation” section. A backguard must be installed when there is less than a 12” clearance between combustibles and the back of the range (above the cooking surface). See Fig. 14. DCS backguards are sold separately. ELECTRICAL CONNECTIONS ELECTRICAL CONNECTIONS Power Requirements Range: 120 VAC, 60 Hz., single phase. -
Page 18: Gas Hook-Up
GAS REQUIREMENTS Verify the type of gas supplied to the location. The range is shipped from the factory set up and adjusted for natural gas or LP (propane), depending on specific model ordered. Verify that the range is compatible with the gas supply at the installation site before proceeding further. -
Page 19: Test And Adjustments
TEST AND ADJUSTMENTS WARNING : COOKTOP BURNER For warranty coverage, DCS requires that burner adjustments be made by a qualified technician at the time of installation. Extreme care should be used when adjustments 1-1/2" are made after installation. IMPROPER OR LACK OF ADJUSTMENT WILL VOID YOUR WARRANTY. -
Page 20: Cleaning Exterior Surfaces
Connection: 1/2 NPT with a minimum 5/8" diameter flex line. ❑ Site gas supply is compatible with range model. The pressure regulator which is connected to the manifold is set for 5.0” W.C. for natural gas or 10.0” W.C. for LP. -
Page 21: How To Obtain Service
HOW TO OBTAIN SERVICE For warranty service, please contact DCS Customer Care Representative at (888) 281-5698. Before you call, please have the following information ready: ■ Model Number (located on rating plate on the back panel and also on the front frame, right lower corner between the kick panel and the oven door). -
Page 22: Warranty
LIMITED WARRANTY When you purchase a new DCS Range, you automatically receive a One Year Limited Warranty covering parts and labor for the entire product, a Five Year Limited Warranty on surface burners and oven burners (parts only), and a Two Year Limited Warranty on the porcelain oven liner and porcelain inner door panel (parts only) for servicing within the 48 mainland United States, Hawaii, Washington D.C. -
Page 23: How To Get Service
Please read your Use and Care Guide. If you then have any questions about operating the Product, need the name of your local DCS Authorized Service Agent, or believe the Product is defective and wish service under this Limited Warranty, please contact your dealer or call us at: TOLL FREE 1-888-281-5698 or contact us through our web site: www.dcsappliances.com... - Page 24 NOTES...
- Page 25 LA CUISINIÈRE À GAZ AUTONETTOYANTE À CINQ BRÛLEURS PROFESSIONNELLE DE 30 POUCES Guide d'installation MODELS: RGTC-305...
-
Page 26: Pour Votre Sécurité
À L'INTENTION DE NOS CLIENTS Nous vous remercions d'avoir choisi cette cuisinière à gaz autonettoyante professionnelle DCS de 30 po. Nous avons conçu ce Manuel d'installation pour expliquer ses fonctions uniques. Il contient des informations extrêmement utiles sur la façon d'installer correctement votre nouvel appareil. Vous pourrez ainsi en profiter pendant des années en toute sécurité. - Page 27 TABLE DES MATIÈRES INTRODUCTION MESURES DE SÉCURITÉ ET DE PRÉCAUTION PLANIFICATION DE L'INSTALLATION DÉBALLAGE ET MANIPULATION EXIGENCES EN MATIÂRE DE VENTILATION INSTALLATION DU DISPOSITIF ANTIBASCULEMENT PRÉPARATION DES ARMOIRES INSTALLATION DU DOSSERET RACCORDEMENTS ÉLECTRIQUES BRANCHEMENT DU GAZ ESSAI ET RÉGLAGES NETTOYAGE DES SURFACES EXTÉRIEURES LISTE DE CONTRèLE FINALE DE L'INSTALLATEUR POUR L'OBTENTION DE SERVICE GARANTIE...
-
Page 28: Introduction
INTRODUCTION Les brûleurs à double débit (Dual Flow Burners ) brevetés de la cuisinière RGTC DCS permettent des températures de mijotage constamment plus basses et dégagent une puissance de 17 500 BTUH, incluant deux brûleurs de 12 500 BTUH. Le four à convection à gaz à grande capacité de la cuisinière RGTC est équipée d'un gril infrarouge à gaz dans le four. -
Page 29: Mesures De Sécurité Et De Précaution
MESURES DE SÉCURITÉ ET DE PRÉCAUTION Votre nouvel appareil DCS fonctionnera de manière sûre et fiable pendant des années si vous en prenez bien soin. Faites extrêmement attention quand vous utilisez cet appareil de niveau professionnel, car il dégage une chaleur intense et peut augmenter les risques d'accidents. - Page 30 MESURES DE SÉCURITÉ ET DE PRÉCAUTION ■ Cet appareil électroménager est destiné à la cuisson. N’utilisez jamais le four ou la table de cuisson pour réchauffer ou chauffer une pièce. Une telle utilisation peut endommager les pièces de la table de cuisson ou du four. AVERTISSEMENT! sages situés au bas du four et évitez de recouvrir entièrement une grille avec des matériaux tel que le papier d'aluminium.
- Page 31 MESURES DE SÉCURITÉ ET DE PRÉCAUTION ■ Évitez de frotter, endommager, déplacer ou enlever le joint de la porte, car il est essentiel à l'obtention d'une bonne cuisson. Lavez le joint avec de l'eau chaude seulement. ■ Nettoyez fréquemment la hotte et les filtres de ventilation surplombant la cuisinière ou table de cuisson afin d'empêcher toute accumulation de graisse provenant des vapeurs de cuisson.
-
Page 32: Planification De L'installation
PLANIFICATION DE L'INSTALLATION INFORMATIONS IMPORTANTES CONCERNANT L'INSTALLATION Le modèle RGTC-305 a été testé conformément à la norme ANSI Z21.1 pour les appareils électroménagers domestiques de cuisson à gaz. La cuisinière doit être installée avec une hotte de ventilation suspendue appropriée. (Voir les exigences en matière de ventilation, page 12.) Étant donnée la puissance de feu professionnelle élevée de cet appareil, faites particulièrement... -
Page 33: Déballage Et Manipulation
PLANIFICATION DE L'INSTALLATION INSTRUCTIONS CONCERNANT L'INSTALLATION RECOMMANDÉE Installez les composants dans l'ordre suivant : A. Hotte à évacuation B. Dosseret (sont séparément vendues) C. Cuisinière 1. Positionnez la cuisinière et mettez-la de niveau conformément aux instructions d'installation. 2. Mesurez la distance entre le plancher et le haut de la garniture d'îlot de la cuisinière en ajoutant 3,5 mm (1/8 po) de dégagement pour le dosseret. - Page 34 Fig. 02 Espaceur de transport Fig. 03 Vis de transport Left Rear Shipping arrière gauches Screws Fig. 04 La cuisinière doit être Range Must soutenue be Uniformly uniformément Supported par des renforts on Braces 22" Pieds d'inclinaison Leveling Legs Fig. 05...
-
Page 35: Retrait De La Porte Du Four
DÉBALLAGE ET MANIPULATION RETRAIT DE LA PORTE DU FOUR AVERTISSEMENT! Évitez de soulever la porte du four par la poignée, vous pourriez l'endommager! Assurez-vous que le four et la porte sont froids avant de retirer la porte! 1. Ouvrez la porte complètement (fig. 06). 2. -
Page 36: Exigences En Matiâre De Ventilation
EXIGENCES EN MATIÈRE DE VENTILATION Vous devez installer une hotte à évacuation appropriée au-dessus de la cuisinière. Le tableau suivant indique la capacité minimum du ventilateur recommandée pour aérer la hotte. Recommandations Recommandations Appareil de concernant l'installation concernant l'installation ventilation d'un comptoir standard en îlot (prof. -
Page 37: Installation Du Dispositif Antibasculement
INSTALLATION DU DISPOSITIF ANTIBASCULEMENT Un dispositif antibasculement doit être installé correctement sur toutes les cuisinières conformément aux instructions suivantes. Si vous devez retirer la cuisinière du mur pour quelque raison que ce soit, veillez à bien la remettre en place lorsque vous la repoussez contre le mur. -
Page 38: Préparation Des Armoires
6. Si le dégagement entre les matériaux combustibles et le bord arrière de la cuisinière (au-dessus de la surface de cuisson) est inférieur à 30,5 cm (12 po), installez un dosseret bas ou intégral DCS (fig. 13, Installation standard). La cuisinière comporte une garniture d'îlot comme équipement standard. - Page 39 PRÉPARATION DES ARMOIRES DIMENSIONS Dégagement de 0 cm/po 75,9 cm/29- 7/8 po 90,8 cm – 94 cm/35- 3/4 po – 37po 69,9 cm/27-1/2 po 71,4 cm/28-1/8 po dosseret mural intégral 25,7 cm/10-1/8 po dosseret mural inférieur 5,1 cm/2 po garniture d'îlot 3,3 cm/1-5/16 po 76,2 cm/30 po 113,3 cm/44-5/8 po...
-
Page 40: Installation Du Dosseret
Le dosseret doit être installé lorsque le dégagement entre les matériaux combustibles et l'arrière de la cuisinière (au- dessus de la surface de cuisson) est inférieur à 30,5 cm (12 po). Voir fig. 14. Les dosserets DCS sont vendus séparément. CONNEXIONS ÉLECTRIQUES CONNEXIONS ÉLECTRIQUES... -
Page 41: Branchement Du Gaz
BRANCHEMENT DU GAZ EXIGENCES CONCERNANT LE GAZ Vérifiez le type de gaz alimentant le site. La cuisinière à gaz est réglée en usine pour fonctionner au gaz naturel ou propane selon le modèle spécifique commandé. avec l'alimentation en gaz du site où elle doit être installée. réglée pour fonctionner avec l'alimentation en gaz du site. -
Page 42: Essai Et Réglages
ESSAI ET RÉGLAGES AVERTISSEMENT : Aux fins de la garantie, DCS exige que le réglage des brûleurs soit effectué par un technicien qualifié au moment de l'installation. Faites extrêmement attention quand des réglages sont effectués après l'installation. LA GARANTIE SERA ANNULÉE SI LES RÉGLAGES SONT EFFECTUÉS INCORRECTEMENT OU PAS DU TOUT. -
Page 43: Nettoyage Des Surfaces Extérieures
NETTOYAGE DES SURFACES EXTÉRIEURES Pour nettoyer les surfaces en acier inoxydable, essuyez-les à l'aide d'un linge ou éponge imbibé d'eau savonneuse. Un savon liquide (Dawn et Stainless Steel Magic, par exemple) permettra d'éliminer les empreintes digitales et les taches. N'utilisez pas de laine d'acier au risque d'égratigner la surface. LISTE DE CONTRÈLE FINALE DE L’INSTALLATEUR GÉNÉRALITÉS ❑... -
Page 44: Pour L'obtention De Service
POUR L'OBTENTION DE SERVICE Pour le service sous garantie, contactez le représentant du centre de service à la clientèle DCS au (888) 281-5698. Avant d'appeler, veuillez avoir les informations suivantes à portée de main : ■ Numéro de modèle (situé sur la plaque signalétique, sur le panneau arrière et également sur le cadre avant, coin inférieur droit entre le panneau de seuil de porte et la porte du four). -
Page 45: Limited Warranty
à domicile normale. Tout service couvert par cette garantie limitée sera assuré par Fisher & Paykel Appliances Inc. ou son agent de service DCS agréé durant les heures d'ouverture normales. QUELLE EST LA DURÉE DE CETTE GARANTIE LIMITÉE? Notre responsabilité... - Page 46 Veuillez consulter le manuel d'utilisation et d'entretien. Si vous avez des questions concernant l'utilisation du produit, que vous cherchez le nom de l'agent de service DCS agréé local ou que pensez que le produit est défectueux et désirez le faire réparer dans le cadre de cette garantie limitée, veuillez contacter votre distributeur ou nous appeler au numéro suivant :...
- Page 48 DCS améliore constamment ses produits et se réserve le droit de modifier les spécifications ou la conception de ses produits sans aucun préavis. As product improvement is an ongoing process at DCS, we reserve the right to change specifications or design without notice.
Need help?
Do you have a question about the RGTC-305 and is the answer not in the manual?
Questions and answers