
Related Manuals for DCS CP-364GD


Summary of Contents for DCS CP-364GD
-
Page 1: Installation Guide
CP SERIES PROFESSIONAL GAS COOKTOP Installation Guide MODELS: CP-366 CP-364GL CP-485GD CP-364GD CP-486GL CP-486GD CP-484GG... -
Page 3: A Message To Our Customers
WARNING To reduce the risk of injury to persons in the event of a cooktop grease fire, observe the following: Turn burner off first. Smother flames with a close-fitting lid, cookie sheet, metal tray, baking soda or use a dry chemical or foam-type fire extinguisher. -
Page 4: Table Of Contents
TABLE OF CONTENTS INTRODUCTION SAFETY PRACTICES AND PRECAUTIONS MODELS PLANNING THE INSTALLATION UNPACKING AND HANDLING VENTILATION REQUIREMENTS CABINET PREPARATION BACKGUARD INSTALLATION ELECTRICAL CONNECTIONS GAS HOOK-UP TEST AND ADJUSTMENTS CLEANING EXTERIOR SURFACES INSTALLER FINAL CHECKLIST HOW TO OBTAIN SERVICE WARRANTY 9-10 12-14 21-22... -
Page 5: Introduction
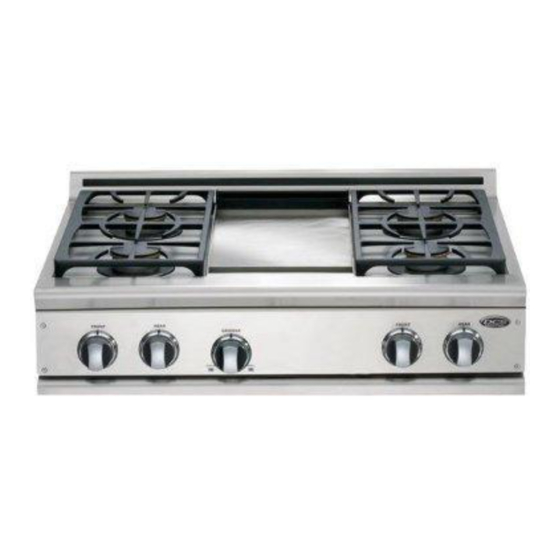
INTRODUCTION The DCS Professional CP Cooktops feature a large number of features varying with each model. All models feature a minimum of 4 surface burners, with the option of up to 6 surface burners on all models. All of the 48"... -
Page 6: Safety Practices And Precautions
SAFETY PRACTICES AND PRECAUTIONS When properly cared for, your new DCS Appliance has been designed to be a safe, reliable cooking appliance. When using this restaurant caliber appliance, use it with extreme care, as this type appliance provides intense heat and can increase the accident potential. Basic safety precautions must be followed when using kitchen appliances, including the following: Read the Use and Care Manual, which came with this appliance, thoroughly before using your new appliance. - Page 7 SAFETY PRACTICES AND PRECAUTIONS Do not use aluminum foil to line any part of the cooktop. Doing so, heat will be trapped underneath it. This trapped heat can upset the cooking performance and can damage the finish of the cooktop parts.
- Page 8 Be sure all the cooktop controls are turned off and the appliance is cool before using any type of aerosol cleaner on or around the appliance. The chemical that produces the spraying action could, in the presence of heat, ignite or cause metal parts to corrode.
-
Page 9: Models
MODELS 48” CP COOKTOP MODELS CP-484GG CP-486GL CP-486GD CP-485GD 36” CP COOKTOP MODELS CP-366 CP-364GL CP-364GD... -
Page 10: Planning The Installation
PLANNING THE INSTALLATION IMPORTANT INSTALLATION INFORMATION All cooktop models with less than a 12” clearance between combustable material and the back edge of the cooktop, require the installation of one of the two offered Wall Mount Backguards – see page 15. -
Page 11: Planning The Installation
29-3/8" wide opening is required. Remove the outer carton and packing material from the shipping base. The cooktop is held to the skid by four straps. After removing the straps, the cooktop must be lifted and removed from the skid. - Page 12 Electric and gas connections should be made (pgs. 15 & 16) and the backguard installed (as required, pg. 8 & 15) before the cooktop is placed in its final position. The grill and griddle sections are fastened in place at the front with screws. They are designed to be stationary and not meant to be removed for cleaning.
-
Page 13: Ventilation Requirements
For best smoke elimination, the lower edge of the hood should be installed a minimum of 30" to a maximum of 36" above the cooktop cooking surface, (page 12). If the hood contains any combustible materials (i.e. a wood covering) it must be a minimum of 36" above the cooking surface. -
Page 14: Cabinet Preparation
It may be necessary to add a supporting cleat along each side or another form of support such as a 2” x 4” corner brace on each side, or a deck to set the cooktop on. - Page 15 CABINET PREPARATION 6. Cut the openings for the following installation: I Standard counter top installation, see Fig. 8A I Deep counter or island installation, see Fig. 8B NOTE: If the deck is used, the sides or bottom of the cutout may be solid combustible or non-combustible material.
- Page 16 CABINET PREPARATION Countertop level 8-7/16" 3" To Center Line of Gas Inlet 26-1/2" 15/16" Wall Mount Full Backguard 30" Wall Mount 12" Low Backguard Base Cabinet As defined in the “National Fuel Gas Code” (ANSI Z223.1, lastest edition). 26-1/2" 1/2" 22-3/4"...
-
Page 17: Backguard Installation
12” clearance between combustibles and the back of the range (above the cooking surface). See fig. 8. DCS backguards are sold separately. ELECTRICAL CONNECTIONS ELECTRICAL REQUIREMENTS 120 VAC, 60 Hz., single phase CP-48: 15 Amp. -
Page 18: Gas Hook-Up
GAS REQUIREMENTS Verify the type of gas supplied to the location. The cooktop is shipped from the factory set up and adjusted for Natural Gas or LP (propane), depending on the specific model ordered. Verify that the cooktop is compatible with gas supply at the installation site before proceeding further. -
Page 19: Test And Adjustments
The cooktop burners have an infinite number of heat settings and there are no fixed positions on the control knobs between HI and LO. To turn the cooktop burner on, push in on the control knob and turn it counter- clockwise to the “LITE”... -
Page 20: Cleaning Exterior Surfaces
CLEANING EXTERIOR SURFACES The stainless steel surfaces may be cleaned by wiping with a damp soapy cloth or sponge. Any liquid soap (like Dawn or Stainless Steel Magic) will remove fingerprints and smears. Do not use steel wool as it will scratch this surface. -
Page 21: Installer Final Checklist
Griddle is level and does not rock (if equipped). Drip trays are properly in place and pull out freely (if equipped). Burner grates correctly positioned, level, and do not rock. Griddle flame (see page 17). Grill flame (see page 17). Cooktop burner flame (see page 17). -
Page 22: How To Obtain Service
HOW TO OBTAIN SERVICE For warranty service, please contact DCS Customer Care Representative at (888) 936-7872. Before you call, please have the following information ready: Model Number (located on the rating plate behind the unit right side) Serial Number (located on the rating plate behind the unit right side) -
Page 23: Warranty
WARRANTY LIMITED WARRANTY When you purchase a new DCS Professional Cooktop you automatically receive a One Year Limited Warranty covering parts and labor for the entire product, a Five Year Limited Warranty on surface burners, griddle burners and grill burners (parts only) for servicing within the 48 mainland United States, Hawaii, Washington D.C. and Canada. -
Page 24: How To Get Service
Please read your User Guide. If you then have any questions about operating the Product, need the name of your local DCS Authorized Service Agent, or believe the Product is defective and wish service under this Limited Warranty, please contact your dealer or call us at: TOLL FREE 1-888-936-7872 or contact us through our web site: www.dcsappliances.com... - Page 25 NOTE...
- Page 26 NOTE...
- Page 27 TABLE DE CUISSON À GAZ PROFESSIONNELLE DE SÉRIE CP Guide d'installation MODÈLES : CP-366 CP-485GD CP-364GL CP-364GD CP-486GL CP-486GD CP-484GG...
- Page 28 REMARQUE : Inspecter le produit pour vérifier qu’il n’a pas été endommagé pendant l’expédition. En cas de dommages, contacter le transporteur et entamer une déclaration pour dommage. DCS by Fisher & Paykel n’est en aucun cas responsable des dommages pendant l’expédition.
- Page 29 INTRODUCTION MESURES DE SÉCURITÉ ET DE PRÉCAUTION MODÈLES PLANIFICATION DE L'INSTALLATION DÉBALLAGE ET MANIPULATION EXIGENCES EN MATIÈRE DE VENTILATION PRÉPARATION DES ARMOIRES INSTALLATION DU DOSSERET CONNEXIONS ÉLECTRIQUES BRANCHEMENT DU GAZ ESSAI ET RÉGLAGES NETTOYAGE DES SURFACES EXTÉRIEURES LISTE DE CONTRÔLE FINALE DE L'INSTALLATEUR POUR L'OBTENTION DE SERVICE GARANTIE 9-10...
-
Page 30: Introduction
INTRODUCTION Les tables de cuisson professionnelles CP de DCS sont dotées de nombreuses fonctions qui varient selon le modèle. Tous les modèles sont dotés de 4 brûleurs de surface minimum et peuvent comporter, en option, jusqu'à 6 brûleurs de surface. Il est possible de combiner de différentes manières les grils et les plaques chauffantes sur toutes les tables de cuisson de 48 po et 36 po. -
Page 31: Mesures De Sécurité Et De Précaution
MESURES DE SÉCURITÉ ET DE PRÉCAUTION Votre nouvel appareil DCS fonctionnera de manière sûre et fiable pendant des années si vous en prenez bien soin. Faites extrêmement attention quand vous utilisez cet appareil de niveau professionnel, car il dégage une chaleur intense et peut augmenter les risques d'accidents. - Page 32 MESURES DE SÉCURITÉ ET DE PRÉCAUTION Utilisez seulement des gants isolants secs : les gants humides sur des surfaces chaudes peuvent provoquer des brûlures causées par la vapeur. N'utilisez pas de serviette ou de linge épais à la place de gants isolants. Ne laissez pas les gants isolants toucher les brûleurs ou leurs grilles.
- Page 33 MESURES DE SÉCURITÉ ET DE PRÉCAUTION Nettoyez la table de cuisson avec précaution. Évitez de vous brûler à la vapeur : n'utilisez pas d'éponge ou de linge mouillé pour nettoyer l'appareil alors qu'il est encore chaud. Certains produits de nettoyage dégagent des vapeurs nocives au contact d'une surface chaude.
-
Page 34: Modèles
MODELS MODÈLES DE TABLES DE CUISSON CP 48 PO CP-484GG CP-486GL CP-486GD CP-485GD MODÈLES DE TABLES DE CUISSON CP 36 PO CP-366 CP-364GL CP-364GD... -
Page 35: Planification De L'installation
PLANIFICATION DE L'INSTALLATION INFORMATIONS IMPORTANTES CONCERNANT L'INSTALLATION Vous devez installer l'un des deux dosserets muraux disponibles si le dégagement entre les matériaux combustibles et le bord arrière de la table de cuisson est inférieur à 30,5 cm (12 po) - voir page 15. Dosseret mural intégral 15/16”... -
Page 36: Déballage Et Manipulation
PLANIFICATION DE L'INSTALLATION INSTRUCTIONS CONCERNANT L'INSTALLATION RECOMMANDÉE Installez les composants dans l'ordre suivant : A. Hotte à évacuation B. Dosseret (vendu séparément) C. Table de cuisson 1. Positionnez la table de cuisson conformément aux instructions d'installation. 2. Mesurez la distance entre la surface du comptoir et le haut de la garniture de la table de cuisson en ajoutant 3,5 mm (1/8 po) de dégagement pour le dosseret. - Page 37 DÉBALLAGE ET MANIPULATION La table de cuisson professionnelle doit être transportée jusqu'à son emplacement final. Effectuez les branchements électriques et à gaz (pages 15 et 16) et installez le dosseret (selon le besoin, pages 8 et 15) avant de placer la table de cuisson sur son emplacement final.
-
Page 38: Exigences En Matière De Ventilation
EXIGENCES EN MATIÈRE DE VENTILATION Vous devez installer une hotte à évacuation appropriée au-dessus de la cuisinière. Le tableau suivant indique la capacité minimum du ventilateur recommandée pour aérer la hotte. Recommandations Recommandations Appareil de concernant l'installation concernant l'installation ventilation d'un comptoir standard en îlot (prof. -
Page 39: Préparation Des Armoires
PRÉPARATION DES ARMOIRES 1. Afin d'assurer un résultat professionnel, les ouvertures de l'armoire et du comptoir doivent être préparées par un ébéniste qualifié. Nous vous recommandons de disposer de la table de cuisson avant de découper l'ouverture afin de vous assurer de manière plus précise de l'exactitude des dimensions. 2. - Page 40 PRÉPARATION DES ARMOIRES 6. Découpez les ouvertures pour l'installation suivante : I Installation standard du comptoir, voir fig. 8A I Installation d'un comptoir profond ou d'un îlot, voir fig. 8B REMARQUE : Si vous utilisez une plate-forme, les côtés ou la partie inférieure de la découpe peuvent être constitués de matériaux pleins combustibles ou non-combustibles.
- Page 41 PRÉPARATION DES ARMOIRES Niveau du comptoir 21,4 cm (8-7/16 po) 7,62 cm (3 po) de la ligne médiane à l'admission de gaz 67,3 cm 26-1/2" 2,4 cm (15/16 po) Dosseret mural intégral 76,2 cm (30 po) Dosseret mural 30,5 cm inférieur (12 po) Armoire...
-
Page 42: Installation Du Dosseret
(au-dessus de la surface de cuisson) est inférieur à 30,5 cm (12 po). Voir fig. 8. Les dosserets DCS sont vendus séparément. CONNEXIONS ÉLECTRIQUES CONNEXIONS ÉLECTRIQUES Besoins en alimentation de la cuisinière : 120 V c.a., 60 Hz, courant monophasé... -
Page 43: Branchement Du Gaz
à la section d'arrivée du régulateur. Remarque: Le cachet de tuyau doit être utilisé sur tous fils de tuyau. Conduite flexible reliée à Flex Line to Cooktop la table de cuisson Le robinet d'arrêt Manual Shut-Off manuel doit être... -
Page 44: Essai Et Réglages
ESSAI ET RÉGLAGES AVERTISSEMENT : Aux fins de la garantie, DCS exige que le réglage des brûleurs soit effectué par un technicien qualifié au moment de l'installation. Faites extrêmement attention quand des réglages sont effectués après l'installation. LA GARANTIE SERA ANNULÉE SI LES RÉGLAGES SONT EFFECTUÉS INCORRECTEMENT OU PAS DU... -
Page 45: Nettoyage Des Surfaces Extérieures
ESSAI ET RÉGLAGES REMARQUE CONCERNANT L'ALLUMAGE DU BRÛLEUR DE LA TABLE DE CUISSON Les brûleurs à tête scellée de la table de cuisson permettent un réglage continu de la flamme et leurs boutons de réglage ne comportent pas de position fixe entre les niveaux HI et LO. Pour allumer le brûleur à tête scellée de la table de cuisson, enfoncez le bouton de réglage et tournez-le vers la gauche à... -
Page 46: Liste De Contrôle Finale De L'installateur
LISTE DE CONTRÔLE FINALE DE L'INSTALLATEUR GÉNÉRALITÉS Emplacement de l'appareil. Dégagement spécifié respecté par rapport aux surfaces d'armoires. Appareil de niveau - de l'avant à l'arrière, d'un bord à l'autre. Matériel d'emballage et courroies d'attache enlevés, ramasse-gouttes propres et vides. Dosseret installé... -
Page 47: Pour L'obtention De Service
Est-ce que le robinet d'arrêt manuel est ouvert? Il est généralement situé là où le gaz provient du mur. Pour le service sous garantie, contactez le représentant du centre de service à la clientèle DCS au (888) 936-7872. Avant d'appeler, veuillez avoir les informations suivantes à portée de main : Numéro de modèle (situé... -
Page 48: Garantie
Cette garantie s'applique à l'acheteur initial et à tous les propriétaires successifs du produit dans la mesure où il s'agit d'un produit acheté pour une utilisation à domicile normale. Tout service couvert par cette garantie limitée sera assuré par Fisher & Paykel Appliances Inc. ou son agent de service DCS agréé durant les heures d'ouverture normales. - Page 49 Veuillez consulter le manuel d'utilisation et d'entretien. Si vous avez des questions concernant l'utilisation du produit, que vous cherchez le nom de l'agent de service DCS agréé local ou que pensez que le produit est défectueux et désirez le faire réparer dans le cadre de cette garantie limitée, veuillez contacter votre distributeur ou nous appeler au numéro suivant :...
- Page 50 REMARQUE...
- Page 52 Fisher & Paykel Appliances, Inc. 5900 Skylab Road, Huntington Beach, CA 92647 Customer Care: 888.936.7872 Fax: 714.372.7003 www.dcsappliances.com As product improvement is an ongoing process, we reserve the right to change specifications or design without notice. Nous améliorons constamment ses produits et se réserve le droit de modifier les spécifications ou la conception de ses produits sans aucun préavis.
Need help?
Do you have a question about the CP-364GD and is the answer not in the manual?
Questions and answers