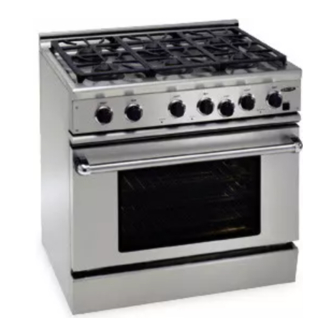
DCS RGS-305 Use And Care Manual
The professional rgs range and gas cooktop
Hide thumbs
Also See for RGS-305:
- Use and care manual (66 pages) ,
- Use and care manual (34 pages) ,
- Installation manual (30 pages)

Related Manuals for DCS RGS-305


Summary of Contents for DCS RGS-305
- Page 1 The Professional RGS Range And Gas Cooktop Use and Care Guide MODELS: RGS-305 RGS-484GG CS-366 CS-485GD RGS-366 RGS-485GD CS-364GL CS-486GL RGS-364GL CS-364GD RGS-486GL CS-486GD RGS-364GD RGS-486GD CS-484GG...
- Page 2 A MESSAGE TO OUR CUSTOMERS Thank you for selecting this DCS Professional Gas Range or Professional Cooktop. Because of this appliance’s unique features we have developed this Use and Care Guide. It contains valuable information on how to properly operate and maintain your new appliance for years of safe and enjoyable cooking.
-
Page 3: Table Of Contents
TABLE OF CONTENTS SAFETY PRACTICES ..............................3-5 MODEL IDENTIFICATION ............................6-7 BEFORE USING YOUR APPLIANCE ........................8-9 COOKTOP USE ................................10-13 Burner Use ................10 Burner Efficiency and Flame Characteristics . -
Page 4: Safety Practices
SAFETY PRACTICES AND PRECAUTIONS When properly cared for, your new DCS Appliance is designed to be a safe, reliable cooking appliance. When using this restaurant caliber appliance, use it with extreme care, as this type of appliance provides intense heat and can increase the accident potential. Basic safety precautions must be followed when using kitchen appliances, including the following: Read this Use and Care Manual thoroughly before using your new appliance. - Page 5 SAFETY PRACTICE AND PRECAUTIONS For personal safety, wear proper apparel. Loose fitting garments or hanging sleeves should never be worn while using this appliance. Some synthetic fabrics are highly flammable and should not be worn while cooking. Do not use aluminum foil to line any part of the oven or cooktop. Using a foil liner could result in a fire hazard, or the obstruction of the flow of combustion and ventilation air.
- Page 6 SAFETY PRACTICES AND PRECAUTIONS Clean the cooktop with caution. Avoid steam burns; do not use a wet sponge or cloth to clean the cooktop while it is hot. Some cleaners produce noxious fumes if applied to a hot surface. Follow directions provided by the cleaner manufacturer.
-
Page 7: Model Identification
MODEL IDENTIFICATION 48” RGS RANGE MODELS RGS-484GG RGS-486GL RGS-486GD RGS-485GD 36” RGS RANGE MODELS RGS-366 30” RGS RANGE MODELS... - Page 8 MODEL IDENTIFICATION 48” CS COOKTOP MODELS CS-484GG CS-486GL CS-486GD CS-485GD 36” CS COOKTOP MODELS CS-366 CS-364GL CS-364GD...
-
Page 9: Before Using Your Appliance
Grill racks, 2 pieces - (RGS-364GL, RGS-486GL & RGS-484GG Models Only) (CS-364GL, CS-486GL & CS-484GG Models Only) 5 burner head assemblies, burner caps and grates (RGS-305, RGS-485GD, and CS-485GD Models Only) Radiant tray - to hold ceramic rods for grill - (RGS-364GL, RGS-486GL & RGS-484GG Models Only) (CS-364GL, CS-486GL &... - Page 10 BEFORE USING YOUR APPLIANCE TO INSERT THE OVEN RACKS: 1) Hold the rack with the back safety rail in the up position and towards the rear of the oven. Slip it into the oven so the rack slides are between the rack and the rack guides. 2) As you slide the rack into the oven, tip the front of the rack up slightly, so that the safety stops on the back of the rack clear the rack slides.
-
Page 11: Cooktop Use
COOKTOP USE BURNERS Your new professional gas range is equipped with burners typical of those used in restaurants. These burners are designed for maximum cleanability and controllability. The large cap spreads the simmer heat out Brass to avoid too much heat being concentrated on the center Port of the pan. -
Page 12: Burner Efficiency And Flame Characteristics
COOKTOP USE BURNER EFFICIENCY AND FLAME CHARACTERISTICS Proper Flame Height It is necessary to keep the burner ports and the igniters clean for proper lighting and efficient performance of the cooktop burners. The burner flame should burn completely around the burner with no excessive noise or lifting.The flame should be blue in color and stable with no yellow tips. - Page 13 The ring is cast iron, and has a porcelain enamel finish. Fig. 5 (305 & 485 models) It can be used with the DCS model CW wok and most commercially available woks. To use the ring, place it on the grate over the desired burner. The vertical tabs on the ring should be aligned with the main fingers of the grate.
-
Page 14: Grill Use
COOKTOP USE GRILL USE GRILL The two grill grates are reversible (see fig. 8). Place the side with the two grooved tabs towards the rear of the cooktop. The grill grates are made of durable porcelain enameled cast iron. One side of the grate is ridged (side A) and should be used for foods where you want the fat to run off, such as steak or hamburger patties. -
Page 15: Grill Use
Chipping or cracking of the ceramic rods may occur as they may get brittle with age, depending on frequency of use. This is normal and does not affect the cooking. Do not replace the radiant tray/ceramic rods with alternates. Contact DCS for genuine factory-direct replacement parts. -
Page 16: Griddle Use
GRIDDLE USE The built-in griddle on your cooktop is made from Type 304 stainless steel, highly polished to provide a smooth cooking surface. It is normal for it to darken with use as oils cook onto the surface to provide a stick resistant base or “seasoning” . Shipping Screw Since the griddle is made from stainless steel, the (remove) -
Page 17: Oven Use
GRIDDLE USE USE OF THE GRIDDLE Before starting to cook on the griddle, be sure the drip tray and liners are in place. Preheat griddle for 15 minutes with the control knob set to the temperature suggested on the cooking chart. When the griddle is preheated, the HEATING light will turn off. -
Page 18: Convection Baking
OVEN USE OVEN Your large new oven can be used in three cooking modes: convection bake, regular bake or broil. To help you decide which way to cook your food, read this information first. Remember, this is a new oven and the thermostat has been checked for accuracy.Your old oven may have had a thermostat that over the years got a little hot or a little cold. -
Page 19: Converting Recipes To Convection Baking
OVEN USE CONVERTING RECIPES TO CONVECTION BAKING Low sided baking utensils will give the best results as the hot air can reach all sides of the food easier. The oven temperature can be left the same as the recipe and the food cooked a shorter period of time. The temperature can be lowered 25ºF and the food will probably take the same length of time to cook as the recipe states. -
Page 20: Baking
OVEN USE TO GET THE BEST RESULTS Baking: Follow the recipe amounts and ingredients, including the size and shape of the baking utensil recommended in the recipe. Do not open the open door “just to peek” , use the interior oven light and look through the window. Do not use the oven for storage, especially when baking in the oven. -
Page 21: Broiling-Oven
OVEN USE CONVECTION BAKING One to three racks can be used simultaneously during BROIL BROIL convection baking. Place the rack/s in the desired position before turning the oven on. Store the unused racks out of the oven. Rack position 2 (second from 150˚... -
Page 22: Broiling-Use Of Meat Thermometer
OVEN USE OVEN RACK POSITION The rack position depends on the type and thickness of the food. Thick pieces of meat or poultry would typically be broiled on rack position 2; steaks, chops and hamburger, would be broiled on rack position 3. -
Page 23: Care And Maintenance
OVEN USE SUGGESTED TEMPERATURES TO KEEP FOOD HOT Food Oven Temperature Beef Rare 150º - 155ºF Medium 155º - 170ºF Well Done 170º - 180ºF Bacon 200º - 225ºF Biscuits and Muffins (covered) 170º - 185ºF Casserole (covered) 170º - 200ºF Fish and Seafood 170º... - Page 24 CARE AND MAINTENANCE COOKTOP Turn off all the burners and allow the grates to cool before starting to clean the cooktop. If you wipe off any part Brass Ring of the cooktop while it is hot, do so Main Locating Pin Burner carefully as using a wet sponge or Port...
- Page 25 CARE AND MAINTENANCE IGNITERS IGNITER (KEEP CLEAN) Wipe with a water dampened cotton swab. Be careful not to damage the igniter (see fig. 13). DRIP TRAYS & DRAIN TUBES If you have a griddle or a grill there will be a tray liner. The drip trays are made of stainless steel.
-
Page 26: Oven And Door Interior
CARE AND MAINTENANCE GRILL Door Hinge Roller Clean the grill immediately after cooking. Turn off the burner. To protect your hand from steam and heat, wear a barbecue mitt. Scrub the grill by dipping a brass bristle barbecue brush frequently into a bowl of water. The steam created softens the food particles and assists the cleaning process. - Page 27 CARE AND MAINTENANCE Follow the manufacturer’s directions. Commercial oven cleaners are corrosive to the thermostat bulb and infrared broiler burner. Do not spray or wipe this type cleaner onto the oven thermostat bulb (#9 & #25 pg. 28 & 29) or broiler burner. If some cleaner gets onto the bulb or broiler burner, wipe it off immediately with a clean damp cloth.
-
Page 28: Oven Light Bulb Replacement
CARE AND MAINTENANCE To Replace the Light Bulb: 1) Turn off circuit breaker. 2) Be sure the oven light bulb switch is in the off position. The bottom of the switch is pressed in. Let the cover and the bulb cool completely. 3) Remove the light cover. -
Page 29: Parts List
PARTS IDENTIFICATION ITEM DESCRIPTION ITEM DESCRIPTION Broil Pan Locator Rack Grill Window Burner Grates Oven Door Griddle Oven Door Handle Drain Tubes 12”Oven Door Handle Large Oven Control Knob 12”Oven Window Griddle Control Knob 12”Oven Door Oven Light Switch Standard Oven Racks (2) lrge. oven; (2) sm oven Grill Control Knob Oven Light Switch Oven Thermostat bulb (behind metal shield) - Page 30 PARTS IDENTIFICATION ITEM DESCRIPTION Thermostat Bulb Thermostat Bulb Broiler Burner Oven Light Convection Fan...
-
Page 31: How To Obtain Service
Is the burner head assembly aligned correctly? Is the manual shut-off valve open? This is usually located where the gas comes out of the wall. For warranty service, contact DCS Customer Service at (888) 281-5698. Before you call, please have the following information ready: Model Number (located on rating plate backside of unit). -
Page 32: Warranty
DCS to be defective. Replacement will be F.O.B. DCS, and DCS will not be liable for any transportation costs, labor costs, or export duties. This warranty shall not apply, nor can we assume responsibility for damage that might... - Page 33 NOTES...
- Page 34 5800 Skylab Road, Huntington Beach, CA 92647 Tel: 714.372.7000 • Fax: 714.372.7001 Customer Service: (888) 281-5698 www.dcsappliances.com As product improvement is an ongoing process at DCS, we reserve the right to change specifications or design without notice. P/N 17455 Rev. B...
Need help?
Do you have a question about the RGS-305 and is the answer not in the manual?
Questions and answers