Table of Contents
Advertisement
OPERATING MANUAL
[SHAKER]
Model: SK-300 / SK-600/ SK-71
Manual No: 00HAA0001149 (Version :5.0)
This operating manual describes the important subjects to maintain the product¡s
functions and to use it safely. Especially, be sure to read <Safety Precaution> carefully
before you use this equipment. Please keep this operating manual close to the equipment to
use it after reading through it once. Please place it where the new user can find it
easily for the safety use when you hand over or lend the equipment to others.
.
Page 1
Advertisement
Table of Contents
Troubleshooting

Related Manuals for Jeio tech Lab Companion SK-300


Summary of Contents for Jeio tech Lab Companion SK-300
- Page 1 OPERATING MANUAL [SHAKER] Model: SK-300 / SK-600/ SK-71 Manual No: 00HAA0001149 (Version :5.0) This operating manual describes the important subjects to maintain the product¡s functions and to use it safely. Especially, be sure to read <Safety Precaution> carefully before you use this equipment. Please keep this operating manual close to the equipment to use it after reading through it once.
-
Page 2: Table Of Contents
Table of Contents Chapter. 1: Introduction Caution about the operating instruction----------------- 5 Warning mark of the product----------------------------- 5 Caution for safe operation and reorganization of the product ------------------------------- 6 Disclaimer --------------------------------------------- 6 Introduction of shaking system ------------------------- 7 ... - Page 3 Chapter. 6: Maintenance and Troubleshooting Maintenance ------------------------------------------- 36 Safekeeping and Cleaning ------------------------------ 37 Troubleshooting---------------------------------------- 38 Chapter. 7: Specification Specification ----------------------------------------- 41 Chapter. 8: Warranty and Service Warranty standard-------------------------------------- 43 Page 3...
-
Page 4: Chapter. 1: Introduction
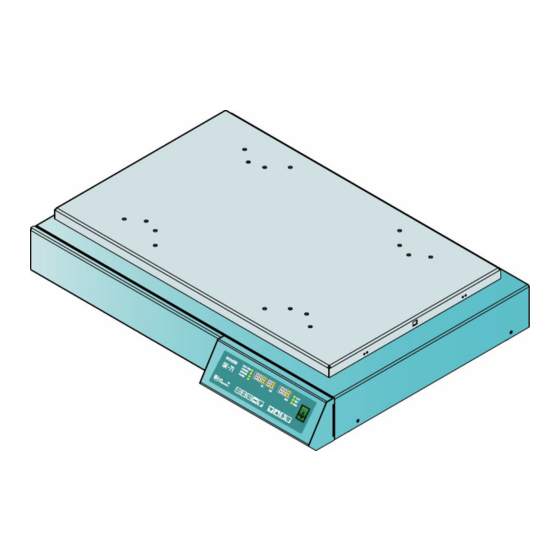
Chapter. 1 Introduction Thank you for purchasing the Lab Companion Shaker. Lab Companion shaker is for cultivating animal or plant cells as well as microorganism cultivation. The system is integrated with shaking table and motor. Excellent shaking for smooth oxygen supply, ph uniformity, culture fluid in growth environment. -
Page 5: Caution About The Operating Instruction
Caution about the operating instruction 1. Always keep this instruction near to the instrument. 2. Copying and distributing part or the whole of this the operating instruction with no permission are prohibited with the law. The operating instruction promised perfection but please ask an agent or us if you have any question about insufficient points, error and omission on the operating instruction. -
Page 6: Caution For Safe Operation And Reorganization Of The Product
5. Do not give a strong shock to the product. It becomes the cause of product damage and wrong operations. Disclaimer 1. In no event will Jeio Tech industries be liable for any incidental or consequential damages for breach of any implied warranty relating to the product. -
Page 7: Introduction Of Shaking System
Introduction of shaking system Shaker is for cultivating animal or plant cells as well as microorganism cultivation. The system is integrated with shaking table and motor. Excellent shaking for smooth oxygen supply, ph uniformity, culture fluid in growth environment. Shaking System Feature Brushless DC Motor Enables the user to control the motor speed in a circuit diagram and the motor rev up by a controller. - Page 8 Auto Control Function Operate stable RPM from 10RPM to 300RPM. The r ot at i on RPM can be pr ogr am m abl e r el at ed t o t he exper i m ent al condi t i on. Rapid Acceleration and Retardation Actualize rapid Acceleration and Retardation using of Velocity Compensation Function and Brake Function.
-
Page 9: Chapter. 2: Transportation Confirmation And Installation
Chapter. 2 Transportation Confirmation and Installation Before you install Shaker, inspect it for damage that may have occurred in transportation. Confirm any damage for compensating following the Compensation regulations and transportation of Lab Companion. Be sure to check the electric conditions for electric safe. -
Page 10: Unpacking And Transportation Confirmation
2. Except for all damage from the transport, we Jeio Tech will service or return. 3. If Jeio Tech or our authorized dealers do not deliver the unit, Jeio Tech disclaims all the responsibility for the damage. Page 10... -
Page 11: Shaker Components
Shaker Components After unpacking, Please check listed shaker component description as follows. If you didn¡t receive one or more component as follow, Contact the Jeio Tech Service center or the distributor where you purchased. Fuse Operating manual D ur i ng bei ng i n use, i f you cont act... -
Page 12: Installation
Installation The machine should be installed on a safe and proper environment following to the below. Check Points Select a proper place Level off the machine Power connection Select a proper place 1. Operating condition: Class 100 ~ Class 10,000 as Clean environment degree for Bio Clean room is optimal condition for shakers. - Page 13 Power connection Check the ID Plate on the back side of the machine to find the electric conditions. Check the power plug to find if the electric conditions are correct. The voltage fluctuation should be within 10% Do not connect the power before checking how to do correct operation.
-
Page 14: Chapter. 3: Safety Alert And Caution
Chapter. 3 Safety Alert and Caution ¡Alert¡ show s t hat user s can be dead or ser i ousl y w ounded by w r ong oper at i on. ¡Notice¡ show s t hat user s can be w ounded or m achi nes br oken by w r ong oper at i on. -
Page 15: Safety Alert
Safety Alert ¡Alert¡ shows that users can be dead or seriously wounded by wrong operation. Check the voltage, phase and capacity on the ID plate before installation. Sources of electricity should be separately wired. The sources of electricity should be grounded. ... -
Page 16: Safety Caution
Safety Caution ¡Notice¡ shows that users can be wounded or machines broken by wrong operation. Do not put heavy things on the power line. Do not put the machine on the line. It causes fire and electric shock. Connect the plug correctly and do not touch it with wet hands. ... - Page 17 Chapter. 4 Part names and Controller instructions Users should be familiar with how to control the controller before operation. Please do operate the machine after checking chapter 4 for 2~3 times. Please do trial test of the machine without loading any sample flask on Please do contact us if you have request while using the controller.
-
Page 18: Part Names And Functions
Part names and functions 1. Shaking Table: Orbital and reciprocating motion is performed 2. Receptacle with Fuse: Electric Socket with fuse. 3. Foot: Supporter of the body. The supporter can be adjustable its height. Body: Fly Wheel system is equipped inside the body. 5. -
Page 19: Operating And Functional Element
Operating and functional element 1. MODE Indicates each operating function. 2. SV/TIME Set time an remaing time display. 3. PV/RPM Speed of rotation displays. 4. Shaker LED TIMER LED : In case of Timer mode, it is ON once total run time is set. F/WARD LED : It is ON, once time for clockwise rotation is set. -
Page 20: How To Operate
How to operate Input shaking speed 1. Press SHAKER/SET key. 2. Press UP/DOWN key. Input RPM. 3. Press Enter Button. Finish to set value. Press START/STOP key. Shaking starts in clockwise rotation. ※ Recall function of RPM value - Previous RPM value starts if new RPM is set again. - Page 21 2) Programming Forward time 1. Press SHAKER/SET key. Time for This section is for setting Time Forward. Clockwise ¡For.S¡ shown on MODE display. rotation 2. Press UP/DOWN key to set Time and then press ENTER key to store the value. (Max Input Time: 10 seconds~ 59 minutes 59 seconds) After setting the value, F/WARD LED is ON.
- Page 22 4) Programming Pause time Time for Pause 1. Press SHAKER/SET key. This section is for setting Pause. ¡PAu.S¡ shown on MODE display. 2. Press UP/DOWN key to set Time and then press ENTER key to store the value. (Max Input Time: 10 seconds~ 59 minutes 59 seconds) 3.
-
Page 23: Examples Of Timer Programming
6) Cancelation of Timer Programming 1. Press SHAKER/SET Button to go on the desired section. Cancel of A related section LED is on. specific 2. Press ENTER Button. timer After finishing cancelaton, A related section is off. 2. Examples of Timer programming 1) Total program time + F/WARD + PAUSE 1.¡Shaking control using ofTimer fuction¡1)Input Total program Time. -
Page 24: Shaker Movement Indication
SHAKER Movement indication Shaking indication on LED This Function is for displaying the presnt shaking table. When maintaing rpm, the display starts a circular movement. Forward Forward Backward Backward (accelation) (deceleration) (accelation) (deceleration) Page 24... -
Page 25: Chapter. 5: Switching Orbital/ Reciprocation Motion
Chapter. 5 Switching Orbital/Reciprocation Motion and Stroke width adjustment. Shaking motion can be changed from Orbital to Reciprocating or from Reciprocating to Orbital. Furthermore, Stroke length can be adjusted so that your valued experiment is highly efficient. Please, choose proper motion and stroke length for optimal experiment. Chapter 5. -
Page 26: Switching Motion Orbital To Reciprocal In Sk-300
How to switch orbital motion to reciprocating motion - Motion selectable, Factory default: Orbital motion Switching motion orbital to reciprocal in SK-300 Shaking Table - Remove the universal platform and miscellaneous accessories from the Shaking table. Shaking table - Keep the working area enough for assembling. - Follow the next instructions. -
Page 27: Switching Motion Orbital To Reciprocal In Sk-600
Switching motion orbital to reciprocal in SK-600 Shaking Table Shaking Table - Remove the universal platform and miscellaneous accessories from the Shaking table. - Keep the working area enough for assembling. - Follow the next instructions. Lower Space Install position Lower Spacer Install position Lower Vibrating Frame... -
Page 28: Switching Motion Orbital To Reciprocal In Sk-71
Switching motion orbital to reciprocal in SK-71 Shaking Table Shaking Table - Remove the universal platform and miscellaneous accessories from the Shaking table. - Keep the working area enough for assembling. - Follow the next instructions. 1. Remove the Shaking table from the unit. Remove M5x8, flat head bolt(+, screw driver) from the Shaking table. -
Page 29: How To Change The Stroke Width Adjustment
How to change the stroke width adjustment How to change shaking stroke on SK-300, 600 D. Bracket E. Frame Fixture A. Shaking Table B. Body Cover C. Bracket F. Position Sensor [ Figure #1 ] [ Figure #2 ] 1) Loosen M5x10, wrench bolt (4mm, wrench handle)and then separate the shaking table(A). (See Figure #1) 2) Loosen M4x8, flat head bolt(+, screw driver) in the position of both side of body cover(B).(See Figure #1) - Page 30 5) Take care and ensure that there will be separated parts Upper/Bottom Vibrating Frame. There will be Drying wheel and RPM sensor in the Body. 6) Disassemble RPM Sensor (F), (+, screw driver) and then Fix it to the modified Stroke.
- Page 31 * Installing position for stroke fixture Stroke 20mm Stroke 30mm Stroke 40mm How to fix 1. Select the Stroke range to be desired as in the picture, take the right position of the driving wheel onto the system unit. 2. Fit and fix out the 4ea M5x10mm, wrench bolt (4mm, wrench bolt handle) into the rotary spin set of the fixture hole according to each stroke.
-
Page 32: How To Change Shaking Stroke On Sk-71
How to change shaking stroke on SK-71 E. Frame Fixture D. Bracket A. Shaking Table B. Body cover F. RPM Sensor C. Bracket [Figure #1] [Figure #2] 1. Loosen M5x8, flat head bolt(+, screw driver) from the shaking table(A).(See Figure #1) 2. - Page 33 5. Now then, make sure that there will be the vibrating frame set and the system unit in the unit. (See Figure #3). 6. You can see 4 ea M5x10mm, wrench bolt under the Hole after spinning out the rotary spin set(G).(See Figure #4).
- Page 34 ※ Installing position for stroke fixture. Stroke from a front view How to fix 1. Sel ect t he St r oke r ange t o be desi r ed as i n t he pi ct ur e, t ake t he r i ght posi t i on of t he dr i vi ng w heel ont o t he syst em uni t .
-
Page 35: Chapter. 6: Maintenance And Troubleshooting
Chapter. 6 Maintenance and Troubleshooting The shaker would be maintained on the best condition by check the functions and state periodically. In addition to prevent of pollution of culture fluid or samples that could be occurred during tests. The chapter 6 illustrates trouble that could be occurred operating the unit. -
Page 36: Maintenance
Maintenance Check the all accessories and volts on the platform are tight up. Check the platform and shaking table are tight up. D o not cl ean t he sur f ace of uni t w i t h sul f ur i c aci d, hydr ochl or i c aci d or or gani c sol vent . -
Page 37: Safekeeping And Cleaning
Safekeeping and Cleaning Safekeeping way Safekeeping way If the shaker is not used for a while, maintain as follow. 1. Please take off the plug to turn off the power switch. 2. Maintain the unit with packing prevent dust inserting inside. Exterior cleaning Exterior cleaning 1. -
Page 38: Troubleshooting
Troubleshooting If any trouble occurs by operting the unit, please follow the bellow directions. If the existing soultions will not solve problems or does not exist, please request the service immediately. Trouble related with main power Trouble Causes Solution Connecting incorrect The unit does not Check... - Page 39 Trouble related with main power Trouble Causes Solution Main power turns on Blackout 1. Check there might be blackout. Main plug does not insert 2. Main plug connects with socket correctly. switch lights correctly 3. If fuses are cut, exchange new one. Fuses are cut 4.
-
Page 40: Chapter. 7: Specification
Chapter. 7 Specification Confirm the shaker¡s specification and circuit diagram to check the unit¡s functions. Read this to know its features and specification, so test to meet its property. The circuit diagram illustrates the shaker¡s component circuit. Specification Page 40... -
Page 41: Specification
Specification Model SK-300 SK-600 SK-71 Temperature 5℃ to 40℃ Permissible Maximum relative humidity 80% environmental condition Altitude up to 2,000m, Pollution degree 2 O r bi t al (f or w ar d, backw ar d, pause) : St andar d, Reci pr ocat i ng: Motion O pt i on Frequency... -
Page 42: Chapter. 8: Warranty And Service
Chapter. 8 Warranty and Service Jeio Tech¡s shakers can be protected by our warranty and service standard. Except for the presented standards, others would not be warranted Warranty standard General matter Warranty exception Service contact Page 42... -
Page 43: Warranty Standard
⑤ If the machine is broken without taking care of the ¡Notice¡ alerted on the manual ⑥ If persons who are not under the authority of service of Jeio tech fixed or changed parts of the machine ⑦ If the broken machine is due to customer¡s fault 3.
Need help?
Do you have a question about the Lab Companion SK-300 and is the answer not in the manual?
Questions and answers