Table of Contents
Advertisement
Quick Links
Advertisement
Table of Contents

Subscribe to Our Youtube Channel
Related Manuals for FP optimail


Summary of Contents for FP optimail
- Page 1 Franking machine Operator Manual...
- Page 2 About this operator manual Please read this operator manual before using the optimail franking machine. Please keep the manual near the optimail at all times for reference. Quick reference The quick reference gives you an overview of the most frequently used functions.
- Page 3 – Display – Next maintenance due – Fault: Display with error number, Available postage warning: and/or Low postage No postage, Service: Memory component / data backup measure Franking not possible – Time display Postage calculator connected, automatic postage value / –...
- Page 4 – Keyboard Display/set Display Connect/disconnect print offset register postage calculator (scales) Display postage used Display/change date by an account of date stamp Program basic Display/set Display number of settings time frankings of an account Set type of mail Numeric keys:...
-
Page 5: Table Of Contents
Using the DX feature (optional) ____________________________________30 Things worth knowing about DX mail _________________________30 Switching DX mode on / off on the optimail _____________________30 Switching DX mode on / off on the flexiscale postage calculator ____32 10 Using the incoming mail stamp function __________________________33 10.1... - Page 6 Operator Manual 12 Maintenance and care _________________________________________ 40 12.1 Cleaning _______________________________________________ 40 12.2 Changing the ribbon cassette _______________________________ 41 12.3 Disposal _______________________________________________ 42 13 Error messages and tips for helping yourself ______________________ 43 13.1 Error messages – device faults _____________________________ 43 13.2...
-
Page 7: Safety Tips
• Connect the optimail only to a grounded PE mains socket with 240 V AC. • Make sure the socket for connecting the optimail is close by and the mains plug is easily accessible at all times. • Switch off the optimail and all devices connected to it before plugging in or removing interface cables. -
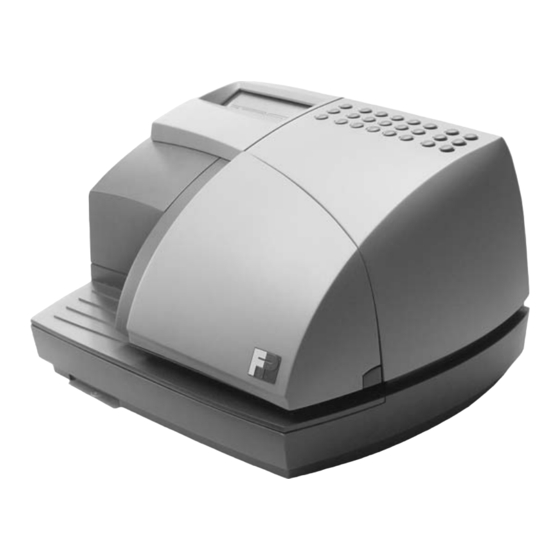
Page 8: Short Description Of The Optimail
Operator Manual A short description of the optimail Display Keyboard Letter guide Letter receiving tray Operating instructions (removable, with slogan imprints and type of mail endorsements) Release key (for flap/ribbon cassette flap/ribbon cassette compartment compartment) with ribbon cassette behind... - Page 9 The LC display shows you the current settings at a glance. You only have to put the letter in place – the optimail takes the letter, franks it and ejects the ready to send letter to the right.
-
Page 10: Switching Optimail On/Off
The optimail is ready for franking. Sleep mode If the optimail is not used for about one minute, i.e. no frankings are made or no key is pressed, the franking machine switches over to the time display. -
Page 11: Franking
You can test the current printing settings in a trial run. Set the postage value “0.00” for trial runs. Input errors The optimail will not accept incorrect inputs. An acoustic signal warns you that the setting is not possible with the entered values. The previous setting reappears in the display. -
Page 12: Setting The Postage Value
“High postage value” is exceeded. In this way the optimail helps you to avoid overfranking and loss of postage. If you want to frank with the set postage value …... -
Page 13: Setting The Slogan Imprint
(can be pulled out at the front left). • Enter the number of the desired slogan imprint. N. B.: If you are using an optimail with the DX fea- ture, the slogan imprint 9 is reserved for DX mail frankings. Read Chapter 9. -
Page 14: Setting The Type Of Mail Endorsement
Special Delivery, Overseas Mail). The available type of mail endorsements and the assigned numbers can be found as operating hints on the optimail (can be pulled out at the front left). • Enter the number of the desired type of mail endorsement. -
Page 15: Date In Date Stamp / Print Without Date
The display shows the postage value again. Read Chapter 8.1 to find out how to change the date of the system clock. Printing the date stamp without a date The optimail allows the date to be omitted from the date stamp. • Press the key. -
Page 16: Changing The Account
To record frankings for an account: • Enter the desired account number. N. B.: If you are using an optimail with the DX fea- ture, the account 9 is reserved for DX mail frankings. Read Chapter 9. •... -
Page 17: Positioning And Franking A Letter
– The top edge must be against the letter guide. • Push in the letter in the direction of the arrow until the optimail grips the letter. As soon as the mail sensor detects a letter, a roller presses the letter against the ribbon and print head –... -
Page 18: Account Function
Operator Manual Account function With the account function, the optimail offers a tool for recording and evaluating the incurred postage costs. Nine account memories are available. Accounts may be the divisions/departments of a company or individual companies in shared office facilities. -
Page 19: Printing An Account Report
Reading the number of frankings for an account • Enter the desired account number (1-9). Remember that account no. 9 has a special significance when using an optimail with the DX feature. See Chapter 9. • Confirm with the key. -
Page 20: Deleting Account Information
Operator Manual The optimail must be switched off. • Keep the key pressed and switch on the optimail with the keylock. • You can release the key as soon as “M 0” for the account and the printing symbol are visible in the display. - Page 21 “0”. If you are using an optimail with DX feature, the frankings for the DX service are booked to account “9”. You cannot delete account “9” in this configura-...
-
Page 22: Displaying And Printing Register Values
Operator Manual Displaying and printing register values The optimail saves important parameters and postage used information in registers. You can have the individual registers shown in the display and printed as an overview together with the account evaluation. The following information is stored in the individual... - Page 23 Displaying and printing register values Show register values • Enter register number (1-8). • Confirm with the key. The register value appears in the display. You will see the appropriate register number in the “R” field. You return to the postage value display function with key.
-
Page 24: Loading Postage - Teleset
• Make sure the optimail is connected to the telephone socket. • Switch on the optimail as usual and wait until the last set postage value appears in the display. • Make sure the scales function is switched off. •... - Page 25 (500.- £ in the example). Permissible amounts for calling postage: From 10 to a maximum 10,000 £ in steps of 100. The optimail will not accept impermissible amounts/ incorrect inputs. The amount last used then reappears in the display.
- Page 26 During connection setup (Position “3”) • Press the key. The optimail aborts postage call. The display shows the postage value again. Technical note: Please do not use telephones connected to the same telephone socket (431a) during postage loading if possible. Unnecessary...
-
Page 27: Basic Settings
• End the date display with the key. The display shows the postage value again. The optimail will not accept incorrect date inputs. The last set date reappears. Setting the time • Enter 2 digits each for the hours and minutes of the new time. -
Page 28: Setting A High Postage Value
2 seconds. The optimail will not accept incorrect time inputs. The time last set is retained. If the built-in clock stops, your optimail indicates this by repeated “beeping and flashing” of the date symbol “DATE” when switching on. Franking is not possible in this state. -
Page 29: Set Limit Value For The Low Postage Limit
Type the desired limit (in the example 15000 for a limit of 150 £). • Press the key. The value disappears from the display. • Press the keys one after another. The optimail shows the new limit (register R6). You return to the postage value display function with key. -
Page 30: Using The Dx Feature (Optional)
Using the DX feature (optional) Things worth knowing about DX mail DX mail is a private carrier. The optimail can frank mail for despatch by DX mail or by Royal Mail. Conditions and special features – The optimail must be equipped with the DX feature. - Page 31 The stamp imprint for DX mail is set. The optimail is now ready for franking for despatch by DX mail. Frank your mail as usual. The frankings are booked to account 9.
-
Page 32: Switching Dx Mode On / Off On The Flexiscale Postage Calculator
The flexiscale is now set to calculation of postage for despatch with the private carrier DX mail. Account 9 and slogan imprint 9 are set automatically on the optimail. The stamp imprint for DX mail is set. Switching off DX mode •... -
Page 33: Using The Incoming Mail Stamp Function
You can print the incoming mail stamp on envelopes up to 5 mm thick or directly on documents. The optimail prints the incoming mail stamp around 8 mm from the upper edge and 10 mm from the right-hand edge of the incoming mail. - Page 34 The optimail grips the incoming mail, prints the incoming mail stamp and ejects it to the right. For stamping thin paper you should place a sheet of...
-
Page 35: Setting A Print Offset
All settings from the incoming mail stamp mode (different incoming mail stamp, print offset) are lost. In incoming mail stamp mode you can also switch off the optimail with the key-operated switch as normal. 10.3 Setting a print offset The optimail prints the incoming mail stamp around 10 mm from the right-hand edge of the incoming mail. -
Page 36: Selecting Another Incoming Mail Stamp (Optional)
Operator Manual 10.4 Selecting another incoming mail stamp (optional) Francotyp-Postalia can equip the optimail with additional incoming mail stamps according to the customer’s wishes. • Enter the number of the desired incoming mail stamp. • Confirm with the key. -
Page 37: Using Optimail With The Postage Calculator
25-pole port. The necessary data transmission cable is delivered with the FP postage calculator. Caution! Switch off the optimail and the FP postage calculator before plugging or removing the data transmission cable. Caution! Read the operator manual of the FP postage calculator before connecting it to the optimail. -
Page 38: Weighing And Franking
• Press the key on the optimail. The scales symbol in the display indicates that the optimail is ready to accept data from the postage calculator. • Select the desired mail data on the FP postage calculator. • Place the mailpiece on the weighing tray. - Page 39 Read the operator manual of your FP postage calculator for instructions on setting up this function. – The optimail is configured to standard such that the postage value transferred by the postage calculator is only valid for one franking.
-
Page 40: Maintenance And Care
Warning! Make sure that no liquids or foreign objects penetrate the interior of the device. If this happens, pull out the mains plug immediately. Have the optimail checked by your local servicing dealer before using it again. • Switch off the optimail. -
Page 41: Changing The Ribbon Cassette
Maintenance and care 12.2 Changing the ribbon cassette The message “Cassette” in the display indicates when you need to change the ribbon cassette. Caution! Only use original ribbon cassettes from Francotyp-Postalia. • Open the flap of the ribbon cassette compartment by lightly pressing the release catch. -
Page 42: Disposal
Your ribbon cassettes are granulated at the FP recycling centre and put back into production. Help us. The environment will be grateful. When you wish to scrap your optimail, please ob- serve the legal regulations for the environmentally friendly disposal of electronic equipment. Our after-... -
Page 43: Error Messages And Tips For Helping Yourself
Post Office licence. You will be liable for any damages. You can eliminate minor faults and problems with the optimail yourself. In this chapter you will find help and tips for eliminating and avoiding faults. 13.1 Error messages – device faults The self-diagnosis system of the optimail gives you information about the respective operating state. - Page 44 Chapter 5.3). Error code 19 appears and optimail is locked: Call Service! Switch off the optimail, wait briefly and switch back If the fault is not eliminated after switching on and off several times, call Service. If error code 21 appears when switching on: A letter was already inserted when switching on.
- Page 45 No postage. The set postage value cannot be franked. Load new postage ( Chapter 7). Call Service. Caution! The optimail can only be used for another 3000 frankings or 3 months and then locks automatically. Call Service. Caution! The optimail can only be used for another 3000 frankings or 3 months and then locks automatically.
-
Page 46: Error Messages - Teleset
Operator Manual 13.2 Error messages – TELESET If an error occurs during loading of postage, an error code is displayed. There are two types of errors: – Temporary problems with establishing connection Error code starts with the letter “C”. - Page 47 Error messages and tips for helping yourself “E” codes Error codes starting with the letter “E” signal abortion of the remote value setting. The two-digit error number indicates the cause. Proceed as follows: • Acknowledge the error message with the key.
- Page 48 Operator Manual Error message Correction by TELESET Servicing Code Cause User data centre dealer Franking machine not regis- E 34 tered with TELESET data centre. Franking machine not yet E 35 approved by TELESET data centre. Postage cannot be called up by E 36 franking machine.
-
Page 49: Tips For Helping Yourself
Possible cause and remedy Blank display No power connection Check whether the power cable is plugged in correctly and the optimail is switched on (keylock in horizontal position). Date and/or time incorrect Reset the date and/or time Chapter 8.1 and 8.2). - Page 50 Data transmission is faulty. Switch off the optimail and the postage calculator, wait briefly and switch back on. optimail is not ready to receive data from the postage calculator. On the optimail: Press the key.
-
Page 51: Instructions For Installation And Commissioning
Appendix - Instructions for installation and commissioning Instructions for installation and commissioning The following overview lists the operating steps for installing and commissioning the optimail. Commissioning overview Step 1: Unpack Step 2: Check the contents of the package Step 3: Install the optimail... - Page 52 • Remove the optimail from the protective foil. • Unpack the accessories. Do not throw away the packaging. Use it again when you need to transport the optimail or send it in to Service. Step 2: Checking the contents of the package Warning! Do not start operating the optimail if parts are damaged or missing.
- Page 53 15°C to 35°C.) – No direct sunlight – Power socket in the immediate vicinity. • Place the optimail on a firm, level, horizontal base. Step 4: Inserting the ribbon cassette • Open the flap of the ribbon cassette compartment by lightly pressing the release key.
- Page 54 Operator Manual Caution! Make sure you do not crease or tear the ribbon when inserting it. This prevents breaking of the ribbon. Make sure the edges of the ribbon do not fold over. Creased ribbons are thicker and prematurely fill the used ribbon spool.
- Page 55 • Plug the modem cable with the 6/6 Western plug into the optimail’s modem socket. The modem socket is on the back of the optimail. The spring on the plug must be facing the side panel. • Connect the modem cable to the telephone socket...
- Page 56 You will find further information about the connection types and setting the outside dialling parameters for the built-in modem on page 58. Read Chapter 11.1 to find out how to connect an FP postage calculator to your optimail. Step 6: Switching on Caution! When you move the optimail from a cold environment (i.e.
- Page 57 Before you can frank letters with the optimail for the first time, you have to load a certain postage amount (at least 10 £) into the optimail. Read Chapter 7 on page 24 to find out how to load postage.
-
Page 58: Setting The Outside Dialling Parameters For The Modem
Operator Manual Setting the outside dialling parameters for the modem The outside dialling parameters for the modem are set for your telephone connection before the optimail leaves the factory (according to your order). You can check the programmed outside dialling parameters and reset them if you change your telephone connection. - Page 59 Appendix - Setting the outside dialling parameters for the modem Example 2: Main line with pulse dialling method (PD) Main line: You do not have to dial a digit (e.g. “0”) or press the R key to dial into the public telephone network (outside line seizure).
- Page 60 Operator Manual Example 3: Extension with dual tone multifrequency dialling (DTMF) Outside line seizure with digit “0” and pause Extension: You have to dial a digit (e.g. “0”) to dial into the public telephone network. You will recognise dual tone multifrequency dialling from the audible “tones”...
- Page 61 Appendix - Setting the outside dialling parameters for the modem Example 4: Extension with pulse dialling method (PD) Outside line seizure with digit “9” and pause Extension: You have to dial a digit/digit sequence (e.g. “9”) to dial into the public telephone network (outside line seizure).
-
Page 62: Glossary
To the left of the value stamp in the franking imprint. DX mail Private Carrier. If your optimail is equipped with the optional DX feature, all frankings for DX mail are counted separately in account 9 and settled directly with the private carrier. - Page 63 Appendix – Glossary TELESET Franking machine accounting system of the Francotyp-Postalia AG & Co KG. The optimail and the Teleset data centre exchange value specifications via modem when loading postage which release the desired postage amount. TELESET data centre (TDC) Data centre of Francotyp-Postalia.
-
Page 64: Technical Data
Operator Manual Technical data Dimensions 320 x 190 x 290 mm (width x height x depth) Weight 13.47 lb. (6.1 kg) Power connection 240 V / 50 Hz Power consumption 90 W (in sleep mode: 6 W) Protection rating Fuse slow-blow 0.5 A at 240 V... - Page 65 Appendix – Technical data Declaration of Conformity...
-
Page 66: Index
Operator Manual Index Date stamp 11, 62 hide date 15 Abort show date 15 input 4, 11 Declaration of Conformity 65 TELESET 26 Delete 4, 11 Account 3 Display 3, 8 account “M0” 21 Disposal 42 change 16 DTMF. See dual tone multifrequency dialling... - Page 67 Number of imprints 22 Incoming mail stamp mode close 4, 35 switch on 33 Operating instructions 8, 13, 14 Input optimail abort 4 general overview 8 delete 4, 11 things worth knowing about… 9 errors 11 Outside dialling parameters 58...
- Page 68 Operator Manual Switching on DX mode 30 Quantity DX mode (on flexiscale) 32 for all accounts 21 incoming mail stamp mode 33 for an account 19 optimail 10, 56 Quick reference 2 scales function 38 Symbols in the display 3...
-
Page 69: Service
Service Service Every optimail is thoroughly checked before leaving the factory. Should any faults occur in spite of our extensive quality control, please contact your local servicing dealer. Our main office will be pleased to tell you the address of your local servicing dealer.
Need help?
Do you have a question about the optimail and is the answer not in the manual?
Questions and answers