Table of Contents
Advertisement
Quick Links
Download this manual
See also:
Operator's Manual
Advertisement
Table of Contents

Related Manuals for FP Optimail 30


Summary of Contents for FP Optimail 30
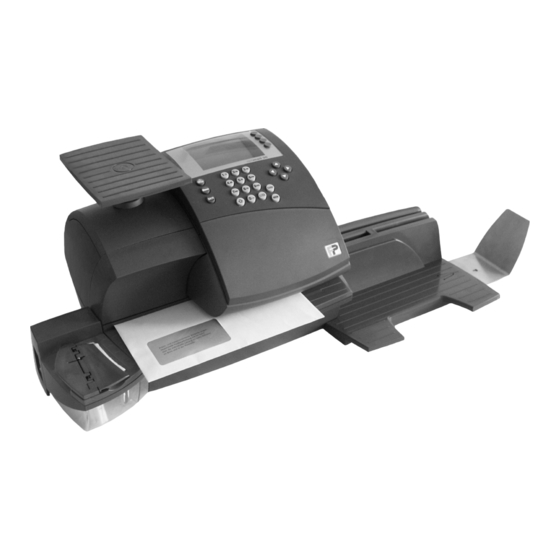
- Page 1 ™ optimail Postage meter Installation Guide...
-
Page 2: Registering Overview
30 Installation Guide Registering overview The following overview lists the operating steps for using your optimail 30 for the first time. You have to perform these steps in the given order before you can use the optimail 30. If certain steps are inapplicable for installation and registering of your optimail 30 (e.g. -
Page 3: Table Of Contents
Tips for dealing with issues occurring during commissioning __________ 25 Service _________________________________________________________31 The optimail 30 is designed so that you can install and start it yourself with the help of this Installation Guide. We will gladly provide support for installing and commissioning your optimail 30. -
Page 4: Safety Tips
30. • Make sure the socket for connecting the optimail 30 is close by and easily accessible at all times. • Do not remove any parts of the housing. -
Page 5: Installing And Commissioning Optimail 30
Sealer (optional) • Open the cardboard box. • Take the sealer out of the cardboard box and the plastic bag. Keep the packing. Use it again when you need to transport the optimail 30 or send it in to Service. -
Page 6: Step 2: Checking The Contents Of The Package
30 Installation Guide Step 2: Checking the contents of the package Warning! Do not start operating the optimail 30 if parts are damaged or missing. Please contact the Francotyp-Postalia Service. • Check that the contents of the package are complete and free from any damage. -
Page 7: Step 3: Installing The Optimail 30
– Room temperature: 50°F to 104°F. – No direct sunlight. – Power socket and telephone jack for connecting the modem in the immediate vicinity. • Place the optimail 30 on a firm, level, low vibration and horizontal base. -
Page 8: Step 4: Installing The Ribbon Cassette
30 Installation Guide Step 4: Installing the ribbon cassette Caution! Make sure not to crease or tear the ribbon when inserting it. Otherwise the ribbon might break. Also make sure the edges of the ribbon do not fold over. Folded ribbons are thicker and prematurely fill the take-up ribbon spool. - Page 9 Installing and commissioning optimail 30 • Place the ribbon cassette on the letter receiving tray with the ribbon facing down- wards. • Hold the ribbon cassette as shown in the illustration and carefully insert it in the cas- sette slot. The cassette must easily slide into the cassette slot.
-
Page 10: Step 5: Mounting The Scale Platform
30 Installation Guide Step 5: Mounting the scale platform The scale comes mounted to the optimail 30 on delivery. You need only attach the scale platform. • Hold the scale platform such that the long slot in the scale platform foot points to the right (towards the display). -
Page 11: Step 6: Installing The Catch Tray (Optional)
Installing and commissioning optimail 30 Step 6: Installing the catch tray (optional, as ordered, otherwise continue with Step 7) • Attach the stop to the catch tray: Slide the stop into the guides on the catch tray bot- tom. (Bottom view) •... -
Page 12: Step 7: Installing The Sealer (Optional)
30 Installation Guide Step 7: Installing the sealer (optional, as ordered, otherwise continue with Step 8) Filling sealit™ sealing liquid Rocker with moistening felt • Swing up the rocker with the moistening felt. The filler hole for filling the sealer is now accessible. - Page 13 Installing and commissioning optimail 30 Connecting the sealer to the postage meter • Place the sealer to the left of the postage meter. • Slightly lift the postage meter on the left. The left side of the housing features two slots where the sealer is fastened.
-
Page 14: Step 8: Connecting The Optimail 30
30 or approved by Francotyp-Postalia. Make sure that cables are not damaged. Connect the optimail 30 only to a grounded single-phase power socket. Make sure your office power supply conforms to power requirements shown on the serial number plate of the optimail 30. -
Page 15: Step 9: Turning On
• Plug the power plug into a grounded Power cable single-phase power socket. Make sure your office power supply conforms to power requirements shown on the serial number plate of the optimail 30. Step 9: Turning on • Push (= ON) on the power switch, the tog- gle switch on the left side of the postage meter. -
Page 16: Step 10: Authorization
This is why you must first sign in (authorize) at the Teleset data center and load postage. The optimail 30 guides you through this authorization procedure. Simply follow the instructions on the display. - Page 17 Installing and commissioning optimail 30 • Press the CONTINUE multifunction key. Setting the location (state) You must set the postage meter location. The optimail 30 needs this data to exactly display the weight. The optimail 30 opens a list. • Use the arrow keys to scroll for the appropriate state.
- Page 18 Connection Configuration: Internal Modem You must edit the configuration to match the internal modem to your telephone connection so the optimail 30 can establish a connection to the Teleset data center. • Select INTERNAL MODEM. The optimail 30 prompts you for –...
- Page 19 Installing and commissioning optimail 30 Modem parameters – possible settings and their meaning Phone type DIRECT LINE optimail 30 is connected to a direct line. EXTENSION optimail 30 is connected to an exten- sion. Access method EXCHANGE DIGIT Defines how the exchange is dialed from (only with phone type the extension.
- Page 20 If necessary, contact your network administrator. • Select UNIVERSAL LINK BOX. optimail 30 will now try to establish a connec- tion with your network. A message will inform you of the test result. • Follow the instructions on the display to configure the network.
-
Page 21: Step 11: Loading Postage / Teleset
Step 11: Loading postage / TELESET You now load the first postage into your postage meter. The sum you enter is loaded into your optimail 30 as a postage credit. The called amount is paid according to your contract with the United States Postal Service. - Page 22 A roller pushes the sheet against ribbon and print head and printing starts as soon as the Folded edge letter sensor detects the sheet. The optimail 30 prints the report and ejects the imprinted sheet to the right. • Press the key to exit the Report function.
- Page 23 The optimail 30 displays the home menu. Installation is complete. You received the adverts and / or endorse- ments you ordered with your optimail 30 on chip card(s). Refer to the Operator Manual for instructions on how to load data from a chip card to the optimail 30.
-
Page 24: The First Stamp
30 Installation Guide The first stamp Your optimail 30 is ready for operation when commissioning has been completed successfully. We recommend that you now make a trial print with postage value $ 00.00 (zero imprint). • Type the postage value “0” in the home menu. -
Page 25: Tips For Dealing With Issues Occurring During Commissioning
An error message with troubleshooting information aborted appears in case of authorization issues. If necessary: • Turn off the optimail 30. Wait one minute. • Turn the optimail 30 on again. The authorization procedure restarts. Make sure that the Connection Configuration is set cor- rectly (see page 17) . - Page 26 30. To do this: • Press the key. • Select TELESET. • Switch off the optimail 30. Wait one minute. • Switch the optimail 30 on again. The optimail 30 starts the loading procedure. Please read the Operator Manual for further information regarding the Teleset topic.
- Page 27 For your notes...
- Page 28 For your notes...
- Page 29 For your notes...
- Page 30 For your notes...
-
Page 31: Service
Service Service FP Mailing Solutions Francotyp-Postalia, Inc. 140 N. Mitchell Court, Suite 200 Addison, IL 60101-5629 Customer Service (800) 341-6052 www.fp-usa.com The Francotyp-Postalia quality management system for the scope Design and Manufac- turing of Franking Machines and Inserters is certified according to DIN EN ISO 9001.
Need help?
Do you have a question about the Optimail 30 and is the answer not in the manual?
Questions and answers