Advertisement
Quick Links
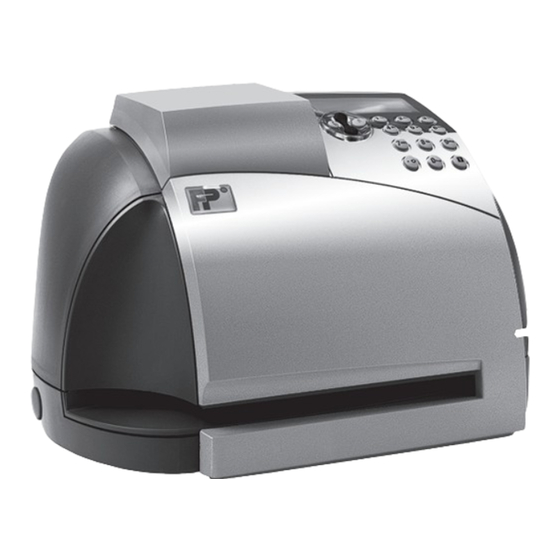
mymail™ MAX
Set-Up and Installation Guide
5
1
3
6
4
2
8
9
Checking the contents of the package
1
–
mymail™ MAX
Base Unit
2
– Power Cable
3
– High Speed Cable
4
– Analog Phone Line
5
– High Speed Cable to USB converter
6
– Master Card (if ordered)
7
– HP® Inkjet Cartridge (if ordered)
8
– Operator Manual
9
– FP Shipment Packing List
1
Before you begin,
activate the mymail™ MAX Meter
- Locate the Shipment Packing List included with your
shipment; Identify your Customer # and Meter Serial #
on this form as shown
- Call FP Toll-Free @
866-750-7570, then select
option 1 to look up your PIN
Order No.
Purchase Order No.
Total Packages
- Key in your Account #, Zip Code,
Package No.
and Meter Serial # as directed
PK000000000
PK222222222
Type
by the phone prompts
Item
Resource
Resource
Fixed Asset
Resource
2
Remove Packing From Ink Cartridge Bay
- Place your
mymail™ MAX
in the work location in which
you wish to install it
- Lift the Keypad Panel as shown to expose the Ink
Cartridge Bay
- Remove all foam/cardboard packing material as shown
- Do NOT Install the Ink Cartridge at this time!
7
- Gently close the Keypad Panel
3
Connect Power
- Locate the power connection on the back of the
as shown above
- Connect the female end of the included Power Cord to the back
of the
mymail™ MAX
as shown; plug the male end into a nearby
power outlet
- Your
mymail™ MAX
will now automatically startup and display
the message "Please wait..." as shown while performing a series
of internal system tests
- Once your
mymail™ MAX
completes its internal testing, your
display will read "Cartridge error" to notify you that no ink
cartridge is currently installed
4
Install mymail™ MAX Ink Cartridge
- Lift the Key Panel as shown to
expose the Ink Cartridge Bay
- Wait for your
mymail™ MAX
Shipment Packing List
August 17, 2011
FP Mailing Solutions
Page
1
140 N. Mitchell Ct.
automatically adjust the position
Addison, IL 60101
jdoe
United States
800-341-6052
www.fp-usa.com
of the ink cartridge holder
RO1234567
Customer No.
2222222222
- Slide the Yellow Locking Lever
2
Ship-to
ABC CORPORATION
JOHN JOHNSBURG
123 MAIN STREET
MAILING, US 12345
United States
backward as shown, then gently
Phone:
1234567890
Shipping Agent
Shipping Agent Service
External Tracking No.
Weight
FEDEX
2Day
111111111111
7
FEXEX
2Day
333333333333
14.7
swing the upper Ink Cartridge Lock
No.
Description
Serial No.
Quantity
56R
FP-5LI SCALE (R)
5555555
1
614
T-1000 SEALER
1
upward towards the back of the
RGP05
RATEGUARD - FP5LI
1
T100795276
T-1000 METER
7777777
1
UNL
UNLIMITED RESETS
1
machine
- Prepare the Ink Cartridge by
removing the protective film as
shown
- Insert the Ink Cartridge into the ink
cartridge holder as shown with the
print head and contacts towards the
front of the
mymail™
MAX; be sure
to snap the cartridge into place by
gently pressing down on the back
of it
- Gently swing the upper Ink Cartridge
Lock back down onto the newly
installed ink cartridge, then slide
the Yellow Locking Lever forward as
shown
- Gently close the Keypad Panel;
your
mymail™ MAX
will now
automatically restart and display
the message "Please wait..." while
performing a series of internal
system tests
- Once your
mymail™ MAX
its internal testing, the display will
read "New ink cartridge detected"
mymail™ MAX
as shown
5
to
Adjustment of mymail™ MAX Ink Cartridge
- Confirm the "New ink cartridge detected" message by pressing
the green
- Confirm the "Please follow instructions to adjust cartridge"
message by pressing the green
- Confirm the "You will need two envelopes" message by pressing
the green
- Wait for your
then insert a blank envelope as shown
- Do not remove the envelope until your
completes printing and releases the envelope
- Input the # of the Straightest Horizontal Line as shown below
using the numeric pad
completes
- Confirm your entry by pressing the green
- Input the # of the Straightest Vertical Line as shown below
using the numeric pad
- Confirm your entry by pressing the green
- Wait for your
second envelope" then insert another envelope as before to
complete the adjustment procedure
- Do not remove the envelope until your
completes printing and releases the envelope
key
key
key
mymail™ MAX
to display "Insert first envelope"
mymail™ MAX
key
key
mymail™ MAX
to display the message "Insert
mymail™ MAX
Advertisement

Related Manuals for FP mymail MAX


Summary of Contents for FP mymail MAX
- Page 1 Identify your Customer # and Meter Serial # expose the Ink Cartridge Bay on this form as shown - Wait for your mymail™ MAX Shipment Packing List - Call FP Toll-Free @ August 17, 2011 FP Mailing Solutions Page 140 N. Mitchell Ct. automatically adjust the position...
- Page 2 Did you know FP has other product lines? the wizard by clicking “Finish,” as shown Make your postage meter part of a total solution, with these lines from FP. - Locate the mailcredit™ icon on your desktop of your PC...
Need help?
Do you have a question about the mymail MAX and is the answer not in the manual?
Questions and answers