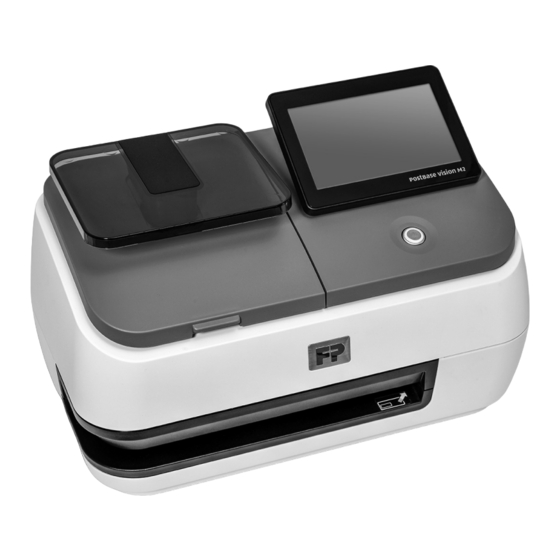
FP PostBase Vision M2 Installation And Safety
Hide thumbs
Also See for PostBase Vision M2:
- Reference manual (144 pages) ,
- Quick reference manual (2 pages)
Table of Contents
Advertisement
Quick Links
Advertisement
Table of Contents

Subscribe to Our Youtube Channel
Related Manuals for FP PostBase Vision M2


Summary of Contents for FP PostBase Vision M2
- Page 1 Franking machine Installation and safety...
-
Page 2: About This Manual
This manual is intended for people who set up and install the PostBase Vision M2 franking machine. Contents This manual contains important information for your safety and describes how to set up and install the PostBase Vision M2 franking machine. Further documents The Quick Reference Guide (leaflet) provides an overview of the most important functions for everyday use. -
Page 3: Table Of Contents
Assembling the PostBase Vision M2 ________________________8 Step 3: Connecting the PostBase Vision M2 ________________________9 Step 4: Turning on the PostBase Vision M2 ________________________11 Step 5: Installing the PostBase Vision M2 _________________________11 Graphic symbols and product safety labels ___________________________19 Technical Data ___________________________________________________21... -
Page 4: For Your Safety
Before setting up, commissioning and using the PostBase Vision M2 franking machine, please read this safety information and the reference guide carefully. The reference guide for the PostBase Vision M2 franking machine is available as a download from Francotyp-Postalia at any time. - Page 5 • If the PostBase Vision M2 franking machine has previously been in a cold environ- ment (i.e. below 10 °C / 50 °F): Unpack the PostBase Vision M2 and wait at least two hours before connecting and operating the PostBase Vision M2. The franking machine needs this time to adapt to the environmental conditions allowing any con- densed moisture to escape.
-
Page 6: Installation And Commissioning
PostBase Vision M2 Installation and commissioning Caution! Follow the steps for setup and installation of the PostBase Vision M2 franking machine in precisely the given order to ensure successful installation. Step 1: Unpacking and checking the contents of the package •... - Page 7 Installation and commissioning Scope of delivery PostBase Vision M2 franking machine 1 PostBase Vision M2 franking machine (1 box) 2 Weighing platform 3 Ink cartridge (packaged) 4 Power supply unit 5 Power cable 6 Ethernet cable 7 Installation and safety (brochure) 8 Quick Reference Guide (leaflet) ❑...
-
Page 8: Step 2: Assembling The Postbase Vision M2
PostBase Vision M2 Step 2: Assembling the PostBase Vision M2 Installation site The installation site for the PostBase Vision M2 franking machine must meet the following requirements: – Firm, level, low vibration and horizontal base, which offers sufficient space for the franking machine. -
Page 9: Step 3: Connecting The Postbase Vision M2
Francotyp-Postalia. Make sure that cables are not damaged. • Only connect the PostBase Vision M2 franking machine to a properly installed power outlet. Make sure that the power connection corresponds to the voltage value indicated on the serial number plate of the power supply unit. - Page 10 PostBase Vision M2 Caution! If the PostBase Vision M2 was previously in a cold environment (i.e. below 10 °C / 50 °F): Wait at least two hours after unpacking before connecting the franking machine. The PostBase Vision M2 needs this time to adapt to the environmental conditions.
-
Page 11: Step 4: Turning On The Postbase Vision M2
‘The basics of operation’. The PostBase Vision M2 will guide you step- by-step through the installation procedure. Simply follow the instructions on the display. • Have the R-PIN ready (received separately from the rest of the delivery). - Page 12 The ‘Connectivity Settings’ overview in the reference guide shows and explains the pos- sible settings. Caution! During the further course of instal- lation, the PostBase Vision M2 may start up multiple times. Do not disconnect the PostBase Vision M2 from the power supply.
- Page 13 • Enter the R-PIN (Repository-PIN. • Confirm with ‘Continue’ and resume the installation. Synchronisation … The PostBase Vision M2 now loads software and data and then restarts. • Follow the information and instructions on the display. Inserting the ink cartridge •...
- Page 14 PostBase Vision M2 • Hold the weighing unit by the handle and carefully fold it upwards as far as it will go. The print system is now accessible. The flashing green LED (front right next to the cartridge compartment) indicates that no cartridge has been inserted yet.
- Page 15 Installation and commissioning • Open the cartridge packaging. • Remove the ink cartridge from its packaging. Note: Depending on the model, the ink car- tridge may be fitted with a clip that acts as a transportation protection. If your cartridge has such a clip: •...
- Page 16 … Contacts • … press down. The cartridge clicks into place. The PostBase Vision M2 acknowledges the cartridge being inserted with a short beep. When the cartridge is inserted correctly, the green LED glows continuously.
- Page 17 Icon: ‘Full cartridge’ icon in the menu bar. Full cartridge Load Postage In order to frank, the PostBase Vision M2 must have available funds. To download postage, this requires a connection to the data centre. • Follow the instructions on the display.
- Page 18 PostBase Vision M2 The ‘Menu’ button is used to access setup functions. You can customise the basic set- tings of your PostBase Vision M2 (e.g. dis- play brightness, tone signals, standby time, PIN protection, colour of the menu bar …).
-
Page 19: Graphic Symbols And Product Safety Labels
Graphic symbols and product safety labels Graphic symbols and product safety labels Graphic symbols and product safety labels are attached to the PostBase Vision M2 franking machine. The product safety labels can be found on the serial number plate of the product. - Page 20 PostBase Vision M2 Symbol for protection class III. Only use the power supply unit specified in the Operator Manual (see page 21). Connection for specified external power supply unit (see page 21). Symbol for DC voltage. Symbol for AC voltage.
-
Page 21: Technical Data
Technical Data Technical Data Dimensions * – Length 340 mm (13.4") – Width / Depth 205 mm (8.1") 200 mm (7.9") – with weighing platform – Height 220 mm (8.7") – highest display position Weight * 3.0 kg (6.6 lb) Power supply 24 VDC / 1.5 A (using an external power supply unit) Protection class III... - Page 22 PostBase Vision M2 Ink cartridge Type FP ink cartridge for PostBase Vision M2 Operating and +15 °C to +35 °C (59 °F to 95 °F) storage conditions Only use in closed rooms Do not expose to direct sunlight Relative humidity 20% to 70%, non-condensing Material Safety Data Sheet (MSDS) for users available at sdb.francotyp.com/en.
-
Page 23: Declaration Of Conformity
Declaration of Conformity Declaration of Conformity... -
Page 24: Licenses
PostBase Vision M2 Licenses This is a copy of the current LICENSE file inside the CVS repository. LICENSE ISSUES ============== The OpenSSL toolkit stays under a dual license, i.e. both the conditions of the OpenSSL License and the original SSLeay license apply to the toolkit. - Page 25 Licenses * This product includes cryptographic software written by Eric Young * (eay@cryptsoft.com). This product includes software written by Tim * Hudson (tjh@cryptsoft.com). Original SSLeay License ----------------------- /* Copyright (C) 1995-1998 Eric Young (eay@cryptsoft.com) * All rights reserved. * This package is an SSL implementation written * by Eric Young (eay@cryptsoft.com).
-
Page 26: Security Declaration For Data Usage
The PostBase Vision M2 franking machine is connected to the user’s local network through an Ethernet interface / Wi-Fi to share data with the FP Data Centre using both the local network and a suitable available internet connection provided by the user. -
Page 27: Fcc Compliance Statement
FCC Compliance Statement FCC Compliance Statement This device complies with FCC Part 15, Subpart B, Class B. Note: This equipment has been tested and found to comply with the limits for a Class B digital device, pursuant to part 15 of the FCC Rules. These limits are designed to provide reasonable protection against harmful interference in a residential installation. - Page 28 PostBase Vision M2...
- Page 29 For your notes...
- Page 30 For your notes...
-
Page 31: Service
Service Service Every PostBase Vision M2 is thoroughly checked before leaving the factory. Should any faults occur with your PostBase Vision M2 franking machine in spite of our extensive quality control, please contact FP help line. fp-francotyp.com...
Need help?
Do you have a question about the PostBase Vision M2 and is the answer not in the manual?
Questions and answers