Table of Contents
Advertisement
Quick Links
Advertisement
Table of Contents

Related Manuals for FP UltiMail 60


Summary of Contents for FP UltiMail 60
- Page 1 Franking System Operator Manual...
- Page 2 The control panel – display and keyboard Multi function keys Display Multi function keys (soft keys) (illuminated) (soft keys) Arrow keys Frank labels SET UP menu: Change system settings Loading postage: TELESET Display / print postage register Info key: Display help Start / Stop key: Back to the home menu Start letter transport /...
-
Page 3: Table Of Contents
Contents About this Operator Manual _____________________________________7 1 Safety tips ____________________________________________________8 2 A short description of the UltiMail _______________________________10 3 Switching the UltiMail ON / OFF _________________________________12 4 UltiMail operating basics _______________________________________14 Access control by MASTER card / USER card ________________14 The operating menu _____________________________________15 Trial run (zero imprint) ___________________________________17 5 Setting the franking imprint _____________________________________19... - Page 4 UltiMail Operator Manual 8 Special functions _____________________________________________ 49 Working with the batch counter ____________________________ 49 Using the UltiMail as incoming mail stamp ___________________ 51 Seal only function (UltiMail with feeder / sealer only) _________________ 52 Using an external postage scale ___________________________ 53 8.4.1 Connecting an external postage scale ______________________ 53 8.4.2...
- Page 5 Contents 14 Advanced settings and system information _______________________87 14.1 Setting the operating mode _______________________________87 14.2 Display, print and send system information ___________________89 14.3 Display and reset item counter ____________________________90 14.4 Display and reset advert counter ___________________________91 14.5 Setting the print offset ___________________________________92 14.6 Setting low postage warning –...
- Page 6 UltiMail Operator Manual 15 Maintenance and care ________________________________________ 127 15.1 Cleaning the UltiMail franking system ______________________ 127 15.2 Changing the ink cartridges ______________________________ 128 15.3 Adjust the ink cartridges ________________________________ 133 15.4 Cleaning the print system _______________________________ 134 15.4.1 Start automatic cleaning the print system ___________________ 134 15.4.2 Manually cleaning the print heads _________________________ 135 15.5...
-
Page 7: About This Operator Manual
(optional). In this Operator Manual, ‘UltiMail’ stands for the franking systems UltiMail 60 and UltiMail 90. Quick Reference Guide The Quick Reference Guide gives you an overview of the operating menu and franking with the UltiMail. -
Page 8: Safety Tips
It is not possible to operate the sealer without the UltiMail franking machine. • The ‘Feeder UltiMail’ is intended for use with the UltiMail 60 / UltiMail 90 franking machine. It is not possible to operate the feeder without the UltiMail franking... - Page 9 Safety tips • We recommend to use only approved FP equipment and FP original parts. The manufacturer FP has established reliability, safety and applicability. The manufac- turer cannot assess the reliability, safety and applicability for products not approved by FP, and therefore not vouch for such products.
-
Page 10: Short Description Of The Ultimail
The franking machine is available as model – UltiMail 60 with a processing speed up to 60 letters/minute – UltiMail 90 with a processing speed up to 90 letters/minute. Menu-supported The back-lit display is clear and easy to read and understand. - Page 11 A short description of the UltiMail Additional functions The following functions will soon be among your favourites: – Account function. Recording and accounting of postage according to accounts. – Memory function for frequently used franking imprint settings. – Label dispenser to print self-adhesive labels for large / thick mail pieces.
-
Page 12: Switching The Ultimail On / Off
UltiMail Operator Manual Switching the UltiMail ON / OFF Use the power switch on the back of the franking machine to switch the UltiMail ON / OFF. Switching on • Switch the power switch on the back of the franking machine to the position. - Page 13 Switching the UltiMail ON / OFF Switching off Caution! Always switch the UltiMail off using the power switch. Never simply pull the power plug or interrupt the power in any other way before the printing system has moved to sealed position. That way you can prevent drying and maintain a constant printing quality.
-
Page 14: Ultimail Operating Basics
UltiMail Operator Manual UltiMail operating basics In this chapter you will learn about the basic UltiMail functions and how to use the operating menu. Access control by MASTER card / USER card MASTER card and USER card, both designated as access cards, control access rights to the UltiMail. -
Page 15: The Operating Menu
UltiMail operating basics The operating menu In this chapter you will get to know the home menu. All other UltiMail menus work in a similar way. You will soon get used to the other windows (setup menu, input, prompt, error message, help). The home menu The home menu appears after switching Postage value... - Page 16 UltiMail Operator Manual How menu sequences are visualised The ‘path’ through the operating menu to the different functions is represented in this way: • Go to the SET UP menu using the key. SET UP • Select SYSTEM SETTINGS MORE TONE SIGNAL.
-
Page 17: Trial Run (Zero Imprint)
UltiMail operating basics Trial run (zero imprint) You can check the settings for franking imprint and the print quality by doing a trial run with postage value S$ 0.00 (zero imprint). • Type the postage value “0” in the home menu. - Page 18 UltiMail Operator Manual Check print quality Make sure your UltiMail prints flawless franking imprints without misalignments. • Examine the imprint. It must not contain any gaps or misalignments. This illustration shows a flawless imprint. If the imprint exhibits misalignment: • Adjust the ink cartridges (see Chapter 15.3 on page 133).
-
Page 19: Setting The Franking Imprint
Setting the franking imprint Setting the franking imprint SMS text Advertising imprint Postage value (logo) Type of mail endorsement Date The settings for the franking imprint are made in the home menu: – Postage value (see Chapter 5.1) – Advertising imprint / Logo (see Chapter 5.3) –... - Page 20 UltiMail Operator Manual High postage The UltiMail will warn you if you enter an amount that is higher than the preset. The UltiMail thus helps to avoid overfranking and loss of postage. You can change the limit for the monitoring function in the SET UP menu (see page 94).
-
Page 21: Type Of Mail Endorsement
Setting the franking imprint Type of mail endorsement You can mark special mail types with an appropriate endorsement (e.g. Airmail, Registered, Urgent). • Press the key next to the type of mail endorsement in the home menu. The SELECTING TYPE OF MAIL ENDORSEMENT menu offers all available type of mail endorsements. -
Page 22: Logo / Advertising Imprint
UltiMail Operator Manual Logo / advertising imprint When franking mail pieces you can also print a logo / advertising imprint of your choice on the envelope. UltiMail offers you the following configurations of equipping with advertising imprints: – UltiMail can save up to 9 different logos. All saved logos are available to all users. For logo administration, read Chapter 13. - Page 23 Setting the franking imprint Using the logo from a USER card • Insert a USER card with logo. • In the home menu, press the key next to the logo. The logo on the USER card always appears in the last position in the SELECTING LOGO menu.
-
Page 24: Sms Text
UltiMail Operator Manual SMS text When franking, you can print a freely editable text message. This text appears on the very left side of the franking imprint. In case you frank without a logo, the SMS text will move to its position. Caution! If you want to print both, a logo and an SMS text: Use sufficiently sized envelopes. -
Page 25: Date For The Franking Imprint
Setting the franking imprint Date for the franking imprint The date for the franking imprint is set automatically to the current date by the system clock. You can set the date forward. The UltiMail does not allow setting the date backward. -
Page 26: Using The Memory
UltiMail Operator Manual Using the memory The UltiMail has 6 short code memories. You can call the saved settings for postage value and endorsement in the home menu. • In the home menu, press the key next to MEMORY. The SELECTING THE MEMORY menu offers the selection of all occupied short code memories. -
Page 27: Franking
Franking Franking Preparations 6.1.1 Setting up catch tray The catch tray can be adjusted to various envelope formats – up to ISO B4 maximum. Work without catch tray when processing larger formats. • Slide the two limit guides until they fit the envelope format you want to process. - Page 28 UltiMail Operator Manual The letter guide moves upwards. • Hold the bar in the grip recess and slide it so that the letter guide outside is di- rected to the suitable format marking. The letter guide is adjusted correctly if the format marking arrow points to the exterior of the letter guide.
-
Page 29: On The Feeder: Adjust Letter Guide (Ultimail With Feeder Only)
Franking 6.1.3 On the feeder: adjust letter guide (UltiMail with feeder only) The letter guide ensures that letters are fed in straight run. You adjust the letter guide to the envelope format using the bar. The format markings on the letter receiving tray facilitate the adjustment. -
Page 30: Switch On / Off Seal Function (Ultimail With Feeder / Sealer Only)
UltiMail Operator Manual For large envelopes: • Position the extension bracket. • Position a sample letter. • Hold the bar in the grip recess and slide the letter guide so that it fits the letter format. The sample letter should have enough clearance between letter guide face and adjustable letter guide (about 2 to 3 mm). -
Page 31: Change Account
Franking Change account You can only change the account if you work with MASTER card or if all accounts are released for franking (in account mode: ACCESS CARD REQUIRED: OFF). If you work with USER card the account for the USER card is set automatically and cannot be changed. -
Page 32: Positioning And Franking A Letter
UltiMail Operator Manual Positioning and franking a letter You can use the UltiMail to frank letters and postcards. Format and material of mail pieces must meet the specifications on page 188. We recommend using envelopes made of ink-absorbent material with as smooth a surface as possible. -
Page 33: Ultimail With Sealer (Optional)
Franking 6.3.2 UltiMail with sealer (optional) If the UltiMail is ready for operation you can feed your mail pieces for sealing and franking. ‘Ready for operation’ means: – UltiMail shows the home menu – the postage value is displayed – the status line shows “MODE: METERING Machine ready.”... - Page 34 UltiMail Operator Manual Feeding similar mail pieces Especially when franking large quantities of similar mail pieces, you can save time by optimised letter feed. • Arrange letters so that address areas are face up. • Loosen letter stack with the upper edge on a level base and shake smooth.
-
Page 35: Ultimail With Feeder (Optional)
Franking 6.3.3 UltiMail with feeder (optional) 6.3.3.1 Positioning letters in stack Caution! Observe the following notes for stack processing: – Only position letters in stack which are to be printed with the same franking imprint. – Position letters of the same format only (max. 353 x 250 mm). –... - Page 36 UltiMail Operator Manual • Arrange the letter stack so that all envelope flaps are face down. • Align upper edges flush: Loosen letter stack with the upper edge on a level base and shake smooth. Letter upper edges • Fan the letter stack so that the lower letter is the first protruding when inserted in the feeder.
-
Page 37: Positioning Single Letters
Franking Letter transport starts automatically when the sensor recognises the letter stack. The feeder separates the letters individually from the stack, moistens the flap (if seal function is switched on) and transfers the letter to the franking machine. The franked letter is placed in the catch tray. -
Page 38: Franking Labels
The UltiMail can print self-adhesive labels. You can order suitable labels for the UltiMail from Francotyp-Postalia. Caution! Only use FP labels. Do not put in more than the pre-packaged 40 labels. We can ensure correct label processing only when you comply with this. -
Page 39: Postage Rate Calculation
Postage rate calculation Postage rate calculation The scales menu Calling the scales menu • In the home menu, press the key to the left of SCALES. The UltiMail opens the scales menu. What you should know about the scales menu … –... - Page 40 UltiMail Operator Manual Default settings The default setting for postage rate calculation is: LOCAL MAIL – LETTERS – REGULAR. You can easily set the scales menu back to default: • Press the key in the scales menu. Exiting the scales menu •...
-
Page 41: Setting Dispatch Data For Postage Rate Calculation
Postage rate calculation Setting dispatch data for postage rate calculation You set the dispatch data in a dialogue with the UltiMail, i.e. the UltiMail requests all the data required for calculating postage one after the other. You select from the dispatch data offered each using the multi function keys. - Page 42 UltiMail Operator Manual Additional service If you wish to use special services of the Singapore Post (e.g. Registered Mail): • Select the desired additional service. In the example, this is REGISTERED. You can select several additional services for one delivery. You must select NON STANDARD if your mailing does not fulfill the criteria of Standard Mail.
-
Page 43: Saving Dispatch Data Settings And Calling Them From Memory
Postage rate calculation Saving dispatch data settings and calling them from memory You can save frequently used settings for postage rate calculation on numeric keys 1 through 9 and call them by push button operation. Saving dispatch data settings • Set the desired dispatch data. •... -
Page 44: Weighing, Determining Postage, Franking
UltiMail Operator Manual Weighing, determining postage, franking This chapter covers using the integrated scales in standard weighing mode (MODE: METERING AND WEIGHING). On how to use the optional ‘Differential weighing’ function, please read Chapter 7.5. While you use the ‘Postage rate calculation’ function the monitoring function ‘High postage’... - Page 45 Postage rate calculation • Remove the mail piece from the weigh- ing platform and position as usual (see Chapter 6.3 on page 32). You can also frank labels with the dis- played postage value (see Chapter 6.4 on page 38). For switching automatic endorsement setting on / off, read page 104.
-
Page 46: Differential Weighing (Optional)
For enabling the differential weighing function you need an authorisation code. Please contact your FP-Partner. Read Chapter 14.23.2 on page 124. Setting the differential weighing mode • Open the SET UP menu with key. - Page 47 Postage rate calculation Using the differential weighing mode • In the home menu: Set your advertising imprint (logo), SMS text, and, if required, a type of mail endorsement (see Chapter 5). • Call the scales menu. • Set the desired dispatch data (see Chapter 7.2).
- Page 48 UltiMail Operator Manual • Remove one letter from the stack or from the box. The UltiMail determines the change in weight and calculates the postage value. • Position the letter as usual. • Handle the remaining mail pieces in the same way.
-
Page 49: Special Functions
Special functions Special functions Working with the batch counter You can use the batch counter function to frank a preset number of letters. This function is especially useful for stack processing with feeder: – The UltiMail will stop once the total number of letters is finished. –... - Page 50 UltiMail Operator Manual • Go back to home menu with key. In the home menu, the status line will always show the current number of mail pieces still to be franked. Once the number set is franked, the display jumps back to the preset number defined in the pre-select counter.
-
Page 51: Using The Ultimail As Incoming Mail Stamp
Special functions Using the UltiMail as incoming mail stamp For registering your incoming mail (up to a thickness of 6.35 mm), you can use the UltiMail as incoming mail stamping machine. For this function, use the INCOMING STAMP mode. The UltiMail will print ‘Received on: …’ together with the date displayed. -
Page 52: Seal Only Function (Ultimail With Feeder / Sealer Only)
UltiMail Operator Manual Seal only function (UltiMail with feeder / sealer only) You can seal letters with the feeder or the sealer without franking them. Switch on sealer • Push the ‘seal envelope’ switch to the seal rear into position. The envelopes must be suited for mechanical sealing (see page 189). -
Page 53: Using An External Postage Scale
Caution! Read the Operator’s Manual of your FP postage scale before connecting it to UltiMail. Obtain information on how to connect the franking machine to the FP postage scale and how to set the postage scale for operation with the franking machine. -
Page 54: Determining Postage And Franking
8.4.2 Determining postage and franking Caution! Also read the Operator’s Manual of your FP postage scale. Obtain information particularly, on the safe handling of the FP postage scale. • Switch on the UltiMail and wait for the start routine to finish. -
Page 55: Postage Register
Postage register Postage register The UltiMail saves important parameters and postage used information in registers. You can have the register states displayed and printed on an empty envelope or a label. • Press key. You will see the current register states: R1 –... -
Page 56: Loading Postage - Teleset
UltiMail Operator Manual Loading postage – TELESET TELESET is the loading of the desired postage credit via modem. To load postage a connection is made to the TELESET data centre with the UltiMail and the desired amount is loaded. Accounting is as per your contract with the Singapore Post. Permissible amounts which may be loaded: You may load amounts to a maximum of S$ 10,000 in steps of S$ 10. - Page 57 Loading postage – TELESET Please note: If you have entered a new reset amount, you will be asked to con- firm the process again within 30 seconds. At the end of the loading process, the UltiMail displays the new descending. •...
-
Page 58: Account Administration
(set a budget), and define authorisations connected with the MASTER / USER card function. The UltiMail 60 has 10 accounts as standard. You can at any time extend the account function to 50 accounts. The UltiMail 90 has a standard administration of up to 50 accounts. - Page 59 Account administration Possible settings and their meaning: Account number 2 to 99999 Account 1 is permanently assigned to MASTER card (MASTER account). Account name Letters, special Refer to pages 81 to 84 for informa- characters and digits tion on how to type text. Standard logo NO STANDARD LOGO When you set up the account for...
- Page 60 UltiMail Operator Manual Possible settings and their meaning: Budget UNLIMITED The total postage of the UltiMail is available. RESTRICTED Account is supplied with a certain credit (= current limit). When the credit is used up, the UltiMail blocks the account until a new credit is assigned (see Chapter 11.2.3 on page 65).
-
Page 61: Change Settings For Existing Accounts
Account administration 11.2 Change settings for existing accounts 11.2.1 Change standard setting for the logo and the SMS text You will find information on the meaning of possible settings for the logo and the SMS text on page 59. • Go to the SET UP menu using the key. - Page 62 UltiMail Operator Manual Define a standard logo • Press the key next to the current logo. The SPECIFY STANDARD LOGO menu appears. • Select the desired logo with the associated key. From now on, this logo is the new default setting for this account.
- Page 63 Account administration Other account Specify logo / SMS text for other accounts If you wish to change settings of another account: • Open the menu for selecting accounts with SELECT ANOTHER ACCOUNT. • Select the account the settings of which you want to change.
-
Page 64: Release / Block Teleset Access
UltiMail Operator Manual 11.2.2 Release / block TELESET access • Go to the SET UP menu using the key. SET UP • Select ACCOUNT ADMINISTRATION ACCT EDIT. ACCOUNT ADMINISTRATION The EDIT ACCOUNT … menu appears. You can see the account number in the ACCT EDIT head line. -
Page 65: Changing Budgets And Assigning Credits
Account administration 11.2.3 Changing budgets and assigning credits More information on the meaning of budget settings can be found on page 60. • Go to the SET UP menu using the key. SET UP • Select ACCOUNT ADMINISTRATION ACCT EDIT FURTHER ACCOUNT ADMINISTRATION FUNCTIONS. - Page 66 UltiMail Operator Manual Setting the current credit In the FURTHER FUNCTIONS ACCOUNT … menu: • Type the amount for credit which you want to make available for the account. • Set the new credit using the key next to CURRENT LIMIT. The displayed current limit is available to this account for franking.
-
Page 67: Change Name
Account administration 11.2.4 Change name • Go to the SET UP menu using the key. SET UP • Select ACCOUNT ADMINISTRATION ACCT EDIT FURTHER ACCOUNT ADMINISTRATION FUNCTIONS EDIT NAME. The UltiMail opens the menu for changing ACCT EDIT the account name. If you wish to change the name of another FURTHER FUNCTIONS account select the desired account with... -
Page 68: Generate / Block User Card(S) For An Account
UltiMail Operator Manual 11.3 Generate / block USER card(s) for an account When you generate a USER card you permanently assign an account to it. To allow several users the access to an account, you can program one account for several identical USER cards. - Page 69 Account administration • Insert a USER card. The UltiMail programs the USER card for the displayed account and signals when the procedure is successfully completed. • Remove USER card. The USER card is valid for the assigned account. • To generate further USER cards or for any other settings in the account administration, insert the MASTER card again.
-
Page 70: Switch On / Off "Access Card Required
UltiMail Operator Manual 11.4 Switch on / off “access card required?” Caution! Mode ACCESS CARD REQUIRED: OFF. This setting cancels access restrictions to accounts. Every UltiMail user can frank on all accounts and call all account data. • Go to the SET UP menu using the key. -
Page 71: Display And Print Account Information
Account administration 11.5 Display and print account information The UltiMail displays the current settings for individual accounts and ascending information in various views. For more information on the overview contents, read page 72. Account information • Go to the SET UP menu using the SET UP key. - Page 72 UltiMail Operator Manual Print information • Press the key. • Position an empty envelope / card. • If necessary, position further envelopes / cards. • Use the key to print the account information on labels. Overview of account information: Information about the Displays data for one account: account …...
-
Page 73: Set Account Counter To Zero
Account administration 11.6 Set account counter to zero zero 11.6.1 Set one account to • Go to the SET UP menu using the key. SET UP • Select ACCOUNT ADMINISTRATION ACCT EDIT. ACCOUNT ADMINISTRATION The EDIT ACCOUNT … menu appears. You can see the account number in the ACCT EDIT head line. -
Page 74: Delete Accounts
UltiMail Operator Manual 11.7 Delete accounts 11.7.1 Delete one account • Go to the SET UP menu using the key. SET UP • Select ACCOUNT ADMINISTRATION ACCT EDIT FURTHER ACCOUNT ADMINISTRATION FUNCTIONS. The FURTHER FUNCTIONS menu ACCT EDIT appears. You can see the account number in the head line. -
Page 75: Memory Administration
Memory administration Memory administration The UltiMail has 6 short code memories. In each of the memories, you can store a postage value with a suitable type of mail endorsement. You can directly call the saved settings from the home menu (see Chapter 5.6 on page 26). 12.1 Saving settings •... - Page 76 UltiMail Operator Manual The UltiMail opens the menu for setting the memory values. • Set the postage value and the type of mail endorsement to be saved as usual. • Continue with SAVE to save the displayed settings. The UltiMail eventually displays the saved settings.
-
Page 77: Display And Print Saved Settings
Memory administration 12.2 Display and print saved settings • Go to the SET UP menu using the key. SET UP • Select EDIT MEMORY. EDIT MEMORY You will see current data contents of all short code memories. Print list of short codes •... -
Page 78: Delete Memories
UltiMail Operator Manual 12.3 Delete memories • Go to the SET UP menu using the key. SET UP • Select EDIT MEMORY. EDIT MEMORY • Press the key next to the memory number that you wish to delete. The EDIT MEMORY menu appears. •... -
Page 79: Print Image Data Administration
Print image data administration Print image data administration The UltiMail offers a large number of efficient functions to manage individual print image components. This includes plain text input for logos, graphical preview, logo and SMS text (freely editable) printing and the possibility to print lists. You can load logos and type of mail endorsements from card. -
Page 80: Change The Logo Names
UltiMail Operator Manual 13.2 Change the logo names Each logo has a name under which the motif is saved in the UltiMail. You can change these names according to your requests. • Go to the SET UP menu using the key. -
Page 81: Enter / Change / Save Sms Texts
Print image data administration 13.3 Enter / change / save SMS texts UltiMail can save up to six text messages (SMS texts). You may set the saved SMS texts for the franking imprint in the home menu. • Go to the SET UP menu using the key. - Page 82 UltiMail Operator Manual Key assignment for text input Characters are entered with the numeric keys The assignment is printed to the housing beneath the key. Punctuation and special characters are entered with the key. . 1 , ? ! - & ’ Blanks are inserted with the key.
- Page 83 Print image data administration Example You wish to save the following SMS text: VACATION 21.-28.12. Text field While entering a new SMS text, the text field is empty and the cursor stands at the first position of the first line. How to enter the text: Press 3 times (=V).
- Page 84 UltiMail Operator Manual The cursor will now stand at the beginning of the second line. Press 4 times (2). Press twice (1). Press once (.). Press 6 times (-). Press 4 times (2). Press 4 times (8). Press once (.). Press twice (1).
-
Page 85: Loading Print Image Data From Card
Print image data administration 13.4 Loading print image data from card You can easily load print image data (e.g. logos, type of mail endorsements) from cards. Order the card with the desired print image data from Francotyp-Postalia. • Insert the MASTER card. SET UP •... -
Page 86: Delete Print Image Data
UltiMail Operator Manual 13.5 Delete print image data You can delete print image data which are no longer required (logos, SMS texts, type of mail endorsements). Therefore you gain memory space, for new logos, for instance. • Go to the SET UP menu using the key. -
Page 87: Advanced Settings And System Information
Advanced settings and system information Advanced settings and system information 14.1 Setting the operating mode You can operate the UltiMail in different operating modes. Information about the meaning of the operating modes and special functions can be found on the next page. •... - Page 88 UltiMail Operator Manual Possible settings and their meaning: METER (FRANK) ITEMS The UltiMail prints the franking imprint for dispatch with Singapore Post. In the home menu, the status line shows MODE: METERING (default setting after switching on). You will find information on how to set the franking imprint and on franking in Chapters 5 and 6.
-
Page 89: Display, Print And Send System Information
• Position further envelopes if required. You can follow the print process progress in the display. Send system information With the SEND TO FP SERVICE DEPT. function you transmit data to the Francotyp-Postalia service. Start this function only when requested to... -
Page 90: Display And Reset Item Counter
UltiMail Operator Manual 14.3 Display and reset item counter The item counter will count all franking imprints in the METERING … (franking) mode. In all other modes PRINTING LOGO, INCOMING STAMP and ONLY TRANSPORTING the item counter is not activated. •... -
Page 91: Display And Reset Advert Counter
Advanced settings and system information 14.4 Display and reset advert counter The advert counter counts all imprints in PRINTING LOGO mode. • Go to the SET UP menu using the key. SET UP • Select SYSTEM SETTINGS MORE. SYSTEM SETTINGS MORE You can see the current value of the advert counter under DEL. -
Page 92: Setting The Print Offset
UltiMail Operator Manual 14.5 Setting the print offset The print image normally appears always at the same distance from the right-hand letter edge. You can slide the imprint to the left away from standard position. The print offset set also applies to imprinting of all other print functions (printing of lists, incoming mail stamp …). -
Page 93: Setting Low Postage Warning - Limit
Advanced settings and system information 14.6 Setting low postage warning – limit The UltiMail signals when the remaining postage falls below a certain limit. You can set the limit for low postage warning. UltiMail warns you, if – the descending register (R1) falls below the set limit –... -
Page 94: Setting High Postage - Limit
UltiMail Operator Manual 14.7 Setting high postage – limit This function gives an alarm if the set postage value exceeds a certain limit. You can set the limit for ‘High postage’. • Go to the SET UP menu using the key. -
Page 95: Tone Signal
Advanced settings and system information 14.8 Tone signal The UltiMail acknowledges every press of a key with a beep. A sequence of tone signals is an alarm due to errors. You can adapt this function to your requests. • Go to the SET UP menu using the key. -
Page 96: Display Contrast
UltiMail Operator Manual 14.9 Display contrast • Go to the SET UP menu using the key. SET UP • Select SYSTEM SETTINGS DISPLAY. SYSTEM SETTINGS DISPLAY • Use the associated keys to REDUCE or INCREASE the display contrast. After each key activation, you will see the display change. -
Page 97: Time
Advanced settings and system information 14.10 Time 14.10.1 Adjusting the current time The built-in battery-operated system clock safely provides the current date and hour of the day. So it is only in rare cases required to correct the system clock for adjusting a minor difference. -
Page 98: Setting Time Zone
UltiMail Operator Manual 14.10.2 Setting time zone If you move the UltiMail from one time zone to another you need to adjust the time zone. • Go to the SET UP menu using the key. SET UP • Select SYSTEM SETTINGS MORE MORE MORE... -
Page 99: Setting Standby Time
Advanced settings and system information 14.11 Setting standby time The standby time defines the period since last printing or last use of keys after which the display illumination is switched off. You can easily ‘wake up’ the UltiMail from standby by pressing any key or feeding a letter. -
Page 100: Setting Memory 1 As Standard After Standby
UltiMail Operator Manual 14.12 Setting Memory 1 as standard after standby You can set the UltiMail to switch automatically to standard mode (METERING) after waking up from standby-mode, and then the settings saved as Memory 1 (postage value and type of mail endorsement) will be used. This function will only take effect, if the home menu is displayed when standby-mode is activated. -
Page 101: Setting Print Head Standby Time
Advanced settings and system information Possible settings and their meaning: After waking up from standby-mode the UltiMail is in standard mode (METERING) and Memory 1 is activated. Requirement: The home menu is displayed. After waking-up from standby-mode the current settings in home menu remain in the state as before standby-mode. -
Page 102: Setting Letter Transport Run-On Time
UltiMail Operator Manual 14.14 Setting letter transport run-on time The letter transport run-on time defines the period from ejecting the last letter to letter transport standstill. • Go to the SET UP menu using the key. SET UP • Select SYSTEM SETTINGS PRINT LETTER TRANSPORT SYSTEM SETTINGS... -
Page 103: Integrated Scales
Advanced settings and system information 14.15 Integrated scales 14.15.1 Tare The integrated scales calibrate automatically. If the scales do not find any zero point, or if you wish to weigh with a pre-load (e.g. with an extra weighing tray), you will have to tare the scales. -
Page 104: Switching Automatic Endorsement Selection On / Off
UltiMail Operator Manual 14.15.2 Switching automatic endorsement selection on / off This setting specifies whether postage rate calculation should control the setting for type of mail endorsement in the home menu. • Go to the SET UP menu using the key. -
Page 105: Setting Weighing Mode
Advanced settings and system information 14.15.3 Setting weighing mode In the ADJUSTING THE INTERNAL SCALES menu you can change the weighing mode to NORMAL and use the UltiMail simply as scales. For this purpose, differential weighing has to be switched off (refer to Chapter 14.15.4 on page 106). •... -
Page 106: Switching Differential Weighing Mode On / Off (Optional)
UltiMail Operator Manual 14.15.4 Switching differential weighing mode on / off (optional) The ‘Differential weighing’ feature is only available if the differential weighing option has been unlocked on your franking system (see Chapter 14.23.2 on page 124). • Go to the SET UP menu using the key. -
Page 107: Postage Rate Table Update
Advanced settings and system information 14.15.5 Postage rate table update You must update the postage rate table if postage regulations or rates have changed. The UltiMail supports the loading from chip card which you can order from Francotyp- Postalia. The UltiMail can store up to 2 postage rate tables. If you load another postage rate table, the UltiMail will overwrite the postage rate table which is currently not used. -
Page 108: Delete All Postage Rate Tables
UltiMail Operator Manual 14.15.6 Delete all postage rate tables Caution! You cannot select a postage rate table to be deleted. All postage rate tables saved in the UltiMail will be deleted. Postage rate calculation is impossible without valid postage rate table! •... -
Page 109: Modem
Advanced settings and system information 14.16 Modem On commissioning, Francotyp-Postalia service will set the appropriate modem configuration. You should verify and, if necessary, correct the modem settings if changes were made to your telephone system. The table on page 111 lists and explains all the possible settings. 14.16.1 Internal Modem You must set the dialling parameters for the internal modem of the UltiMail to match your telephone connection. - Page 110 UltiMail Operator Manual Setting the dialling parameters The ADJUST MODEM CONFIGURA- TION menu offers the selection of possible parameter settings. The table on page 111 lists and explains all parameters. During setting procedure, all parameters that are not technically possible do not appear or further parameters are displayed, depending on the selected parameters.
- Page 111 Advanced settings and system information Possible settings and their meaning: Parameter Setting Explanation MODEM TYPE INTERNAL Using the built-in modem. For the built-in modem you have to set parameters accord- ing to your telephone connec- tion (type of phone line, …). EXTERNAL In case the built-in modem is not applicable to your tele-...
-
Page 112: External Modem (Optional)
UltiMail Operator Manual 14.16.2 External Modem ( optional If the internal modem should prove to be incompatible with your telephone connec- tion, you can use the GSM Modem (mobile phone modem) offered by Francotyp- Postalia for communication with the data centre. Caution! Carefully read the product information that came with the GSM Modem before connecting it to the UltiMail. - Page 113 Advanced settings and system information Setting the modem type “External” • Press the key next to MODEM TYPE. The setting switches between INTERNAL and EXTERNAL. If MODEM TYPE EXTERNAL is displayed: • Press CONTINUE to confirm and proceed with the configuration procedure.
-
Page 114: Changing Phone Numbers
UltiMail Operator Manual 14.17 Changing phone numbers The UltiMail saves important phone numbers. In this menu you can see and change all saved phone numbers. Caution! Any incorrect setting of the phone number for the TDC (TELESET data centre) results in non loading of postage. •... - Page 115 Advanced settings and system information The phone numbers and their meaning: Phone number of the TELESET data centre. The UltiMail dials this number during the TELESET procedure. SERVICE Hotline phone number. For your questions and issues regarding UltiMail operation. SMMC Phone number of the Security Module Management Centre.
-
Page 116: Selecting The User Interface Language
UltiMail Operator Manual 14.18 Selecting the user interface language The UltiMail user interface supports the languages English and German. Language change-over will have immediate effect. How to switch to the German user interface SET UP • Go to the SET UP menu using the key. -
Page 117: High Ink Density
Advanced settings and system information 14.19 High ink density For better printing results and a consistent imprint you can use the function “High ink density”. • Go to the SET UP menu using the key. SET UP • Select SYSTEM SETTINGS MORE MORE MORE... -
Page 118: Standard Karat Mask
UltiMail Operator Manual 14.20 Standard KARAT mask This setting configures which parameters the UltiMail sends to the personal computer (PC), e.g. at using the postage accounting software KARAT. The factory-setting “Standard KARAT mask: ON” makes data transmission work smoothly in most cases. You need to change this setting only if problems occur in the communication of the UltiMail with PC-software. - Page 119 Advanced settings and system information Possible settings and their meaning: STANDARD KARAT MASK: ON The UltiMail uses the new PC-protocol. (default setting) The UltiMail activates a PC-protocol which transmits only the reduced data set for KARAT.
-
Page 120: Teleset & Rsi
UltiMail Operator Manual 14.21 TELESET & RSI The UltiMail allows transmitting the current settings, software version and possibly occurred errors to a diagnosis server while loading postage, without further inputs. If required, Francotyp-Postalia service has all relevant information about your franking system at hand to help quickly and efficiently. - Page 121 UltiMail transmits all relevant system data to the Francotyp-Postalia service. The UltiMail will not transmit any data to the Francotyp-Postalia service. If required, use the function SEND TO FP SERVICE DEPT. for transmitting the data (see Chapter 14.2 on page 89).
-
Page 122: Generate Master Card
UltiMail Operator Manual 14.22 Generate MASTER card MASTER card holders can generate another MASTER card with this function. • Insert your MASTER card. SET UP • Go to the SET UP menu using the key. SYSTEM SETTINGS • Select SYSTEM SETTINGS MORE MORE CREATE NEW MASTERCARD. -
Page 123: Enable / Disable Optional Functions
Enable / disable optional functions 14.23.1 Account administration extension As a standard, the UltiMail 60 is provided with 10 account memories. You can in- crease the number of possible accounts to 50. With an UltiMail 90, a total of 50 accounts are supported. The number can be extended to 200 accounts. -
Page 124: Differential Weighing Feature
UltiMail Operator Manual 14.23.2 Differential weighing feature For the integrated scales, the optional function ‘Differential weighing’ is available. For using this feature, you need an authorisation code which you can order from Francotyp-Postalia. • Go to the SET UP menu using the key. -
Page 125: Infoprint
Advanced settings and system information 14.23.3 InfoPrint InfoPrint is a software tool for administrating and archiving account, dispatch and system information on your PC. Among other things it provides you with the following functions: – display and print account information –... - Page 126 UltiMail Operator Manual...
-
Page 127: Maintenance And Care
Maintenance and care Maintenance and care Have your franking system cleaned and serviced once a year by our authorised service personnel. Therefore you can ensure long-term trouble-free operation. Contact us for our low-price maintenance and service agreements. You can carry out yourself the following cleaning and servicing jobs: –... -
Page 128: Changing The Ink Cartridges
We recommend keeping two ink cartridges in case the installed cartridges run out. We advice to clean the contacts in the cartridge holder at each cartridge replacement. Use the FP cleaning kit ‘clean & renew for Ink-Jet Printsystem’, available at Francotyp-Postalia. - Page 129 Maintenance and care Remove ink cartridges • Open the cartridge flap with a powerful sudden motion and fold up as far as it goes. Note: Do not be too timid. The cartridge flap has a clip lock roughly in the middle of its front edge.
- Page 130 UltiMail Operator Manual Insert new ink cartridges Caution! Insert the cartridges only after the cartridges have adapted to the ambi- ent temperature of the franking machine (e.g. after storage in cellar or after con- veyance in a cold vehicle). Otherwise, calibration might not be possible.
- Page 131 Maintenance and care • Close the cartridge flap. The clip lock audibly clicks into place. Calibrating After cartridge exchange, the UltiMail will calibrate the cartridges. You can follow the process progress in the display. Please wait until calibration is completed. Cleaning the print system Subsequent to calibrating the UltiMail cleans the ink cartridges.
- Page 132 UltiMail Operator Manual • Confirm with CONTINUE. Vertical line • Determine the number on the test imprint where the vertical line is the straightest. • Enter the number with numeric keys. The entered number appears in the display behind “Your input: __”. •...
-
Page 133: Adjust The Ink Cartridges
Maintenance and care Starting the exchange procedure If you wish to change the ink cartridges before being prompted by the UltiMail, go to the change procedure in the SET UP menu. • Go to the SET UP menu using the key. -
Page 134: Cleaning The Print System
UltiMail Operator Manual 15.4 Cleaning the print system 15.4.1 Start automatic cleaning the print system You should start the cleaning process for the ink cartridges only if the quality of the imprint is not good enough (e.g. gaps in the imprint after longer periods out of use). Cleaning •... -
Page 135: Manually Cleaning The Print Heads
Maintenance and care 15.4.2 Manually cleaning the print heads Caution! Inexpert cleaning can damage the print heads and render them useless. To avoid damage to the print heads make certain to heed the following hints: • Always start the integrated UltiMail cleaning function first when you expe- rience print quality issues. - Page 136 Best results are achieved with the FP contact cleaner and cleaning clothes of the FP cleaning kit ‘clean & renew for Ink- Jet Printsystem’, available at Francotyp- Postalia. • Hold the cartridge as shown in the figure.
-
Page 137: Replacing The Ink Pad Insert
Maintenance and care 15.5 Replacing the ink pad insert The purpose of the ink pad insert is to absorb spilled ink. It is located beneath the printing position of the print heads. The ink pad insert should be replaced every 100.000 imprints, at least once a year. - Page 138 UltiMail Operator Manual • Check the new ink pad insert against a light source: The layering of the ink pad must be without gaps. Without gaps (visual check) • Fan out the ink pad with a pointed object if necessary. Fanned •...
- Page 139 Maintenance and care • Evenly push down the ink pad insert until it audibly locks into place on both sides. Its sides will be flush with the letter transport. • Insert letter transport. The locking bar clicks into place. The UltiMail is ready for operation again.
-
Page 140: Filling The Water Tank (Ultimail With Feeder / Sealer Only)
UltiMail Operator Manual 15.6 Filling the water tank (UltiMail with feeder / sealer only) We recommend using ‘sealit’ sealing liquid. This special sealing liquid is available from Francotyp-Postalia. Using tap water is possible. Note, however, that the sealing process may be less reliable when using water. Feeder and sealer are supplied with the same moistening unit. - Page 141 Maintenance and care • Unscrew water tank cover. • Fully empty water tank and, if neces- sary, clean it. • Fill the water tank with ‘sealit’ sealing liquid. • Place water tank screw cover and tighten. • Turn water tank upside down in non- dangerous area (e.g.
-
Page 142: Adjust Moistening Level (Ultimail With Feeder / Sealer Only)
UltiMail Operator Manual 15.7 Adjust moistening level (UltiMail with feeder / sealer only) There are two hoses of different length included in the scope of supply, to be mounted on the cover of the water tank. The moistening level can thus be adapted to the letters accordingly. -
Page 143: Cleaning / Changing The Moistening Sponge (Ultimail With Feeder / Sealer Only)
Maintenance and care 15.8 Cleaning / changing the moistening sponge (UltiMail with feeder / sealer only) Feeder and sealer are supplied with the same moistening unit. Cleaning / changing the sponge is done in the same way. Warning! Please observe the following safety tips for cleaning and changing the sponge on the feeder and sealer: •... - Page 144 UltiMail Operator Manual • Remove water tank out of housing and put it at a safe place. • Release roller transport by pressing on release key. Roller transport moves upward. Now you have access to the moistening brush beneath the roller support. •...
- Page 145 Maintenance and care • Lift out of the water tray the basket with the sponge. Remove sponge from basket. • Clean sponge or replace with a new one. • Put a new sponge into water before inserting it, and let soak completely. Sponge Basket The flaps are thus correctly moistened...
- Page 146 UltiMail Operator Manual • Check if moistening felt and brush are well moistened. If necessary, apply some water and stroke with your finger several times over the brush. • Lower the brush into the horizontal position. • Press roller transport down until it clicks into place.
-
Page 147: Cleaning / Changing The Moistening Brush (Ultimail With Feeder / Sealer Only)
Maintenance and care 15.9 Cleaning / changing the moistening brush (UltiMail with feeder / sealer only) Feeder and sealer are supplied with the same moistening unit. Cleaning / changing the brush is done in the same way. • Switch off the franking system: Switch the power switch on the back of the franking machine to the position. - Page 148 UltiMail Operator Manual On both sides, the brush is provided with pins that are snapped in clips on the sword. • Slightly lift the brush and pull it off the sword in the direction of the arrow. Brush Sword • Clean brush or replace with a new one. •...
- Page 149 Maintenance and care • Press roller transport down until it clicks into place. • Attach feeder / sealer to the franking machine. For details on attaching the feeder / sealer to the franking system, read pages 176 to 178.
-
Page 150: Changing The Battery
UltiMail Operator Manual 15.10 Changing the battery The franking system monitors the battery charge status. An appropriate message appears in the display when it is time to change the battery. Caution! Only use a battery 90.4701.8004.00 as provided by Francotyp- Postalia. - Page 151 Maintenance and care Opening battery compartment: • Press the clip lock at the battery compartment cover and take off battery compartment cover. • Take out the used battery. Clip lock Battery compartment cover • Insert new battery (90.4701.8004.00). Make sure that the polarity is correct. Symbols in the battery compartment indicate the correct position.
-
Page 152: Withdrawal And Disposal Of The Machine
UltiMail Operator Manual 15.11 Withdrawal and disposal of the machine When withdrawing the UltiMail franking system, you must sign off all relevant postal services properly. Please contact the Francotyp-Postalia service. -
Page 153: Troubleshooting
Troubleshooting Troubleshooting 16.1 Problems and remedies Problem Possible cause and remedy … in general Blank display. Check whether the power cable is plugged in correctly and if the power switch is switched on. Display light on, but Software problem. display blank. Switch off power switch and pull power plug. - Page 154 UltiMail Operator Manual Problem Possible cause and remedy Franking is not possible No postage in the franking machine. Please load postage! (See Chapter 10, page 56.) with the postage value set. Too low credit of current account. Have assigned new budget from system administrator.
- Page 155 Troubleshooting Problem Possible cause and remedy Adjust ink cartridges (see Chapter 15.3, page 133). Print quality – print image distorted. Use the ‘High ink density’ function (see Chapter 14.19, Print quality (general) page 117). SMS text does not fit on Franking imprint with logo and SMS text exceeds the the mail piece.
- Page 156 UltiMail Operator Manual Problem Possible cause and remedy … when weighing and for postage rate calculation No weight is determined Scales are overloaded or the weight of the mail piece for the mail piece on the is too low. weighing platform. Use the scales only for mail pieces within the weight range limits (see page 190).
- Page 157 Card is defective. Call Francotyp-Postalia service. loaded from card. The card used does not contain valid data. Wrong card inserted? Data transfer to FP- UltiMail fails to establish a connection to the service. Check modem configuration (see Chapter 14.16, page 109) service impossible.
- Page 158 UltiMail Operator Manual Problem Possible cause and remedy … with envelope sealing (feeder / sealer UltiMail) Letters are not sealed. Seal envelope is switched off. Switch on seal envelope (see page 30). Water tank is empty. Fill more ‘sealit’ sealing liquid (see Chapter 15.6, page 140). Letters are not correctly Rub powerfully with your hand over the letter stack sealed.
- Page 159 Troubleshooting Problem Possible cause and remedy … with automatic feeding from stack (feeder UltiMail) Double feeding, Material is unsuited for processing, cards are bent too jam. much, mail pieces stick to each other. Fan thin material to remove paper dust and prevent adherence of the mail pieces.
-
Page 160: Removing Letter Jams
UltiMail Operator Manual 16.2 Removing letter jams Removing letter jam in the franking machine Warning! Do not reach into the danger areas marked with a safety sign. Keep long hair, fingers, loose clothing pieces, shawls and jewellery away from moving machine parts. - Page 161 Troubleshooting Removing letter jams in the feeder or in the sealer Warning! Do not reach into the danger areas marked with a safety sign. Keep long hair, fingers, loose clothing pieces, shawls and jewellery away from moving machine parts. • Release roller transport by pressing on release key.
-
Page 162: How To Prevent Jamming And Double-Feeding During Batch Mailing
UltiMail Operator Manual 16.3 How to prevent jamming and double-feeding during batch mailing By simple preventive measures and special care when positioning the stacks, you can reduce feeding incidents and increase processing speed. Selecting and preparing the mail pieces Material and form of the mail pieces are of essential influence on the behaviour during feeding and separating from the stack. - Page 163 Troubleshooting When positioning the letter stack in the feeder The figure shows how the letter stack should sit in the feeder: Letter guide face – The letter stack should be flush with the letter guide face. – The letter stack should be scaled out so that the front edges form a slope in the shape of the adjustable letter guide.
-
Page 164: Attach Adjustable Letter Guide To Feeder / Sealer
UltiMail Operator Manual 16.4 Attach adjustable letter guide to feeder / sealer The adjustable letter guide is provided with clips for locking the bar. The two Clips slots in the front edge of the plastic will hold the wire spring on the bar. Slots How to insert the letter guide •... -
Page 165: Error Codes (Sample)
Troubleshooting 16.5 Error codes (sample) An error message appears on the display in case of an error or handling error. An additional beep may also indicate an error (see Chapter 14.8 on page 95). Make sure to carefully read the error message. - Page 166 Correctly insert the ink cartridges and allow the UltiMail to calibrate. Read “Insert new ink cartridges” on page 130. Contacts are dirty. Clean contacts in the print system (cartridge holder) with the FP cleaning kit ‘clean & renew for Ink-Jet Printsystem’, available at Francotyp-Postalia.
- Page 167 Perform an ink cartridge exchange (see “Starting the exchange procedure” on E131 page 133). Remove and re-insert the cartridges. E135 Clean contacts in the print system (cartridge holder) with the FP E136 cleaning kit ‘clean & renew for Ink-Jet Printsystem’, available at E143 Francotyp-Postalia.
- Page 168 Perform an ink cartridge exchange. Read “Starting the exchange procedure” on page 133. Remove and re-insert the cartridges. Clean contacts in the print system (cartridge holder) with the FP cleaning kit ‘clean & renew for Ink-Jet Printsystem’, available at Francotyp-Postalia.
- Page 169 Troubleshooting Error code Possible cause and remedy G239 Card incorrectly inserted. L100 Insert card with the chip facing downward. Continue pushing the card in beyond the pressure point. O007 Connect the modem cable (see page 177). Check the phone numbers (see page 114). X003 Letter stack is too high.
-
Page 170: Display, Print And Send Diagnostics List
• Position further envelopes if required. You can follow the print process progress in the display. Send data With the SEND TO FP SERVICE DEPT. function you transmit – only upon request by Francotyp-Postalia – data to the Francotyp-Postalia service. -
Page 171: Appendix
Appendix – Moving the UltiMail to another location Appendix Moving the UltiMail to another location Warning! Switch off the UltiMail and all connected equipment prior to dismantling and transporting the franking system. Make sure that no liquids or foreign objects penetrate the interior of the UltiMail. - Page 172 UltiMail Operator Manual Dismantling the UltiMail franking system Preparations • Remove MASTER card or USER card. • Switching off the franking system: Switch the power switch on the back of the franking machine to the position • Switch off all connected external equip- ment (e.g.
- Page 173 Appendix – Moving the UltiMail to another location On the franking machine: • Unplug the power cable. • Removing the phone cable from the franking machine: Press the spring on the plug and pull the plug out of the phone socket. Spring •...
- Page 174 UltiMail Operator Manual Emptying water tank and water tray • Take water tank and water tray out of the feeder / sealer and empty. Proceed as shown on pages 143 and 144. Separate catch tray from franking machine • Pull off catch tray toward the right-hand side of the franking machine.
- Page 175 Appendix – Moving the UltiMail to another location • Taking off feeder: Remove the extension bracket (if pre- sent). Slightly lift feeder to release it from the two locking clips on the franking machine. • Slide the bar for adjustable letter guide so that it is flush with the housing edge.
- Page 176 UltiMail Operator Manual Reinstalling the UltiMail franking system • Install the UltiMail franking system on a level, stable surface. Attaching the feeder • Place hand feed tray on the two locking clips on the franking machine housing. • Place feeder on the two locking clips on the franking machine housing.
- Page 177 Appendix – Moving the UltiMail to another location Attaching the catch tray • Push catch tray from the right-hand side against the franking machine. • Ensure that the catch tray is flush with the side of the franking machine. The fork-type lug engages in one foot on the franking machine.
- Page 178 UltiMail Operator Manual On the franking machine: • Connect the power cable to the franking machine. The socket for the power connection is on the back of the UltiMail franking machine. • Connect the phone cable to the franking machine phone socket. Make sure that spring is in correct position.
- Page 179 Appendix – Moving the UltiMail to another location Commissioning and function test • Fill water tank. Read Chapter 15.6 on page 140. • Switching on the UltiMail franking sys- tem: Switch the power switch on the back of the franking machine to the position.
- Page 180 UltiMail Operator Manual...
-
Page 181: Access Rights
Appendix – Access rights Access rights Status Without With With Mode: access card USER card MASTER Access card Functions card Assign budget for account Change logo name Create / block USER cards Create / delete accounts Display / print account data Display / print postage register Edit SMS text... - Page 182 UltiMail Operator Manual Status Without With With Mode: access card USER card MASTER Access card Functions card Reload print image data (e.g. logos) Reset account counter Seal envelopes without franking System settings not all not all not all Zero imprint (postage value ‘S$ 0.00’)
-
Page 183: Set Up Menu (Overview)
Appendix – SET UP menu (overview) SET UP menu (overview) -
Page 184: Glossary
UltiMail Operator Manual Glossary Franking imprint Franking mail for delivery by the Singapore Post. When franking, the UltiMail prints the postage value, the machine identification, the place of posting and the date. An advertising imprint, an SMS text and an endorsement can also be printed. - Page 185 Appendix – Glossary TELESET data centre Data centre of Francotyp-Postalia. Postage is (TDC) released and accounts managed. The TELESET data centre is at your service for loading postage 24 hours a day. TELESET Franking machine accounting system of (remote value setting) Francotyp-Postalia.
-
Page 186: Technical Data
UltiMail 60 / UltiMail 90 with sealer* and catch tray UltiMail 60 / UltiMail 90 1,028 x 400 x 299 mm with feeder* and catch tray franking machine UltiMail 60 / UltiMail 90 Weight 9.6 kg 0.4 kg catch tray hand feed tray 0.4 kg... - Page 187 Appendix – Technical Data Equipment Subject to short-term modification.
- Page 188 UltiMail Operator Manual Mail piece specifications for franking Format Minimum values: 140 mm x 90 mm 200 mm x 90 mm (franking with SMS text and logo) Maximum values: 353 mm x 250 mm (ISO B4) Thickness Postcards: max. 1 mm Letters: max.
- Page 189 Appendix – Technical Data Envelope specifications for sealing Flap position On the longitudinal side Flap height 25 mm to 75 mm Flap shape and size You cannot process rectangular, pointed or high flaps. The side cuts of the flap should be parallel and very close to the side fold edge.
- Page 190 UltiMail Operator Manual Operating and storage conditions UltiMail franking system and ink cartridges Operating temperature +15 °C to +35°C Only use in closed rooms Do not expose to direct sunlight Rel. humidity 15 % to 80 % non-condensing Integrated postage scales Weighing area 3 g to 5 000 g Smallest display value...
-
Page 191: Declaration Of Conformity
Appendix – Declaration of Conformity Declaration of Conformity... - Page 192 UltiMail Operator Manual...
-
Page 193: Index
Appendix – Index Index Advertising imprint 15, 19 See also Logo Access card 14 choose from list 22 See also MASTER card, USER card set 22 inserting 14 set standard logo for account 59 MASTER card 14 Ascending 55 removing 14 Automatic feeding 35 USER card 14 Automatic type of mail endorsement... - Page 194 UltiMail Operator Manual Change moistening brush 147 Diagnostics list 170 Change moistening sponge 143 Differential weighing 11, 46 Cleaning 128 enable / disable 124 contacts in cartridge holder 166, 168 on 106, 121 housing 127 switching on / off 46, 106 print system 134 Disable functions 123 Cleaning kit ‘clean &...
- Page 195 Appendix – Index Feeder 11, 203 Imprint offset. See Print offset connect 204 Incoming mail 11 connecting with franking machine 176 position 51 separating from franking machine 175 stamp 51 Feeding Incoming mail stamp function automatic 35 end 51 large mail pieces 37 using 51 letter / postcard 32, 33, 37 InfoPrint 11, 125...
- Page 196 UltiMail Operator Manual Letter guide, adjustable 202, 203 Material safety data sheet (ink) 186 adjust on the feeder 29 MEM1 after standby 100 adjust on the sealer 27 Memory 75 attach 164 call 26 Letter stack calling data 43 place 163 delete 43, 78 position 35 display data contained 77...
- Page 197 Appendix – Index Print head latency. See Print head standby time Non-Standard Mail 42 Print head standby time 101 Not seal / non seal 30 Print image data 79 delete 86 editing 79, 80, 81 loading from card 85 Operating and storage conditions Print image, faulty 155 ink cartridges 190 Print offset 11, 92...
- Page 198 UltiMail Operator Manual Stamp of receipt 11, 51 Standard KARAT mask 118 Safety sign 203, 204 on / off 118 Safety tips 7, 8, 171 Standby (display illumination) Scales memory 1 after standby on / off 100 external postage scale 53, 204 set standby time 99 integrated (internal) scales 103 Standby (print head) 101...
- Page 199 86 Weigh 44 set 21 Weighing mode 105 differential weighing 46 lock 105 normal 105 UltiMail 60 10, 187, 204 standard weighing mode 44 UltiMail 90 10, 187, 204 Weighing platform 204 UltiMail franking system attaching 177 dispose 152...
- Page 200 UltiMail Operator Manual...
- Page 201 For your notes...
- Page 202 Sealer UltiMail * To open: Cover flap, with the water tank underneath press here Safety sign Roller transport Release key Letter guide face Seal / non seal Letter receiving switch tray Letter guide (adjustable) Bar with recessed grip (setting the lateral letter guide) Cover flap, with the water tank underneath Water tray...
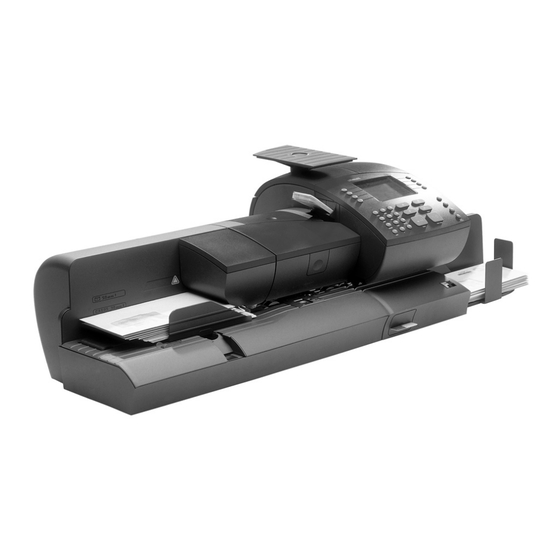
- Page 203 Feeder UltiMail (automatic feeder with sealer) * Cover flap, with the water tank underneath To open: press here Roller transport Safety sign Letter guide face Markings for maximum stack height Release key Extension bracket Seal / non seal switch Bar with recessed grip Belt conveyor (setting the lateral letter guide) Letter guide (adjustable)
- Page 204 Franking machine UltiMail 60 / UltiMail 90 Cartridge flap, with 2 ink cartridges underneath Weighing Display platform Keyboard Label dispenser Catch tray Safety sign Hand feed tray Letter guide face Battery compartment (on the bottom) Card reader Letter receiving tray...
-
Page 205: Service
Service Service Every UltiMail franking system is thoroughly checked before leaving the factory. Should any faults occur with your UltiMail in spite of our extensive quality control, please contact Francotyp-Postalia help line. Our main office will be pleased to tell you the address of your local servicing dealer.
Need help?
Do you have a question about the UltiMail 60 and is the answer not in the manual?
Questions and answers