Table of Contents
Advertisement
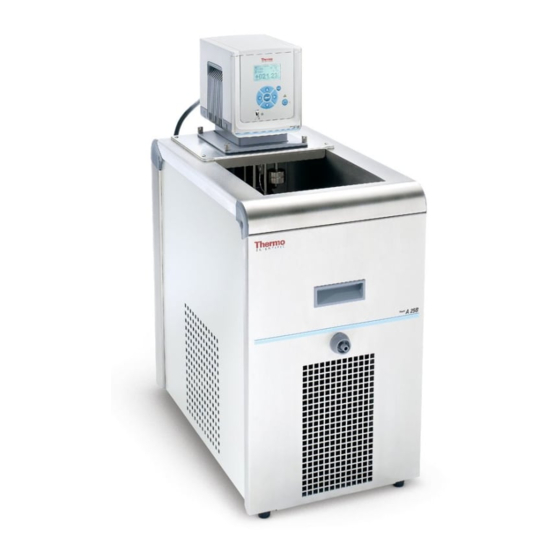
ADVANCED Series Heated
Immersion Circulators
AC150
AC200
ARCTIC Series
Refrigerated/Heated
Bath Circulators
A5B
A28F
A10B
A40
A25B
A28
GLACIER Refrigerated
Bath Circulator
G50
SAHARA Series Heated
Bath Circulators
S3
S21
S7
S30
S13
S45
S15
S49
A24B
A10
A25
S12T
S19T
S14P
S21P
Thermo Scientific
Laboratory
Temperature
Control Products
Manual Part Number U01152
Rev. 05/29/2015
Multilingual Quick
Start Guides
Installation
Operation
Basic Maintenance
Visit our Web site at:
http://www.thermoscientific.com/tc
Product Service Information, Applications
Notes, MSDS Forms, e-mail.
Advertisement
Table of Contents

Related Manuals for Thermo Scientific ADVANCED Series


Summary of Contents for Thermo Scientific ADVANCED Series
- Page 1 Thermo Scientific Laboratory Temperature Control Products Manual Part Number U01152 Rev. 05/29/2015 ADVANCED Series Heated Immersion Circulators AC150 AC200 ARCTIC Series Refrigerated/Heated Bath Circulators Multilingual Quick Start Guides A28F A24B A10B Installation A25B Operation GLACIER Refrigerated Basic Maintenance Bath Circulator...
- Page 3 Thermo Scientific Laboratory Temperature Control Products Manual Part Number U01152 Rev. 05/29/2015 ADVANCED Series Heated Immersion Circulators AC150 AC200 ARCTIC Series Refrigerated/Heated Bath Circulators Multilingual Quick Start Guides A28F A24B A10B Installation A25B Operation GLACIER Refrigerated Basic Maintenance Bath Circulator...
- Page 4 Thermo Fisher Scientific Sales, Service, and Customer Support 25 Nimble Hill Road 25 Nimble Hill Road Newington, NH 03801 Newington, NH 03801 Tel : (800) 258-0830 or Tel: (800) 258-0830 (603) 436-9444 Sales: 8:00 am to 5:00 pm Fax : (603) 436-8411 Service and Support: 8:00 am to 6:00 pm Monday www.thermoscientific.com/tc through Friday (Eastern Time)
-
Page 5: Table Of Contents
Approved Fluids....................3-10 Additional Fluid Precautions .................3-12 Filling Requirements ..................3-13 Draining ......................3-13 ................4-1 Section 4 Operation ADVANCED Immersion Circulators ............4-1 Setup ........................4-2 Start Up .......................4-2 Status Display .....................4-3 Stand By Mode ....................4-3 Stopping the Circulator ..................4-4 Power Down .......................4-4 Thermo Scientific... - Page 6 ............6-1 Section 6 Preventive Maintenance Cleaning ......................6-1 Condenser Fins ....................6-1 Ground Strap and Nut ..................6-2 Testing the Safety Features ................6-2 Section 7 Troubleshooting ....................7-1 Error Displays ....................7-1 Appendix Serial Communications ..................A-1 Declaration of Conformity RoHS Directive Warranty Thermo Scientific...
- Page 7 < >...
- Page 8 < >...
- Page 9 < >...
- Page 10 < >...
- Page 11 < >...
- Page 14 < >...
-
Page 17: Preface
Please include the manual part number and the revision date listed on the front cover. Warranty Thermo Scientific Laboratory Temperature Control Products have a warranty against defective parts and workmanship for 36 months from date of shipment. See back page of this manual for more details. - Page 18 There can be up to three nameplates located on the rear of the bath. Before calling, please obtain the serial number printed on the complete system nameplate located on the upper rear of the bath. Nameplate Refer to nameplate when call- ing for after-sale support Nameplates (Typical Locations) Thermo Scientific...
-
Page 19: Safety
It is the user's responsibility to assure a proper ground connection is provided. The circuit protector located on the rear of the circulator is not intended to act as a disconnecting means. Thermo Scientific... - Page 20 When using ethylene glycol and water, check the fluid concentration and pH on a regular basis. Changes in concentration and pH can impact system performance. Ensure the fluid is at a safe temperature (~40°C) before handling or draining. Thermo Scientific...
- Page 21 The are no special personal protective equipment requirements needed to perform normal operation. We do recommend wearing eye protection and Equipment gloves. The user must review and understand all the sections in this manual before Training operating the bath. Thermo Scientific...
- Page 22 Section 1 Safety Thermo Scientific...
-
Page 23: General Information
General Information Section 2 Description and The Thermo Scientific ADVANCED Series of Heated Immersion Circulators are used with refrigerated and heated baths. All immersion Intended Use circulators can pump to an external system. All circulators have a digital display and easy-to-use touch pad, five programmable setpoint temperatures, acoustic and optical alarms, and offer adjustable high temperature protection. - Page 24 115 V/60 Hz or 230 V/50 Hz *See page 2-5. Add ~26 mm (1 inch) to D for drain fitting. **See Section 3 for additional information. • Thermo Fisher Scientific reserves the right to change specifications without notice. Thermo Scientific...
- Page 25 +20°C ambient condition, at nominal operating voltage. Other fluids, process temperatures, ambient temperatures, altitude or operating voltage will affect performance. Pump specifications are nominal values of ±10%. Specifications are for reference only and are subject to change Thermo Scientific...
- Page 26 +20°C ambient condition, at nominal operating voltage. Other fluids, process temperatures, ambient temperatures, altitude or operating voltage will affect performance. Pump specifications are nominal values of ±10%. Specifications are for reference only and are subject to change Thermo Scientific...
-
Page 27: Bath/Circulator Specifications
+20°C ambient condition, at nominal operating voltage. Other fluids, process temperatures, ambient temperatures, altitude or operating voltage will affect performance. Pump specifications are nominal values of ±10%. Specifications are for reference only and are subject to change. Overall Dimensions Work Area Dimensions Thermo Scientific... - Page 28 24.3/53.4 *Lower temperature range requires supplemental cooling. **See page 2-5. Add ~26 mm (1 inch) to D for drain fitting. ***See Section 3 for additional information. • Thermo Fisher Scientific reserves the right to change specifications without notice. Thermo Scientific...
- Page 29 Pump specifications are nominal values of ±10%. Specifications are for reference only and are subject to change. Heat-up rates for the 100V baths will take approximately 25% longer than the 115V. Thermo Scientific...
-
Page 30: Wetted Materials
Wetted Materials ADVANCED Immersion Stainless Steel Baths/Circulators Circulator Stainless Steel 316 Viton Stainless Steel 304 EPDM EPDM Ceramic Ryton (drain fitting) Ultem Zotek-N (cover seal) Vectra Transparent Acrylic Baths/Circulators Stainless Steel Poly-acryl Polyphenylene oxide (PPO) Baths/ Circulators Polyphenylenoxid Thermo Scientific... -
Page 31: Installation
• If possible, secure the bridge to your bath using the two supplied thumb- screws. • The immersion depth is 75 to 145 mm (~3 to 5 "). Your bath container must be sturdy enough to support the weight of the assembly, approximately 3.8 kilograms (8.5 pounds). The circulator is designed for continuous operation and for indoor use only. Thermo Scientific... -
Page 32: Bath Circulator
The circulator can operate with 0 clearance on two exhaust sides as long as the third exhaust side has unrestricted air flow. Blocked ventilation increases the circulator's temperature, reduce its cooling capacity and, on refrigerated baths, eventually lead to premature compressor failure. Ventilation Options Thermo Scientific... - Page 33 The outlet must be rated as suitable for the total power consumption of the circulator, see next page. Note If a bath and immersion circulator were purchased separately, fol- low the electrical requirements listed on the bath nameplate. Thermo Scientific...
- Page 34 230/50/1 12.9 2980 Country Specific All Heated 115/60/1 11.3 1300 N5-15 Baths/Circulators 100/50-60/1 10.0 1300 N5-15 230/50/1 2135 Country Specific 1. Volts ± 10% 2. Maximum amp draw 20 Amp Outlet 15 Amp Outlet (16 Amp) (12 Amp) Thermo Scientific...
- Page 35 Ensure the electrical cords do not come in contact with any of the CAUTION plumbing connections or tubing. Immersion Circulator A = Power Inlet from Bath B = Power Outlet to Immersion Circulator Bath C = Power Inlet from power supply Thermo Scientific...
- Page 36 • Connect the bath’s power cord, C, to a grounded power outlet. Ensure the electrical cords do not come in contact with any of the CAUTION plumbing connections or tubing. C = Power Inlet from power supply Thermo Scientific...
-
Page 37: External Circulation
Note G50 circulators are supplied with 2" pieces of insulation (4 total). For low-temperature operation, install a single piece of insulation on each of the pump lines. To prevent damage to the circulator's plumbing, use a 19 mm CAUTION backing wrench when removing/installing the connections. Thermo Scientific... -
Page 38: Remote Temperature Sensor
• after prolonged use, tubes may become brittle or they may get very soft, check them on a regular basis and replace if necessary • secure all tube connections using clamps When using the internal bath only, the plumbing connections can be closed with the supplied plate and union nuts. Thermo Scientific... -
Page 39: Tubing
The metal tubing is attached directly to the plumbing connections, gaskets are not required. Do not subject tubing to mechanical strain and ensure any specified CAUTION bend radius is not exceeded. Tubing is available in lengths of 0.5, 1.0 and 1.5 meters. Couplings for connecting tubes are also available. The smallest opening inside the metal tubes is 10 mm. The metal tubing is provided with coupling nuts (M16 x 1, DIN 12 879, part 2) at either end. Thermo Scientific... -
Page 40: Approved Fluids
To help alleviate these problems Thermo Fisher Scientific recommends the use of chlorine. The duration of time that chlorine remains in solution depends on factors such as water temperature, pH and availability of direct sunlight. We recommend maintaining chlorine levels at proper levels using chlorine test strips, generally 1 to 5 ppm is adequate. 3-10 Thermo Scientific... - Page 41 Thermo Fisher Scientific offers a range of heat transfer fluids for these temperature control applications. SYNTH 60 and SYNTH 260: Synthetic thermal liquid with a medium life span (several months) and little smell annoyance. See next page for additional information. SIL 100, SIL 180, SIL 300: Silicone oil with a very long life span (over 1 year) and negligible smell. See next page for additional information. Thermo Fisher heat transfer fluids are supplied with an EC Safety Data Sheet. 3-11 Thermo Scientific...
-
Page 42: Additional Fluid Precautions
• Avoid spattering on the circulator's components, always slowly add fluid. When adding fluid, point the opening of a container away from yourself. • Use fume hoods. • Do not allow any ignition sources in the vicinity. 3-12 Thermo Scientific... - Page 43 Reacts with Silicone Silicone Silicone Rubber Copper Silicone Light metals Bronze EC-Safety Data Sheets will be delivered together with each container of liquid. 3-13 Thermo Scientific...
- Page 44 <50 <10 Other Parameters 6.5-8.5 Resistivity 0.01* 0.05-0.1* * MΩ-cm (compensated to 25°C) Unfavorably high total ionized solids (TIS) can accelerate the rate of galvanic corrosion. These contaminants can function as electrolytes which increase the potential for galvanic cell corrosion and lead to localized corrosion such as pitting. Eventually, the pitting will become so extensive that refrigerant will leak into the water reservoir. As an example, raw water in the United States averages 171 ppm (of NaCl). The recommended level for use in a water system is between 0.5 to 5.0 ppm (of NaCl). Recommendation: Initially fill the tank with distilled or deionized water. Do not use untreated tap water as the total ionized solids level may be too high. This will reduce the electrolytic potential of the water and prevent or reduce the galvanic corrosion observed. 3-14 Thermo Scientific...
-
Page 45: Filling Requirements
In this case screw the drain fitting back into the bath. Attaching the cap onto the fitting aids in installation. If required, contact us for additional information. Installed Drain Fitting with Cap Removed 3-15 Thermo Scientific... - Page 46 Section 3 Installation 3-16 Thermo Scientific...
-
Page 47: Operation
Operation Section 4 ADVANCED The Thermo Scientific ADVANCED Series of Heated Immersion Circula- tors have a digital display and easy-to-use touch pad, five programmable Heated setpoint temperatures, acoustic and optical alarms. All circulators offer adjust- Immersion able high temperature protection. -
Page 48: Setup
the circulator does not start refer to Section 5 Troubleshooting. • On refrigerated baths, place the circuit protector located on the rear to the I position. • Place the circuit protector located on the back of the immersion circulator to the I position. After a slight delay the blue LED on the front panel illuminates. • Press , the Start Display appears and the blue LED goes out. • Ensure the start symbol has a highlight box around it, if not use the arrow keys to navigate to the symbol. Menu Reservoir 20.0°C Highlighted Fluid Start Symbol Temperature 24.2°C Start Display • Press . The circulator starts and the start symbol turns into a stop symbol ( 20.0°C Stop Symbol Note The pump starts immediately but refrigerated baths take up to 30 seconds before the compressor starts. Note After start up, check all the plumbing connections for leaks. Thermo Scientific... -
Page 49: Status Display
Status Display after 60 seconds. If desired, change the Display Options time or disable this feature using the Menu. Stand By Mode Press , the display goes blank and the circulator enters the stand by mode. The blue LED illuminates. Thermo Scientific... -
Page 50: Stopping The Circulator
The circuit protector located on the rear of the components is not CAUTION intended to act as a disconnecting means. Note When quickly restarting, the compressor may take up to 10 Restarting minutes before it starts to operate. Thermo Scientific... -
Page 51: Changing The Setpoint
Use the left and right arrows to move the cursor to the desired digit and then use the up and down arrows to change the value. Once all the desired changes are made, press to save the change. Note Using this procedure also changes the setpoint's stored value. Thermo Scientific... -
Page 52: Menu Displays
1. From any submenu display, use the down arrow 2. Press to return to the Start Display. Menu button to highlight Application Settings Menu Display Options 20.0°C 24.2°C Menu Start Display Pressing from the Menu line returns you to the previous screen. Thermo Scientific... - Page 53 Section 4 Operation Thermo Scientific...
- Page 54 Use the left and right arrows to move the cursor to the desired digit and then use the up and down arrows to change the value. Once all the desired changes are made, press to save the change to cancel it. Thermo Scientific...
- Page 55 Prog. Step at the end of the program. If enabled the circulator beeps once at the beginning of the program and once at the end of each step. Press to return to the previous display. Thermo Scientific...
- Page 56 Note The range is also limited by the bath tem- perature range, see Section 2. High Note When using oil as a reservoir fluid, we recommend running the circulator at 95°C for 15 Menu minutes to remove any moisture in the fluid. 4-10 Thermo Scientific...
- Page 57 This can result in substantial energy savings over the life of the circulator. The default setting is disable (enable for A40 refrigerated circulators). Energy Saving 1. With highlighted, press to toggle between enable and disable. Thermo Scientific 4-11...
- Page 58 Cycles For example, selecting 3 runs the entire ramp program a total of 3 times. Shut Down End State Maintain configures the circulator to either or continue running ( ) when the program is over. 4-12 Thermo Scientific...
-
Page 59: Settings
Menu Start Temp xxx.xx 20.00°C Stop Temp xxx.xx Duration (min) xxxxx 24.29 °C Assured Soak Menu Settings - You can enable an alarm to sound when each step and/or the program is complete, see Basic Settings in this section. Thermo Scientific 4-13... - Page 60 ± variance is reached. Ramp If a program is not running, highlighting with the circulator running causes the bath tempera- Start Temp ture to go to the ramp . The temperature remains there until the ramp is started. 4-14 Thermo Scientific...
- Page 61 Stop Bits 1 or 2 Baud Address (Displayed for RS485 only) Parity Supported protocols: AC, Standard, NC, Namur Data Bits Menu See the Appendix for additional information. Note Keypad operation is still available with serial communications enabled. Thermo Scientific 4-15...
- Page 62 Once the desired delay is displayed press Display Delay With enabled and the Start Display showing, if no arrows are pressed the Start Display changes to the Status Display after the delay expires, see pages 4-2 and 4-3. 4-16 Thermo Scientific...
- Page 63 A10; 115V XXXXXXX.XX Menu With an invalid bath connected the display is: Without a bath connected the display is: Head AC200 Head AC200 XXXXXXX.XX XXXXXXX.XX Checksum XXXX Checksum XXXX Bath Invd xx Bath None XXXXXXX.XX XXXXXXX.XX Menu Menu Thermo Scientific 4-17...
- Page 64 6. Scroll down to display , see page Calibration 5. With highlighted, press 4-20. to calibrate the internal temperature sensor. The procedure is covered on the next page,: Level Operator Password Reset Password Calibration Reset PID Tuning Calibration Menu Menu 4-18 Thermo Scientific...
- Page 65 You can later restore the same calibration by High xx.x Restore User Cal highlighting and pressing xx.x Calibrate xx.x Menu Another option is to restore the factory calibra- Restore Factory tion values by highlighting and pressing Thermo Scientific 4-19...
- Page 66 Cool PID xx.x Heat PID x.xx x.xx Menu Menu 3 . If required, press to change the value. xx.x Factory preset values are: P = 00.6 x.xx I = 0.60 x.xx D = 0.00 Menu 4-20 Thermo Scientific...
-
Page 67: System
Refill Timer 45 Menu Highlight the desired accessory, press to en- able/disable. Refill Timer is the length of time the auto refill operates if the normal reservoir level is not reached. The range is adjustable from 5 to 600 seconds. Thermo Scientific 4-21... -
Page 68: High Temperature Cutout
To restart the circulator press the black reset ring surrounding the red dial - and then press again. If Auto Restart is enabled the circulator restarts, if disabled use the Start Up procedure. Note: We recommend periodically rechecking operation or if the circulator is moved. 4-22 Thermo Scientific... - Page 69 The circulator can be stored for up to 90 days inside the temperature range of -25°C to +60°C (-13°F to +140°F). If necessary, when removing the circulator from storage allow it time to warm up and dry out in order to prevent any condensation issues. Thermo Scientific 4-23...
- Page 70 Section 4 Operation 4-24 Thermo Scientific...
-
Page 71: S Ection 5 Accessories
Note the long end of the stack is installed Secure the stacks to the platform. into the hole on the platform as shown. Insert the sockets into the holes on the top of the bridge. Secure the sockets to the bridge using a M15 nut on the bottom of each socket. Slide the stacks up and through the sockets on the bridge. Install a male knurled nut into each socket and install a female knurled nut to the top of the stack. Place the assembly in the bath and secure it to the circulator using the four Torx head screws. Place the immersion circulator on the bridge and secure it using the four thumbscrews, hand tight. Place the lifting platform to the desired position and lock it by using the male knurled nuts. Female Knurled Nut (0032720) Socket (0032718) Male Knurled Nut (0032721) Bridge Position Stack (0032325) M15 Nut (9000144) Platform(Typical) Thermo Scientific... - Page 72 Always turn off the circulator and disconnect the power cord from CAUTION the power source before installing the bridge. Undo the four thumbscrews securing the immersion circulator to the top panel and remove the immersion circulator. Undo the four Phillips Head screws securing the top panel to the bath and remove it. Turn the old panel over and note the placement of its three gaskets. Using the old panel as a template, install the three supplied gaskets in the same position on the new panel. Note Place the panels on a soft clean cloth, their stainless steel surfaces are susceptible to scratching. Place the immersion cooler bridge on the bath and secure it to the circulator using the four Phillips Head screws. Place the immersion circulator on the top panel and secure it using the four thumbscrews, hand tight. Remove the two screws securing the "dummy" panel to the immersion cooler bridge. Insert the immersion circulator head through the hole. Secure the head to the top panel using the two supplied panels. Immersion Cooler Head Thermo Scientific...
- Page 73 A25B, A40, S21, S30 (160 x 145 mm) Optional Inserts S13, S12T (160 x 100 mm) • 10 mm test tube holes • 16 mm test tube holes • 25 mm test tube holes • No holes Base Rack Thermo Scientific...
- Page 74 6 - 9 No connection TX = Transmitted data from circulator RX = Received data to circulator. If the circulator already has a communication cable installed, remove the cable from the rear of the immersion circulator and plug that cable into PORT 2 on the adapter. PORT 1 RS232 PORT2 Plug the supplied cable into PORT 1 on the adapter and the other end into the immersion circulator. Regardless of the configuration, the supplied cable always goes from the immersion circulator to PORT 1. Plug your 9-pin serial communications cable into the communication port on the adapter and then the other end into your computer. Cables are available from Thermo Fisher. If desired, use the supplied Velcro tape to attach the adapter to a ® convenient location on the circulator. Thermo Scientific...
-
Page 75: Multifunction Port Standard I/Odb-15Hd (Ac 200 Only)
11 or 12 11 or 12 11 12 13 14 15 6 7 8 9 10 1 or 2 1 or 2 1 or 2 1 2 3 4 5 ON STATE Current = 10 - 20 mA Thermo Scientific... -
Page 76: Tubing
150 cm (59") long 333-0294 tube coupling 001-2560 PVC tubing (water only) 8 mm i.d. (available per meter) 082-0745 12 mm i.d. (available per meter) 082-0304 Viton tubing -60 to +200 °C temperature range 8 mm i.d. (available per meter) 082-1214 12 mm i.d. (available per meter) 082-1215 Silicone tubing -30 to +220 °C temperature range (not to be used with any silicone oil, i.e., SIL or Synth 60) 8 mm i.d. (available per meter) 082-0663 12 mm i.d. (available per meter) 082-0664 Perbunan tubing -40 to +100 °C temperature range 8 mm i.d. (available per meter) 082-0172 12 mm i.d. (available per meter) 082-0173 Foam rubber insulation for PVC, Viton, Silicone and Perbunan tubes 8 mm i.d. (available per meter) 806-0373 12 mm i.d. (available per meter) 806-0374 Fittings for plastic tubing 8 mm i.d. 001-1209 12 mm i.d. 001-1210 Coupling nut 001-0797 Thermo Scientific... -
Page 77: Preventive Maintenance
3 Replace the panel. For all other refrigerated baths: Clean the fins with compressed air. For extreme soiling a qualified technician will need to remove the cooling compressor casing. Tubing Inspect and tighten the tubing and clamps daily. Thermo Scientific... -
Page 78: Testing The Safety Features
With the circulator on, use a screwdriver and slowly push down on each level sensor, one at a time, until an error message appears. See Section 7 for details on error messages. If not, have the circulator checked by a qualified technician. Thermo Scientific... -
Page 82: Troubleshooting
Enter the controller menu and ensure the ENERGY SAVER mode is on in order for the system to maintain a stable temperature. Check for high thermal gradients (e.g., the application load is being turned on and off or rapidly changing). Thermo Scientific... - Page 83 If your operating system does not automatically recognize the optional driver log on to: http://www.ftdichip.com/FTDrivers.htm for instructions. Please contact Thermo Fisher Scientific Sales Service and Customer Support if you need any additional information, see inside cover for contact instructions. Thermo Scientific...
- Page 84 Section 7 Troubleshooting Thermo Scientific...
-
Page 85: Appendix Serial Communications
AC Serial Communications Protocol Appendix Serial communication is accomplished either through the optional 9-pin Serial Communications Box or through the USB port on the immersion circulator. If your operating system does not automatically recognize the optional driver log on to: http://www.ftdichip.com/FTDrivers.htm for instructions. Note This appendix assumes you have a basic understanding of communications protocols. - Page 86 Commands Table Commands All messages from master and slave are terminated with a carriage return [CR] Command Description Master Sample Slave Response Sends (echo off) Alternate units Read Temperature Internal [V]C Read Temperature 2 External (optional) [V]C Read Displayed Setpoint [V]C Read Internal RTA1 –...
- Page 87 Commands All messages from master and slave are terminated with a carriage return [CR] Command Description Master Sends Sample Slave Response Set Displayed Setpoint SS [V] Set Internal RTA1 – Internal RTA5 SIRTA1 – SIRTA5 [V] Set External RTA1 – External RTA5 SERTA1 –...
- Page 88 Commands All messages from master and slave are terminated with a carriage return [CR] Command Description Master Sends Sample Slave Response Set Ramp Program this will SRP [v1,v2,v3,v4,v5] load defaults for all steps de- V1 #of steps Note: If unit allows more than one clared by V1 V2 variance ramp the ramp number must first...
- Page 89 RUFS Read Unit Fault Status This command returns 5 values. These are decimal representations of hexadecimal values. Each individual bit of the value represents a different warning, fault or status. decimal B5 B4 B3 B2 B1 B0 Value Description of bits Value Description of bits B0 –...
- Page 90 Refer to Key table on page 1 for explanation of symbols and their meanings. Examples: Set Setpoint: Read Temperature: Host Host Command [CR] Command [CR] Controller: Controller: Command [CR] [U] [CR] Accepted Read Temperature 2: Host: C [CR] Controller: Set Setpoint to -22°C when minimum allowed is -20°C: Minimum allowed is [V Host: - 2 2 CR - 2 0 CR...
-
Page 91: Declaration Of Conformity
Laboratory Equipment Div. 25 Nimble Hill Road Newington, NH 03801 DECLARATION OF CONFORMITY Manufacturer: Thermo Fisher Scientific Address: 25 Nimble Hill Road Newington, NH 03801 USA Date of inception 2009 We declare that the following products conform to the Directives and Standards listed below. Products: ThermoTemp Refrigerated and non refrigerated heated liquid baths All rated 100Vac-50HZ &... - Page 92 Laboratory Equipment Div. 25 Nimble Hill Road Newington, NH 03801 RoHS DECLARATION OF CONFORMITY Manufacturer: Thermo Fisher Scientific Address: 25 Nimble Hill Road Newington, NH 03801 USA Products: Standard ThermoTemp refrigerated and non refrigerated heated liquid baths and their associated standard accessories. Thermo Fisher Scientific certifies that the above ThermoTemp models meet the requirements of DIRECTIVE 2002/95/EC, Restriction of Hazardous Substances Directive ( RoHS ).
- Page 93 48 months from date of shipment for the ARCTIC, GLACIER and SAHARA Bath circulators only. This promotion does not cover standalone Immersion Circulators. Otherwise, Thermo Fisher Scientific warrants for 36 months from date of shipment the Thermo Scientific ADVANCED series of Immersion Circulators, ARCTIC and GLACIER refrigerated/heated bath circulators, and SAHARA heated bath circulators according to the following terms.
- Page 96 Thermo Fisher Scientific 81 Wyman Street P.O. Box 9046 Waltham, Massachusetts 02454-9046 United States www.thermofisher.com...
Need help?
Do you have a question about the ADVANCED Series and is the answer not in the manual?
Questions and answers