
Subscribe to Our Youtube Channel
Related Manuals for Thermo Scientific Barnstead GenPure xCAD Plus


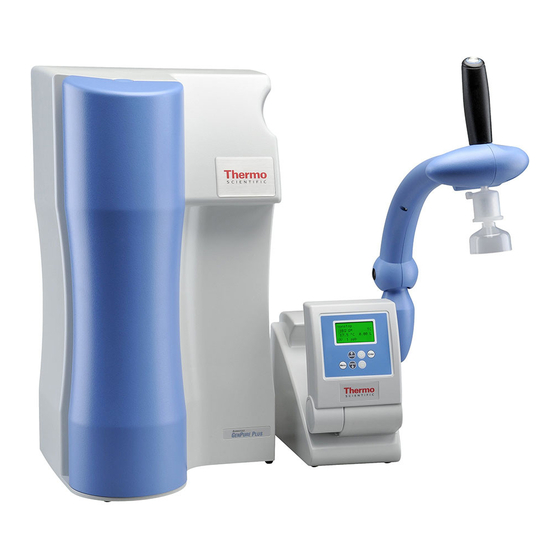
Summary of Contents for Thermo Scientific Barnstead GenPure xCAD Plus
- Page 1 Thermo Scientific Barnstead GenPure xCAD Plus Ultrapure water system Operating Instruction 50137064 Revision E June 2016...
- Page 2 © 2016 Thermo Fisher Scientific Inc. All rights reserved. Thermo Fisher Scientific Inc. provides this document to its customers with a product purchase to use in the product operation. This document is copyright protected and any reproduction of the whole or any part of this document is strictly prohibited, except with the written authorization of Thermo Fisher Scientific Inc.
-
Page 3: Preface
This document is not part of any sales contract between Thermo Fisher Scientific Inc. and a purchaser. This document shall in no way govern or modify any Terms and Conditions of Sale, which Terms and Conditions of Sale shall govern all conflicting information between the two documents. Thermo Scientific GenPure... -
Page 4: Legal Information
Please consult your local sales representative for details. Warranty Thermo Electron LED GmbH warrants the operational safety and functions of the Thermo Scientific Barnstead Ultrapure Water Systems only under the condition that: • the system is operated and serviced exclusively in accordance with its intended purpose and as described in these operating instructions, •... -
Page 5: Explanatory Notes On The Operating Instructions
Risk of electric shock! Electrical work on the system is only to be carried out by qualified personnel. Protective conductor connection. Connect the power supply to an electrical socket with a protective connection. Indicates a situation where protected gloves or clothing is needed. Indicates a situation in which protective goggles must be worn. Thermo Scientific GenPure... - Page 6 Additionally, the ultrapure water system is in compliance with many other international standards, regulations and directives not listed here. Should you have any questions regarding compliance with national standards, regulations and directives applicable for your country, please contact your Thermo Fisher Scientific sales organization. GenPure Thermo Scientific...
-
Page 7: Table Of Contents
Installation examples ..........50 Connection to an Ion exchanger DI 1500 (option) ..... 50 Thermo Scientific GenPure... - Page 8 Set the sending interval ........80 GenPure Thermo Scientific...
- Page 9 Chapter 20 Maintenance records ......... 115 Chapter 21 Contact Information Thermo Scientific ......117 Index .
- Page 10 Contents GenPure Thermo Scientific...
-
Page 11: Transport And Packaging
Contents • “Examination on receipt” page 6 • “Complaints” page 6 • “Packing for return shipment” page 6 Do not pull the plastic foil over your head. Risk of suffocation. Use the plastic foil only for packaging. Thermo Scientific GenPure... -
Page 12: Examination On Receipt
• Prior to send back a operated system, empty the water and dry the system and take out the cartridges. • Pack the filter cartridges into a bubble wrap and/ or packaging foam include it with the package of the ultrapure water system. GenPure Thermo Scientific... -
Page 13: Chapter 2 Safety Precautions
Safety precautions Observe these safety precautions for your own safety. Thermo Scientific Barnstead Ultrapure Water Systems are modern water purification systems intended solely for the treatment of potable water or water of ASTM Type II quality. The water it produces is not fit for drinking. - Page 14 UV-lamp glass. • Wear safety goggles when working with cleaning solution. • If your eyes come into contact with a chlorine product, rinse them immediately with ample, fresh water and immediately contact a physician. GenPure Thermo Scientific...
- Page 15 • Do not use oxidative cleaning agents when cleaning the system. They would cause damage to it. • Proceed as follows when the system has a defect: • Switch the system off and unplug the system from outlet. • Shut off the feedwater supply. • Contact your local service organization. Thermo Scientific GenPure...
- Page 16 Safety precautions GenPure Thermo Scientific...
-
Page 17: Chapter 3 Extent Of Delivery
Extent of delivery Contents • “Extent of assembly kit” page 12 • “Available GenPure xCAD Plus versions” page 14 Thermo Scientific GenPure... -
Page 18: Extent Of Assembly Kit
30min is recommended. The procedure for the filter can be repeated up to 5 times. Transformer-table power pack Catalog no.:50149597 Universal Holder and Universal adapter Catalog no.: 21.0007 Catalog no.: 21.0006 Feedwater connecting kit Catalog no.: 25.0075 GenPure Thermo Scientific... - Page 19 Sub-D extension cable, 25 pin, 5 m or 5.47 yards Catalog no.: 16.0375 PE hose, Ø8mm x 20 m or 0.31 inch x 21.87 yards Catalog no.: 18.0036 Sub-D-extension cable, 9pin, 3m or 3.28 yards Catalog no.: 16.0397 Thermo Scientific GenPure...
-
Page 20: Available Genpure Xcad Plus Versions
50136151 UV Basic system + UV photooxidation 50136152 UV/UF Basic system + UV photooxidation + ultrafiltration module 50136153 UV-TOC Basic system + UV-photooxidation and TOC Measurement 50136146 UV-TOC/UF Basic system + UV-photooxidation and TOC Measurement + ultrafiltration module GenPure Thermo Scientific... -
Page 21: Genpure Xcad Plus Wall Version
Basic system + ultrafiltration module 50136169 UV Basic system + UV-photooxidation 50136170 UV/UF Basic system + UV-photooxidation and ultrafiltration module 50136171 UV-TOC Basic system + UV-photooxidation + TOC Measurement 50136172 UV-TOC/UF Basic system + UV-photooxidation and TOC Measurement + ultrafiltration module Thermo Scientific GenPure... - Page 22 Extent of delivery Available GenPure xCAD Plus versions GenPure Thermo Scientific...
-
Page 23: Chapter 4 Intended Use
The system allows the purification of water into the water categories mentioned in the standards of ASTM 11.01 and ASTM 11.02. The Thermo Scientific Barnstead Ultrapure Water System is designed to be installed and use in the following application areas: - Laboratories for cell biological and biotechnological work with the safety levels L1, L2 and L3. - Page 24 Intended Use GenPure Thermo Scientific...
-
Page 25: Chapter 5 Technical Specifications
< 0.2 < 0.2 Performance l/min** up to 2 up to 2 up to 2 up to 2 up to 2 up to 2 * Depends on the feedwater and disinfection ** Depends on the feedwater pressure Thermo Scientific GenPure... - Page 26 52.91 lbs (dry weight) GenPure UV-TOC 24 kg 52.91 lbs (dry weight) GenPure UV-TOC/UF 25 kg 55.12 lbs (dry weight) When the system is operating the system is by the amount of water about 3kg / 6.61 lbs heavier. GenPure Thermo Scientific...
- Page 27 26.46 lbs (dry weight) Dimensions and weight xCAD Server, xCAD Client (wall version) Height approx. 655 mm 25.79 inch Width 260 mm 10.24 inch Depth approx. 530 mm 20.87 inch Weight 5 kg 11.02 lbs (dry weight) Thermo Scientific GenPure...
- Page 28 DC 24 V, 5.0 A max System connection DC 24 V, 80 W Serial interface RS 232 Protection Class Class II (external SMPS certified as Class I) Electrical connections xCAD/Server 1x SUB-D socket 25 pin 2x SUB-D socket 9 pin GenPure Thermo Scientific...
- Page 29 Dispensing valve PET = Polyethyleneterephthalate Conductivity measuring cells POM = Polyoxymethylen, stainless steel Distributor block POM = Polyoxymethylen Distributor block POM = polyoxymethylen Connectors POM = Polyoxymethylen Hoses PE = Polyethylene O-Rings EPDM = Ethylene Propylene Diene Rubber Thermo Scientific GenPure...
- Page 30 Technical specifications GenPure Thermo Scientific...
-
Page 31: The Installation Area
• Easy access for operation and control of the system. • Water pre treated such as DI, RO or distillation water connection with 3/4 NPT male thread and customer supplied shutoff valve. Thermo Scientific GenPure... - Page 32 The installation area GenPure Thermo Scientific...
-
Page 33: Installation
41 • “Installation of an additional xCAD Client, wall version (optional)” page 42 • “Wall mounting GenPure xCAD Plus system” page 46 • “Mounting the power pack (voltage supply)” page 48 • “Installation examples” page 50 Thermo Scientific GenPure... - Page 34 4. Ultrapure water connector, hose 0.31” (8 mm) o.d (to xCAD Server backflow) 5. Ultrapure water connector, hose 0.31” (8 mm) o.d (to xCAD Server Flow) 6. Power supply connector 24 V DC 7. Push button for releasing the cartridge 8. Cartridge cover GenPure Thermo Scientific...
- Page 35 11. Ultrapure water connector, 0.31” (8 mm) o.d xCAD flow (to GenPure) 12. Ultrapure water connector, 0.31” (8 mm) o.d xCAD backflow (to GenPure) 13. Printer connection 14. xCAD connector (to xCAD Client) 15. Connector for 25 pin sockets to GenPure (system control) Thermo Scientific GenPure...
- Page 36 18. Ultrapure water connector, 0.31” (8 mm) o.d xCAD flow (to xCAD Server backflow) 19. Ultrapure water connector, 0.31” (8 mm) o.d xCAD backflow (to GenPure) 20. Connector for 9 pin sockets to xCAD Server (system control) 21. Connector for 9 pin sockets to an additional xCAD Client GenPure Thermo Scientific...
-
Page 37: Installation Of Genpure Xcad Plus System, Bench Version
O-ring on it. Screw the fitting back to the Fitting system. Feedwater connector unit Only feedwater that has been pretreated by reverse osmosis, ion exchange or distillation is to White O-ring Hose 8 mm o.d be used. Thermo Scientific GenPure... - Page 38 The other end of the 0.31” (8 mm) o.d hose you should connect to the xCAD backflow connector of the xCAD Server. Hose 0.31“ White O-ring Fitting (8 mm) o.d Connector xCAD Server Hose 0.31” (8 mm) o.d GenPure Thermo Scientific...
- Page 39 Plug the other end of the 25 pin cable for system control into the xCAD Server 25 pin cable connector. System control If applicable use the RS232 connector (13) to connect the optional data printer. RS232 25 pin connector 25 pin cable system control Thermo Scientific GenPure...
- Page 40 Open the feedwater supply and switch the system Rinse about 3 liters through the final filter before use. The system is now ready for use. Feedwater supply Only feedwater that has been pretreated by reverse osmosis, ion exchange or distillation is to be used. GenPure Thermo Scientific...
-
Page 41: Installation Of Genpure Xcad Plus System, Wall Version
To wall mount the xCAD Server wall version unscrew the 4 screws (see red arrows in the xCAD picture) of the underside from the xCAD Server Server and remove the wall mount bracket. Screws Wall bracket Thermo Scientific GenPure... - Page 42 Connect the wall mount bracket to the wall by screwing in the 4 supplied screws with a cross Screw screw driver into the wall where you installed the plugs before. Cross screw- driver Wall mount bracket GenPure Thermo Scientific...
- Page 43 Server 25 pin cable connector. System control If applicable use the RS232 connector (13) to connect the optional data printer. RS232 25 pin connec- tor xCAD Server 25 pin cable system control Thermo Scientific GenPure...
- Page 44 Push each of the quick connectors onto the Outlet Quick cartridge. You will know they are attached when connectors an audible “click” is heard. Inlet Fit the cartridge cover on again. Filter cartridge GenPure Thermo Scientific...
- Page 45 Hose 0.31” 8 mm o.d Screw the final filter in counter clockwise direction (see red arrow in the picture) into the 1/4" female thread of the xCAD dispensing valve. 1/4" female thread connection Final filter 0.2 μm Thermo Scientific GenPure...
- Page 46 “Mounting the power pack (voltage supply)” page Open the feedwater supply and switch the system The system is now ready for use. Feedwater Only feedwater that has been pretreated by supply reverse osmosis, ion exchange or distillation is to be used. GenPure Thermo Scientific...
-
Page 47: Installation Of An Additional Xcad Client, Bench Version (Optional)
Server When the xCAD Client is finish connected to the xCAD Server the xCAD Server must be in operating mode (nonstop mode) in order to use the xCAD Client. You cannot use the xCAD Client only. Thermo Scientific GenPure... -
Page 48: Installation Of An Additional Xcad Client, Wall Version (Optional)
To wall mount the xCAD Client wall version unscrew the 4 screws (see red arrows in the xCAD picture) on the bottom of the xCAD Client and Client remove the wall mount bracket. Screws Wall bracket GenPure Thermo Scientific... - Page 49 Attach the wall mount bracket to the wall by screwing in the 4 supplied screws with a philips screw driver into the wall where you have put in Screw the plugs before. Philips screw- driver Wall mount bracket Thermo Scientific GenPure...
- Page 50 Server When the xCAD Client is finish connected to the xCAD Server the xCAD Server must be in operating mode (nonstop mode) in order to use the xCAD Client. You cannot use the xCAD Client only. GenPure Thermo Scientific...
- Page 51 Wall mount bracket wall. Screw in the 4 screws (see red arrows) which you unscrewed in step 2 to attach the xCAD Client xCAD on the wall mount bracket. Client Wall mount bracket Screws Cross screw driver Thermo Scientific GenPure...
-
Page 52: Wall Mounting Genpure Xcad Plus System
Screw hooks Dowels Lift the System and hang the back side of it onto the screw hooks. Screw hooks in wall Lifting and carrying the system should be completed by 2 people. Backside Wall system GenPure Thermo Scientific... - Page 53 Installation Wall mounting GenPure xCAD Plus system Figure 1. Holes for wall mounting Thermo Scientific GenPure...
-
Page 54: Mounting The Power Pack (Voltage Supply)
The removable line cord must be shown to the Universal adapter bottom. Plug the connecting cable (appliance cable) in the power pack socket. Power pack Connecting cable Do not bring the power pack in contact with water. Risk of an electrical shock. GenPure Thermo Scientific... - Page 55 Connect the power pack to the ultrapure water system (48V 4-pin power supply connector, connector 8) and to an earthed 100 - 250V, Power 50/60Hz socket. supply connector Switch the system on. The system is now ready for use. Thermo Scientific GenPure...
-
Page 56: Installation Examples
Connect the hose which has a R3/4 female nut (1) from the raw water tap to the R3/4” input of the ion exchanger. Make connection from the R3/4 output of the ion exchanger to the feedwater connector of the GenPure system by using the hose (2) that is contained in the assembly kit. GenPure Thermo Scientific... -
Page 57: Chapter 8 Flow Chart
Ultrapure water Primary xCAD Plus Additional xCAD Plus Additional xCAD Plus remote dispenser, remote dispenser remote dispenser bench mounted (optional accessory), (optional accessory), shown bench mounted bench mounted shown shown Purification flow Recirculation flow Waste water Thermo Scientific GenPure... - Page 58 GenPure Thermo Scientific...
-
Page 59: How The System Functions
The TOC value is calculated by taking the difference between the values measured by the measuring cells QIA300 and QI302. The measurement range is 0 - 30 ppb. When this range is exceeded, the number 99 is shown in the display instead of the measured value. In Stand-by operation, “___” is shown. Thermo Scientific GenPure... - Page 60 How the system functions GenPure Thermo Scientific...
-
Page 61: Chapter 10 Putting System Into Operation
5. Connection 0.31“ (8 mm) o.d xCAD flow (Server) 6. Connection 0.31“ (8 mm) o.d xCAD back flow (Server) 7. Connection 0.31“ (8 mm) o.d xCAD flow (Client) 8. Connection 0.31“ (8 mm) o.d xCAD back flow (Client) Thermo Scientific GenPure... -
Page 62: Dispensing Water From The Dispensing Valve
0.2 μm final filter, open the white knurled screw. 0.2 μm final filter Knurled screw Do not close the knurled screw until pure water runs out of the opening at the knurled screw continuously. Rinse about 500 ml of water through the final filter. GenPure Thermo Scientific... -
Page 63: Chapter 11 Operating Elements Xcad Server And Xcad Client
Client Contents • “Description of Display xCAD Server” page 58 • “Flow chart of menu system control xCAD Server” page 59 • “Description display xCAD Client” page 60 • “Flow chart control unit xCAD Client” page 61 Thermo Scientific GenPure... -
Page 64: Description Of Display Xcad Server
• UV lamp intensity and operating time Also enables values to be • Cartridge number and maintenance interval changed in the menu mode. • Rinsing • Disinfection • System errors display • System errors print-out • Unlocking the factory setting with your password. GenPure Thermo Scientific... -
Page 65: Flow Chart Of Menu System Control Xcad Server
Operating elements xCAD Server and xCAD Client Flow chart of menu system control xCAD Server Flow chart of menu system control xCAD Server SW version 1.1 Thermo Scientific GenPure... -
Page 66: Description Display Xcad Client
• Setting for the feedwater resistance values in the menu. operation of the UV • UV lamp intensity and operating time lamp. Also enables • Unlocking the factory setting with your values to be changed in password the menu mode. GenPure Thermo Scientific... -
Page 67: Flow Chart Control Unit Xcad Client
Operating elements xCAD Server and xCAD Client Flow chart control unit xCAD Client Flow chart control unit xCAD Client SW version 1.1 Thermo Scientific GenPure... - Page 68 Operating elements xCAD Server and xCAD Client Flow chart control unit xCAD Client GenPure Thermo Scientific...
-
Page 69: Chapter 12 System Control
• “User menu” page 68 • “.OEM Menu” page 75 • “Data transmission via the RS 232 interface” page 80 • “Printer output” page 81 • “Measuring cell error recognition” page 82 • “Code lock” page 82 Thermo Scientific GenPure... -
Page 70: General Information
(measuring cell LF1) and temperature are also displayed. The displays of messages and measured values are independent of the operating mode. The TOC value is not shown in Interval mode. The display shows: GenPure Thermo Scientific... -
Page 71: Non-Stop Mode
The standstill time is given by the difference between half an hour and the interval pump time, so that the pump and the solenoid valve are actuated in a half-hourly rhythm. The TOC value is not shown in this operating mode. The display shows: Thermo Scientific GenPure... -
Page 72: Uv-Lamp
The operating time of the UV-lamp is recorded and the “UV duration” error message is brought to display when the limiting value set for this time is exceeded. TOC measurement is also carried out during the time that the UV-lamp is glowing only. The display shows: GenPure Thermo Scientific... -
Page 73: Water Dispensing Via Volumetric Control
Volumetric dispense is supported in all versions. The display shows: OFF mode A second press on the ON/Off-button causes the display to go dark and all text output on the display to be extinguished. No outputs are now switched. Thermo Scientific GenPure... -
Page 74: User Menu
Set the limiting value using the arrow buttons (see Settings with the arrow buttons). With settings above 50 μS/cm, the limiting value is switched off and the word off appears in the display. Press the Menu-button once then the display shows: GenPure Thermo Scientific... -
Page 75: Ultrapure Water Limiting Value
Limiting value setting range: 0.055 - 5.000 μS/cm Basic setting: 0.200 μS/cm With settings above 5.000 μS/cm, the limiting value is switched off and “Off ” is shown in the display.Press the menu-button twice then the display shows: Thermo Scientific GenPure... -
Page 76: Uv-Lamp Operating Time And Intensity
The operating time counter for the filter cartridge is set back on entry of a valid serial number.Press the menu-button 4 times then the display shows: For more details see under section “Change the ultrapure cartridge” page GenPure Thermo Scientific... -
Page 77: Rinsing The Ultrafilter
The remaining rinsing time is counted down and displayed during rinsing. Step Action Figure Press the menu-button 5 times then the display shows: Confirm rinse by putting the enter button. The rinsing is started for 30 sec. Thermo Scientific GenPure... -
Page 78: Disinfection
Change the filter cartridge with the disinfection cartridge (see under chapter “Disinfection” page 87). Confirm with enter. The Disinfection is started for 30 min, indicating the remaining time. The completely process is described under section “Disinfection” page GenPure Thermo Scientific... -
Page 79: Error History
Now you can see two last saved errors with date and time. Print out of Data In this menu, the current system data can be printed via a connected printer. Press the menu-button 8 times then the display shows: Thermo Scientific GenPure... -
Page 80: Registering The Xcad Client To The Xcad Server
Client display changes to the same color of the xCAD Server display. When the xCAD Client is registered the both display on the xCAD Server and xCAD Client jumps automatically to the display message “Interval or Nonstop mode”. GenPure Thermo Scientific... -
Page 81: Entering A Code Number
The language can be changed in this menu. The choice is between English, French and German. The setting can be changed with the arrow buttons. Basic setting: English After entering the OEM menu press the menu-button once then the display shows: Thermo Scientific GenPure... -
Page 82: Program Selection
In this menu, a choice is given as to whether measured values are to be displayed in the conductivity unit or the specific electric resistance unit. Basic setting: Conductivity After entering the OEM menu press the menu-button 4 times then the display shows: GenPure Thermo Scientific... -
Page 83: Switch Temperature Compensation Off
71 you can read how to rinse the system manually. Step width: Setting range: 10 - 60 sec. Basic setting: 30 sec. After entering the OEM menu press the menu-button 7 times then the display shows: Thermo Scientific GenPure... -
Page 84: Change The Disinfection Time
Specification of the voltage in % of the maximum supply voltage value. Basic setting for Interval mode: 20 % (for recirculation) Basic Setting for Nonstop mode: 45 % (for dispensing ultrapure water) After entering the OEM menu press the menu-button 10 times then the display shows: GenPure Thermo Scientific... -
Page 85: Set The Interval Rinse Time
The real time clock can be set in this menu. Basic setting: The actual date Setting range: 1-12 Month, 1-31 Day, 0-24 h, 0-60 min. After entering the OEM menu press the menu-button 13 times then the display shows: Thermo Scientific GenPure... -
Page 86: Set The Sending Interval
In Nonstop operation, a set of data is issued to the printer once only. The interface has a transmission rate of 9600 bits/sec., 8 data bits, 1 stop bit and no parity. The SUB-D socket assignment is: PIN 2: TXD PIN 3: RXD PIN 5: GND GenPure Thermo Scientific... -
Page 87: Printer Output
UV-intensity, 0 is entered in place of measured values for these functions! Code message: Whenever a code number is entered in system control and confirmed with Enter, the code input is immediately printed out. Code identification (see “Code lock” page 82). Print-out: Thermo Scientific GenPure... -
Page 88: Error Message
Menu + OEM menu All levels 0150 0450 0750 0250 0550 0850 0350 0650 0950 Each access via the code is printed out by the printer (RS 232) complete with date, time and the code number used. The display shows: GenPure Thermo Scientific... -
Page 89: Chapter 13 Maintenance
“Change the ultrapure cartridge” page 85 • “Disinfection” page 87 • “Change the ultrafilter” page 90 • “Structure of the UV-lamp” page 91 • “Change the UV-lamp” page 93 • “Change and autoclave the Final filter” page 96 Thermo Scientific GenPure... -
Page 90: Maintenance Intervals
Months to be replaced. systems with a UV lamp) *Please keep in mind that the life of your consumable is directly dependent on the quality of the feed water and the amount of water used daily. GenPure Thermo Scientific... -
Page 91: Change The Ultrapure Cartridge
Locate the new ultrapure cartridge and insert it into the system. Plug the quick connects correctly onto the new ultrapure cartridge. You will know they are Outlet attached when an audible “click” is heard. Quick Replace the cartridge cover. connector Inlet Thermo Scientific GenPure... - Page 92 UV button to go to the next value. c. When you are finished, press enter and the new serial number is saved. You can only use a serial number one time. Discard at least 5 liters of water. GenPure Thermo Scientific...
-
Page 93: Disinfection
Wear protective gloves for handling syringe of cleaning solution. Wear safety goggles when working with cleaning solution. Please observe the information given in the safety data sheet supplied with disinfectant to avoid possible health hazards. Thermo Scientific GenPure... - Page 94 Quick system. connectors Disinfectant cartridge See under chapter “Change the ultrapure cartridge” page 85 to put in the filter cartridge in to the system. Re-open the feedwater supply, switch the system on again. Feedwater supply GenPure Thermo Scientific...
- Page 95 Save the disinfection cartridge for later use. See step 5 under chapter “Change the ultrapure cartridge” page Before dispensing water from the system, let water run out for approx 15 minutes. The system is then ready for use. Thermo Scientific GenPure...
-
Page 96: Change The Ultrafilter
When you are installing the new UF filter the flow arrow of the filter must be pointing to the bottom of the system. Reinstall the back panel, reopen the feedwater supply and switch on the system again. Feedwater supply GenPure Thermo Scientific... -
Page 97: Structure Of The Uv-Lamp
Immersion tube Immersion tube Catalog no.: 22.0063 UV-lamp housing Catalog no.: 22.0081 UV intensity sensor Catalog no.: 16.0222 Bumper PE Pipe d16x2mm Catalog no.: 14.0187 These bumpers are seating in the UV-lamp housing Bumper O-ring Catalog no.: 21.5008 Thermo Scientific GenPure... - Page 98 UV-lamp O-ring Catalog no.: 21.5030 Immersion tube Immersion tube Catalog no.: 22.0063 UV-lamp housing Catalog no.: 22.0055 Bumper PE Pipe d16x2mm Catalog no.: 14.0187 These bumpers are seating in the UV-lamp housing Bumper O-ring Catalog no.: 21.5008 GenPure Thermo Scientific...
-
Page 99: Change The Uv-Lamp
We therefore recommend that clean gloves be worn. See chapter “Structure of the UV-lamp” page 91 where is seating the sealing ring to not damage it. Thermo Scientific GenPure... - Page 100 Once it is in place, re-mount the bracket holding the UV housing onto the system’s the mounting plate. Connection Sealing ring UV-lamp UV-lamp housing UV-lamp UV-lamp housing GenPure Thermo Scientific...
- Page 101 UV-lamp back and save the new values by an automatically calibration. The UV-lamp must be switched on (Nonstop mode). The calibration process of the UV intensity can be take between 5 min. and 2 hours. Thermo Scientific GenPure...
-
Page 102: Change And Autoclave The Final Filter
Unpacking the new Final filter and screw in the filter counter clockwise (See arrow in the picture) Dispensing valve in the dispensing valve outlet (R 1/4” female outlet thread) Final filter Rinse about 3 liters through final filter before use. GenPure Thermo Scientific... -
Page 103: Autoclave The Final Filter
96). If you are trying to dispense water and nothing is coming out from the outlet, the final filter is blocked. Please look then in chapter “Trouble shooting” page 101 or change with a new one. Thermo Scientific GenPure... - Page 104 Maintenance Change and autoclave the Final filter GenPure Thermo Scientific...
-
Page 105: Chapter 14 Waste Disposal
Waste disposal Before you are shipping your Thermo Scientific Barnstead Ultrapure Water System to the waste disposal, only a specially trained personal is to be taken out the system of operation. When the packaging is no longer needed it can be disposed of as household waste. - Page 106 Waste disposal GenPure Thermo Scientific...
-
Page 107: Chapter 15 Trouble Shooting
• Contact Thermo for service • Faulty Dispense button Water flows out • Leaky hose connection • Check and seal the hose connection • Feedwater pressure > 6 bar • Install a pressure reducer • Contact Thermo for service Thermo Scientific GenPure... - Page 108 • Measuring cell cable break • Replace the measuring cell “Measuring cell LF1” • System control defect • Replace system control • Conductivity of ultrapure • see “Resistance < 18.2 water outside of the M ·cm” page 101 measuring range GenPure Thermo Scientific...
- Page 109 • Replace the measuring cell “Temp. meas. cell.” cable • System control defect • Replace the system control Error message: • Operating hours of the filter • Replace it with a new one “change cartridge” cartridge has expired Thermo Scientific GenPure...
- Page 110 Trouble shooting GenPure Thermo Scientific...
-
Page 111: Chapter 16 Replacement Parts
Replacement parts GenPure Thermo Scientific GenPure... - Page 112 Check valve 50150598 UV-Intensity sensor (only UV - TOC) 16.0222 Leakage sensor 16.0389 G fuse holder 5 x 20 mm 50143154 G fuse, 5 x 20 mm, 4.0 A 50150714 Table top power pack (not shown) 50149597 GenPure Thermo Scientific...
-
Page 113: Xcad Server/ Xcad Client
We ask for your understanding that our guarantee for this system is invalid when replacement parts, accessories or consumables materials from other manufactures are used in or for the system, as we have no influence on their composition or quality. Thermo Scientific GenPure... - Page 114 Replacement parts GenPure GenPure Thermo Scientific...
-
Page 115: Chapter 17 Consumable Materials
Consumable materials Designation Catalog no. Ultrapure cartridge 09.2005 UV-Lamp 09.2002 Ultrafiltration module 50133980 Final filter 0.2 μm 09.1003 Thermo Scientific GenPure... - Page 116 Consumable materials GenPure Thermo Scientific...
-
Page 117: Chapter 18 Accessories
Accessories Designation Catalog no. Disinfection cartridge 09.2201 Cleaning Solution, 1 syringe CMX25 Printer 09.2207 Ion exchanger DI 1500 02.1500 DI 1500 hose kit for new installations 04.1690 Thermo Scientific GenPure... - Page 118 Accessories GenPure Thermo Scientific...
-
Page 119: Chapter 19 Terminal Assignments
Terminal assignments Thermo Scientific GenPure... - Page 120 Terminal assignments GenPure Thermo Scientific...
-
Page 121: Chapter 20 Maintenance Records
[l/h] Any false entry is considered to be a falsification of documents. The following point should be observed for maintenance of the quality of the system: • 1x / Weekly, acquire measured values. Thermo Scientific GenPure... - Page 122 Maintenance records GenPure Thermo Scientific...
-
Page 123: Chapter 21 Contact Information Thermo Scientific
Contact Information Thermo Scientific The address to contact when your system requires service: Overview of Thermo Scientific International Sales Organization Postal address USA: Thermo Scientific 275 Aiken Road Asheville, NC 28804 Enquiries from USA/Canada +1 866 984 3766 Sales: +1 800 438 4851... - Page 124 Contact Information Thermo Scientific Finland/Nordic/Baltic countries +358 9 329 100 Sales: +358 9 329 100 Service: France +33 2 2803 2180 Sales: +33 825 800 119 Service : Germany: Postal Address Germany: Thermo Electron LED GmbH Robert-Bosch-Straße 1 D - 63505 Langenselbold...
-
Page 125: Index
Flow charts 51 Consumable materials 109 Contact information 117 GenPure xCAD Plus bench version 14 Contact Information Thermo Scientific 117 GenPure xCAD Plus wall version 15 Contents 1 Holes for wall mounting 47 Data transmission via the RS 232 interface 80... - Page 126 Registering the xCAD Client to the xCAD Server 74 Registering the station 75 Replacement parts 105 Rinsing the ultrafilter 71 Return shipment 6 Ultrapure water limiting value 69 Rinsing the ultrafilter 71 UV Intensity and operating time 69 Rinsing time 77 GenPure Thermo Scientific...
- Page 127 Index: UV-Lamp 66 UV-lamp Change 93 Structure 91 UV-Lamp operating time and intensity 70 Wall mounting Holes 46 Wall mounting GenPure xCAD Plus system 46 Warranty iv Waste disposal 99 Thermo Scientific GenPure...
- Page 128 © 2016 Thermo Fisher Scientific Inc. All rights reserved. All trademarks are the property of Thermo Fisher Scientific Inc. and its subsidiaries. Specifications, terms and pricing are subject to change. Not all products are available in all countries. Please consult your local sales representative for details. Thermo Fisher Scientific 81 Wyman Street GenPure Thermo Scientific Waltham, MA 02451...
Need help?
Do you have a question about the Barnstead GenPure xCAD Plus and is the answer not in the manual?
Questions and answers