Avery Dennison ADTP1 System Administrator Manual
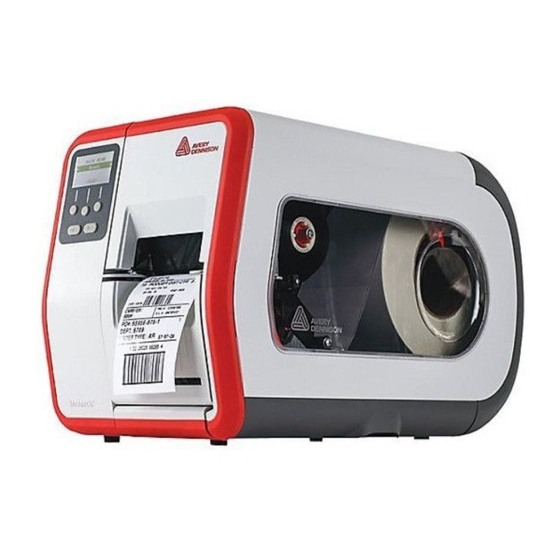
Tabletop printer
Hide thumbs
Also See for ADTP1:
- Reference manual (224 pages) ,
- Operator's handbook manual (46 pages) ,
- Instructions (4 pages)

Subscribe to Our Youtube Channel
Related Manuals for Avery Dennison ADTP1


Summary of Contents for Avery Dennison ADTP1
- Page 1 Printer Solutions SYSTEM ADMINISTRATOR’S GUIDE ® Avery Dennison ® Monarch Tabletop Printer 1 TCADTP1SA Rev. AM 7/21 © 2015 Avery Dennison Corp. All rights reserved. Classification: Avery Dennison - Public...
- Page 2 Each product and program carries a respectiv e written warranty, the only warranty on which the customer can rely. Avery Dennison Corp. reserves the right to make changes in the product, the programs, and their av ailability at any time and without notice. Although Av ery Dennison Corp.
-
Page 3: Table Of Contents
Setting the Word Length ....................... 3-2 Setting the Stop Bits ........................3-2 Setting the Parity ......................... 3-2 Setting the Flow Control ....................... 3-2 Resetting to Default Values ......................3-3 Using USB Communications ......................3-3 Setting the Mode ........................3-3 Classification: Avery Dennison – Public TOC-i... - Page 4 Setting the Hour ........................6-14 Setting the Minute ........................6-14 Setting the Day of the Month ....................6-14 Setting the Month ........................6-14 Setting the Year ........................6-15 Selecting the Interpreter ......................6-15 ii System Administrator’s Guide Classification: Avery Dennison - Public...
- Page 5 Downloading Files ........................9-1 Online Printing ..........................9-2 Offline Printing ..........................9-2 USING DIAGNOSTICS ........................10-1 Factory Set Password ........................ 10-1 Checking the Versions ....................... 10-2 Checking Supply Quality ......................10-2 Using a Password ........................10-3 Classification: Avery Dennison – Public TOC-iii...
- Page 6 SPECIFICATIONS & ACCESSORIES..................... 1 Supplies (Media) ..........................2 String Tags..........................2 Cable Pinouts ..........................2 Accessories ............................ 3 Factory-Installed Options ........................ 3 Shipping the Printer ........................3 MENU STRUCTURE ..........................1 GLOSSARY ............................1 iv System Administrator’s Guide Classification: Avery Dennison - Public...
-
Page 7: Getting Started
G E T T I N G S T A R T E D The Avery Dennison® Monarch® Tabletop Printer 1 prints on thermal transfer (ribbon) and thermal direct labels or tags. The printer prints labels continuously (in one strip) or on-demand (one label at a time). The printer prints on aperture, die cut, black mark, or continuous (non-indexed) supplies. -
Page 8: Selecting A Function
Contains the module’s Firmware Version, configuration. Module Type, Easy Setup Version (RFID Inlay Database), Region, Frequency, etc. Note: There are two RFID module types: One for FCC (IPJ-RS500GX) and one for ETSI (IPJ-RS500EU) frequency ranges. 1-2 System Administrator’s Guide Classification: Avery Dennison - Public... -
Page 9: Removing The Cover
Gently push down on the control panel release tab located inside the front cover. The control panel tilts forward. Contr ol Pan e l Using both hands, slide the cover to the left and remove. Classification: Avery Dennison – Public Getting Started 1-3... - Page 10 1-4 System Administrator’s Guide Classification: Avery Dennison - Public...
-
Page 11: Setting Supply Options
Overstrike/Continue 1x – 5x Rotate Image No/Yes Maximum 0 to 6902 (203 dpi = 34 inches) 3552 Calibration Length Contrast -699 to 699 Press CANCEL to exit an option without changing the setting. Classification: Avery Dennison – Public Setting Supply Options 2-1... -
Page 12: Setting The Supply Type
This is also known as non-indexed supply. C Aperture (Center Aperture) Aperture holes (or openings) in the center of the supply. They do not contain a black mark. The supply is sensed using the holes. 2-2 System Administrator’s Guide Classification: Avery Dennison - Public... -
Page 13: Setting The Ribbon
No more than 20% of the supply should have print (black coverage). ♦ CAUT ION: The high energy ribbon may break or stick to the supply when more than 20% of the supply contains print. Classification: Avery Dennison – Public Setting Supply Options 2-3... -
Page 14: Setting The Speed
Cutter & Stacker supported supported not supported not supported Peel Mode supported supported not supported not supported Bar Code supported not recommended not recommended Verifier recommended 2-4 System Administrator’s Guide Classification: Avery Dennison - Public... -
Page 15: Setting The Feed Mode
The last tag in the batch is queued to be cut once it reaches the cutter; however, there may be printed tags left between the printhead and the cutter. The user must send another batch to feed the last tag out far enough to be cut. Classification: Avery Dennison – Public Setting Supply Options 2-5... -
Page 16: Cut Modes With Rf Id
This menu includes selections to change the print, supply, margin, cut, dispense, and backfeed distance positions. See the following graphic for a representation of the following adjustments: dispense position, backfeed distance, supply position, print position, and margin position. 2-6 System Administrator’s Guide Classification: Avery Dennison - Public... -
Page 17: Setting The Print Position
Select Decrease the setting. Moves the print down. Increase the setting. Moves the print up. Press 1 to toggle the amount (1, 10, or 100). Classification: Avery Dennison – Public Setting Supply Options 2-7... -
Page 18: Setting The Margin Position
This function adjusts the amount to advance each label to allow for easy removal from the printer. Select Decrease the setting. Moves the print down. Increase the setting. Moves the print up. Press 1 to toggle the amount (1, 10, or 100). 2-8 System Administrator’s Guide Classification: Avery Dennison - Public... -
Page 19: Setting The Backfeed Distance
Bat ch S ep ar ator Select Disable batch separators. Do not use batch separators with continuous (non-indexed) supply. Enable batch separators. Long Enable double-length (two tags) batch separators. Classification: Avery Dennison – Public Setting Supply Options 2-9... -
Page 20: Using Skip Index
Printing is stopped after the selected number of Overstrike/Continue 4x overstrike patterns have printed. Press CANCEL to clear the Overstrike/Continue 5x error and continue printing. Do not use the overstrike label. 2-10 System Administrator’s Guide Classification: Avery Dennison - Public... -
Page 21: Using Rotate Image
Make sure the loaded supply matches the image length and width or the rotated image does not print correctly. Select Print the image without rotation. Rotate the image 180° before printing. Classification: Avery Dennison – Public Setting Supply Options 2-11... -
Page 22: Setting The Maximum Calibration Length
Select Decrease the setting. Shortens the maximum calibration length. Increase the setting. Increases the maximum calibration length. Press 1 to toggle the amount (1, 10, or 100). 2-12 System Administrator’s Guide Classification: Avery Dennison - Public... -
Page 23: Setting The Print Contrast
An in spec bar code may not look as good as one that is too dark, but it has the highest scan rate. Dar k I N S PEC Lig ht Classification: Avery Dennison – Public Setting Supply Options 2-13... - Page 24 2-14 System Administrator’s Guide Classification: Avery Dennison - Public...
-
Page 25: Setting Communications
Communicate at 9600 bits per second. 19200 Communicate at 19200 bits per second. 38400 Communicate at 38400 bits per second. 57600 Communicate at 57600 bits per second. 115200 Communicate at 115200 bits per second. Classification: Avery Dennison – Public Setting Communications 3-1... -
Page 26: Setting The Word Length
Set flow control to DTR (Data Terminal Ready). This is the most common setting. Use it for PC computers (unless you have XON/XOFF software). Set flow control to CTS (Clear to Send). 3-2 System Administrator’s Guide Classification: Avery Dennison - Public... -
Page 27: Resetting To Default Values
Download the latest drivers and follow the on-screen prompts as necessary. The updated driver appears in the Ports list. When connected via USB, the printer’s display includes the USB status icon: Classification: Avery Dennison – Public Setting Communications 3-3... - Page 28 3-4 System Administrator’s Guide Classification: Avery Dennison - Public...
-
Page 29: Setting Ethernet Communications
With version 1.6 or greater firmware, the Ethernet and wireless interfaces share the same MAC Address. When using DHCP, Ethernet and wireless will receive the same IP address from a DHCP server. Classification: Avery Dennison – Public Setting Ethernet Communications 4-1... -
Page 30: Entering The Ip Address
If you enter a series of digits greater than 255 for any segment of the IP address and press SET, the printer does not save the setting. Correct the setting, then press SET. 4-2 System Administrator’s Guide Classification: Avery Dennison - Public... -
Page 31: Setting The Boot Method
Depending on your printer’s boot method, the IP address may be automatically assigned when you turn on the printer. The new IP address may not be the same as the previous one. Classification: Avery Dennison – Public Setting Ethernet Communications 4-3... -
Page 32: Factory Defaults
PXR_xxxxxx (xxxxxx = last six digits of the MAC address.) Encryption Mode Disabled Authentication Type Open System Authentication Protocol Regulatory Domain United States May keep previous v alues based on net work configuration. 4-4 System Administrator’s Guide Classification: Avery Dennison - Public... -
Page 33: Setting Wireless Communications
To improve the signal strength, try moving the printer closer to the access point and away from other radio devices such as Bluetooth wireless devices, microwave ovens, or 2.4- gigahertz cordless phones. Classification: Avery Dennison – Public Setting Wireless Communications 5-1... -
Page 34: Entering The Ssid
11 - 13 Sets the roam threshold to 14 decibels. 14 - 15 Sets the roam threshold to 15 decibels. This setting is helpful when the printer is on a Mobile Workstation. 5-2 System Administrator’s Guide Classification: Avery Dennison - Public... -
Page 35: Setting Defaults
Ignore BchCtl Disable/Enable Disable Error Retry Disable/Enable Enable Adjust Length -30 to 30 Sleep Delay 0 to 240 LCD Contrast 1 to 9 Ignore Fmt #s Disable/Enable Disable Temp G. Buffer Disable/Enable Disable Classification: Avery Dennison – Public Setting Defaults 6-1... -
Page 36: Setting The Language
Displays prompts in Danish. Nederlands Displays prompts in Dutch. Polski Displays prompts in Polish. Türkçe Displays prompts in Turkish. Displays prompts in Simplified Chinese. 简体中文 Français-CA Displays prompts in Canadian French. 6-2 System Administrator’s Guide Classification: Avery Dennison - Public... -
Page 37: Setting The Monetary Sign
$1.00 will print like this: $ .45 Print a secondary monetary sign. prices under $1.00 will print like this: 45¢ The secondary sign also applies to monetary signs other than the dollar. Classification: Avery Dennison – Public Setting Defaults 6-3... -
Page 38: Setting The Number Of Decimal Places
The setting for slashed zero applies when a format is downloaded. Changing the setting does not affect batches already in the printer. Select Do not print zeroes with a slash. Prints zeroes with a slash (Ø). 6-4 System Administrator’s Guide Classification: Avery Dennison - Public... -
Page 39: Setting The Power-Up Mode
Note: Before using flash storage, format flash memory. See “Formatting Flash Memory” for more information. Select Disabled Does not allow flash storage. Enabled Allows flash storage for formats, fonts, and graphics. Classification: Avery Dennison – Public Setting Defaults 6-5... -
Page 40: Setting The Image Error Mode
The printer ignores all online configuration packets. This is useful when you cannot change your host’s data or when you want the printer to operate as specified through the printer’s menu. 6-6 System Administrator’s Guide Classification: Avery Dennison - Public... -
Page 41: Setting The Batch Packet Mode (Ignore Bchctl)
Depending on your environment, you may not want jobs reprinted. Select The printer discards the job that was in process and does not reprint it. Disable The printer reprints the job that was in process when the error Enable occurred. Classification: Avery Dennison – Public Setting Defaults 6-7... -
Page 42: Adjusting The Image Length
Decrease the inactivity time before the printer goes into sleep mode. Increase the inactivity time before the printer goes into sleep mode. Press 1 to toggle the amount (1, 10, or 100). 6-8 System Administrator’s Guide Classification: Avery Dennison - Public... -
Page 43: Setting The Lcd Contrast
Batch 1 {B,1,...} format number (1) is ignored Prints with Batch 1 data applied to Format 2, because the printer ignores the format numbers and associates batches with only the preceding format. Classification: Avery Dennison – Public Setting Defaults 6-9... -
Page 44: Using A Temporary Graphics Buffer
Each line in a packet requires the same amount of memory. The smaller the format, ♦ the less memory required to save it. The flash memory options are in the table below. Option Choices Default Format Flash No/Yes Unused Flash Pack Flash No/Yes 6-10 System Administrator’s Guide Classification: Avery Dennison - Public... -
Page 45: Formatting Flash Memory
Packing flash memory permanently removes any deleted files from memory. Select Does not pack flash memory. Packs flash memory. Removes any deleted files from memory. Periodically select this option to "clean up" the printer's memory. Classification: Avery Dennison – Public Setting Defaults 6-11... -
Page 46: Using A Usb Thumb Drive
Turn on the printer. When you see “Ready”, insert the thumb drive into the USB port. Press MENU and use or to select the Setup menu, USB Drive. Press ENTER and use or and select the RFID Database file. Press SELECT. 6-12 System Administrator’s Guide Classification: Avery Dennison - Public... -
Page 47: Setting The Clock (Optional)
Files on the thumb drive must be saved into a folder named ADTP, not ADTP1 or the root. S e t t i n g t h e C l o c k ( O p t i o n a l ) The EF version (extended features) printer contains a real-time clock. -
Page 48: Setting The Hour
Sets the clock to June. Sets the clock to July. Sets the clock to August. Sets the clock to September. Sets the clock to October. Sets the clock to November. Sets the clock to December. 6-14 System Administrator’s Guide Classification: Avery Dennison - Public... -
Page 49: Setting The Year
ADTP-1MLI. W MS XML Use the XML interpreter. Refer to the XML Quick Reference on our Web site for more information. When you print test labels, the model number appears as ADTP-1X. Classification: Avery Dennison – Public Setting Defaults 6-15... - Page 50 6-16 System Administrator’s Guide Classification: Avery Dennison - Public...
-
Page 51: Using Scripts
If a script is loaded, you see the script name and version number. If a script is already loaded, see "Enabling a Script," to continue. If you need to download a script, see "Formatting Flash Memory" in Chapter 6. Classification: Avery Dennison – Public Using Scripts 7-1... -
Page 52: Downloading A Script
The flash memory used by the script is not available for other scripts or fonts until the flash memory is reformatted. However, when you format flash memory, you must resend the script and any downloaded fonts to the printer. 7-2 System Administrator’s Guide Classification: Avery Dennison - Public... -
Page 53: Enabling Status Polling
ADK script ignores an immediate command control character. Instead, the immediate command control character and immediate command are treated as data. Enable ADK script processes an immediate command control character and performs the requested immediate command. Classification: Avery Dennison – Public Using Scripts 7-3... - Page 54 7-4 System Administrator’s Guide Classification: Avery Dennison - Public...
-
Page 55: Setting Rfid Options
For example, some chips such as the Impinj Monza R6 can only be permalocked. Refer to the Packet Reference Manual for more information. Printing over the RFID inlay causes printing irregularity and may impact bar code print quality. Classification: Avery Dennison – Public Setting RFID Options 8-1... -
Page 56: What Is Pitch
M easur e th is di sta n ce in t h e g a p! di sta n ce Aper tur e M easur e th is di sta n ce 8-2 System Administrator’s Guide Classification: Avery Dennison - Public... -
Page 57: Getting Started With Rfid
Check the RFID Printer Setup Utility for database updates and downloads if your inlay type is not listed. Only inlays qualified for use in the ADTP1 printer are included in the database. See “Updating the RFID Inlay Database” for more information... -
Page 58: Selecting The Inlay
The printer may prompt to calibrate when exiting the Easy Setup menu. Press START to calibrate or STOP to cancel. The calibration prompt appears when the inlay type or the inlay distance changes. 8-4 System Administrator’s Guide Classification: Avery Dennison - Public... -
Page 59: Using The Advanced Setup Menu
External/Both Verify Power -15 to 23 Tag Verify Position 10 to 2000 Retry Encode Enable/Disable Enable Clear Data Yes/No Use the RFID Printer Setup Utility to calculate the required positional settings. Classification: Avery Dennison – Public Setting RFID Options 8-5... -
Page 60: Setting Stop-To-Encode Mode
RFID chip. information. The printer errors if it cannot program ♦ all the RFID data while the inlay is within the encode zone. 8-6 System Administrator’s Guide Classification: Avery Dennison - Public... -
Page 61: Enabling Singulate Mode
RF Field. If the Write power setting is too high, you may change the data that was programmed into adjacent RFID inlays. Press 1 to toggle the amount (1, 10, or 100). Classification: Avery Dennison – Public Setting RFID Options 8-7... -
Page 62: Setting The Read Power
Use the RFID Printer Setup Utility to determine the encode position then enter the value at the printer. Select Decrease the setting. Increase the setting. Press 1 to toggle the amount (1, 10, or 100). 8-8 System Administrator’s Guide Classification: Avery Dennison - Public... -
Page 63: Enabling Tag Saver
Fir st T I D Pos iti on 0, 0 poi nt Le ad in g E dg e Select Decrease the setting. Increase the setting. Press 1 to toggle the amount (1, 10, or 100). Classification: Avery Dennison – Public Setting RFID Options 8-9... -
Page 64: Setting The Start Encode Position
Star t E nc od e Po si tio n 0, 0 poi nt Le ad in g E dg e Select Decrease the setting. Increase the setting. Press 1 to toggle the amount (1, 10, or 100). 8-10 System Administrator’s Guide Classification: Avery Dennison - Public... -
Page 65: Setting The Encode Zone
Use the RFID Printer Setup Utility to determine the encode zone then enter the value at the printer. Select Decrease the setting. Increase the setting. Press 1 to toggle the amount (1, 10, or 100). Classification: Avery Dennison – Public Setting RFID Options 8-11... -
Page 66: Verifying The Rfid Inlay Data
Requires setting the tag verify position. Enabling internal or both may decrease throughput. A checkmark icon appears on the display for a half second once verification is successful. 8-12 System Administrator’s Guide Classification: Avery Dennison - Public... -
Page 67: Setting The Verify Power
Use the RFID Printer Setup Utility to determine the tag verify position then enter the value at the printer. Select Decrease the setting. Increase the setting. Press 1 to toggle the amount (1, 10, or 100). Classification: Avery Dennison – Public Setting RFID Options 8-13... -
Page 68: Enabling Retry Encode
1. Call Technical Support. For detailed descriptions of error messages, refer to the Packet Reference Manual. If an RFID error occurs when using stop-to-encode mode, call Technical Support. 8-14 System Administrator’s Guide Classification: Avery Dennison - Public... -
Page 69: Printing
Refer to the MonarchNet2 Operating Instructions for more information. The printer accepts files in MPCLII, MLI, or XML format. MPCLII files include configuration packets, formats, batches (print jobs), fonts, scripts, check digits, or graphics. Classification: Avery Dennison – Public Printing 9-1... -
Page 70: Online Printing
Print Now? Yes/No The printer prints the batch (print job). If you change the speed in offline mode, turn off the printer then turn it back on before the change takes effect. 9-2 System Administrator’s Guide Classification: Avery Dennison - Public... -
Page 71: Using Diagnostics
A password is required to access the diagnostic functions. Press Feed three times and then press Enter. The Service Diagnostics menu can only be accessed by a Service Representative; it requires a separate password. Classification: Avery Dennison – Public Using Diagnostics 10-1... -
Page 72: Checking The Versions
Press or to display the readings. The length of the loaded supply in dots. Should always be greater than Min listing. Did the sense mark pass the detection test? Y or N 10-2 System Administrator’s Guide Classification: Avery Dennison - Public... -
Page 73: Using A Password
Scripts menus. Enter the password: press FEED three times then ENTER. When password protection is enabled, a password is not required to clear batches, but it is required to clear formats, graphics, and fonts. Classification: Avery Dennison – Public Using Diagnostics 10-3... - Page 74 10-4 System Administrator’s Guide Classification: Avery Dennison - Public...
-
Page 75: Troubleshooting
Depending on the facility’s network, you may need to use a wired connection to initially configure the wireless printer. The ADTP1 printer has different IP addresses based on connection type: one for wired (Ethernet) and a different one for wireless connections. The 169.x.x.x IP address is a default address. - Page 76 From the SNMP tab, change the System Name (printer’s name) if necessary. Click Save Changes. Any changes made on this screen or other screens do not take effect until you click Save/Reboot. This process takes a few minutes. 11-2 System Administrator’s Guide Classification: Avery Dennison - Public...
- Page 77 15. Once an IP Address appears, Web back into the printer. Type access for the password and click Submit. To verify the connection, click Virtual Panel Display, and press Feed. The printer should feed a label. Classification: Avery Dennison – Public Troubleshooting 11-3...
-
Page 78: Using The Network Console Packet
“” is the default. Each command must be on a separate line. The maximum number of characters per command is 100. Refer to the complete list of console commands in the ADTP1 MonarchNet2 Operating Instructions for more information. The maximum number of commands per packet is twenty five (25). - Page 79 C,"set en inap [pap]" | Sets the password for 802.11b/g EAP C,"set en pw <mypsword>" | mypsword authentication to C,"init" | Saves the settings and initializes the printer Exits console mode C,"exit" | } Classification: Avery Dennison – Public Troubleshooting 11-5...
-
Page 80: Adjusting The Printer To Remove Ribbon Wrinkle
Adjust the ♦ ribbon’s tension. Af ter ri bb on a dj ust m en ts , no r ib bo n wr in kl e 11-6 System Administrator’s Guide Classification: Avery Dennison - Public... -
Page 81: About The Ribbon's Take-Up Reel
About t he Ribbon’s T ake-up Reel Rotate the take-up reel until the ribbon is tight under the printhead and no wrinkles are visible. Rib bo n T a ke -u p R ee l Classification: Avery Dennison – Public Troubleshooting 11-7... -
Page 82: Setting The Supply Guides
Tuck the supply under the nibs and die cut sensor. Adjust the supply guides so they barely touch the supply. Turn the supply lever up to lock it in place. 11-8 System Administrator’s Guide Classification: Avery Dennison - Public... -
Page 83: Adjusting The Ribbon Tension
Hold the ribbon take-up guide and tighten the screw. If wrinkles occur again, repeat the adjustment. If print quality does not improve, a service adjustment may be necessary. Contact Technical Support. Classification: Avery Dennison – Public Troubleshooting 11-9... - Page 84 11-10 System Administrator’s Guide Classification: Avery Dennison - Public...
-
Page 85: Specifications & Accessories
S P E C I F I C A T I O N S & A C C E S S O R I E S For printer and supply specifications, refer to the Operator’s Handbook. Classification: Avery Dennison – Public Specifications & Accessories A-1... -
Page 86: Supplies (Media)
RCV 3 3 RCV TX 2 2 TX CTS 6 6 CTS RTS 4 4 RTS DTR 8 8 DTR DSR 7 7 DSR +5V 9 9 +5V SGND 5 5 SGND A-2 System Administrator’s Guide Classification: Avery Dennison - Public... -
Page 87: Accessories
Shipping carton (1) 70107 Foam Support, Horizontal (1) 70102 Bottom Pad (1) 70108 Foam Support, Vertical (1) 70103 Top Pad (1) 70109 Angleboard (4) 70110 Scored Insert (1) 00054301 Poly Bag (1) Classification: Avery Dennison – Public Specifications & Accessories A-3... - Page 88 A-4 System Administrator’s Guide Classification: Avery Dennison - Public...
-
Page 89: Menu Structure
Neder- Error Image lands Retry Verify Max. Cal. Adjust Verify Polski Length Length Power Sleep Türkçe Delay Verify Pos Retry 简体中文 Contrast Encode Français- Ignore Clear Fmt #s Data Temp G. Buffer Classification: Avery Dennison – Public Menu Structure B-1... - Page 90 B-2 System Administrator’s Guide Classification: Avery Dennison - Public...
-
Page 91: Glossary
The print job is also called a "batch." offline mode The printer does not need a connection to a host to print. online mode The printer requires a connection between a network/computer to print. Classification: Avery Dennison – Public Glossary G-1... - Page 92 The combination of the embedded programmable chip with an antenna on some type of media (film, paper, etc.). write power Increase or decreases the strength of the RF field emitted by the printer’s antenna to program the inlay. G-2 System Administrator’s Guide Classification: Avery Dennison - Public...
- Page 94 Avery Dennison Printer Systems Division, 170 Monarch Lane, Miamisburg, OH 45342 http://rbis.averydennison.com/ADTP1 Printer Documentation...
Need help?
Do you have a question about the ADTP1 and is the answer not in the manual?
Questions and answers