Avery Dennison AP5.4 User Manual
Hide thumbs
Also See for AP5.4:
- Service manual (21 pages) ,
- User & service manual (16 pages) ,
- User and service manual (12 pages)
Table of Contents
Advertisement
05/10 Version 5.05-00
Commissioning and Operation
Installation ..................................................... 2
Unpacking and setting up the printer ........ 2
Checking the shipment .............................. 3
Product description ....................................... 5
AP 5.4/5.6 dispenser ................................. 7
Functionality of AP 5.4/5.6 dispenser ........ 9
Ports and connections ............................. 10
Warning signs on printer ......................... 12
Operation panel ....................................... 13
Operating modes ..................................... 14
USER MANUAL
AP5.4 - AP5.6
Main operating steps ...................................16
Connecting the printer .............................16
Configuring the data interface ..................17
(De)activating the internal rewinder .........17
(De)activating the dispensing edge .........19
Setting the dispenser ...............................19
Operating in offline mode .........................20
Online operation ......................................21
Creating a print job ..................................22
Transferring a print job .............................23
Using SD cards ........................................25
Setting the real-time clock .......................26
Advertisement
Table of Contents

Subscribe to Our Youtube Channel
Related Manuals for Avery Dennison AP5.4


Summary of Contents for Avery Dennison AP5.4
-
Page 1: Table Of Contents
05/10 Version 5.05-00 USER MANUAL AP5.4 – AP5.6 Commissioning and Operation Installation ............. 2 Main operating steps ........16 Unpacking and setting up the printer ..2 Connecting the printer ......16 Checking the shipment ......3 Configuring the data interface ....17 Product description ........ -
Page 2: Installation
05/10 Version 5.05-00 USER MANUAL Commissioning and Operation AP5.4 – AP5.6 Installation Unpacking and setting up the printer WARNING! Lethal hazard from mains power! Only use the device in enclosed rooms under normal ambient conditions (office atmosphere)! CAUTION! To avoid damage to the printer, observe the following: Do not lift the printer using the plastic components on the front and rear. -
Page 3: Checking The Shipment
05/10 Version 5.05-00 USER MANUAL Commissioning and Operation AP5.4 – AP5.6 Checking the shipment AP 5.4/5.6 “basic” Delivery: AP 5.4/5.6 “peripheral” • Printer AP 5.4/5.6 including 2 pairs of core adapters [2B] and one paper core [2A] for rewinding thermotransfer ribbon. - Page 4 05/10 Version 5.05-00 USER MANUAL Commissioning and Operation AP5.4 – AP5.6 AP 5.4/5.6 “peripheral” If you have ordered a AP 5.4/5.6 “peripheral” printer with an optional cutter [3], with cutter the cutter will be provided in a special carrier at the top of the box.
-
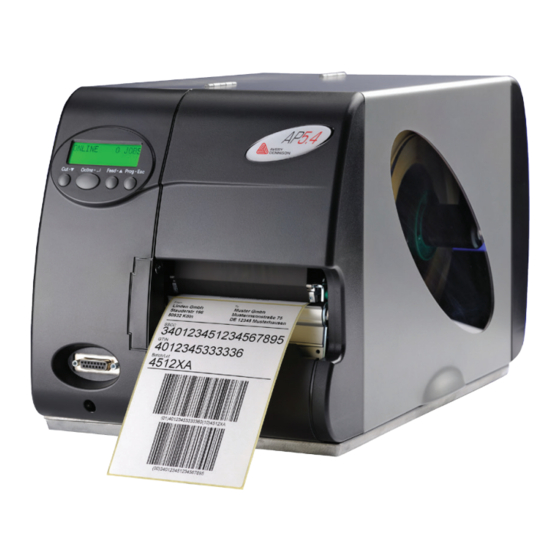
Page 5: Product Description
05/10 Version 5.05-00 USER MANUAL Commissioning and Operation AP5.4 – AP5.6 Product description Operating controls on AP 5.4/5.6 “basic” and “peripheral” [5] Outside view of AP 5.4/5.6 “peripheral”. A Control panel LCD screen; 4 buttons; displays operating status of printer; allows param- eter menu settings. - Page 6 05/10 Version 5.05-00 USER MANUAL Commissioning and Operation AP5.4 – AP5.6 [6] Operating controls of AP 5.4/5.6. A Ribbon unwinding mandrel: Holds the new ribbon roll B Ribbon winding mandrel Holds the cardboard core that rewinds the spent ribbon. C Connection flange for additional devices You can fasten either a cutter or rewinder (AP 5.4 only) here.
-
Page 7: Operating Controls On Ap 5.4/5.6 Dispenser
05/10 Version 5.05-00 USER MANUAL Commissioning and Operation AP5.4 – AP5.6 Operating controls on AP 5.4/5.6 dispenser AP 5.4/5.6 “basic” or “peripheral” dispenser [7] Additional operating controls on AP 5.4/5.6 dispenser. A Dispensing edge: This is where the labels are separated from the backing paper. - Page 8 05/10 Version 5.05-00 USER MANUAL Commissioning and Operation AP5.4 – AP5.6 AP 5.4/5.6 “basic” or “peripheral” dispenser in rewinder mode [8] Additional operating controls of AP 5.4/5.6 dispenser in rewinding mode. A Baffle plate: Deflects the printed labels without dispensing any of them.
-
Page 9: Functionality Of Ap 5.4/5.6 Dispenser
05/10 Version 5.05-00 USER MANUAL Commissioning and Operation AP5.4 – AP5.6 Functionality of AP 5.4/5.6 dispenser The AP 5.4/5.6 dispenser allows freshly printed labels to be dispensed (via the dispensing edge) or rewound in the printer enclosure (via the defelector). -
Page 10: Ports And Connections
05/10 Version 5.05-00 USER MANUAL Commissioning and Operation AP5.4 – AP5.6 Ports and connections CAUTION! Using poor quality auxiliary equipment can damage the printer. Only connect the printer to devices that fulfil the SELV (safety extra-low voltage) circuit requirements in accordance with EN 60950. - Page 11 05/10 Version 5.05-00 USER MANUAL Commissioning and Operation AP5.4 – AP5.6 C Memory card slot For SD cards where you can store fonts, logos, graphics, etc. D Serial port (option): RS232 or RS422/485 on optionally available I/O board E USB port (host) For USB sticks, keyboards, etc.
-
Page 12: Warning Signs On Printer
05/10 Version 5.05-00 USER MANUAL Commissioning and Operation AP5.4 – AP5.6 Warning signs on printer WARNING! If warning signs are missing on the printer, possible hazards may not be no- ticed in time. Do not remove warning stickers. Replace any warning stickers if they become lost or illegible. -
Page 13: Operation Panel
05/10 Version 5.05-00 USER MANUAL Commissioning and Operation AP5.4 – AP5.6 Operation panel [11] Operation panel of AP 5.4/5.6. A Display The display contains two rows of 32 digits for displaying operating modes, parameters, values, statuses and messages. Users can adjust the display language so that the text appears in their native language. -
Page 14: Operating Modes
05/10 Version 5.05-00 USER MANUAL Commissioning and Operation AP5.4 – AP5.6 E Prog button – Offline: Opens Parameters menu – Parameter menu: Moves back one step in Parameters menu or quits the menu. For more functions and more details, see •... - Page 15 05/10 Version 5.05-00 USER MANUAL Commissioning and Operation AP5.4 – AP5.6 Message mode Status messages are used to indicate errors or certain operating statuses. When status messages appear, the background colour of the display becomes red. When a status message is present, the printer waits until the error has been eliminated and/or acknowledged.
-
Page 16: Main Operating Steps
05/10 Version 5.05-00 USER MANUAL Commissioning and Operation AP5.4 – AP5.6 Main operating steps Connecting the printer WARNING! This unit operates at mains voltage! Contacting electrically live components can cause potentially lethal electrical shocks and burns. Make sure that the machine has been switched off before connecting the mains cable. -
Page 17: Configuring The Data Interface
05/10 Version 5.05-00 USER MANUAL Commissioning and Operation AP5.4 – AP5.6 Configuring the data interface The AP 5.4/5.6 has been pre-configured at our factory for data transmission through the USB port. Alternatively, printer data can also be transmitted via RS232, RS422/485 (only with optional I/O board), USB or Ethernet port. - Page 18 05/10 Version 5.05-00 USER MANUAL Commissioning and Operation AP5.4 – AP5.6 During the initialisation, the printer attempts to tighten the label strip. Deactivate SYSTEM PARAMETER > Perip. device to “None”. Possible fault The following error message may appear briefly after activating the internal re-...
-
Page 19: (De)Activating The Dispensing Edge
05/10 Version 5.05-00 USER MANUAL Commissioning and Operation AP5.4 – AP5.6 (De)activating the dispensing edge Only applies to AP 5.4/5.6 dispensers with dispensing edge installed! Activating SYSTEM PARAMETER > Periph. device to “Dispenser”. DISPENSER PARA The printer restarts. Afterwards, an additional menu... -
Page 20: Operating In Offline Mode
05/10 Version 5.05-00 USER MANUAL Commissioning and Operation AP5.4 – AP5.6 Label length (PRINT PARAMETERS > Material length If very short labels are to be printed < 40 mm set to < 40 mm), the printer is automatically initialised for the material before printing. -
Page 21: Online Operation
05/10 Version 5.05-00 USER MANUAL Commissioning and Operation AP5.4 – AP5.6 Online operation • Switching to offline mode: ONLINE x JOBS OFFLINE x JOBS Online • Adjusting the print contrast: press Feed button to increase, press Cut but- ton to decrease the print contrast... -
Page 22: Creating A Print Job
05/10 Version 5.05-00 USER MANUAL Commissioning and Operation AP5.4 – AP5.6 Creating a print job There are basically two ways of generating a print job: You can use a label lay- out program together with a Windows printer driver or create a simple text file containing printer commands. -
Page 23: Transferring A Print Job
05/10 Version 5.05-00 USER MANUAL Commissioning and Operation AP5.4 – AP5.6 Command file Enter a sequence of printer commands into a text file and send this file to the printer. To do this, you require a simple text editor and the copy command in MS-DOS. - Page 24 05/10 Version 5.05-00 USER MANUAL Commissioning and Operation AP5.4 – AP5.6 Tips on transferring data via USB or Ethernet: The procedure described here does not apply to Windows 98, Windows ME or Windows NT 4.0. The share name must comply with MS-DOS conventions (max. 8 charac-...
-
Page 25: Using Sd Cards
05/10 Version 5.05-00 USER MANUAL Commissioning and Operation AP5.4 – AP5.6 Using SD cards CAUTION! To prevent malfunctions, observe the following. Only use SD cards that have been approved by the manufacturer. Only insert or remove SD cards after the printer has been switched off. -
Page 26: Setting The Real-Time Clock
05/10 Version 5.05-00 USER MANUAL Commissioning and Operation AP5.4 – AP5.6 Removing the card: 1. Insert the card into the slot until it stops [15B] and release it. The card springs back out of the card slot [15A]. 2. Remove the card fully from the slot.
Need help?
Do you have a question about the AP5.4 and is the answer not in the manual?
Questions and answers
when printing labels the last one printed doesn't finish with the gap above the cutter bar, Instead it leaves last label a few mm back from edge. How can I adjust it so that last label finishes printing with label gap above cutter?
To adjust the Avery Dennison AP5.4 printer so that the last label finishes printing with the gap above the cutter bar, follow these steps:
1. Check Software Settings: Ensure the correct sensor type is selected (gap sensor for gap labels, black mark sensor for black mark stock).
2. Verify Label Dimensions: Confirm that the label height in the software matches the actual label height.
3. Adjust Vertical Gap Setting: For gap labels, set the vertical gap to about 0.120 inches.
4. Position the Paper Sensor: For gap labels, the sensor should detect the gap, usually centered. For black mark stock, ensure the sensor is aligned with the black mark.
5. Use Threshold Setup: If using preprinted labels, run the printer’s threshold setup and select the appropriate sensor setting (e.g., "preprinted").
6. Fine-Tune Feed Settings: Adjust the feed or tear-off position in the printer menu or software to align the gap with the cutter bar after printing.
These steps help ensure proper label alignment relative to the cutter bar.
This answer is automatically generated