Avery Dennison AP 4.4 User Manual
Hide thumbs
Also See for AP 4.4:
- User manual (26 pages) ,
- User & service manual (11 pages) ,
- User manual (23 pages)
Table of Contents
Advertisement
05/04 Rev. 1.2-03
Commissioning & Operation
Installing the Printer ...................................... 2
Unpacking the printer ................................ 2
Carrying the Printer ................................... 2
Check the Delivery .................................... 3
Removing the Transportation Lock ........... 5
Product Description ....................................... 6
Operating Parts AP 4.4 / AP 5.4 basic ....... 6
Rewinder ................................................... 7
nal Rewinder ............................................. 8
Arrangement of the Connections ............. 9
Warning Signs at the Maschine .............. 10
Control Panel (Display) ........................... 11
Operating State ....................................... 12
USER MANUAL
AP4.4 - AP5.4
Basic Operating Procedures .......................14
Connecting the Printer .............................14
Setting the Interface .................................15
Activate/Deactivate Dispenser .................16
Operation in Offline Mode ........................17
Operation in Online Mode ........................19
Creating a Print job ..................................19
Transferring a Print Job ...........................20
Using the CF Cards .................................21
Setting the Realtime Clock ......................22
Reading out real time with Easy-Plug ......22
Index ............................................................23
Advertisement
Table of Contents

Related Manuals for Avery Dennison AP 4.4


Summary of Contents for Avery Dennison AP 4.4
-
Page 1: Table Of Contents
Removing the Transportation Lock ... 5 Activate/Deactivate Dispenser ....16 Product Description ........6 Operation in Offline Mode ......17 Operating Parts AP 4.4 / AP 5.4 basic ..6 Operation in Online Mode ......19 Operating parts AP 5.4 Dispenser / Internal Creating a Print job ........19 Rewinder ........... -
Page 2: Installing The Printer
4. Place the printer on an even surface. Carrying the Printer One person can easily carry the AP 4.4/5.4 because it only weighs 14 kg. To carry the printer, grip the baseplate from the front and rear (see Fig. 1). -
Page 3: Check The Delivery
AP4.4 – AP5.4 Check the Delivery You are bound to want to start using your new AP 4.4/5.4 as soon as possi- ble. However, we would ask you to take a few minutes to check the following: Please ensure that the printer has not been damaged in transit. If the pak- kaging has been dented or torn, please check the contents particularly care- fully for damage that may have resulted from transportation. - Page 4 05/04 Rev. 1.2-03 USER MANUAL Setup & Operation AP4.4 – AP5.4 Tool which is used to replace the print roller and to mount a dispensing edge. • AP 5.4 with Cut- Cutter (Fig. 4) Only if you ordered the “AP 5.4 peripheral with cutter”. Fig.
-
Page 5: Removing The Transportation Lock
CAUTION! Do not use a knife to cut the cable tie! The printhead could be damaged by the resulting force when splitting the tie! Fig. 7: AP 4.4/5.4 transportation lock (1). AP 5.4 Dispen- Remove the connector from its transport position at the printer bottom and... -
Page 6: Product Description
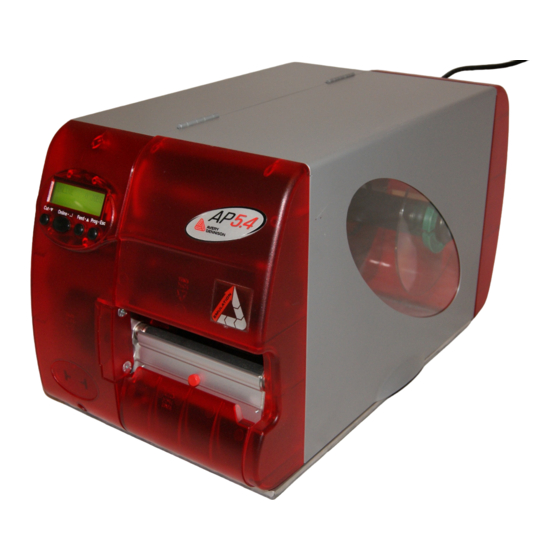
05/04 Rev. 1.2-03 USER MANUAL Setup & Operation AP4.4 – AP5.4 Product Description Operating Parts AP 4.4 / AP 5.4 basic Front cover Open to insert material and foil. Control panel LCD graphics display, 4 buttons; displays printer operating status, enables parameter menu settings. -
Page 7: Operating Parts Ap 5.4 Dispenser / Internal Rewinder
05/04 Rev. 1.2-03 USER MANUAL Setup & Operation AP4.4 – AP5.4 Operating parts AP 5.4 Dispenser / Internal Rewinder AP 5.4 Dispensing edge Dispenser Peels the labels off the backing paper. Connector Connection of the dispensing edge sensor. Dispensing roller Holds the material web tight over the dispensing edge. -
Page 8: Modes Of Operation Ap 5.4 Dispenser / Internal Rewinder
05/04 Rev. 1.2-03 USER MANUAL Setup & Operation AP4.4 – AP5.4 Modes of Operation AP 5.4 Dispenser / Internal Rewinder With the AP 5.4 featuring an internal rewinding module, a label can either be dispensed (using the dispensing edge) or rewound into the printer housing (using the deflector) after it is printed. -
Page 9: Arrangement Of The Connections
05/04 Rev. 1.2-03 USER MANUAL Setup & Operation AP4.4 – AP5.4 Arrangement of the Connections CAUTION! - Additional equipment of poor quality can damage the printer! Connect only devices that fulfill SELV circuit requirements to EN 60950. Connect only original accessories. For information about using the network connection, please read topic section Advanced... -
Page 10: Warning Signs At The Maschine
Keep hands clear of rollers. A5346 Fig. 13: Warning signs at the AP 4.4/5.4. The warning sign pictured in fig. 13 above warns of the risk of getting hands, fingers, loose clothing, jewellery, etc. drawn in between rotating parts of the printer (part no. -
Page 11: Control Panel (Display)
05/04 Rev. 1.2-03 USER MANUAL Setup & Operation AP4.4 – AP5.4 Control Panel (Display) Display Cut button Online button Feed button Prog button Fig. 14: Control panel for the AP 5.4. Display With 32 digits and two lines, the display shows the operating conditions (mo- di) for parameters, values, status and errors. -
Page 12: Operating State
05/04 Rev. 1.2-03 USER MANUAL Setup & Operation AP4.4 – AP5.4 For more detailed descriptions of the button functions, please see – sections Operation in Offline Mode on page 17 and Operation in Online Mode on page 19 – or “Info-Printouts and Parameters”. Operating State Offline Mode Display... - Page 13 05/04 Rev. 1.2-03 USER MANUAL Setup & Operation AP4.4 – AP5.4 More information on message reports and a detailed list of all messages can be found under “Status Reports”. Standalone (For AP 5.4 only) Mode In standalone mode, the print jobs are not transmitted via a data cable, but are stored on a CF-Card.
-
Page 14: Basic Operating Procedures
05/04 Rev. 1.2-03 USER MANUAL Setup & Operation AP4.4 – AP5.4 Basic Operating Procedures Connecting the Printer WARNING! Printer is driven by mains voltage! Touching of live parts can cause life- threatening body currents and burns! Make sure, that the machine is switched off, before connecting the power cable. -
Page 15: Setting The Interface
AP4.4 – AP5.4 Setting the Interface According to the factory settings, the AP 4.4/5.4 is set for data transfer via the Centronics interface. Print data can also alternately be transferred via the RS232, USB or Ethernet interface (AP 5.4 only). -
Page 16: Activate/Deactivate Dispenser
05/04 Rev. 1.2-03 USER MANUAL Setup & Operation AP4.4 – AP5.4 Possible causes: – No printing material has been inserted, or the material’s end was not fixed to the rewinder. Attach the end to the rewinder and press the Online button. –... -
Page 17: Operation In Offline Mode
05/04 Rev. 1.2-03 USER MANUAL Setup & Operation AP4.4 – AP5.4 • Configure Application A: Dispenser The label is dispensed so that a small portion still sticks to the backing paper above the dispensing edge. After the dispensed label has been removed by hand, the next label is immediately printed and dispensed. -
Page 18: System Start
05/04 Rev. 1.2-03 USER MANUAL Setup & Operation AP4.4 – AP5.4 Pressed Display after Display afterwards switching on button(s) Online ONLINE 0 JOBS OFFLINE 0 JOBS Online Feed System start... Reset Feed Material feed OFFLINE 0 JOBS feeding... Online OFFLINE 0 JOBS Material feed backwards feeding... -
Page 19: Operation In Online Mode
„Press feed“. Creating a Print job Essentially, there are two ways of creating a print job: Either by using the AP 4.4/5.4 printer driver for Windows or by creating a text file with print com- mands. •... -
Page 20: Transferring A Print Job
05/04 Rev. 1.2-03 USER MANUAL Setup & Operation AP4.4 – AP5.4 However, functionality is strongly dependent on the choice of software. Spe- cial label layout programs are best suited, e.g. Jetmark 2000 or WinLabel. You can find printer drivers for each Windows version –... -
Page 21: Using The Cf Cards
Xtra speed professional 32MB Xtra speed professional 64MB Xtra speed professional 128MB Tab. 9: For the use with AP 4.4/5.4 approved CF cards. a) Capacity detected by the printer electronic. More than 128 MB card memory is possible but not recommended, be- cause the printer electronic can not use more than 128 MB memory in a rea- sonable way. -
Page 22: Setting The Realtime Clock
05/04 Rev. 1.2-03 USER MANUAL Setup & Operation AP4.4 – AP5.4 Inserting a 1. Switch off the printer. Wait for 5 seconds. CF card 2. Insert the CompactFlash card completely into the card insert. The wide guide notch should face upwards (see Fig. 17). Insert the CF card into the designated slot until the release button (1) is pushed outwards. -
Page 23: Index
05/04 Rev. 1.2-03 USER MANUAL Commissioning & Operation AP4.4 – AP5.4 Index Carrying the Printer Offline Mode CF Cards, Using the Online Mode CompactFlash Cards Operating Parts Configure Dispenser Connections, Arrangement of Product Description Control Panel Creating a Print Task Realtime Clock Delivery Setting the Interface...
Need help?
Do you have a question about the AP 4.4 and is the answer not in the manual?
Questions and answers