Avery Dennison ADTP-1 Operator's Handbook Manual
Hide thumbs
Also See for ADTP-1:
- Reference manual (224 pages) ,
- System administrator manual (94 pages) ,
- Instructions (4 pages)

Related Manuals for Avery Dennison ADTP-1


Summary of Contents for Avery Dennison ADTP-1
- Page 1 OPERATOR’S HANDBOOK TABLETOP PRINTER Monarch Products ® TCADTP1OH Rev. AA 7/15 © 2015 Avery Dennison Corp. All rights reserved.
- Page 2 Each product and program carries a respective written warranty, the only warranty on which the customer can rely. Avery Dennison Corp. reserves the right to make changes in the product, the programs, and their availability at any time and without notice. Although Avery Dennison Corp.
-
Page 3: Table Of Contents
T A B L E O F C O N T E N T S GETTING STARTED ........................1-1 Audience ..........................1-1 Printer Overview ........................1-1 Connecting the Power Cable ....................1-3 Establishing Communications....................1-3 Using the Control Panel ......................1-4 Selecting a Function ...................... - Page 4 SPECIFICATIONS ........................A-1 Printer ..........................A-1 Supplies (Media) ........................A-1 Ribbon ..........................A-2 ii Operator’s Handbook...
-
Page 5: Getting Started
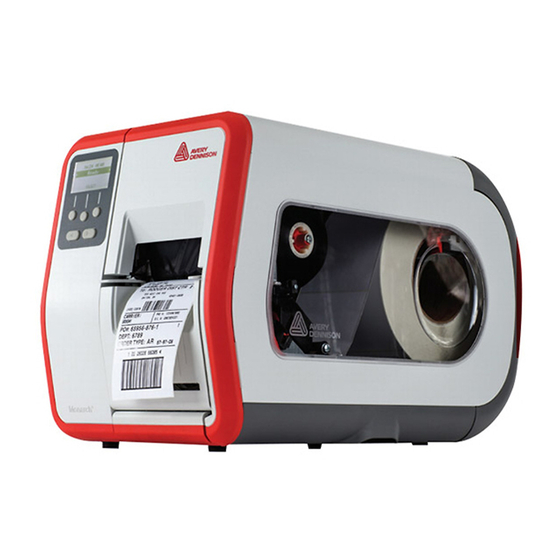
G E T T I N G S T A R T E D The Avery Dennison® Monarch® Tabletop Printer 1 prints on thermal transfer (ribbon) and thermal direct labels or tags. The printer prints labels continuously (in one strip) or on-demand (one label at a time). You can print on aperture, die cut, black mark, or continuous (non-indexed) supplies. - Page 6 User touch parts are red. Roll Guides Die Cut Sensor Supply Holder Printhead Liner Take-up Reel (optional) Deflector Tab Tension Bar Printhead Tab Supply Guides Ribbon Guides Supply Lever Ribbon Reel Printhead Latch Ribbon Take-up Reel Platen Roller Printhead Release 1-2 Operator's Handbook...
-
Page 7: Connecting The Power Cable
C o n n e c t i n g t h e P o w e r C a b l e The power supply automatically switches between 115V or 230V. No operator settings are required. 1. Plug the power cable into the connection located on the back of the printer. -
Page 8: Using The Control Panel
For Ethernet Communications: If you are using Ethernet communications, you can monitor the status using the LEDs as shown: Green LED Top LED: Blinking network activity/receiving data green Orange LED Bottom LED: Orange a connection is present U s i n g t h e C o n t r o l P a n e l The control panel has an LCD display and five buttons. -
Page 9: Selecting The Printer's Language
Selecting the Printer’s Language To change the printer’s menu language: 1. Press MENU. 2. Press or until you see SETUP. Press SELECT. 3. Press or until you see LANGUAGE. Press CHANGE. 4. Press or until you see the language you need, then press SET. 5. - Page 10 1-6 Operator's Handbook...
-
Page 11: Loading Supplies
L O A D I N G S U P P L I E S This chapter describes how to load: ♦ a roll of labels, tags, or string tags ♦ fan-fold supply ♦ peel mode supplies with and without internal liner take-up. Ask your System Administrator which type of supply to use: Thermal Direct heat activated supplies that do not use a ribbon for printing... -
Page 12: Loading Labels Or Tags
L o a d i n g L a b e l s o r T a g s 1. Open the cover. 2. Turn the printhead latch to unlock the printhead. 3. Lift the printhead assembly until it locks into place. 2-2 Operator's Handbook... - Page 13 4. Adjust the roll guides to fit your supply roll. The supply roll must move freely. 5. Place rolled supply on the supply holder. Label supply can unroll from the top or the bottom; tag supply should unroll from the bottom only (tag rolls are wound face in). 6.
-
Page 14: For String Tags
For String Tags Shake the roll of string tags down to untangle the roll. Make sure the strings face out. For Fan-Fold Labels Place a fan-fold supply stack behind the printer, label side facing up. Lay the label strip over the supply holder. 2-4 Operator's Handbook... - Page 15 7. Turn the supply lever to unlock the supply guides. Suppl y Leve r unlocked (do w n) Suppl y Leve r locked (up ) 8. Feed the supply through the supply path so a few inches extend past the front of the printer.
- Page 16 11. Close the printhead assembly until you hear it click into place. 12. Close the cover. 13. Press FEED to position the supply under the printhead. You may need to adjust the printhead pressure dials depending on the width of your supply.
-
Page 17: Loading Labels For Peel Mode (Optional)
Loading Labels for Peel Mode (Optional) In peel mode, the printer separates the liner from the label. This is known as on-demand mode printing. The next label is not printed until the completed one is removed from the printer or when you press FEED. The display shows "Printing X of Y" until all labels print. ♦... - Page 18 3. Lift the printhead assembly until it locks into place. 4. Adjust the roll guides to fit your supply roll. The supply roll must move freely. 5. Place rolled supply on the supply holder. Label supply can unroll from the top or the bottom. 6.
- Page 19 7. Turn the supply lever to unlock the supply guides. Suppl y Leve r unlocked (do w n) Suppl y Leve r locked (up ) 8. Feed the supply through the supply path so a few inches extend past the front of the printer.
- Page 20 10. Press down on the exit cover tabs to open the exit cover on the front of the printer. 2-10 Operator's Handbook...
- Page 21 11. Remove the labels from the first 10 inches of the liner. 12. Feed the liner through the lower opening in the exit cover. 13. Close the exit cover. 14. Push the printhead release. Loading Supplies 2-11...
- Page 22 15. Close the printhead assembly until you hear it click into place. 16. Close the cover. 17. Press FEED to position the supply under the printhead. Label Liner Note: To remove the liner, pull up across the tear edge. 2-12 Operator's Handbook...
-
Page 23: Loading Labels For Peel Mode With Liner Take-Up (Optional)
Loading Labels for Peel Mode w ith Liner Take-Up (Optional) Use internal liner take-up with peel mode. Liner is collected on a take-up reel near the supply roll. Note: Your System Administrator must set the printer to liner take-up (feed mode). Remove the labels from the first 18 inches of the liner. - Page 24 6. Hold the liner while placing one end of the bail in a groove in the liner take-up reel. Gently rotate the bail counter-clockwise until the other end snaps into the corresponding groove. Res t the bail in the groove and rotate it counter -clockw ise as show n.
-
Page 25: Removing A Full Liner Take-Up Roll
Removing a Full Liner Take-Up Roll The printer alerts you when the liner take-up reel is full. The liner take-up reel holds approximately half of a roll of liner. Note: The liner can be removed before the take-up reel is full. 1. - Page 26 2-16 Operator's Handbook...
-
Page 27: Loading Ribbon
L O A D I N G R I B B O N This chapter describes how to load ribbon. If you are using thermal direct supplies, do not load a ribbon. Your System Administrator must set the printer to use a ribbon. About Ribbons ♦... - Page 28 4. Push the deflector tab down. Defle ctor Tab 5. Slide an empty ribbon core on the take-up reel as far as it will go. 6. Remove the new ribbon from the package. Do not wrinkle or crush the ribbon. 7.
- Page 29 10. Use the adhesive on the ribbon leader to attach it to the take-up core. Make sure an empty take-up core is on the reel. 11. Rotate the take-up reel until the leader is past the printhead. 12. Remove any slack in the ribbon by turning the take-up reel until the ribbon is tight under the printhead.
- Page 30 14. Close the printhead assembly until you hear it click into place. Press her e 15. Close the cover. 3-4 Operator's Handbook...
-
Page 31: Printing
P R I N T I N G This chapter explains how to ♦ print, pause, cancel, and repeat a batch. When the printer receives print data, batches begin printing automatically. Your System Administrator can use the Packet Reference Manual to create, store, and download the data necessary to print batches. -
Page 32: Pausing While Printing
P a u s i n g W h i l e P r i n t i n g 1. Press PAUSE to interrupt printing. The LCD is green. PAUSE MENU ← Resume → ENTER BACK 2. Press ENTER to resume printing the current batch OR press or to display the Pause Menu options: Select Cancel Batch... -
Page 33: Care & Maintenance
C A R E & M A I N T E N A N C E This chapter tells you how to ♦ clear label jams and clean the printer. ♦ replace a printhead. CAUTION: Do not use sharp objects to clean the printhead or touch the printhead with your fingers. -
Page 34: Cleaning
C l e a n i n g Clean the printhead, peel bar, sensor, and platen roller: ♦ when there is any adhesive build-up in the supply path. ♦ after printing approximately three rolls of thermal transfer/thermal direct supplies or after each ribbon. - Page 35 Turn the platen roller with your finger to make sure it is clean all the way around. Platen Roller Die Cut Sensor Suppl y Sensor 6. Once the printer is dry, reload the ribbon and supply roll. 7. Close the exit cover by pushing firmly on it. Both latches click into place. 8.
-
Page 36: Replacing The Printhead
R e p l a c i n g t h e P r i n t h e a d Replace the printhead when it is damaged or worn-out. ERROR #768 CAUTION: Static electricity can damage the printhead. Check printhead Ground yourself by touching metal, such as the printer's metal base, before touching the printhead. - Page 37 7. Carefully unplug the cable from the printhead. 8. Carefully plug the cable into the new printhead. 9. Align the new printhead with the tabs. 10. Snap the printhead into place. Note: Make sure the printhead cable does not touch the ribbon roll. 11.
- Page 38 5-6 Operator's Handbook...
-
Page 39: Troubleshooting
T R O U B L E S H O O T I N G This chapter explains how to adjust print quality and contains basic troubleshooting information. If you need to call Technical Support, print a test label first. See “Printing a Test Label” in Chapter 1 for more information. -
Page 40: Adjusting The Printhead Pressure Dials
Adjusting the Printhead Pressure Dials Two dials are located on either edge of the printhead assembly. Use a coin or flathead screwdriver to adjust the dials based on the width of your supply. The “out of the box” setting (default) is least pressure, which provides optimal printing in most cases. If you see smudging, ribbon wrinkling, or poor print quality, adjust the printhead pressure dials. -
Page 41: Troubleshooting
T r o u b l e s h o o t i n g Use this information to solve some common problems. Problem Action Does not print. Check supply. Check ribbon. Press feed. Check connection to host. Does not feed. Check supply. -
Page 42: Error Messages
E r r o r M e s s a g e s ERROR #756 Contact your System Administrator if you cannot clear an error or you see an error not listed below. Load supplies Many of these errors require action by your System ENTER ESCAPE Administrator. -
Page 43: Specifications
S P E C I F I C A T I O N S P r i n t e r Height: 13.8 inches (351.1 mm) Width: 11.6 inches (293.5 mm) Depth: 21.7 inches (550.8 mm) Weight: 33 lb. (15 kg) Shipping Weight: 38 lb. -
Page 44: Ribbon
R i b b o n Do not leave ribbon in sunlight, high temperatures or humidity. Ribbon Type: Standard (wax, high speed) Premium (wax resin, TUFF-MARK® resin) Ribbon Widths Use with Maximum supply width 1.5 inches (38 mm) 1.3 inches (33 mm) 1.8 inches (46 mm) 1.5 inches (38 mm) 2.3 inches (58 mm) - Page 46 Avery Dennison Printer Systems Division, 170 Monarch Lane, Miamisburg, OH 45342 http://rbis.averydennison.com/ADTP1 Printer Documentation...
Need help?
Do you have a question about the ADTP-1 and is the answer not in the manual?
Questions and answers