2N NetSpeaker Manual
Ip audio system
Hide thumbs
Also See for NetSpeaker:
- Complete manual (114 pages) ,
- Manual (107 pages) ,
- Quick start manual (23 pages)
Table of Contents
Advertisement
Quick Links
Advertisement
Table of Contents

Related Manuals for 2N NetSpeaker


Summary of Contents for 2N NetSpeaker
- Page 1 ® 2N NetSpeaker IP Audio System Manual Version www.2n.cz...
- Page 2 At present, we export our products into over 120 countries worldwide and have exclusive distributors on all continents. ® 2N is a registered trademark of 2N TELEKOMUNIKACE a.s.. Any product and/or other names mentioned herein are registered trademarks and/or trademarks or brands protected by law. 2N TELEKOMUNIKACE administers the FAQ database to help you quickly find information and to answer your questions about 2N products and services. On www.faq.2n.cz you can find information regarding products adjustment and instructions for optimum use and procedures...
-
Page 3: Table Of Contents
Content 1. Manual for Console software ......4 1.1 Settings and Connection ......... . 5 2. -
Page 4: Manual For Console Software
1. Manual for Console software Here is overview what you can find in this section: 1.1 Settings and Connection ® TELEKOMUNIKACE a.s., www.2n.cz... -
Page 5: Settings And Connection
Enter the user name and password into the dedicated fields in the Console window upon start. Moreover, you have to configure the correct host name or IP address for login. Click on the setting pictogram in the program header, see next figure, and then on Server settings to get into configuration. Use the Language settings to modify the application language. ® TELEKOMUNIKACE a.s., www.2n.cz... - Page 6 CAUTION: Freeride is the highest priority user role and shall be preferred in all zones. This screen helps you select a role after login to the Console program. Next figure shows the window for a user with all roles. Refer to other parts of the manual for details on the roles. ® TELEKOMUNIKACE a.s., www.2n.cz...
- Page 7 When you have selected a role, the screen will display the selected role, but the appearance is similar in all cases. New pictograms and the role name get displayed in the application header. To change the role, use the human pictogram, which returns you to the role selecting window . The "power off" pictogram is used for logout fro m the Console application. General Console Control Primarily, Console is designed for broadcasting sounds via microphone or audio/music in the mp3 format. The left section with the microphone picture controls the microphone and the middle section – List of sounds – helps play audio files. Press the "Add" button to add a sound to the application. The right–hand section is used for input check and control. Refer to next figure for the Console program control. ® TELEKOMUNIKACE a.s., www.2n.cz...
- Page 8 . When the Play button is pushed for another song, the microphone is automatically deactivated and the listeners do not hear the studio noise. You can enable Listening in in the Console application too. To do so, push the but ton to the right of the lower screen. Listening in is used for activation of local listening to played files or microphone sound. Select the device to listen in via the Setting–>Audio settings menu. ® TELEKOMUNIKACE a.s., www.2n.cz...
- Page 9 units in the List of speakers/zones . Refer to next figure. Figure: Freeride Role Broadcast as "user" Logged in as a user, you cannot choose where to broadcast. Your user role authorises you to broadcast to sessions to which you are assigned as a user input. Contact your system administrator for more information. Broadcast as "virtual input" Logged in as a virtual input, you cannot choose where to broadcast. Your user role authorises you to broadcast to sessions which contain the virtual input assigned to you. Contact your system administrator for more information.tails on the roles. ® TELEKOMUNIKACE a.s., www.2n.cz...
- Page 10 Figure: Console Roles When you have selected a role, the screen will display the selected role, but the appearance is similar in all cases. New pictograms and the role name get displayed in the application header. To change the role, use the human pictogram, which returns you to the role selecting window . The "power off" pictogram is used for logout fro m the Console application. ® TELEKOMUNIKACE a.s., www.2n.cz...
-
Page 11: Manual For Control Panel Software
2. Manual for Control Panel software Here is overview what you can find in this section: 2.1 Introduction 2.2 Sessions 2.3 Audio Sources 2.4 Zones 2.5 Speakers 2.6 Scheduler 2.7 Users 2.8 Sync Manager 2.9 Administrator ® TELEKOMUNIKACE a.s., www.2n.cz... -
Page 12: Introduction
2.1 Introduction IP Audio System - 2N® NetSpeaker ® NetSpeaker is an IP audio system which allows you to play an acoustic message or any other audio stream from any LAN/WAN-connected PC. All you have to do to get a virtual broadcasting exchange is connect a standard loudspeaker or amplifier to your ® NetSpeaker . The virtual exchange helps you play any audio system and create separate zones with different communication contents. ® You can make use of your existing LAN/WAN while installing your NetSpeaker sy stem to save the total implementation time and, of course, cut your wiring costs. ® The NetSpeaker IP Audio System consists of two basic components - a server and an audio converter. The ControlPanel software has been developed to configure the whole broadcasting system. Console and Player are software products designed for everyday ... -
Page 13: Sessions
Source - Destination connection, i.e. defines which source will be played to which destination. The left session part defines and helps control the source, the right session part determines the destination and Session optio Session Creation and Preparation for Playing Click on Session -> Create empty session to create a session. You can perform this and other actions by retrieving the floating menu by the right mouse-click. Figure: Session Window Layout ® TELEKOMUNIKACE a.s., www.2n.cz... - Page 14 Fig.5 shows two types of sources. The common bar contains volume control settings. Session Control and Launch Click on in the Session control section to launch a session; refer to next figure, which also shows additional session controls. Balance – set balance for the right/left channel. Listening in – enable this parameter to listen to remote destinations locally. Volume – set the main session volume. Sound activation/deactivation – enable/disable sound for the active session. ® TELEKOMUNIKACE a.s., www.2n.cz...
- Page 15 Besides the basic settings, there are additional session settings such as Priority or Channel situated in the right-hand upper corner. Priority – set the session priority. The highest priority session is always preferred to lower priority sessions. A higher priority of the active Session always guarantees that the Session will occupy the destinations assigned to it (the source will play in the destination). The priority range is <1;10>, where priority 10 is automatically assigned to Freeride role broadcasting. ® Channel – set the channel for each session. NetSpeaker supports 4 channels for 4 different sources. Figure: Priority and Channel Settings ® TELEKOMUNIKACE a.s., www.2n.cz...
- Page 16 Figure: Volume Bars Common bar – helps you control volume, balance and sound activation/deactivation. The Internet radio contains a status line displaying information on playing. Playlist – here you can, besides basic functions, control mp3 files with play/stop, pause, next, previous, shuffle and repeat. Moreover, you can minimise the playlist bar. ® TELEKOMUNIKACE a.s., www.2n.cz...
-
Page 17: Audio Sources
External sound cards can be used too. Audio Sources Hardware Inputs ® HW inputs are inputs of your server - PC on which the NetSpeaker Server is running; refer to the system architecture in 2.1 Introduction . A microphone, internal/external sound card and/or mixer are used for playing locally stored music using a standard audio player. - Page 18 Figure: Import of Audio Files to Server Generated playlists Generated playlists are playlists that are created by the ControlPanel automatically from the selected directory according to selected rules. Generated playlists are created via the 2.9 Administrator tag. Refer to the Audio sources tag for the playlist items. ® TELEKOMUNIKACE a.s., www.2n.cz...
- Page 19 Figure: Generated Playlists This way, you can fill the server with mp3 files even remotely via the WAN. Virtual Input Virtual input is a group of rules rather than an actual input. The rules define users with the right to use the input and also assign inputs to rooms if necessary. Example: Suppose a language school has English and German classrooms. There are 4 teachers in the school: Mr. Cook, Ms. Scott, Hr. Himmel and Fr. Moselle. Use the virtual input to create English classroom input and German classroom input Enable the "English classroom" virtual input for Mr. Cook and Ms. Scott. Enable the "German classroom" virtual input for Hr. Himmel and Fr. Moselle. Doing this, you have created the possibility to play audio in the classrooms and let the teachers simply choose classrooms using the Console tool. ® TELEKOMUNIKACE a.s., www.2n.cz...
- Page 20 Figure: Adding of English Teachers to Virtual Input SIP Port ® The SIP source helps you connect NetSpeaker to a VoIP (Voice over IP) PBX as a VoIP station via the SIP. You have to know the PBX IP address, username and password (if requested) and the port to establish connection to the PBX. Refer to the subsections below for the parameters and setting options. ® TELEKOMUNIKACE a.s., www.2n.cz...
- Page 21 Figure: SIP Source Setting Source status Refer to the upper menu section for information on the stack (communication protocol) type and current status. SOCK_TCP_ERROR – TCP socket failed to open. SOCK_UDP_ERROR – UDP socket failed to open. CREDS_IN_ERROR – authorisation server unavailable. CREDS_OUT_ERROR – authorisation client unavailable. REALM_CONFLICT – realm collides with another port's realm/alias. STUNNING – public address obtaining from STUN server in progress. STUN_TIMEOUT – STUN server inaccessible. EXPIRED – public address validity expired. SIP_REGISTERING – gateway registration in progress. REG_TIMEOUT – REGISTRAR server inaccessible. REG_NOT_AUTH – registration unauthorised. REG_REJECTED – registration rejected with error. ® TELEKOMUNIKACE a.s., www.2n.cz...
- Page 22 Basic parameters Port – is a local port of NetSpeaker Server on which the given gateway is communicating with the counterparty. Realm(Domain) – define the domain over which this gateway is communicating. The domain and port specified here are relevant for subsequent call routing to the NetSpeaker Server. The Request-URI field including Realm(Domain) + port are checked for incoming INVITE messages. If the values match the SIP GW setting, the packets are routed to the NetSpeaker Server. The...
- Page 23 Use short headers – tick off this option to use abbreviated header items for outgoing SIP packets. Example: From = f, To = t, Via = v. This optimisation helps minimise data to be transmitted. Do not replace +,#,* in numbers – if you do not tick off this option, the above mentioned characters will be replaced with adequate strings %xx in numbers. Tick off the option to send the characters. ® TELEKOMUNIKACE a.s., www.2n.cz...
- Page 24 VAD acc. to G.729 Annex B VAD light Generate comfort noise – enable comfort noise generating. As users of classic analogue lines are used to some background noise, this option simulates similar call impression to them. Mask lost packets – enable optimised computing of probable contents of lost packets. The TOS/DiffServ section helps you set outgoing packet parameters which define the packet priority for processing by network elements. SIP – hexadecimal priority value for SIP packets. RTP – hexadecimal priority value for RTP packets. Default values – restore the default values for the two parameters. Echo suppression Use this tag to activate various echo cancelling methods. Suppression disabled ® TELEKOMUNIKACE a.s., www.2n.cz...
- Page 25 STUN IP method is selected in the port RTP interface configuration. The default value is stunserver.org Port – set the port to be used for STUN. The default value is port 3478 Internet Radio The Internet radio source allows you to insert URI of the selected radio and set radio delay (in ms) - characterises the radio buffer size. Radios in the mp3 format are supported only. ® TELEKOMUNIKACE a.s., www.2n.cz...
- Page 26 Figure: Internet Radio Parameters User Input User input is assigned to the user and defines the audio stream parameters from the user for playing from Console , for example. Next figure shows the default input settings. Figure: User Input Parameters ® TELEKOMUNIKACE a.s., www.2n.cz...
-
Page 27: Zones
units are installed. Two possible tag settings are displayed to the right. A ring includes the possibility to switch the big icon view of ® Detailed listing, yellow designates the possibility to hide the list of all 2N ® NetSpeaker units (all ... - Page 28 All speakers . The first method is shown in next figure and considers enable of the Show "All speakers" group setting. Figure: Default Zone Display ® With this enable, click on the zone to which you want to assign the selected 2N ® NetSpeaker(s) . Move the selected NetSpeaker(s) from the All speakers ...
- Page 29 Figure: Default Zone Display Other Zones Tag Options Use Rename zone in the left menu or the Rename zone item retrieved with the right mouse button to rename a zone. Use the Delete zone item in the same menus to delete a zone. ® TELEKOMUNIKACE a.s., www.2n.cz...
-
Page 30: Speakers
2.5 Speakers What you should know ® A detected NetSpeaker unit is indicated by a pictogram ® with a big plus. Add this NetSpeaker to the database ® NetSpeaker with the active mode setting connects to the server automatically. ® Once NetSpeaker gets connected to the server, its setting by Telnet is prohibited until Telnet is enabled in the configuration. - Page 31 Once the connection is established, save the setting. Subsequently, the 2N NetSpeaker Server starts searching for speakers in the network automatically. Fig.2 ® ® shows NetSpeaker detection – a NetSpeaker pictogram with a big plus in ® the lower part indicates successful detection and instructs you to Add 2N NetSpeaker to the database using Menu –> Add speaker to database. Once the speaker is added, the pictogram becomes dark and the plus disappears. Use the left or floating menu to remove or rename a connection. Automatic speaker connection ®...
- Page 32 ® Figure: 2N NetSpeaker Detection ® NetSpeaker Setting Options ® Find the NetSpeaker setting panel to the right. The header includes the Speaker name and a link to assigned connection (if existing). In addition, it contains a Restart ® button for remote NetSpeaker restart. Synchronisation The section dedicated to 2.5 Speakers does not provide any setting options. It displays the synchronisation state only. Push the Synchronise Now! button to start synchronisation immediately as defined in the 2.5 Speakers tag. This button activates ® synchronisation of this particular ...
- Page 33 NetSpeaker is connected to the server, but is not recommended for security reasons. ® Sound path delay – helps you set an expected delay – buffer size for 2N NetSpeaker – for installations where Wi–Fi facilities are used or unreliable packet deliveries are expected.
-
Page 34: Scheduler
Only then you can start creating an event as follows: Procedure: Create a new event – use one of the following methods: click on the Scheduler tag and then on the Create event menu item, or use the floating menu. Also, you can assign an event to a date before creation by clicking on the required day and then on Create event Figure: Scheduler Tag Action setting options: Set event start – click on Event to display the event setting option to the left. ® TELEKOMUNIKACE a.s., www.2n.cz... - Page 35 Monthly – select a day in the month for the action start and also in which months the action shall occur Once only Figure: Event Settings Action Setting Having created an event according to Subs. Event Creation above, specify the contents of the event, i.e. what shall be played and when. ® TELEKOMUNIKACE a.s., www.2n.cz...
- Page 36 in the time axis header (see the figure). Always move the action to the playlist to be controlled within one session. A session can contain multiple playlists and all the playlists can be administered. You can modify the actions created as mentioned above according to the requirements of the given event. Click on an action and edit its parameters in the "Action setting" window. Refer to Fig.4 for details on the Play action. ® TELEKOMUNIKACE a.s., www.2n.cz...
- Page 37 Balance – set the playlist balance – in addition to start time, set a smooth balance change via the Change duration time option. Event Display There is an event list in the left part of the Scheduler tag. Display the list in any of the following views: Month Day , or All events by selecting a card. Month view – this view displays calendar for navigation. Click on a date to run the events associated with the selected date. Day view – having selected a date in the Month view, click on the Day card to display the required day details. Like with the Month card, you can only see the actions assigned to the selected date. All events – select this card to display all the events available. ® TELEKOMUNIKACE a.s., www.2n.cz...
-
Page 38: Users
The system administrator defines the virtual inputs to certain sessions; refer to the Sources tag for details. These inputs can then be assigned/provided to users in the Permit user connection to virtual inputs section. This section includes a list of all virtual inputs and helps you assign a user to an input by ticking off the option. ® TELEKOMUNIKACE a.s., www.2n.cz... -
Page 39: Sync Manager
Content is synchronised automatically at the defined time or manually in the NetSpeakers & Zones tag. Content is synchronised only if nothing is being played from the server. ® Sync Manager is used for administration of SD cards inserted in the NetSpeaker system, synchronisation of these cards with the defined content and setting of action starts. Sync Manager Tag Layout ® Actions for synchronisation with the SD card (inserted in NetSpeaker ) are managed via the Sync Manager tag. The layout of this tag is rather complex. Refer to the next figure for an overview of its functions. ® TELEKOMUNIKACE a.s., www.2n.cz... - Page 40 Not scheduled – perform synchronisation manually by pushing the Sync Now! button, or At defined time with the "Daily", "Weekly", "Monthly" and "Once only" options. Each of these options can be further set. This setting specifies the time when the selected synchronisation shall be launched. Next figure shows an example of configuration for a one–month progress of updates. ® TELEKOMUNIKACE a.s., www.2n.cz...
- Page 41 Figure: Synchronisation Properties Basic parameters These parameters define how the action shall behave: its trigger and behaviour upon start. ® Action type – define the action trigger: either the logical input to 2N NetSpeaker Button press ( ) or a time value ( At time ). If you select time, select the time value and start day in ...
- Page 42 Weekly – the event will start at the set time of the set days every week or Every xth week Monthly – select a day in the month for the action start and also in which months the action shall occur Once only Figure: Weekly Schedule ® TELEKOMUNIKACE a.s., www.2n.cz...
- Page 43 Define the speakers for which the action shall be enabled. These speakers will be ® synchronised with the server and the files will be saved onto the SD card for each 2N NetSpeaker Playlist Select the playlist(s) in the Playlist to be played when the given offline action starts. Use the arrows to assign priorities to the playlist(s). Figure: Playlist Example of Synchronisation Action Configuration ® Suppose company XYZ intends to play ad spots in its NetSpeaker system at 6 a.m. every day. As the spots vary every week, it will be necessary to synchronise the ® NetSpeaker system early in the morning on Mondays. ® TELEKOMUNIKACE a.s., www.2n.cz...
- Page 44 Enabling action to individual speakers to be involved in the action. Caution! Make sure that the selected ® NetSpeaker units contain the SD cards via the Speakers 5. Now select the playlist to be saved on the SD card and played at the defined time. Retrieve a floating menu in the ...
-
Page 45: Administrator
2.9 Administrator What you should know Access via API is restricted to 10 clients by default. ® Multicast is active on addresses 239.0.0.0/8 in 2N NetSpeaker by default. Trace can be saved and help communicate your problem to the 2N Technical Support department. ® The Administrator tag helps you set other NetSpeaker parameters and monitor the state of the system. The tag contains general settings and administration. General Settings General settings are provided in this section. Language setting – set the ControlPanel language. Audio devices – select the output for listening in. ... - Page 46 Figure: Multicast Setting Options Administration Server authorisation Server authentication to 2N® NetSpeaker – set the password for server ® authentication to NetSpeaker ® 2N® NetSpeaker authentication to server – set the password for 2N NetSpeaker authentication to server. Administrator password – change the main administrator password of the ...
- Page 47 Figure: XML Script for Password Saving ® TELEKOMUNIKACE a.s., www.2n.cz...
-
Page 48: Manual For Player Software
3. Manual for Player software Here is overview what you can find in this section: 3.1 Software Control ® TELEKOMUNIKACE a.s., www.2n.cz... -
Page 49: Software Control
Delete selected items from playlist – remove songs from the playlist. Add mp3 from directory – add a directory to the playlist. Save playlist into files – save the playlist into an .m3u file on a local disk. Add playlist – add an empty playlist to the Player application. Rename current playlist – rename the currently selected playlist. Delete current playlist – delete the currently selected playlist. Select playlist – select one of the playlist created and modify the current playlist. ® TELEKOMUNIKACE a.s., www.2n.cz... - Page 50 Local Playing Settings ® In addition to NetSpeaker playing, the Player application allows you to play files locally too. Find the settings for local sources in Menu–>Tools–> Local source settings . Select the source for microphone and volume in the window (Fig. 2). The same settings are used for listening in – select the HW sources for the output from PC and set the volume level. ® TELEKOMUNIKACE a.s., www.2n.cz...
- Page 51 Figure: Local Sources ® TELEKOMUNIKACE a.s., www.2n.cz...
-
Page 52: User Manuals
4. User manuals Here is overview what you can find in this section: 4.1 Quick Start 4.2 HW Configuration Manual ® TELEKOMUNIKACE a.s., www.2n.cz... -
Page 53: Quick Start
® side, you can locate the PoE injector, which supplies NetSpeaker over Ethernet. On the lower right–hand side, there is space for connecting cables (230V AC power supply, CAT5 RJ 45 Ethernet cable). See next figure. Pull out the connecting cables and connect the power supply cable to the power outlet. ® ® NetSpeaker unit turns ON, you can see blue/green light on the 2N NetSpeaker front panel. The default settings of the unit are as follows: STATIC IP settings: ® TELEKOMUNIKACE a.s., www.2n.cz... - Page 54 IP – 192.168.1.100 MASK: 255.255.255.0 ® Active mode is OFF – NetSpeaker waits for the Server requests Login for Server: Admin/2n To connect to 2N® NetSpeaker via Ethernet, set the Static IP address on your computer to: IP – 192.168.1.x (x?100, 0, 255) MASK – 255.255.255.0 You can check the interconnection by the PING command. Insert the USB Flash disk in your computer and run /Netspeaker/setup.exe Confirm the licence agreement. Set the Complete installation type (install Server, Control Panel and Console) to c:\Program Files\2N TELEKOMUNIKACE\2N NetSpeaker\. Follow the wizard instructions to finish the installation. ® TELEKOMUNIKACE a.s., www.2n.cz...
- Page 55 Connecting 2N® NetSpeaker In this section, we provide you with the steps how to configure NetSpeaker device in the server database and connect it to the system. Please follow the steps bellow. Run Control Panel application from the Star Menu> All Programs > 2N ® ® Telekomunikace > 2N NetSpeaker > 2N NetSpeaker Control Panel. ® TELEKOMUNIKACE a.s., www.2n.cz...
- Page 56 Login Windows opens. Enter the password "2n" and click on Connect. ® TELEKOMUNIKACE a.s., www.2n.cz...
- Page 57 Click on the Speakers icon in the left menu. Click on New connection (click on it with the right mouse button to rename the connection). Your new connection line appears in the lower middle window – Connection. Remember to change the IP address to 192.168.1.100 in the Connection settings to the right, no other changes are necessary. ® TELEKOMUNIKACE a.s., www.2n.cz...
- Page 58 Click on the Save configuration icon in the upper menu bar to save the changes. ® After a few seconds, you can see the detected NetSpeaker device in the upper middle window – Speakers. Click on the Speaker symbol and the on Add detected to the database. The grey symbol with a '+' sign represents a detected but unused speaker. Add the symbol to change it to , save the changes. ® TELEKOMUNIKACE a.s., www.2n.cz...
- Page 59 Click on the User icon in the left menu. In the middle window, the Untitled root group is created. The Untitled user is created in this group. Click on it with the right mouse button to rename it to User. Enable the Freeride role and User input (Input User will be created automatically in menu Sources, see below) in the User settings. Click to Change Password to set the user password (it is necessary for connecting the 2N® NetSpeaker Console). Set "pswd". Click on the Source Icon in the left menu. Here you define all sources for audio broadcast. You can see your computer sound card detected as the source and User input already created in the user creating section. Click on Create playlist to create a playlist for mp3 files. Click on Create virtual input to create a free input for any user. ® TELEKOMUNIKACE a.s., www.2n.cz...
- Page 60 Click on Sessions in the left menu. System asks you to whether to save the changes. Click on Create session. A session defines the relationship between sources and destinations (speakers). The default tray is created in the middle window. You can see all the defined sources and connected Speakers to the right. Use Drag & Drop to assign a destination to the session. Simply move the highlighted speaker over the Master fader of the particular session. ® TELEKOMUNIKACE a.s., www.2n.cz...
- Page 61 Add sources to the session like destinations. Now the session is created, the system is ready to process the broadcast. Broadcasting a) To start the broadcast, you can use the Control Panel to play the playlist files, or mix different sources together dynamically. To start broadcasting just click on the Play icon in the Master under the session Master fader. ® TELEKOMUNIKACE a.s., www.2n.cz...
- Page 62 To make a simple announcement only, run the Console application. For login, enter the username "User" and password "pswd". You can choose the Freeride role or broadcast as User, choose the User role. The application enables you to use the microphone connected to the computer to make an announcement. Click on MUTE to start broadcasting. In the left field, you can see the broadcasting destination (speaker). ® TELEKOMUNIKACE a.s., www.2n.cz...
- Page 63 ® TELEKOMUNIKACE a.s., www.2n.cz...
-
Page 64: Hw Configuration Manual
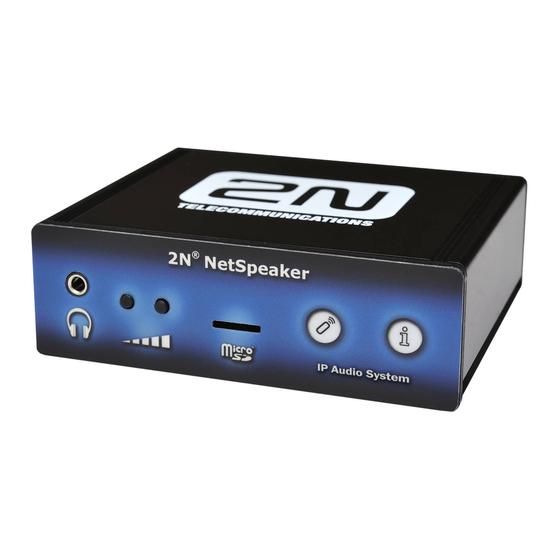
Module with an amplifier and a loudspeaker (Part No. 914020E), designed for direct wall mounting (wall/flush/ceiling mounting). This User Manual applies to Part No. 914010E. 10/100Base–TX LAN interface 12V DC/2A or PoE 802.3af power supply Integrated 14W STEREO/MONO amplifier Line/headphone output Colour LED operation status indicators Universal galvanically isolated output Universal digital input MicroSD card slot Two universal programmable buttons Infrared remote control Optional Accessories 12V DC/2A Power Supply Adapter ® Universal power supply adapter for NetSpeaker . With it, you can ® TELEKOMUNIKACE a.s., www.2n.cz... - Page 65 ® NetSpeaker is a LAN audio converter designed for public sound distribution ® ® through the NetSpeaker System. It is connected to the NetSpeaker ® System via the local area network (LAN). It communicates with the 2N NetSpeaker Server, receives the audio stream, decodes it and converts it into ® an analogue signal. NetSpeaker is equipped with an integrated 14W amplifier for direct loudspeaker connection. ® NetSpeaker ...
- Page 66 NetSpeaker helps you extend the internal FLASH memory using MicroSD memory cards. ® Use the integrated Telnet server to make basic settings for connection of 2N NetSpeaker into the LAN (refer to the Basic Parameter Settings). Apply the 2N® NetSpeaker Software for configuration and use of all functions (refer to the ...
- Page 67 is equipped with a power amplifier for 1 (MONO) or 2 (STEREO) loudspeakers. The loudspeakers to be used must have the nominal impedance of 4–16Ω. Possible configurations and related maximum power outputs (sinus, THD < 1%) are included in the table below: ® TELEKOMUNIKACE a.s., www.2n.cz...
- Page 68 ® The current NetSpeaker FW version does not support this function. Refer ® to www.2n.cz for NetSpeaker FW updates. Contact the 2N TELEKOMUNIKACE Technical Support staff please for more information. Digital Input Use ® NetSpeaker is equipped with a digital input for an optional button, sensor of movement or other applications. This input is available on the LOGIC IN terminal. Up to 5 to 24V DC voltage can be applied to the input against the ground terminal marked DC IN –.
- Page 69 ® ? The current NetSpeaker FW version does not support this function. Refer ® to www.2n.cz for NetSpeaker FW updates. Contact the 2N TELEKOMUNIKACE Technical Support staff please for more information. LAN Connection ® NetSpeaker can be connected to a standard local area network using a LAN interface via the RJ–45 connector on the back panel. Always use CAT–5d or higher class cables for reliability reasons. The LAN interface is equipped with the Auto MDIX function for automatic detection of a straight or cross–over cable.
- Page 70 displays its serial number and the current firmware version. Enter the password, which is equal to the ® connection authorisation password from the NetSpeaker Server (i.e. pwd parameter). The default password is admin. ® Telnet Commands to 2N NetSpeaker ® NetSpeaker can be controlled using the commands included in the table below. Enter LC characters only, separate parameters, if any, with a space and confirm every row with Enter. ® TELEKOMUNIKACE a.s., www.2n.cz...
- Page 71 NetSpeaker Server . The same password must be stored in the ® ® NetSpeaker Server global settings and must be identical for all NetSpeaker units in the system. This password is used for Telnet server connection authorisation too. Default setting: admin activemode ® ® NetSpeaker is connecting actively to the NetSpeaker Server Remember to set the srvipadr and srvport parameters correctly if 1 is selected. Setting options ® TELEKOMUNIKACE a.s., www.2n.cz...
- Page 72 NetSpeaker . The password must be identical with the 2N® NetSpeaker Server password. Default setting: admin Firmware Upgrade ® ® NetSpeaker firmware upgrade runs automatically whenever 2N ® NetSpeaker gets connected to the NetSpeaker Server . This guarantees that all connected devices have identical and latest firmware versions. Refer to www.2n.cz for the latest firmware version. Firmware Installation ®...
- Page 73 Yellow (quick flashing) Internal FLASH memory deletion in progress during resetting. Orange (quick flashing) Device failure. Try to restart, disconnect from power supply or reset he device. If nothing helps, contact the 2N TELEKOMUNIKACE Technical Support staff. Mechanical,Technical and Electrical Parameters ®...
- Page 74 2 x 16Ω STEREO 1 x 14W 1 x 8W 4Ω MONO 1 x 8W 1 x 8W 8Ω MONO 20Hz – 20kHz (+/– 0.5dB) Frequency range 0.05% @ 1kHz Harmonic distortion 91dB Signal–to–noise ratio STEREO 3.5mm jack on front panel Headphone/Line output 24V 1A AC/DC relay output, galvanically isolated Digital output 5 to 24V DC digital input, galvanically non–isolated Digital input MicroSD card slot on front panel Memory capacity extension MPEG–2 Audio Layer III (MP3) Sound compression 32–320kbps Bandwidth ® TELEKOMUNIKACE a.s., www.2n.cz...
-
Page 75: Installation Manuals
5. Installation manuals Here is overview what you can find in this section: 5.1 IP Audio System - API Manual ® TELEKOMUNIKACE a.s., www.2n.cz... -
Page 76: Ip Audio System - Api Manual
Basic Properties Basic Information Opening Communication Authorisation Server Version Active Connection Check Server Time Check Session Configuration List of All Sessions List of All Sessions and Input Sources Assigned to Them Activate Session Deactivate Session Add Session Edit Session Remove Session Session State Monitoring Deactivate Session State Monitoring Audio Input Configuration Add Source to Session Edit Source in Session Delete Source from Session Activate Source in Session Deactivate Source in Session Pause Source in Session Skip to Next Line in Source Skip to Previous Line in Source Smooth Change of Source Volume Smooth Change of Source Balance Set File Position in Source Playlist Configuration List of All Playlists ® TELEKOMUNIKACE a.s., www.2n.cz... - Page 77 Create Playlist Edit Playlist Delete Playlist List of All Files in All Playlists Delete File from Playlist ® TELEKOMUNIKACE a.s., www.2n.cz...
- Page 78 Basic Properties Here is overview what you can find in this section: Basic Information Opening Communication Authorisation Server Version Active Connection Check Server Time Check ® TELEKOMUNIKACE a.s., www.2n.cz...
- Page 79 NetSpeaker Server . This type of communication is also used for event registration and unregistration of events. Event messages use the "<CTI_IE_REFERENCE Ref" tag. This type of IE is used for ® recognition of responses sent asynchronously on events in the 2N NetSpeaker Server Message Request and Response ® The NetSpeaker Server XML interface has two different formats:...
- Page 80 Opening Communication ® NetSpeaker Server - Starting Communication ® By default, the NetSpeaker Server listens on TCP port 6543 on all eth server ports. External applications are connected to this port. ® Communication between external applications and the NetSpeaker Server alway s starts with the BIND command. This command is sent by the server client. The application cannot continue communicating until it receives the <bind ®...
- Page 81 Authorisation The AppName item is used for application identification. The application cannot ® continue communicating until it receives the <bind Status="OK"/> reply from the 2N NetSpeaker Server. The server thus confirms the connection and creation of a communication channel. Explicit authorisation - LOGON method Or, you can enter your login and password simply as follows: 1. Check whether the library offers the LOGON method after receiving the request for authorisation and, if yes, then: 2. Send the ...
- Page 82 ® TELEKOMUNIKACE a.s., www.2n.cz...
- Page 83 Server Version Enter the command to identify the current version of the server. Request <msg Id="CTI_GET_VERSION_REQ"> <CTI_IE_REFERENCE Ref="0x420"/> </msg> Response <msg Id="CTI_GET_VERSION_CONF"> <CTI_IE_RESULT Result="OK"/> <CTI_IE_REFERENCE Ref="0x420"/> <CTI_IE_VERSION Ver="1.1.0.40.0_HEAD-rel Nov 25 2011 16:58:41"/> </msg> ® TELEKOMUNIKACE a.s., www.2n.cz...
- Page 84 Active Connection Check Enter the command to check if the communication with the server is still active. Request <msg Id="CTI_ALIVE_REQ"> <CTI_IE_REFERENCE Ref="0x420"/> </msg> Response <msg Id="CTI_ALIVE_CONF"> <CTI_IE_REFERENCE Ref="0x420"/> <CTI_IE_RESULT Result="OK"/> </msg> ® TELEKOMUNIKACE a.s., www.2n.cz...
- Page 85 Server Time Check Enter the command to find the current server time. Request <msg Id="CTI_GET_DATETIME_REQ"> <CTI_IE_REFERENCE Ref="0x420"/> </msg> Response <msg Id="CTI_GET_DATETIME_CONF"> <CTI_IE_REFERENCE Ref="0x420"/> <CTI_IE_TIME Time="2011/12/1 12:11:14"/> <CTI_IE_TZ_ID Id="37" TZStatus="STANDARD"/> <CTI_IE_RESULT Result="OK"/> </msg> ® TELEKOMUNIKACE a.s., www.2n.cz...
- Page 86 Session Configuration Here is overview what you can find in this section: List of All Sessions List of All Sessions and Input Sources Assigned to Them Activate Session Deactivate Session Add Session Edit Session Remove Session Session State Monitoring Deactivate Session State Monitoring ® TELEKOMUNIKACE a.s., www.2n.cz...
- Page 87 Enter this command to list all existing sessions along with the following information: SessionId = session ID, Name = session name, Priority, PanelUserId = only for console panel, PanelMode = only for console panel, PanelVirtualInputId = only for console panel, FreerideId = only for console panel. Request <msg Id="CTI_NSPK_GET_ALL_SESSIONS_REQ"> <CTI_IE_REFERENCE Ref="0x420"/> </msg> Response <msg Id="CTI_NSPK_GET_ALL_SESSIONS_CONF"> <CTI_IE_REFERENCE Ref="0x420"/> <CTI_NSPK_IE_SESSION SessionId="0x4" Name="Moje session nova" Flags="0x0" Priority="1" Channel="0" MasterVolume="4032" MasterBalance="0" MasterFadeTime="0" PanelUserId="0xFFFFFFFF" PanelMode="USER" PanelVirtualInputId="0xFFFFFFFF" FreeRideId="0xFFFFFFFF"/> <CTI_NSPK_IE_SESSION SessionId="0x5" Name="New session (1)" Flags="0x0" Priority="1" Channel="0" MasterVolume="4096" MasterBalance="0" MasterFadeTime="0" PanelUserId="0xFFFFFFFF" PanelMode="USER" PanelVirtualInputId="0xFFFFFFFF" FreeRideId="0xFFFFFFFF"/> </msg> ® TELEKOMUNIKACE a.s., www.2n.cz...
- Page 88 The Type and Id parameters help acquire general information on the source, i.e. the source type, source files, file Id and file duration. Request <msg Id="CTI_NSPK_GET_ALL_SESSIONS_SOURCES_REQ"> <CTI_IE_REFERENCE Ref="0x420"/> </msg> Response <msg Id="CTI_NSPK_GET_ALL_SESSIONS_SOURCES_CONF"> <CTI_IE_REFERENCE Ref="0x420"/> <CTI_NSPK_IE_SESSION_SOURCE SessionId="0x4" SourceId="0x5" Flags="0x12" Type="PLAY_LIST" Id="0x1" Volume="4032" Balance="7" FadeTime="0"/> <CTI_NSPK_IE_SESSION_SOURCE SessionId="0x4" SourceId="0xB" Flags="0x12" Type="PLAY_LIST" Id="0x4" Volume="4096" Balance="0" FadeTime="0"/> <CTI_NSPK_IE_SESSION_SOURCE SessionId="0x5" SourceId="0xA" Flags="0x12" Type="PLAY_LIST" Id="0x5" Volume="153" Balance="0" FadeTime="0"/> </msg> ® TELEKOMUNIKACE a.s., www.2n.cz...
- Page 89 Enter this command to enable a session. A session is defined by the CmdPar1 = SessionId parameter. If you specify a wrong SessionId, the server processes the command and sends the OK message, but no session will be activated. Request <msg Id="CTI_NSPK_CMD_REQ"> <CTI_NSPK_IE_SES_CMD Cmd="ACTIVATE_SESSION" CmdPar1="0x4"/> <CTI_IE_REFERENCE Ref="0x420"/> </msg> Response <msg Id="CTI_NSPK_CMD_CONF"> <CTI_IE_REFERENCE Ref="0x420"/> <CTI_IE_RESULT Result="OK"/> </msg> ® TELEKOMUNIKACE a.s., www.2n.cz...
- Page 90 Enter this command to disable a session. A session is defined by the CmdPar1 = SessionId parameter. If you enter a wrong SessionId, the server processes the command and sends OK, but no session will be deactivated. Request <msg Id="CTI_NSPK_CMD_REQ"> <CTI_NSPK_IE_SES_CMD Cmd="DEACTIVATE_SESSION" CmdPar1="0x4"/> <CTI_IE_REFERENCE Ref="0x420"/> </msg> Response <msg Id="CTI_NSPK_CMD_CONF"> <CTI_IE_REFERENCE Ref="0x420"/> <CTI_IE_RESULT Result="OK"/> </msg> ® TELEKOMUNIKACE a.s., www.2n.cz...
- Page 91 MasterBalance = session balancing value, MasterFadeTime = time during which the volume or balance change is effective if requested, PanelUserId = relates to the console panel, PanelMode = relates to the console panel, PanelVirtualInputId = relates to the console panel, FreeRideId = relates to the console panel. Request <msg Id="CTI_NSPK_SET_SESSION_REQ"> <CTI_IE_REFERENCE Ref="0x421"/> <CTI_NSPK_IE_SESSION SessionId="0x1" Name="Moje nova session" Flags="0x0" Priority="1" Channel="0" MasterVolume="4096" MasterBalance="0" MasterFadeTime="0" PanelUserId="0xFFFFFFFF" PanelMode="USER" PanelVirtualInputId="0xFFFFFFFF" FreeRideId="0xFFFFFFFF"/> </msg> Response <msg Id="CTI_NSPK_SET_SESSION_CONF"> <CTI_IE_REFERENCE Ref="0x421"/> <CTI_IE_RESULT Result="OK"/> </msg> ® TELEKOMUNIKACE a.s., www.2n.cz...
- Page 92 PanelUserId = relates to the console panel, PanelMode = relates to the console panel, PanelVirtualInputId = relates to the console panel, FreeRideId = relates to the console panel. Request <msg Id="CTI_NSPK_SET_SESSION_REQ"> <CTI_IE_REFERENCE Ref="0x421"/> <CTI_NSPK_IE_SESSION SessionId="0x7" Name="Moje session upravena" Flags="0x0" Priority="1" Channel="999" MasterVolume="4096" MasterBalance="0" MasterFadeTime="0" PanelUserId="0xFFFFFFFF" PanelMode="USER" PanelVirtualInputId="0xFFFFFFFF" FreeRideId="0xFFFFFFFF"/> </msg> Response <msg Id="CTI_NSPK_SET_SESSION_CONF"> <CTI_IE_REFERENCE Ref="0x421"/> <CTI_IE_RESULT Result="OK"/> </msg> ® TELEKOMUNIKACE a.s., www.2n.cz...
- Page 93 If you specify a wrong SessionId value, the server will return an error message. Request <msg Id="CTI_NSPK_REMOVE_SESSION_REQ"> <CTI_IE_REFERENCE Ref="0x423"/> <CTI_NSPK_IE_SESSION_ID SessionId="0x11"/> </msg> Response <msg Id="CTI_NSPK_REMOVE_SESSION_CONF"> <CTI_IE_REFERENCE Ref="0x423"/> <CTI_IE_RESULT Result="OK"/> </msg> Error <msg Id="CTI_NSPK_REMOVE_SESSION_CONF"> <CTI_IE_REFERENCE Ref="0x423"/> <CTI_IE_RESULT Result="INVALID_OBJECT"/> </msg> DB relations: must be deleted all objects before deleting the session. NSPK_SEST_SESSIONS_SOURCES ************************** Delete Source from Session NSPK_SEST_SESSIONS_DESTS ************************ Výpis všech NetSpeakerů, destinací a jejich editace ® TELEKOMUNIKACE a.s., www.2n.cz...
- Page 94 Enter the command to create a hook on a session which will periodically send information on the session whenever a change occurs in the session. Defined by the Id = SessionId parameters. If this parameter is -1, the hook will be created for all sessions. Request <msg Id="CTI_NSPK_CREATE_HOOK_REQ"> <CTI_NSPK_IE_OBJECT Type="SESSION_SOURCE" Id="-1"/> </msg> Response <msg Id="CTI_NSPK_SESSION_SOURCE_INFO_IND"> <CTI_NSPK_IE_SESSION_SOURCE_INFO SessionId="0x2" SourceId="0x3" PlayState="PLAYING" ActFileId="0x11" ActFile="C:\Documents and Settings\jsvoboda\Plocha\Download\Adele - 21\01 Rolling in the Deep.mp3" ActDuration="229347" State="ACTIVE" StateInfo="File(ACTIVE); Resampler(ACTIVE)"/> </msg> ® TELEKOMUNIKACE a.s., www.2n.cz...
- Page 95 <documentation IE="CTI_NSPK_IE_SESSION_SOURCE"> <member Type="KER_T_INT" Name="SessionId" Brief="Primary key source (link to SESSION) "/> <member Type="KER_T_INT" Name="SourceId" Brief="Primary key source (link to SESSION_SOURCE) "/> <member Type="NSPK_E_SES_PLAY_STATE" Name="PlayState" Brief="Playback status according NSPK_E_SES_PLAY_STATE "/> <member Type="KER_T_INT" Name="ActFileId" Brief="Currently playing file (id corresponds FileId of PLAY_LIST) "/> <member Type="KER_P_CHAR" Name="ActFile" OffsetPointer="true" Brief="Name of the currently playing file "/> <member Type="KER_T_INT" Name="ActDuration" Brief="The length of the file in ms "/> <member Type="NSPK_E_STATE" Name="State" Brief="Current status according NSPK_E_STATE source session "/> <member Type="KER_P_CHAR" Name="StateInfo" OffsetPointer="true" Brief="Lyrically divorced Resource "/> <documentation> <documentation Enum="NSPK_E_SES_PLAY_STATE"> <item Name="STOPPED" Brief="Play is stopped "/> <item Name="READING" Brief="Reads the next file in the "/> <item Name="PLAYING" Brief="Now Playing "/> <item Name="PAUSED" Brief="Playback is zapausováno "/> <documentation> <documentation Enum="NSPK_E_STATE"> <sure these items are sorted according to priority!!> <item Name="ERROR" Brief="When opening the device error "/> <item Name="OPENING" Brief="The device is currently open "/> <item Name="CLOSING" Brief="The device is just closing "/> <item Name="IDLE" Brief="The device is not open "/> <item Name="ACTIVE" Brief="The facility is open and functional "/> <documentation> ® TELEKOMUNIKACE a.s., www.2n.cz...
- Page 96 Deactivate Session State Monitoring Enter this command to cancel the hook on a session. Defined by the Id = SessionId parameter. If this parameter is -1, the hook will be cancelled for all sessions. Request <msg Id="CTI_NSPK_DESTROY_HOOK_REQ"> <CTI_NSPK_IE_OBJECT Type="SESSION_SOURCE" Id="-1"/> </msg> Response <msg Id="CTI_NSPK_DESTROY_HOOK_CONF"> <CTI_IE_RESULT Result="OK"/> </msg> ® TELEKOMUNIKACE a.s., www.2n.cz...
- Page 97 Audio Input Configuration Here is overview what you can find in this section: Add Source to Session Edit Source in Session Delete Source from Session Activate Source in Session Deactivate Source in Session Pause Source in Session Skip to Next Line in Source Skip to Previous Line in Source Smooth Change of Source Volume Smooth Change of Source Balance Set File Position in Source ® TELEKOMUNIKACE a.s., www.2n.cz...
- Page 98 If the SessionId and SourceId parameters match, the source with the defined SourceId is replaced with a new source defined by the Type and Id parameters. If you specify a non-existent SessionId, the server will return an error message. Request <msg Id="CTI_NSPK_SET_SESSION_SOURCE_REQ"> <CTI_IE_REFERENCE Ref="0x421"/> <CTI_NSPK_IE_SESSION_SOURCE SessionId="0x1" SourceId="0x2" Flags="0x1A" Type="PLAY_LIST" Id="0x1" Volume="4096" Balance="0" FadeTime="0"/> </msg> Response <msg Id="CTI_NSPK_SET_SESSION_SOURCE_CONF"> <CTI_IE_REFERENCE Ref="0x421"/> <CTI_IE_RESULT Result="OK"/> </msg> Error <msg Id="CTI_NSPK_SET_SESSION_SOURCE_CONF"> <CTI_IE_REFERENCE Ref="0x421"/> <CTI_IE_RESULT Result="REJECTED"/> </msg> ® TELEKOMUNIKACE a.s., www.2n.cz...
- Page 99 If the SessionId and SourceId parameters match, the source with the defined SourceId is replaced with a new source defined by the Type and Id parameters. If you specify a non-existent SessionId, the server will return an error message. Request <msg Id="CTI_NSPK_SET_SESSION_SOURCE_REQ"> <CTI_IE_REFERENCE Ref="0x422"/> <CTI_NSPK_IE_SESSION_SOURCE SessionId="0x4" SourceId="0xD" Flags="0x10" Type="PLAY_LIST" Id="0x1" Volume="1024" Balance="0" FadeTime="0"/> </msg> Response <msg Id="CTI_NSPK_SET_SESSION_SOURCE_CONF"> <CTI_IE_REFERENCE Ref="0x422"/> <CTI_IE_RESULT Result="OK"/> </msg> ® TELEKOMUNIKACE a.s., www.2n.cz...
- Page 100 Delete Source from Session Enter the command to remove a source from a session. The session is defined by the SessionId parameter and the source by the SourceId parameter. If you specify a non-existent SessionId or SourceId, the server will return an error message. Request <msg Id="CTI_NSPK_REMOVE_SESSION_SOURCE_REQ"> <CTI_IE_REFERENCE Ref="0x423"/> <CTI_NSPK_IE_SESSION_SOURCE_ID SessionId="0x4" SourceId="0xD"/> </msg> Response <msg Id="CTI_NSPK_REMOVE_SESSION_SOURCE_CONF"> <CTI_IE_REFERENCE Ref="0x423"/> <CTI_IE_RESULT Result="OK"/> </msg> Error <msg Id="CTI_NSPK_REMOVE_SESSION_SOURCE_CONF"> <CTI_IE_REFERENCE Ref="0x423"/> <CTI_IE_RESULT Result="INVALID_OBJECT"/> </msg> ® TELEKOMUNIKACE a.s., www.2n.cz...
- Page 101 CmdPar2 values are non-existent, the server replies OK, but no source will be activated. If the CmDPar3 value is -1 or any non-existent value, the source will be played from the first file in the sequence. Request <msg Id="CTI_NSPK_CMD_REQ"> <CTI_NSPK_IE_SES_CMD Cmd="PLAY" CmdPar1="0x4" CmdPar2="0x5" CmdPar3="-1"/> <CTI_IE_REFERENCE Ref="0x420"/> </msg> Response <msg Id="CTI_NSPK_CMD_CONF"> <CTI_IE_REFERENCE Ref="0x420"/> <CTI_IE_RESULT Result="OK"/> </msg> ® TELEKOMUNIKACE a.s., www.2n.cz...
- Page 102 Deactivate Source in Session Enter the command to disable a session input source. Defined by the CmdPar1 = SessionId and CmdPar2 = SourceId parameters. If the CmdPar1 and CmdPar2 values are non-existent, the server replies OK, but no source will be stopped. Request <msg Id="CTI_NSPK_CMD_REQ"> <CTI_NSPK_IE_SES_CMD Cmd="STOP" CmdPar1="0x4" CmdPar2="0x5"/> <CTI_IE_REFERENCE Ref="0x420"/> </msg> Response <msg Id="CTI_NSPK_CMD_CONF"> <CTI_IE_REFERENCE Ref="0x420"/> <CTI_IE_RESULT Result="OK"/> </msg> ® TELEKOMUNIKACE a.s., www.2n.cz...
- Page 103 Pause Source in Session Enter the command to pause a source in a session. Defined by the CmdPar1 = SessionId and CmdPar2 = SourceId parameters. If the CmdPar1 and CmdPar2 values are non-existent, the server replies OK, but no source will be suspended. Request <msg Id="CTI_NSPK_CMD_REQ"> <CTI_NSPK_IE_SES_CMD Cmd="PAUSE" CmdPar1="0x1" CmdPar2="0x1"/> <CTI_IE_REFERENCE Ref="0x420"/> </msg> Response <msg Id="CTI_NSPK_CMD_CONF"> <CTI_IE_REFERENCE Ref="0x420"/> <CTI_IE_RESULT Result="OK"/> </msg> ® TELEKOMUNIKACE a.s., www.2n.cz...
- Page 104 Skip to Next Line in Source Enter the command to skip to the next file in the sequence in a source. Defined by the CmdPar1 = SessionId and CmdPar2 = SourceId parameters. If the CmdPar1 and CmdPar2 values are non-existent in the database, the server replies OK, but no change will be executed for any existing session. Request <msg Id="CTI_NSPK_CMD_REQ"> <CTI_NSPK_IE_SES_CMD Cmd="NEXT" CmdPar1="0x4" CmdPar2="0x4"/> <CTI_IE_REFERENCE Ref="0x420"/> </msg> Response <msg Id="CTI_NSPK_CMD_CONF"> <CTI_IE_REFERENCE Ref="0x420"/> <CTI_IE_RESULT Result="OK"/> </msg> ® TELEKOMUNIKACE a.s., www.2n.cz...
- Page 105 Skip to Previous Line in Source Enter the command to skip to the previous file in the sequence in a source. Defined by the CmdPar1 = SessionId and CmdPar2 = SourceId parameters. If the CmdPar1 and CmdPar2 values are non-existent in the database, the server replies OK, but no change will be executed for any existing session. Request <msg Id="CTI_NSPK_CMD_REQ"> <CTI_NSPK_IE_SES_CMD Cmd="PREV" CmdPar1="0x1" CmdPar2="0x1"/> <CTI_IE_REFERENCE Ref="0x420"/> </msg> Response <msg Id="CTI_NSPK_CMD_CONF"> <CTI_IE_REFERENCE Ref="0x420"/> <CTI_IE_RESULT Result="OK"/> </msg> ® TELEKOMUNIKACE a.s., www.2n.cz...
- Page 106 Enter the command to set the source volume. Defined by CmdPar1 = SessionId, CmdPar2 = SourceId, CmdPar3 = volume and CmdPar4 = transition time from the current value to the new one. Request <msg Id="CTI_NSPK_CMD_REQ"> <CTI_NSPK_IE_SES_CMD Cmd="SET_VOL" CmdPar1="0x1" CmdPar2="0x1" CmdPar3="10" CmdPar4="2"/> <CTI_IE_REFERENCE Ref="0x420"/> </msg> Response <msg Id="CTI_NSPK_CMD_CONF"> <CTI_IE_REFERENCE Ref="0x420"/> <CTI_IE_RESULT Result="OK"/> </msg> ® TELEKOMUNIKACE a.s., www.2n.cz...
- Page 107 Enter the command to set the source balance. Defined by CmdPar1 = SessionId, CmdPar2 = SourceId, CmdPar3 = balance and CmdPar4 = transition time from the current value to the new one. Request <msg Id="CTI_NSPK_CMD_REQ"> <CTI_NSPK_IE_SES_CMD Cmd="SET_BAL" CmdPar1="0x1" CmdPar2="0x1" CmdPar3="0" CmdPar4="2"/> <CTI_IE_REFERENCE Ref="0x420"/> </msg> Response <msg Id="CTI_NSPK_CMD_CONF"> <CTI_IE_REFERENCE Ref="0x420"/> <CTI_IE_RESULT Result="OK"/> </msg> ® TELEKOMUNIKACE a.s., www.2n.cz...
- Page 108 Set File Position in Source Enter the command to set the position of the played file in a source. Defined by CmdPar1 = SessionId, CmdPar2 = SourceId and CmdPar3 = time in milliseconds. Request <msg Id="CTI_NSPK_CMD_REQ"> <CTI_NSPK_IE_SES_CMD Cmd="SET_POS" CmdPar1="0x1" CmdPar2="0x1" CmdPar3="5000"/> <CTI_IE_REFERENCE Ref="0x420"/> </msg> Response <msg Id="CTI_NSPK_CMD_CONF"> <CTI_IE_REFERENCE Ref="0x420"/> <CTI_IE_RESULT Result="OK"/> </msg> ® TELEKOMUNIKACE a.s., www.2n.cz...
- Page 109 Playlist Configuration Here is overview what you can find in this section: List of All Playlists Create Playlist Edit Playlist Delete Playlist List of All Files in All Playlists Delete File from Playlist ® TELEKOMUNIKACE a.s., www.2n.cz...
- Page 110 List of All Playlists Enter the command to list all playlists defined for the server. Defined by the PlayListId, Name and Flags parameters (currently unused). Request <msg Id="CTI_NSPK_GET_ALL_PLAYLISTS_REQ"> <CTI_IE_REFERENCE Ref="0x420"/> </msg> Response <msg Id="CTI_NSPK_GET_ALL_PLAYLISTS_CONF"> <CTI_IE_REFERENCE Ref="0x420"/> <CTI_NSPK_IE_PLAYLIST PlayListId="0x1" Name="Muj playlist 1" Flags="0x0"/> <CTI_NSPK_IE_PLAYLIST PlayListId="0x4" Name="Novy playlist" Flags="0x0"/> </msg> ® TELEKOMUNIKACE a.s., www.2n.cz...
- Page 111 Create Playlist Enter the command to create a new playlist. Defined by the PlayListId, Name and Flags parameters (currently unused). Request <msg Id="CTI_NSPK_SET_PLAYLIST_REQ"> <CTI_IE_REFERENCE Ref="0x421"/> <CTI_NSPK_IE_PLAYLIST PlayListId="0x1" Name="Muj playlist novy" Flags="0x0"/> </msg> Response <msg Id="CTI_NSPK_SET_PLAYLIST_CONF"> <CTI_IE_REFERENCE Ref="0x421"/> <CTI_IE_RESULT Result="OK"/> </msg> ® TELEKOMUNIKACE a.s., www.2n.cz...
- Page 112 Edit Playlist Enter the command to modify an existing playlist. Defined by the PlayListId, Name and Flags parameters (currently unused). Request <msg Id="CTI_NSPK_SET_PLAYLIST_REQ"> <CTI_IE_REFERENCE Ref="0x421"/> <CTI_NSPK_IE_PLAYLIST PlayListId="0x7" Name="Muj playlist upraveny" Flags="0x0"/> </msg> Response <msg Id="CTI_NSPK_SET_PLAYLIST_CONF"> <CTI_IE_REFERENCE Ref="0x421"/> <CTI_IE_RESULT Result="OK"/> </msg> ® TELEKOMUNIKACE a.s., www.2n.cz...
- Page 113 Delete Playlist Enter the command to delete an existing playlist. Defined by the PlayListId parameter. Request <msg Id="CTI_NSPK_REMOVE_PLAYLIST_REQ"> <CTI_IE_REFERENCE Ref="0x423"/> <CTI_NSPK_IE_PLAYLIST_ID PlayListId="0x2"/> </msg> Response <msg Id="CTI_NSPK_REMOVE_PLAYLIST_CONF"> <CTI_IE_REFERENCE Ref="0x423"/> <CTI_IE_RESULT Result="OK"/> </msg> ® TELEKOMUNIKACE a.s., www.2n.cz...
- Page 114 List of All Files in All Playlists Enter the command to list all files in all existing playlists. Defined by the PlayListId, FileId, Priorities, Filename, Duration and Shuffle parameters. Request <msg Id="CTI_NSPK_GET_ALL_PLAYLISTS_FILES_REQ"> <CTI_IE_REFERENCE Ref="0x420"/> </msg> Response <msg Id="CTI_NSPK_GET_ALL_PLAYLISTS_FILES_CONF"> <CTI_IE_REFERENCE Ref="0x420"/> <CTI_NSPK_IE_PLAYLIST_FILE PlayListId="0x1" FileId="0x1" Priority="1" FileName="C:\Documents and Settings\All Users\Data aplikacĂ-\2N TELEKOMUNIKACE\2N NetSpeaker\Server\Media\Test.mp3" Duration="54085" Shuffle="0x0"/> </msg> ® TELEKOMUNIKACE a.s., www.2n.cz...
- Page 115 Delete File from Playlist Enter the command to delete a file from an existing playlist. Defined by the PlayListId and FileId parameters. Request <msg Id="CTI_NSPK_REMOVE_PLAYLIST_FILE_REQ"> <CTI_IE_REFERENCE Ref="0x423"/> <CTI_NSPK_IE_PLAYLIST_FILE_ID PlayListId="0x2" FileId="0x1"/> </msg> Response <msg Id="CTI_NSPK_REMOVE_PLAYLIST_FILE_CONF"> <CTI_IE_REFERENCE Ref="0x423"/> <CTI_IE_RESULT Result="OK"/> </msg> ® TELEKOMUNIKACE a.s., www.2n.cz...
-
Page 116: Supported Internet Radio Stations
6. Supported Internet Radio Stations Canada Radio Comment CJSW http://stream.cjsw.com/cjsw.mp3.m3u CHRW http://chrwradio.com/playlist/stream.m3u CKLN http://www.ckln.fm/streams/ckln.m3u Czech republic ® TELEKOMUNIKACE a.s., www.2n.cz... - Page 117 ČRo Wave http://www.rozhlas.cz/audio/download/radiowave_high_mp3.m3u Evropa2 http://icecast3.play.cz/evropa2-128.mp3.m3u Frekvence http://icecast4.play.cz/frekvence1-128.mp3.m3u Radio http://icecast3.play.cz/bonton-128.mp3.m3u Bonton Impuls http://icecast5.play.cz/impuls128.mp3.m3u Radio Orlik http://www.play.cz/radio/orlik128.mp3.m3u Rock Zone http://icecast5.play.cz/rockzone128.mp3.m3u Radio http://icecast5.play.cz:8000/dechovka128.mp3 Dechovka Radio Beat http://62.44.1.26:8000/radiobeat128.mp3 Radio http://kocka.limemedia.cz:8000/blanikfm128.mp3.m3u Blanik Denmark ® TELEKOMUNIKACE a.s., www.2n.cz...
- Page 118 Järviradio http://radio.6net.fi:8000/jarviradio.m3u Metro FM http://217.30.180.242:8000/mrfm.mp3.m3u http://149.5.240.22/WR-FI-finland.m3u NRJ Hip-Hop http://149.5.240.22/WR-FI-HIPHOP.m3u NRJ Suomihitit http://149.5.240.22/WR-FI-WR10.m3u NRJ RNB http://149.5.240.22/WR-FI-RNB.m3u NRJ POP http://149.5.240.22/WR-FI-POP.m3u Oi FM http://media.innoventum.fi:8000/oifm.m3u NRJ HIT http://149.5.240.22/WR-FI-HIT.m3u Radio 957 http://www.radio957.fi/nettiradio/957.m3u Radio Aalto http://www.listenlive.eu/aalto.m3u Iskelmä http://www.iskelma.fi/nettiradio/iskelma.m3u Iceland ® TELEKOMUNIKACE a.s., www.2n.cz...
- Page 119 United Kingdom Radio Comment Big L 1395 http://eastlondonradio.com:8100/biglh.mp3.m3u Bolton FM http://icecast.commedia.org.uk:8000/boltonfm.mp3.m3u Choice FM http://media-ice.musicradio.com/ChoiceFMMP3.m3u Demon FM http://live.demonfm.co.uk:8000/demon.m3u Gold http://media-ice.musicradio.com/GoldMP3.m3u Insight Radio http://icy-e-03.sharp-stream.com/insightradio.mp3.m3u North Manchester http://live.canstream.co.uk:8000/manchesterfm.mp3.m3u Queen's http://quis.qub.ac.uk:8080/qrlivehi.m3u Radio Two Lochs http://icecast.commedia.org.uk:8000/twolochs.mp3.m3u Radio The Source http://live.canstream.co.uk:8000/sourcefm.mp3.m3u ® TELEKOMUNIKACE a.s., www.2n.cz...
- Page 120 Rádio Lumen http://audio.lumen.sk:8000/live128.mp3.m3u Rádio Prešov http://www.radiopresov.sk/lib/jorbis/64.mp3.m3u Radio Viva http://85.159.106.242:8000/vivastream64.mp3.m3u Rádio Kiss http://85.159.106.242:8000/kissmp3_128.mp3.m3u Rádio http://www.frontinus.sk/frontinus128.m3u Frontinus Sweden Radio Comment Sveriges Radio http://sverigesradio.se/topsy/direkt/132-hi-mp3.m3u supported Lite FM http://www.litefm.se/live.m3u Radio Guld http://audiostream.picsearch.com:8000/radioguld.m3u Studentradion http://130.238.166.180:8004/live.m3u 98,9 Tidaholm FM http://radio.fnf.nu:443/radiotidaholm.mp3.m3u ® TELEKOMUNIKACE a.s., www.2n.cz...
-
Page 121: Ip Audio System Limits And Specifications
FTP - installation is required, otherwise you will have problems with stability) Microsoft. NET Framework 4 redistributable package (part of the installation) ® Registration No: Counterparty calls on the IP address of 2N NetSpeaker predefined server and port for the SIP trunk (eg 5061). ® Registration: NetSpeaker only client netspeaker registering in the PBX. It cannot switch to mode = SIP registrar proxy (no phones register to it). - Page 122 In version 1.1.1 and higher, TELNET is off by default immediately after ® connecting to the NetSpeaker Server . After disconnecting from the server, ® TELNET is re-activated. If you want to enable TELNET even when 2N NetSpeaker is connected to the server, you must enable this in Speakers in the Control Panel. Test Results Intel XEON HW – CPU, Chipset...
-
Page 123: Ip Audio System - Http Manual
8. IP Audio System - HTTP Manual NetSpeker server supports http commands for control of session. Http commands should be used in the following form: Request http://nspk_addr:port/httpAPI.xml?session=1&state=ON&volume=10&mute=OFF&cha The answer for this command: Response <?xml version="1.0" encoding="UTF-8"?> <callctrl-result> <errcode>0</errcode> </callctrl-result> On error: errcode 1. Default port is 8088 and can be changed in the Control Panel. ® TELEKOMUNIKACE a.s., www.2n.cz... - Page 124 2N TELEKOMUNIKACE a.s. Modřanská 621, 143 01 Prague 4, Czech Republic Tel.: +420 261 301 500, Fax: +420 261 301 599 E-mail: sales@2n.cz Web: www.2n.cz ® TELEKOMUNIKACE a.s., www.2n.cz...
Need help?
Do you have a question about the NetSpeaker and is the answer not in the manual?
Questions and answers