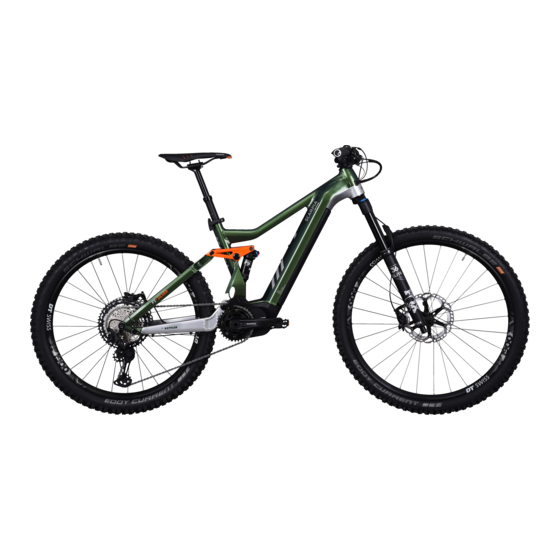
Kettler Scarpia FS 1.0 LTD Gold Translation Of The Original Operating Instructions
Mountain bike
Hide thumbs
Also See for Scarpia FS 1.0 LTD Gold:
- Translation of original operating instructions (292 pages)
Table of Contents
Advertisement
Quick Links
TRANSLATION OF THE ORIGINAL OPERATING INSTRUCTIONS
IMPORTANT
READ CAREFULLY BEFORE USE
KEEP SAFE TO CONSULT AT A LATER DATE
Shimano 8000 operating instructions
Scarpia FS 1.0 LTD Gold, Scarpia FS 1.0 LTD Silver, Scarpia FS 2.0,
Scarpia FS 3.0,
K S 1 2 7 - Z A K D , K S 1 2 8 - Z A K D , K S 1 2 9 - Z A K D , K S 1 3 0 - Z A K D
MY20K03-2_1. 0_ 1 8.0 7.20 19
Advertisement
Table of Contents

Related Manuals for Kettler Scarpia FS 1.0 LTD Gold


Summary of Contents for Kettler Scarpia FS 1.0 LTD Gold
- Page 1 KEEP SAFE TO CONSULT AT A LATER DATE Shimano 8000 operating instructions Scarpia FS 1.0 LTD Gold, Scarpia FS 1.0 LTD Silver, Scarpia FS 2.0, Scarpia FS 3.0, K S 1 2 7 - Z A K D , K S 1 2 8 - Z A K D , K S 1 2 9 - Z A K D , K S 1 3 0 - Z A K D...
-
Page 2: Table Of Contents
Contents Contents 3.1.7 Riding light 3.1.8 Display 3.1.9 Operating elements About these operating instructions Proper use Manufacturer Improper use Type number and model Technical data Identifying the operating instructions 3.4.1 Pedelec Laws, standards and directives 3.4.2 Rechargeable battery Subject to change 3.4.3 Emissions Language... - Page 3 Contents 5.3.4.1 Wheel with quick release (15 mm) 6.6.8 Setting the FOX rear frame damper 5.3.4.2 Adjusting the FOX quick release 6.6.8.1 Adjusting the negative deflection 5.3.4.3 Installing the wheel with Kabolt axles 6.6.8.2 Adjusting the rebound 5.3.4.4 Checking the stem and handlebars 6.6.9 Retracting the brake linings 5.3.5...
- Page 4 Contents 6.15.2 Adjusting the compression of the Fox 7.4.4 Checking and adjusting the tyre pressure damper 6.15.3 Adjusting the compression of the 7.4.4.1 Dunlop valve Suntour fork 7.4.4.2 Presta valve 6.15.4 Adjusting the compression of a 7.4.4.3 Schrader valve Suntour damper 7.4.5 Brake system 6.15.5...
-
Page 5: About These Operating Instructions
Scarpia FS 3.0 Mountain bike and suggestions in the operating instructions. They will help you to enjoy your KETTLER Table 1: Type number, model and pedelec type pedelec for a long time to come. We hope you Identifying the operating... -
Page 6: Subject To Change
If you are unable to contact General warning your specialist dealer, you will find other specialist dealers online at https://www.kettler-alu-rad.de/ gb/en/index.html. Adhere to the instructions for use The rider or the operator of the pedelec will be... -
Page 7: For Your Information
About these operating instructions For your information 1.8.3 Information on the nameplate Alongside the warnings, product nameplates also 1.8.1 Instructions for actions contain other important information about the Instructions for actions are structured in pedelec: accordance with the following pattern: ... -
Page 8: Nameplate
Nameplate The nameplate is situated on the frame. You will information on the nameplate. find the precise position of the nameplate in Figure 2. You will find thirteen pieces of KETTLER Alu-Rad GmbH Longericher Str. 2 50739 Köln, Germany Typ:... -
Page 9: Safety
Safety Safety General warnings CAUTION WARNING Electric shock in case of damage Risk of fire and explosion due to faulty battery Damaged chargers, cables and plug connectors increase the risk of electric shock. The safety electronics on a damaged or faulty battery may fail. -
Page 10: Toxic Substances
Safety Toxic substances CAUTION WARNING Risk of fire and explosion due to high temperatures Intoxication from suspension oil Excessively high temperatures will damage the Suspension oil in the rear frame damper is toxic to battery. The battery may self-ignite and explode. the touch, irritates respiratory tracts and causes ... -
Page 11: Requirements For The Rider
Safety Protection for vulnerable groups CAUTION You must keep batteries and charger away from Environmental hazard posed by oil and children and people with reduced physical, lubricants from the fork sensory or mental capabilities or lacking in experience and knowledge. The fork contains toxic, environmentally harmful oils If minors are to use the pedelec, comprehensive and lubricants. -
Page 12: Emergency
Safety After skin contact Symbol Explanation Remove any solid particles immediately. Rinse Read the instructions the affected area with plenty of water for at least 15 minutes. Then dab the affected skin gently. Do Separate collection of electrical not rub dry. Remove contaminated clothing and electronic devices immediately. -
Page 13: Leaking Fluids
Safety 2.8.4 Leaking fluids 2.8.4.1 Brake fluid The brake system must be repaired immediately if brake fluid leaks out. Contact your specialist dealer about repair. Dispose of leaking brake fluid in an environmentally responsible way in accordance with statutory regulations. Ask a specialist dealer for more information. -
Page 14: Overview
Overview Overview 11 12 Figure 2: Pedelec viewed from the right, example Front wheel Saddle Fork Rear wheel Handlebars Chain Stem Frame number Frame Damper Seat post Battery and nameplate MY20K03-2_1.0_18.07.2019... -
Page 15: Description
Overview Description 3.1.2 Suspension Both forks and suspension forks are fitted in this 3.1.1 Wheel and suspension model series. A suspension fork is based either on a steel spring or air suspension. Unlike a rigid fork, a suspension fork has two functions which improve floor contact and comfort: suspension and damping. -
Page 16: Steel Suspension Fork Structure
Overview 3.1.2.1 Steel suspension fork structure 3.1.2.2 Air suspension fork structure The pedelec's fork features both air suspension and a compression damper plus a rebound damper in some cases. Figure 5: Example showing Suntour fork The stem and handlebars are fastened to the fork steerer (1). -
Page 17: Structure Of The Fox Rear Frame Damper
Overview 3.1.2.3 Structure of the FOX rear frame damper Air valve Air chamber The rear frame damper features air suspension, a Lockout lever compression damper and a rebound damper. Rebound lever 3.1.3 Brake system The pedelec's brake system comprises either a hydraulic: •... -
Page 18: Disc Brake
Overview The hydraulic rim brake features a locking lever. 3.1.3.3 Back-pedal brake Figure 10: Rim brake locking lever, closed (1) and open (2) The rim brake locking lever is not marked with any lettering. Figure 12: Pedelec brake system with a back-pedal brake Only a specialist dealer may set the rim brake locking lever –... -
Page 19: Electric Drive System
Overview 3.1.4 Electric drive system Chain tensioner Drive unit cover The pedelec is driven by muscle power applied to Drive unit the chain drive. The force which is applied by Rear derailleur (DI2) pedalling in the direction of travel drives the front Front chainring chain wheel. -
Page 20: Charger
Overview 3.1.8 Display The battery's service life can be extended if it is well maintained and, above all, stored at the The display controls the drive system with two correct temperatures. The charging capacity will operating elements shifter and assistance lever decrease with age, even if the battery is and displays the journey data. -
Page 21: Proper Use
Overview Proper use The general laws and the regulations for the prevention of accidents and environmental The pedelec must only be used in perfect, fully protection in the respective country of use must be functional condition. National requirements may adhered to. All check lists and instructions for apply to the pedelec which the standard actions in these operating instructions met. -
Page 22: Improper Use
Overview Improper use • carrying other people • riding with excessive baggage Failure to adhere to the proper use poses a risk of • riding with no hands personal injury and material damage. The pedelec • riding on ice and snow is not suitable for the following uses: •... -
Page 23: Technical Data
Overview Technical data 3.4.1 Pedelec Transportation temperature -20 °C - +60 °C Storage temperature -20 °C - +70 °C Operation temperature -10 °C - 50 °C Charging ambient temperature 0 °C - 40 °C Power output/system 250 W (0.25 kW) Shut-off speed 25 km/h Table 11: Pedelec technical data... -
Page 24: Environmental Requirements
Overview Environmental requirements You can be ride the pedelec within a temperature As a general rule, you should avoid temperatures range between 5 °C and 35 °C. The drive system under -10 °C or over +60 °C. is limited in its performance outside this You must also keep within the following temperature range. - Page 25 Overview The pedelec is unsuitable for the following areas of use: Child's bicycles/ City and trekking Area of use bicycles for young Mountain bikes Racing bicycle Cargo bike Folding bicycle bicycles adults Never drive off-road Never drive off-road Never drive off-road Never drive off-road Never drive off-road or perform jumps.
-
Page 26: Description Of Controls And Screens
Overview Description of controls and 3.6.3 Display screen indicators screens The display has eight on-screen indicators: 3.6.1 Handlebars Figure 18: Detailed view of pedelec from rider position, example Figure 19: On-screen indicators overview Rear brake lever Front brake lever Assistance lever Gear indicator Fork lock on the suspension fork Display area of system messages... -
Page 27: Warnings
Overview 3.6.3.3 Warnings 3.6.3.5 Battery level indicator The battery level indicator indicates the battery level as a percentage in a bar symbol. 100 - 81% 80 - 61% 60 - 41% 40 - 21% 20 - 1% Figure 20: Example: Warning W010 Table 20: Charge level of the battery Warnings are displayed between the selected 3.6.3.6 Journey information... -
Page 28: Level Of Assistance
Overview 3.6.3.8 Level of assistance The higher the level of assistance, the more the drive system assists the rider when pedalling. The following levels of assistance are available: Screen display Details B O O ST High level of assistance. T R AIL Normal assistance E CO Low level of assistance... -
Page 29: Transporting And Storing
Transporting and storing Transporting and storing CAUTION Physical transport Oil leak if no transport securing device characteristics The brake securing device prevents the brakes from being applied accidentally during 4.1.1 Dimensions during transportation transportation. This could cause irreparable damage to the brake system or an oil leak, which There was no information relating to the box will harm the environment. -
Page 30: Transporting The Battery
Transporting and storing Storing Notice The specialist dealer will advise you on how to CAUTION select a suitable rack system properly and how to use it safely. Risk of fire and explosion due to high temperatures If you ship the pedelec, we recommend that you have it partially dismantled and packaged Temperatures over 60 °C can also cause liquid to properly by the specialist dealer. -
Page 31: Break In Operation
Transporting and storing 4.3.1 Break in operation 4.3.1.1 Preparing a break in operation Remove battery from the pedelec. Notice Charge battery to around 30%–60%. The battery discharges when not in use. This can The pedelec needs to be cleaned with a damp cause irreparable damage to the battery. -
Page 32: Assembly
Assembly Assembly Unpacking CAUTION WARNING Hand injuries caused by cardboard packaging Injury to the eyes The shipping carton is closed with metal staples. Problems may arise if the settings are not made There is a risk of puncture wounds and cuts when to components properly and you may sustain unpacking and crushing the packaging. -
Page 33: Commissioning
Assembly Commissioning 5.3.1 Checking the battery WARNING CAUTION Risk of fire and explosion due to faulty battery Risk of fire and explosion due to incorrect charger The safety electronics may fail if the battery is damaged or faulty. The residual voltage can Batteries which are recharged with an unsuitable cause a short circuit. -
Page 34: Installing The Wheel With Screw-On Axle (20 Mm)
Assembly Tighten the axle with a 5 mm hexagon socket 5.3.2.2 Installing the wheel with screw-on axle (20 mm) spanner to 8–10 Nm. Insert the axle completely on the drive side. Figure 24: Tightening the axle Insert the securing screw on the non-drive Figure 27: Tightening the inserted axle side. -
Page 35: Installing The Wheel With A Quick Release Axle
Assembly Tighten the axle with the red handle. 5.3.2.3 Installing the wheel with a quick release axle CAUTION Crash caused by loose quick release axle A faulty or incorrectly installed quick release axle may become caught in the brake disc and block the wheel. -
Page 36: Installing The Wheel With A Quick Release
Assembly Check the position and clamping force of the 5.3.3 Installing the wheel with a quick quick release lever. The quick release lever release must be flush with the lower housing. You must CAUTION be able to see a slight impression on the palm of your hand when you close the quick release Crash caused by unfastened quick lever. -
Page 37: Installing The Wheel In The Fox Fork
Assembly Push in the quick release until you hear a 5.3.4 Installing the wheel in the FOX fork clicking sound. Make sure that the flange is Only applies to pedelecs with this equipment extended. 5.3.4.1 Wheel with quick release (15 mm) The procedure for installing the 15 x 100 mm and 15 x 110 mm quick releases is the same. -
Page 38: Adjusting The Fox Quick Release
Assembly 5.3.4.2 Adjusting the FOX quick release 5.3.4.3 Installing the wheel with Kabolt axles The procedure for installing the 15 x 100 mm and 15 x 110 mm Kabolt axles is the same. Place the front wheel in the fork ends of the fork. -
Page 39: Pedelec Sale
Assembly 5.3.5 Pedelec sale Firm hold Place your entire body weight on the Complete the data sheet on the operating handlebars with the quick release lever closed instructions envelope. to check that the stem is firmly in place. ... -
Page 40: Operation
Operation Operation CAUTION Risks and hazards Risk of fire and burning due to hot motor The motor housing becomes hot when riding. WARNING Touching it may cause burns to the skin or other objects. Injuries and death caused by other road users ... -
Page 41: Tips For A Greater Range
Operation Stopping & starting Notice Stopping and starting all the time is less Moisture penetrating at low temperatures may economical than long stretches at the same impair individual pedelec functions due to the speed, just like with a car. open structural design. ... -
Page 42: Error Messages
Operation Error messages Battery error message The battery indicates errors with different LED statuses. The LED statuses are lit ( ), non-lit ) and flashing ( Lighting pat- Type Status Remedy tern System error Communication error with Check that the charging cable is firmly and properly connected. the bicycle system. -
Page 43: Warning Message
Operation Warning message Code Cause Limitation Remedy W010 The drive unit temperature is Pedal assistance is possibly less Do not use the assistance function any more until the drive unit higher than during normal than normal. temperature decreases. operation. ... -
Page 44: Error Message Screen
Operation Error message screen If an error message is shown over the entire display, follow the procedure indicated below to reset the screen. Press the On-Off button (battery). Take the battery from the mount. Contact your specialist dealer if the problem persists. -
Page 45: Before The First Ride
Operation Before the first ride 6.6.2 Determining the seat height To determine the seat height safely, either push CAUTION the pedelec near to a wall, so that you can lean on the wall to support yourself or ask another person Crash caused by incorrectly adjusted torques to hold the pedelec for you. -
Page 46: Height-Adjustable Seat Post
Operation The seat post quick release with clamping lever (5) and setting bolt (4) in the open position (1) and in the direction of the closed position (2). Set the seat post at the required height. CAUTION Figure 47: The seat post activation lever can be installed either on the left (1) or the right (2) side of the handlebars Crash caused by an excessively high seat post setting... -
Page 47: Adjusting The Handlebars
Operation within its permitted displacement range only 6.6.3.2 Adjusting the height of the handlebars (marked on the saddle stay). CAUTION Crash caused by incorrectly set clamping force Excessively high clamping force will damage the quick release and cause it to lose its function. Insufficient clamping force will cause a detrimental transmission of force. -
Page 48: Turning The Handlebars To The Side
Operation 6.6.3.3 Turning the handlebars to the side 6.6.3.4 Checking the clamping force in quick releases Only applies to pedelecs with this equipment Open and close the quick releases on the stem or the seat post. CAUTION The clamping force is sufficient if the clamping Crash caused by incorrectly set clamping lever can be moved easily from the open final force... -
Page 49: Adjusting The Grip Distance
Operation Figure 52: Brake lever grip distance Figure 51: Using the twist knob (1) to adjust the pressure point 6.6.4.3 Adjusting the grip distance on a Magura brake lever 6.6.4.2 Adjusting the grip distance Only applies to pedelecs with this equipment WARNING Use a T25 TORX®... -
Page 50: Adjusting The Suspension Of The Suntour Fork
Operation 6.6.5 Adjusting the suspension of the 6.6.5.1 Adjusting the negative deflection Suntour fork Negative deflection (sag) is compression of the fork caused by the weight of the rider and their Only applies to pedelecs with this equipment gear (e.g. a backpack), the sitting position and the The following Suntour forks can be installed in this frame geometry. -
Page 51: Adjusting The Steel Suspension Fork Negative Deflection
Operation 6.6.5.3 Adjusting the steel suspension fork Rider weight AION, NEX XCR 32, XCR 34 negative deflection < 55 kg 35 - 50 psi 40 - 55 psi Only applies to pedelecs with this equipment 55 - 65 kg 50 - 60 psi 55 - 65 psi You can adjust the fork by tensioning the spring to the rider's weight and their preferred riding style. -
Page 52: Adjusting The Rebound
Operation 6.6.6 Adjusting the suspension of the 6.6.5.4 Adjusting the rebound FOX fork Only applies to pedelecs with this equipment Only applies to pedelecs with this equipment The rebound defines the speed at which the fork rebounds after being loaded. The rebound setting CAUTION depends on the air pressure setting. -
Page 53: Adjusting The Rebound
Operation The air valve is located under a blue cover on Measure the distance between the dust wiper the head of the left shock absorber. Screw off and the O-ring or cable tie. This dimension is the cover anti-clockwise. the sag. -
Page 54: Setting The Suntour Rear Frame Damper
Operation 6.6.7 Setting the Suntour rear frame Measure the distance between the rubber air damper chamber seal and the O-ring. This dimension is the sag. The recommended sag value is Only applies to pedelecs with this equipment between 15% (hard) and 25% (soft) of the "total damper deflection."... -
Page 55: Setting The Compression
Operation Set the compression adjuster to the OPEN 6.6.7.3 Setting the compression position. The compression damper setting of the rear frame damper makes it possible to set the damper Adjust the air pressure of the damper so that it according to the conditions of the ground. -
Page 56: Adjusting The Rebound
Operation 6.6.9 Retracting the brake linings 6.6.8.2 Adjusting the rebound The rebound defines the speed at which the rear Disc brakes require wearing-in time. The braking frame damper rebounds after being loaded. The force increases over time. You therefore need to rebound setting depends on the air pressure be aware that the braking force may increase setting. -
Page 57: Accessories
Operation Accessories CAUTION We recommend a parking stand into which either Risk of crushing due to exposed springs the front or rear wheel can be inserted securely for pedelecs which do not have a kickstand. The The child may crush his/her fingers on exposed following accessories are recommended: springs or open mechanical parts of the saddle or Description... -
Page 58: Bicycle Trailers
Operation 6.7.3 Pannier rack cables, brake cables, hydraulic and electrical cables are adjusted as necessary, the rider's The specialist dealer will advise on choosing a freedom of movement is not restricted and the suitable pannier rack. pedelec's permitted total weight is not exceeded. The specialist dealer must install the pannier rack The specialist dealer will provide instruction on the first time to ensure that it is safely fitted. -
Page 59: Before Each Ride
Operation Before each ride Check list before each ride Check the pedelec before each ride. CAUTION Do not use the pedelec if there is evidently something wrong with it. Crash caused by difficult-to-spot damage If the pedelec topples over or you have a fall or an ... -
Page 60: Using The Kickstand
Operation 6.10 Using the kickstand CAUTION CAUTION Crash caused by unsecured baggage Crash caused by a lowered kickstand Loose or unsecured objects on the pannier rack, e.g. belts, may become caught in the rear wheel. The kickstand does not fold up automatically. This may cause a crash with injuries. -
Page 61: Rechargeable Battery
Operation 6.12 Rechargeable battery CAUTION WARNING Chemical burns to the skin and eyes caused by faulty battery Risk of fire and explosion due to faulty battery Liquids and vapours may leak from a damaged or The safety electronics on a damaged or faulty faulty battery. -
Page 62: Side Down Tube Battery
Operation Notice If you leave a key inserted when riding or transporting the pedelec, it may break off or the locking system may open accidentally. Remove the key from the battery lock immediately after use. We recommend that you attach the key to a key ring. -
Page 63: Charging The Battery
Operation 6.12.2 Charging the battery The ambient temperature during the charging process must be within the range from 0 °C to 40 °C. WARNING The battery can remain on the pedelec or can Fire and explosion due to defective batteries be removed for charging. - Page 64 Operation You can check the current charging status by The LED light on the charger has three statuses: pressing the battery's On-Off switch. Status Meaning 100 - 81% The charger is recharging the battery. 80 - 61% Flashing There is a charging error. 60 - 41% Switched off Battery disconnected...
-
Page 65: Electric Drive System
Operation 6.13 Electric drive system Press the On-Off button (battery) briefly. The LED light will light up and indicate the 6.13.1 Switching on the drive system remaining battery capacity. If the drive system is switched on, the drive is CAUTION activated as soon as the pedals are moved with Crash caused by lack of readiness for braking... -
Page 66: Display
Operation 6.13.3 Display 6.13.5 Using the push assist system CAUTION CAUTION Crash caused by distraction Injury caused by pedals A lack of concentration while riding increases the The pedals turn when using the push assist due risk of an accident. This may cause a crash with to the system design. -
Page 67: Exit Walk Level Of Assistance
Operation 6.13.5.3 Exit WALK level of assistance 6.13.6.1 Clearing the displayed distance travelled Push the short assistance lever to change The settings menu is open. from the WALK level of assistance to the level of assistance last used. ... -
Page 68: Closing The Settings Menu
Operation 6.13.6.3 Closing the settings menu 6.13.6.5 Setting the clock Push the long assistance lever or short Configure the clock settings. First set the hours assistance lever briefly repeatedly until E X I T and then the minutes. You can change the values is highlighted. -
Page 69: Changing The Brightness
Operation 6.13.6.7 Changing the brightness 6.13.6.9 Change the units The settings menu is open. The settings menu is open. Press the button (display) briefly repeatedly Press the button (display) briefly repeatedly until BRIGHTNESS is displayed. until UNIT is displayed. ... -
Page 70: 11Changing The Font Colour
Operation 6.13.6.11 Changing the font colour 6.13.6.13 Rear derailleur reset The settings menu is open. The rear derailleur protection function will trigger Press the button (display) briefly repeatedly to protect the system if the pedelec is exposed to until FONT COLOR is displayed. -
Page 71: Brake
Operation 6.14 Brake DANGER DANGER After swallowing Hydraulic fluid can be fatal if it is swallowed Rinse out mouth with water. Never induce and penetrates into the respiratory system vomiting! Risk of aspiration! Place a person lying on their back who is Hydraulic fluid may leak out after an accident or due to material fatigue. -
Page 72: Using The Brake Lever
Operation WARNING CAUTION Amputation due to rotating brake disc Crash after cleaning or storage The brake disc in disc brakes is so sharp that it The brake system is not designed for use on a can cause serious injuries to fingers if they are pedelec which is placed on its side or turned inserted into the brake disc openings. -
Page 73: Using The Back-Pedal Brake
Operation 6.14.2 Using the back-pedal brake WARNING Only applies to pedelecs with this equipment Accidents on bends and slippery ground The best braking effect is achieved if the pedals You are at greater risk of falling off if you use ABS are in the 3 o'clock and 9 o'clock position when braking. -
Page 74: While Riding
Operation Remember that the anti-blocking system can WARNING make your braking distance longer. Reduce your speed on slippery ground. Brake in Accidents due to manipulation bursts and in good time. Modified or manipulated ABS components or use of non-authorised replacement components will have Notice an adverse effect on the ABS function. -
Page 75: Damper
Operation 6.15.2 Adjusting the compression of the 6.15.3 Adjusting the compression of the Fox damper Suntour fork Only applies to pedelecs with this equipment Only applies to pedelecs with this equipment The compression adjuster makes it possible to make The compression adjuster makes it possible to quick adjustments to the suspension behaviour of make quick adjustments to the suspension the damper to suit changes in terrain. -
Page 76: Adjusting The Rebound In A Rock
Operation Use the OPEN position for rough descents and The ideal setting for the rebound damper has been achieved when the rebound movement of the LOCK position for efficient climbing. First set the rear wheel feels comparable to that of the the compression adjuster to the OPEN position. -
Page 77: Gear Shift
Operation 6.16 Gear shift 6.16.2 Using the hub gear The selection of the appropriate gear is a Only applies to pedelecs with this equipment prerequisite for a physically comfortable ride and making sure that the electric drive system functions properly. The ideal pedalling frequency CAUTION is between 70 and 80 revolutions per minute. -
Page 78: Use Eshift
Operation If the system is switched on for the first time when a new, unused wheel is used, the system will learn the gears first. To do so, the automatic system changes to the highest/most difficult gear and then switches through all gears during the first ride. -
Page 79: Eshift With Nuvinci H|Sync/Enviolo With Optimized H|Sync
Operation 6.16.3.4 eShift with NuVinci H|Sync/enviolo with Optimized H|Sync Only applies to pedelecs with this equipment N U V I NC I C A D E N C E mode allows you to reduce or increase the desired pedalling frequency using the plus button or minus button on the operating unit. -
Page 80: Cleaning And Servicing
Cleaning and servicing Cleaning and servicing Cleaning check list The following servicing measures must be performed regularly. Servicing can be performed Clean the pedals after each ride by the operator and rider. In case of any doubt, consult the specialist dealer. Clean the suspension fork and, if ... -
Page 81: Basic Cleaning
Cleaning and servicing Basic cleaning 7.2.1 Cleaning the frame Soak dirt stains on the frame with dish-washing CAUTION detergent if the dirt is thick and ingrained. After leaving it to soak for a time, remove the Crash caused by brake failure dirt and mud with a sponge, brush and The braking effect may be unusually poor toothbrush. -
Page 82: Cleaning The Chain
Cleaning and servicing 7.2.6 Cleaning the chain 7.2.8 Cleaning the display Notice Notice Never use aggressive (acid-based) cleaners, If water enters into the display screen, it will be rust removers or degreasers when cleaning permanently damaged. the chain. Never immerse the display in water. ... -
Page 83: 11 7.2.10 Cleaning The Brake
Cleaning and servicing 7.3.2 Servicing the stem 7.2.10 Cleaning the brake Apply silicone or Teflon oil to the stem shaft WARNING tube and the quick release lever pivot point. Brake failure due to water penetration If you have speedlifter Twist, also apply oil to the unlocking bolt using the groove in the The brake seals are unable to withstand high speedlifter body. -
Page 84: Maintenance
Cleaning and servicing Maintenance 7.4.2 Checking the tyres Check the tyre wear. The tyre is worn if the CAUTION anti-puncture protection or the carcass cords are visible. Crash and falling caused by unintentional A specialist dealer will need to change the tyre activation if it is worn. -
Page 85: Presta Valve
Cleaning and servicing Screw the valve cap tight. 7.4.5 Brake system Screw the rim nut gently against the rim with CAUTION the tips of your fingers. Crash caused by brake failure 7.4.4.2 Presta valve Worn brake discs and brake linings, as well as a ... -
Page 86: Electrical Cables And Brake Cables
Cleaning and servicing 7.4.9 Electrical cables and brake cables Check all visible electrical cables and cables for damage. If the sheathing is compressed, for 2 cm example, the pedelec will need to be removed from service until the cables have been replaced. -
Page 87: Maintenance
Maintenance Maintenance CAUTION Hazard for the environment due to toxic WARNING substances Injury due to damaged brakes The brake system contains toxic and environmen- tally harmful oils and lubricants. Such fluids will con- Special tools and specialist knowledge are taminate if they enter the sewers or groundwater. required to repair the brakes. -
Page 88: Axle With Quick Release
Maintenance The specialist dealer will fully inspect the 8.1.1 Checking the quick release interior and exterior of the rear frame damper, Check the position and clamping force of the overhaul the rear frame damper, replace all air quick release lever. The quick release lever seals on air forks, overhaul the air suspension, must be flush with the lower housing. -
Page 89: Cable-Operated Gear Shift, Single-Cable
Maintenance 8.2.1 Cable-operated gear shift, single- 8.2.3 Cable-operated twist grip, dual- cable cable Only applies to pedelecs with this equipment Only applies to pedelecs with this equipment For a smooth gear shift, adjust the adjusting For a smooth gear shift, set the adjusting sleeves on the shifter housing. -
Page 90: Troubleshooting, Fault Clearance And Repair
Troubleshooting, fault clearance and repair Troubleshooting, fault clearance and repair Troubleshooting and fault Insert the battery. clearance Start the drive system. If the drive system does not start up, remove WARNING the battery. Risk of fire and explosion due to faulty battery ... -
Page 91: Assistance Function
Troubleshooting, fault clearance and repair Assistance function Symptom Cause Remedy Check the battery level. Is the battery charged sufficiently? If the battery is almost flat, recharge it. Are you riding on long inclines in summer Turn off the drive system. weather or have you been carrying a heavy ... -
Page 92: Rechargeable Battery
Troubleshooting, fault clearance and repair Rechargeable battery Symptom Cause Remedy The battery discharges The battery may be at the end of its service Replace the battery with a new one. quickly. life. Pull out the charger mains plug and reconnect it again. Is the charger mains plug firmly connected ... -
Page 93: Lighting
Troubleshooting, fault clearance and repair Symptom Cause Remedy Fumes are emitted from the WARNING battery. Move away from the battery immediately. Contact the fire service immediately. Observe all the safety instructions in Section 2 Safety. Table 45: Error solution for battery Lighting Symptom Cause... -
Page 94: Miscellaneous
Troubleshooting, fault clearance and repair Miscellaneous Symptom Cause Remedy Two beeps will sound if a This is not a malfunction. Pressed switch mode has been switch is pressed but the deactivated. switch cannot be operated. This occurs when a warning or an error is shown on the display Three beeps are sounded. -
Page 95: Recycling And Disposal
Recycling and disposal Recycling and disposal CAUTION Hazard for the environment WARNING The fork, rear frame damper and hydraulic brake Risk of fire and explosion system contain toxic and environmentally harmful The safety electronics on a damaged or faulty oils and lubricants. Such fluids will contaminate if battery may fail. -
Page 96: Documents
Documents Documents 11.1 Parts list There was no information relating to a parts list yet at the time of going to press. You'll find the information in the latest operating instructions. MY20K03-2_1.0_18.07.2019... -
Page 97: Assembly Report
Documents 11.2 Assembly report Date: Frame number: Components Description Criteria Measures if rejected Accept- Assembly/inspection Tests Rejection ance Front wheel Assembly O.K. Loose Adjust quick release Kickstand Check mount fastening Functional check O.K. Loose Retighten screws Tyre pressure too low/ Tyres Tyre pressure check O.K. - Page 98 Documents Components Description Criteria Measures if rejected Drive/gear shift Chain/cassette/ Refasten if necessary or replace Check for damage O.K. Damage pinion/chainring as specified in parts list Chain guard/spoke Check for damage O.K. Damage Replace as specified in parts list guard Bottom bracket axle/ Check mount fastening O.K.
-
Page 99: Maintenance Log
Documents 11.3 Maintenance log Diagnosis and documentation of current status Date: Frame number: Components Frequency Description Criteria Measures if rejected Inspection Tests Maintenance Accept- Rejection ance Front wheel 6 months Assembly O.K. Loose Adjust quick release Kickstand 6 months Check mount fastening Functional check O.K. - Page 100 Documents Components Frequency Description Criteria Measures if rejected Inspection Tests Maintenance Accept- Rejection ance Light system First examination O.K. Error message Contact battery Rechargeable manufacturer; take out of battery service, new battery Connections, correct O.K. Cable defective, New cabling Light cabling wiring no light Side light...
- Page 101 Documents Technical inspection, checking safety, test ride Components Description Criteria Measures if rejected Assembly/inspection Tests Accept- Rejection ance Functional check O.K. No full braking; braking Locate defective part in brake Brake system distance too long system and correct Gear shift under operat- Functional check O.K.
-
Page 102: Red Certification
Documents 11.4 RED certification MY20K03-2_1.0_18.07.2019... - Page 103 Documents DOC-0191-003 Българин [Bulgarian] Dansk [Danish] Eesti [Estonian] ЕС ДЕКЛАРАЦИЯ ЗА СЪОТВЕТСТВИЕ EU-OVERENSSTEMMELSESERKLÆRING ELI VASTAVUSDEKLARATSIOON 1 Радиосъоръжение (номер на продукта, тип, партиден или 1 Radioudstyr (produkt-, parti-, type- eller serienummer): 1 Raadioseade (toode, tüüp, partii- või seerianumber): сериен номер): 2 Име и адрес на производителя или на неговия упълномо 2 Navn og adresse på...
- Page 104 Documents DOC-0191-003 Español [Spanish] Français [French] Italiano [Italian] DECLARACIÓN UE DE CONFORMIDAD DECLARATION UE DE CONFORMITE DICHIARAZIONE DI CONFORMITÀ UE 1 Equipo radioeléctrico (producto, tipo, lote o número de 1 Équipement radioélectrique (numéro de produit, de type, de 1 Apparecchiatura radio (numero di prodotto, di tipo, di lotto o serie): lot ou de série): di serie):...
- Page 105 Documents DOC-0191-003 Lietuvių [Lithuanian] Magyar [Hungarian] Português [Portuguese] ES ATITIKTIES DEKLARACIJA EU-MEGFELELŐSÉGI NYILATKOZAT DECLARAÇÃO UE DE CONFORMIDADE 1 Radijo įrenginys (gaminio, partijos, tipo ar serijos numeris): 1 Rádióberendezés (termék-, típus-, tétel- vagy sorozatszám): 1 Equipamento de rádio (número do produto, do tipo, do lote ou de série): 2 Gamintojo arba jo įgaliotojo atstovo pavadinimas ir adresas: 2 A gyártó...
- Page 106 Documents DOC-0191-003 Slovensko [Slovenian] Suomi [Finnish] Türkçe [Turkish] IZJAVA EU O SKLADNOSTI U-VAATIMUSTENMUKAISUUSVAKUUTUS AB UYGUNLUK BEYANI 1 Radijska oprema (produkt, vrsta, serija ali serijska številka): 1 Radiolaite (tuote-, tyyppi-, erä- tai sarjanumero): 1 Telsiz ekipmanı (ürün, tip, paket ve seri numarası): 2 Ime in naslov proizvajalca ali njegovega pooblaščenega 2 Valmistajan tai sen valtuutetun edustajan nimi ja osoite: 2 Üreticinin veya yetkili temsilcisinin ismi ve adresi:...
-
Page 107: Documented Evidence Of Conformity With Directive 2014/35/Eu
Documents 11.5 Documented evidence of conformity with Directive 2014/ 35/EU MODEL: SC-E8000 RI-0191C-000 Regulatory information Europe Česky [Czech] Tímto SHIMANO INC. prohlašuje, že typ rádiového zařízení SC-E8000 je v souladu se směrnicí 2014/53/EU. Úplné znění EU prohlášení o shodě je k dispozici na této internetové adrese: http://si.shimano.com Dansk [Danish] Hermed erklærer SHIMANO INC., at radioudstyrstypen SC-E8000 er i overensstemmelse med direktiv 2014/53/EU. - Page 108 Documents Canada CAN ICES-3 [B] / NMB-3 [B] This device complies with Industry Canada license-exempt RSS standards. Operation is subject to the following two conditions: 1. this device may not cause interference, and 2. this device must accept any interference, including interference that may cause undesired operation of the device.
-
Page 109: Keyword Index
Keyword index Keyword index Gear recommendation, 25 Air chamber, 16 Saddle, 13 Air valve Gear shift twist grip, 25 - changing the saddle tilt, 44 Fork, 15 - checking, 85 - changing the seat length, 45 Rear frame damper, 16 Gear shift, - determining the saddle height, 44, Alternative equipment, 6... -
Page 110: Glossary
Glossary Glossary and associated wiring for the motor electrical power assistance. Brake lever Electrically power assisted cycle, pedelec Source: EN 15194:2017: lever used to apply the Source: EN 15194:2017: electrically power brake. assisted cycle, equipped with pedals and an auxiliary electric motor, which cannot be propelled Braking distance exclusively by means of the auxiliary electric motor, except in start-up assistance mode. - Page 111 Glossary Maximum continuous power Permitted total weight Source: ZEG: the maximum continuous power is Source: EN 15194:2017: weight of the fully the maximum power for the electric motor output assembled pedelec plus the rider and baggage, shaft during 30 minutes. as specified by the manufacturer.
- Page 112 Glossary Wear Source: DIN 31051: reduction in useful life (4.3.4), caused by chemical and/or physical processes. Weight of ready-to-ride bicycle Source: ZEG: the indicated weight for a ready-to- ride bicycle refers to the weight of a pedelec at the time of sale. The weight of each additional accessory must be added to this weight.
-
Page 113: Appendix
General drafting principle; EN 15194:2018 Cycles – Electrically power assisted cycles – EPAC bicycles and EN 11243:2016 Cycles – Luggage carriers for bicycles – Requirements and test methods. Ms. Janine Otto (Technical Editor), c/o KETTLER Alu-Rad GmbH, Longericher Str. 2, 50739 Köln, Germany, is authorised to compile the technical documentation.
Need help?
Do you have a question about the Scarpia FS 1.0 LTD Gold and is the answer not in the manual?
Questions and answers