
Related Manuals for Radware AppDirector OnDemand Switch VL


Summary of Contents for Radware AppDirector OnDemand Switch VL
- Page 1 AppDirector Installation and Maintenance Guide Document ID: RDWR_APD_IG_1312 December, 2013...
- Page 2 AppDirector Installation and Maintenance Guide Document ID: RDWR_APD_IG_1312...
-
Page 3: Important Notices
Ce guide d’informations est fourni à nos clients dans le cadre de l’installation et de l’usage des produits de Radware décrits dans ce document et ne pourra être utilisé dans un but autre que celui pour lequel il a été conçu. -
Page 4: Copyright Notices
The OnDemand Switch may use software components licensed under the GNU General Public License Agreement Version 2 (GPL v.2) including LinuxBios and Filo open source projects. The source code of the LinuxBios and Filo is available from Radware upon request. A copy of the license can be viewed at: http://www.gnu.org/licenses/old-licenses/gpl-2.0.html... - Page 5 AppDirector Installation and Maintenance Guide The Regents of the University of California. All rights reserved. Redistribution and use in source and binary forms, with or without modification, are permitted provided that the following conditions are met: 1. Redistributions of source code must retain the above copyright notice, this list of conditions and the following disclaimer.
- Page 6 GNU General Public License Agreement Version 2 (GPL v.2), y compris les projets à source ouverte LinuxBios et Filo. Le code source de LinuxBios et Filo est disponible sur demande auprès de Radware. Une copie de la licence est répertoriée sur: http://www.gnu.org/licenses/old-licenses/gpl-2.0.html Ce code est également placé...
- Page 7 Der OnDemand Switch verwendet möglicherweise Software, die im Rahmen der DNU Allgemeine Öffentliche Lizenzvereinbarung Version 2 (GPL v.2) lizensiert sind, einschließlich LinuxBios und Filo Open Source-Projekte. Der Quellcode von LinuxBios und Filo ist bei Radware auf Anfrage erhältlich. Eine Kopie dieser Lizenz kann eingesehen werden unter: http://www.gnu.org/licenses/old-licenses/gpl-2.0.html...
-
Page 8: Standard Warranty
Radware software carries a standard warranty that provides bug fixes for up to 90 days after date of purchase. Should a Product unit fail anytime during the said period(s), Radware will, at its discretion, repair or replace the Product. -
Page 9: Limitations On Warranty And Liability
S'agissant de la garantie d'échange ou de réparation du matériel informatique, le Produit doit être retourné chez un réparateur désigné par Radware. Le Client aura à sa charge les frais d'envoi du Produit à Radware et Radware supportera les frais de retour du Produit au client. Veuillez consulter les conditions spécifiques décrites dans la partie "... -
Page 10: Safety Instructions
CONSEQUENTIAL DAMAGES, SO THE ABOVE LIMITATION OR EXCLUSION MAY NOT APPLY TO YOU. Limitations de la Garantie et Responsabilité RADWARE LTD. OU SES ENTITIES AFFILIES NE POURRONT EN AUCUN CAS ETRE TENUES RESPONSABLES DES DOMMAGES SUBIS DU FAIT DE L'UTILISATION DES PRODUITS (EN CE... - Page 11 AppDirector Installation and Maintenance Guide The following figure shows the caution label that is attached to Radware platforms with dual power supplies. Figure 1: Electrical Shock Hazard Label DUAL-POWER-SUPPLY-SYSTEM SAFETY WARNING IN CHINESE The following figure is the warning for Radware platforms with dual power supplies.
- Page 12 AppDirector Installation and Maintenance Guide LINE VOLTAGE Before connecting this instrument to the power line, make sure the voltage of the power source matches the requirements of the instrument. Refer to the Specifications for information about the correct power rating for the device. 48V DC-powered platforms have an input tolerance of 36-72V DC.
- Page 13 AppDirector Installation and Maintenance Guide KCC KOREA Figure 5: KCC—Korea Communications Commission Certificate of Broadcasting and Communication Equipment Figure 6: Statement For Class A KCC-certified Equipment in Korean Translation of Statement For Class A KCC-certified Equipment in Korean: This equipment is Industrial (Class A) electromagnetic wave suitability equipment and seller or user should take notice of it, and this equipment is to be used in the places except for home.
- Page 14 AppDirector Installation and Maintenance Guide This marking or statement includes the following text warning: CAUTION RISK OF EXPLOSION IF BATTERY IS REPLACED BY AN INCORRECT BATTERY TYPE. DISPOSE OF USED BATTERIES ACCORDING TO THE INSTRUCTIONS. Caution – To Reduce the Risk of Electrical Shock and Fire 1.
- Page 15 AppDirector Installation and Maintenance Guide La figure suivante montre l’étiquette d’avertissement apposée sur les plateformes Radware dotées de plus d’une source d’alimentation électrique. Figure 7: Étiquette d’avertissement de danger de chocs électriques AVERTISSEMENT DE SÉCURITÉ POUR LES SYSTÈMES DOTÉS DE DEUX SOURCES D’ALIMENTATION ÉLECTRIQUE (EN CHINOIS)
- Page 16 AppDirector Installation and Maintenance Guide FUSIBLES Assurez-vous que, seuls les fusibles à courant nominal requis et de type spécifié sont utilisés en remplacement. L’usage de fusibles réparés et le court-circuitage des porte-fusibles doivent être évités. Lorsqu’il est pratiquement certain que la protection offerte par les fusibles a été détériorée, l’instrument doit être désactivé...
- Page 17 AppDirector Installation and Maintenance Guide KCC Corée Figure 11: KCC—Certificat de la commission des communications de Corée pour les equipements de radiodiffusion et communication. Figure 12: Déclaration pour l’équipement de classe A certifié KCC en langue coréenne Translation de la Déclaration pour l’équipement de classe A certifié...
- Page 18 AppDirector Installation and Maintenance Guide AVERTISSEMENT RISQUE D’EXPLOSION SI LA BATTERIE EST REMPLACÉE PAR UN MODÈLE INCORRECT. METTRE AU REBUT LES BATTERIES CONFORMÉMENT AUX INSTRUCTIONS. Attention - Pour réduire les risques de chocs électriques et d’incendie 1. Cet équipement est conçu pour permettre la connexion entre le conducteur de mise à la terre du circuit électrique CC et l’équipement de mise à...
- Page 19 Servicepersonal durchgeführt werden. Zur Reduzierung der Feuer- und Stromschlaggefahr muss das Gerät vor der Entfernung der Abdeckung oder der Paneele von der Stromversorgung getrennt werden. Folgende Abbildung zeigt das VORSICHT-Etikett, das auf die Radware-Plattformen mit Doppelspeisung angebracht ist. Figure 13: Warnetikett Stromschlaggefahr SICHERHEITSHINWEIS IN CHINESISCHER SPRACHE FÜR SYSTEME MIT DOPPELSPEISUNG...
- Page 20 AppDirector Installation and Maintenance Guide HOCHSPANNUNG Jegliche Einstellungs-, Instandhaltungs- und Reparaturarbeiten am geöffneten Gerät unter Spannung müssen so weit wie möglich vermieden werden. Sind sie nicht vermeidbar, dürfen sie ausschließlich von qualifizierten Personen ausgeführt werden, die sich der Gefahr bewusst sind. Innerhalb des Gerätes befindliche Kondensatoren können auch dann noch Ladung enthalten, wenn das Gerät von der Stromversorgung abgeschnitten wurde.
- Page 21 AppDirector Installation and Maintenance Guide Figure 16: Erklärung zu VCCI-zertifizierten Geräten der Klasse B Übersetzung von Erklärung zu VCCI-zertifizierten Geräten der Klasse Dies ist ein Produkt der Klasse B gemäß den Normen des Voluntary Control Council for Interference by Information Technology Equipment (VCCI). Wird dieses Gerät in einem Wohnbereich benutzt, können elektromagnetische Störungen auftreten.
- Page 22 AppDirector Installation and Maintenance Guide VERKOPPLUNG VON GERÄTEN Kabel für die Verbindung des Gerätes mit RS232- und Ethernet- müssen UL-zertifiziert und vom Typ DP-1 oder DP-2 sein. (Anmerkung: bei Aufenthalt in einem nicht-LPS-Stromkreis) ÜBERSTROMSCHUTZ Ein gut zugänglicher aufgeführter Überstromschutz mit Abzweigstromkreis und 15 A Stärke muss für jede Stromeingabe in der Gebäudeverkabelung integriert sein.
-
Page 23: Altitude And Climate Warning
AppDirector Installation and Maintenance Guide Altitude and Climate Warning Note: This warning only applies to The People’s Republic of China. 对于在非热带气候条件下运行的设备而言, Tma:为制造商规范允许的最大环境温度,或者为 25°C,采用两 者中的较大者。 关于在海拔不超过 2000m 或者在非热带气候地区使用的设备,附加警告要求如下: 关于在海拔不超过 2000m 的地区使用的设备,必须在随时可见的位置处粘贴包含如下内容或者类似用语的警告标 记、或者附件 DD 中的符号。 “ 只可在海拔不超过 2000m 的位置使用。” 关于在非热带气候地区使用的设备,必须在随时可见的位置处粘贴包含如下内容的警告标记: “ 只可在非热带气候地区使用。” 附件... -
Page 24: Document Conventions
AppDirector Installation and Maintenance Guide Document Conventions The following describes the conventions and symbols that this guide uses: Item Description Description (French) Beschreibung (German) An example scenario Un scénario d’exemple Ein Beispielszenarium Example Possible damage to Endommagement Mögliche Schäden an equipment, software, or possible de l’équipement, Gerät, Software oder... -
Page 25: Table Of Contents
Chapter 2 – Pre-Installation..................Unpacking Instructions ....................Unpacking the Platform ....................... Checking the Contents ......................NEBS Requirements ....................Rack and Radware Platform ....................Grounding ..........................Port Cables .......................... Specifications ........................Mounting the Platform ....................Connecting Cables to a Platform ................. - Page 26 OnDemand Switch 1 Platform Specifications ............. OnDemand Switch 2 Platform Specifications ............. OnDemand Switch 3 Platform Specifications ............. AC Power Factor ......................Serial Cable Pin Assignment ..................Transceiver-Module Specifications ................Radware Ltd. End User License Agreement ............Document ID: RDWR_APD_IG_1304...
-
Page 27: Chapter 1 - Platforms
Reset button. Resets the platform. Serial RJ-45 port for out-of-band management. Note: Radware supplies a RJ-45–to–DE-9 adapter cable to connect the console port of the platform to a console PC. USB port for recovery and file transfer. Six RJ-45 GbE ports for traffic or in-band management. -
Page 28: Ondemand Switch 1
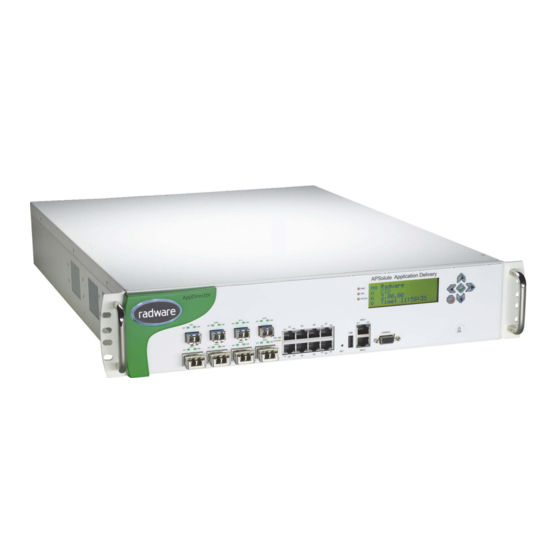
AppDirector Installation and Maintenance Guide Platforms Table 1: OnDemand Switch VL Front Panel Connectors and Indicators Feature Label/Description Two SFP GbE ports for traffic. • ACT—Flashing indicates activity. • LINK—Green indicates 1000 Mbit/s. Status LEDs: • PWR OK—Green indicates normal power supply operation. •... - Page 29 AppDirector Installation and Maintenance Guide Platforms Table 3: OnDemand Switch 1 Front Panel Connectors and Indicators Feature Label/Description Four dual (SFP or RJ-45) GbE ports for traffic or management. Only one side of a dual port can be active at the same time. LEDs: •...
-
Page 30: Ondemand Switch
AppDirector Installation and Maintenance Guide Platforms Figure 23: OnDemand Switch 1 (with Dual Power Supply) Back Panel Table 4: OnDemand Switch 1 Back Panel Feature Description Power supply The socket to which the power cable is connected. socket(s) CompactFlash Insertion point for compact flash card. Ground screws Screws to ground the platform chassis to the rack. - Page 31 AppDirector Installation and Maintenance Guide Platforms Figure 26: OnDemand Switch 2 Front Panel Table 5: OnDemand Switch 2 Front Panel Connectors and Indicators Feature Label/Description SFP GbE ports for traffic or management. The platform supports four (4) SFP ports. LEDs: •...
-
Page 32: Ondemand Switch
AppDirector Installation and Maintenance Guide Platforms Figure 28: OnDemand Switch 2 (with Dual Power Supply) Back Panel Figure 29: OnDemand Switch 2 NEBS Back Panel Table 6: OnDemand Switch 2 Back Panel Feature Description Power supply The socket to which the power cable is connected. socket(s) CompactFlash Insertion point for compact flash card. - Page 33 AppDirector Installation and Maintenance Guide Platforms Table 7: OnDemand Switch 3 Front Panel Feature Label/Description 10 Gigabit Ethernet (10GbE) ports for traffic or management. The platform supports four XFP ports. LEDs: • ACT—Flashing indicates activity. • LINK—Green indicates 10GbE. SFP GbE ports for traffic or management. The platform supports four SFP ports. LEDs: •...
-
Page 34: Dc Power Supply Connectors
AppDirector Installation and Maintenance Guide Platforms Figure 31: OnDemand Switch 3 Back Panel Table 8: OnDemand Switch 3 Back Panel Feature Description Dual power The socket to which the power cable is connected. supply sockets CompactFlash Insertion point for compact flash card. Ground screws Screws to ground the platform chassis to the rack. - Page 35 AppDirector Installation and Maintenance Guide Platforms Figure 32: DC Power Supply Connector 1U-size platforms Figure 33 shows the DC connector for the following platforms: • OnDemand Switch 2 2U-size platform • OnDemand Switch 3 platform Figure 33: DC Power Supply Connector 2U-size platforms –48V Blue Black...
-
Page 36: The Lcd Module
During the boot process, the third line, Loading…, changes to Loaded Boot <Boot version>. After the initial configuration, when the platform completes booting—or after 30 minutes without any activity, the LCD displays the following: oo Radware <Product> <Product version> Time: <HH:MM:SS>... - Page 37 AppDirector Installation and Maintenance Guide Platforms After the platform boots, press any of the LCD buttons to access the LCD menus. Table 10: LCD Menu Submenu Sub-submenu Remark Device Information Platform Platform type and version. Product Product. Version Version of product. MAC address of the platform.
- Page 38 AppDirector Installation and Maintenance Guide Platforms Document ID: RDWR_APD_IG_1304...
-
Page 39: Chapter 2 - Pre-Installation
2. Locate, remove, and set aside the accessories box. 3. Verify the contents of the accessories box with the packing list. Immediately report any missing item to your Radware representative. Notes — The accessories box contains all cables, power cords, mounting kits, a product CD with a user guide, and all other accessories required for the particular platform model and version. -
Page 40: Checking The Contents
Radware Operations. Rack and Radware Platform The rack in which a Radware platform is mounted must be in a Network Telecommunication Facility only. The NEBS-certified Radware platform and rack in which the platform is mounted must be installed in a restricted access location. -
Page 41: Port Cables
AppDirector Installation and Maintenance Guide Pre-Installation When mounting a Radware platform with a DC power supply, battery return terminals must be in the configuration of an Isolated DC Return (DC-I) or Common DC Return (DC-C). The following diagram shows the proper grounding connection to a Radware platform. -
Page 42: Connecting Cables To A Platform
AppDirector Installation and Maintenance Guide Pre-Installation 3. Connect at least one ground wire from the platform chassis to the rack. Typically, the platform has one or two, special, ground screws on the back panel near the screws that secure the power supply. -
Page 43: Ondemand Switch Boot Commands
— Insert the DE-9 connector of the RJ-45–to–DE-9 adapter cable to the console PC. Note: Radware supplies a RJ-45–to–DE-9 adapter cable to connect the console port of the platform to a console PC. 3. Connect the management cable (Ethernet 10/100/1000). - Page 44 AppDirector Installation and Maintenance Guide Pre-Installation Document ID: RDWR_APD_IG_1304...
-
Page 45: Chapter 3 - Platform Installation
Initial Configuration of Management Port Using the LCD Module, page 48 Configuring Management Ports Note: Radware management interfaces communicate with various UDP/TCP ports using HTTPS, HTTP, Telnet, and SSH. If you intend to use these interfaces, ensure they are accessible and not blocked by your firewall. - Page 46 Enter. login Enter the username and password. Note: Contact your Radware support representative for the default user name and password. d. To view the current IP interface setting, enter the following: net ip-interface get e. To add/modify/delete the existing IP Interface, enter the following: net ip-interface add/modify/delete or enter: net ip-interface help to see the command options.
- Page 47 AppDirector Installation and Maintenance Guide Platform Installation To configure the 6 / MMG1 port for dedicated out-of-band management 1. Ensure that an ASCII console is connected to the platform through the RJ-45–to–DE-9 cable and that console computer is turned on. 2.
-
Page 48: Initial Configuration Of Management Port Using The Lcd Module
AppDirector Installation and Maintenance Guide Platform Installation Initial Configuration of Management Port Using the LCD Module When you turn on the platform for the first time, there is no defined IP address, subnet mask, or physical port for the management port of the platform. You can define these parameters using the LCD module after the platform boots and displays Setup Config. -
Page 49: Chapter 4 - Initial Configuration And Connections
Connecting via the Web Interface, page 49 • Connecting via the Command Line Interface, page 50 Note: Contact Radware Technical Support for the user name and password. Connecting to AppDirector Using APSolute Vision You can connect to and manage AppDirector using APSolute Vision. -
Page 50: Connecting Via The Command Line Interface
AppDirector Installation and Maintenance Guide Initial Configuration and Connections Connecting via the Command Line Interface You can manage your platform with a proprietary CLI. You can connect to CLI either by serial terminal, Telnet, or SSH. To connect using CLI ... -
Page 51: Chapter 5 - Maintenance And Upgrade
Log Files, page 56 • Upgrading the Platform, page 57 Caution: Unless specifically stated otherwise, downgrading Radware platforms is not supported. Downgrading a platform may cause loss of configuration and unexpected behavior. Shutting Down and Rebooting To shut down the platform •... -
Page 52: Configuration File Format
Uploading Configuration Files, page 54 Configuration File Format The latest Radware platforms use configuration files in text format only. When using older versions of Radware platforms, the downloaded configuration file is in BER format. To view the BER-format file, you must convert it to ASCII format. However, the configuration file that you upload to the platform must be in BER format. -
Page 53: Downloading Configuration Files Using Web Interface
AppDirector Installation and Maintenance Guide Maintenance and Upgrade Downloading Configuration Files Using APSolute Vision You can download the configuration file from the platform to APSolute Vision. For more information, see the APSolute Vision User Guide or online help. Downloading Configuration Files Using Web Interface If you are downloading a configuration file using Web Based Management, you cannot download to a platform configured to use only SNMPv3. -
Page 54: Uploading Configuration Files
AppDirector Installation and Maintenance Guide Maintenance and Upgrade Downloading Configuration Files Using CLI If you are downloading a configuration file using CLI and SNMPv3, you cannot download to a platform supporting only SNMPv1. To download a configuration file using CLI ... - Page 55 AppDirector Installation and Maintenance Guide Maintenance and Upgrade To log the command outputs in the terminal, you need to run the command system config with the option, whereby the output to the terminal displays each command upload append and its result—that is, whether the action succeeded or not. Append Commands to Configuration File with Reboot Using the Append Commands to Configuration File with Reboot mode, it is possible to add parts of a configuration to a platform.
-
Page 56: Log Files
AppDirector Installation and Maintenance Guide Maintenance and Upgrade Uploading a Configuration File Using APSolute Vision You can upload a configuration file from APSolute Vision to the platform. For more information, see the APSolute Vision User Guide or online help. Uploading a Configuration File Using Web Interface To upload a configuration file using a Web interface 1. -
Page 57: Upgrading The Platform
In addition, a special upgrade password may be needed during the upgrade procedure, and is available from the Radware site. The upgrade password is based on the Base MAC address of your platform and on the version software file size. -
Page 58: Upgrading Licenses
APSolute OS license was given to you on a trial basis and not purchased, Radware provides you with another license. The old license cannot be reused without APSolute OS support. -
Page 59: Chapter 6 - Troubleshooting And Recovery
If the error persists, contact Radware Technical Support. The application started, May be a minor mismatch in Restart the platform but a warning was printed. -
Page 60: Software Recovery
AppDirector Installation and Maintenance Guide Troubleshooting and Recovery Software Recovery Before starting the software recovery procedure, contact Radware Technical Support to validate that this is the only rescue-measure option. The procedure used for software recovery depends on the OnDemand Switch model, as follows: Recovery with Bootable USB Mass Storage Device: ODS VL, ODS VL XL, ODS 3 v.2, ODS 3 XL... -
Page 61: Recovery With Non-Bootable Usb Or Compact Flash Device
The OnDemand Switch will prompt and wait for this confirmation. 11. Press Enter to confirm the USB is out of the OnDemand Switch. 12. When prompted, enter the license, which you obtain from Radware Technical Support. 13. Enter the password. - Page 62 From the CLI, enter the following command: hda1:/install b. Wait for the license prompt (up to approximately three minutes). 8. At the prompt, enter the license, which you obtain from Radware Technical Support. 9. Enter the password. Note: You can generate the password from: http://www.radware.com/Portal/Customer/passwordGenerator.aspx?id=4294967329...
-
Page 63: Chapter 7 - Hardware Component Replacement
Chapter 7 – Hardware Component Replacement This chapter includes the following sections: • Replacing a Power Supply, page 63 • Replacing a Compact Flash, page 64 • Fan Filter Replacement on NEBS-certified Platforms, page 64 Replacing a Power Supply Note: Dual power supplies are hot-swappable. -
Page 64: Replacing A Compact Flash
4. Close the cover and switch on the platform. 5. Re-install the OnDemand Switch. Fan Filter Replacement on NEBS-certified Platforms It is recommended to replace the fan filter on Radware NEBS-certified platforms once a year. Note: For the availability status of Radware's OnDemand Switch NEBS-compliant platforms, please contact Radware Operations. - Page 65 AppDirector Installation and Maintenance Guide Hardware Component Replacement 4. Return the fan-filter sleeve as shown in the following figures. 5. Fasten the screws of the fan-filter-sleeve cover. Document ID: RDWR_APD_IG_1304...
- Page 66 AppDirector Installation and Maintenance Guide Hardware Component Replacement Document ID: RDWR_APD_IG_1304...
-
Page 67: Appendix A - Specifications
Appendix A – Specifications This appendix contains specifications for all Radware platforms and includes the following sections: • OnDemand Switch VL Platform Specifications, page 67 • OnDemand Switch 1 Platform Specifications, page 70 • OnDemand Switch 2 Platform Specifications, page 71 •... - Page 68 USB port Yes (on front panel) LCD screen RS-232 console Via RJ-45. Radware supplies a RJ-45–to–DB-9 adapter cable to connect the console port of the platform to a console PC. Dimensions Width: 424 mm (17 in.) Depth: 457 mm (18 in.) Height: 44 mm (1.7 in.)
- Page 69 AppDirector Installation and Maintenance Guide Specifications Table 13: General Specifications of OnDemand Switch VL Platforms Item OnDemand Switch VL Specification CPU temperature SNMP traps are sent in response to high temperatures: • Warning: 74 ºC • Critical: 81 ºC Note: When the platform reaches the critical temperature, it will automatically shut down.
-
Page 70: Ondemand Switch 1 Platform Specifications
AppDirector Installation and Maintenance Guide Specifications OnDemand Switch 1 Platform Specifications Table 14: General Specifications of OnDemand Switch 1 Platforms Item OnDemand Switch 1 Specification Throughput • AppDirector 204: Up to 200 Mbit/s • AppDirector 504: Up to 500 Mbit/s •... -
Page 71: Ondemand Switch 2 Platform Specifications
Values in the table below are specified for a NEBS-certified chassis only if there is a significant difference between the value for the NEBS-certified chassis and the value for the non– NEBS-certified chassis. For the availability status of Radware's OnDemand Switch NEBS-compliant platforms, contact Radware Technical Support. - Page 72 AppDirector Installation and Maintenance Guide Specifications Table 15: General Specifications of OnDemand Switch 2 Platforms Item OnDemand Switch 2 Specification Layer 2 switching Wire-speed Simultaneous sessions • AppDirector OnDemand Switch 2: up to 3M • AppDirector OnDemand Switch 2 XL: up to 8M •...
- Page 73 AppDirector Installation and Maintenance Guide Specifications Table 15: General Specifications of OnDemand Switch 2 Platforms Item OnDemand Switch 2 Specification Weight OnDemand Switch 2: • 1U: 9.7 kg (21.4 lbs) • 2U: 13.2 kg (29.1 lbs) OnDemand Switch 2 XL: •...
-
Page 74: Ondemand Switch 3 Platform Specifications
AppDirector Installation and Maintenance Guide Specifications OnDemand Switch 3 Platform Specifications Table 16: General Specifications of OnDemand Switch 3 Platforms Item OnDemand Switch 3 Specification Throughput OnDemand Switch 3 v.2: • AppDirector 8016: Up to 8 Gbit/s • AppDirector 12016: Up to 12 Gbit/s •... - Page 75 AppDirector Installation and Maintenance Guide Specifications Table 16: General Specifications of OnDemand Switch 3 Platforms Item OnDemand Switch 3 Specification Dimensions • Width: 424 mm (17 in.) • Depth: 600 mm (24 in.) • Height: 44 mm (1.7 in.) • Width: 424 mm (17 in.) •...
-
Page 76: Ac Power Factor
1 – Commonly referred to as DB-9. 2 – Commonly referred to as RJ-45. On the OnDemand Switch VL platforms, the console port uses an 8P8C connector. Radware supplies a RJ-45-to-DE-9 adapter cable to connect the console port of the platform to a console PC. -
Page 77: Transceiver-Module Specifications
AppDirector Installation and Maintenance Guide Specifications Transceiver-Module Specifications The following table lists the transceiver-module specifications. Table 18: Transceiver-Module Specifications Description Manufacturer Manufacturer Part Number OnDemand Switch VL 1Gbps SFP Optics Multimode SX Sanoc SI8512-X5ATO-3C 1Gbps SFP Optics Singlemode LX Sanoc SI1312-10ATO 1Gbps SFP Optics Singlemode ZX Sanoc... - Page 78 AppDirector Installation and Maintenance Guide Specifications Document ID: RDWR_APD_IG_1304...
-
Page 79: Radware Ltd. End User License Agreement
EMPLOYEES AND THIRD PARTY CONTRACTORS TO COMPLY WITH THE TERMS OF THIS LICENSE AGREEMENT. 1. License Grant. Subject to the terms of this Agreement, Radware hereby grants to you, and you accept, a limited, nonexclusive, nontransferable license to install and use the Software in machine-readable, object code form only and solely for your internal business purposes (“Commercial License”). - Page 80 You may use the Software only for internal evaluation purposes (“Evaluation Use”) for a maximum of 30 days or such other duration as may specified by Radware in writing at its sole discretion (the “Evaluation Period”). The evaluation copy of the Software contains a feature that will automatically disable it after expiration of the Evaluation Period.
- Page 81 If any Radware Party is found to be liable to You or to any third- party under any applicable law despite the explicit disclaimers and limitations under these terms, then any liability of such Radware Party, will be limited exclusively to refund of any license or registration or subscription fees paid by you to Radware.
- Page 82 Third Party Software is being licensed to Radware or a link thereto, are included with the Software documentation or in the header or readme files of the Software. Third Party licensors and suppliers retain all right, title and interest in and to the Third Party Software and all copies thereof, including all copyright and other intellectual property associated therewith.
- Page 83 Radware Ltd. End User License Agreement IF YOU DO NOT AGREE WITH THE TERMS OF THIS LICENSE YOU MUST REMOVE THE SOFTWARE FROM ANY DEVICE OWNED BY YOU AND IMMEDIATELY CEASE USING THE SOFTWARE. COPYRIGHT © 2013, Radware Ltd. All Rights Reserved. Document ID: RDWR_APD_IG_1304...
Need help?
Do you have a question about the AppDirector OnDemand Switch VL and is the answer not in the manual?
Questions and answers