Table of Contents
Advertisement
Available languages
Available languages
Advertisement
Chapters
Table of Contents

Related Manuals for KERN AEJ-C Series


Summary of Contents for KERN AEJ-C Series
- Page 1 KERN & Sohn GmbH Ziegelei 1 Tel: +49-[0]7433- 9933-0 D-72336 Balingen Fax: +49-[0]7433-9933-149 E-Mail: info@kern-sohn.com Internet: www.kern-sohn.com Betriebsanleitung Operating instruction Mode d’emploi KERN AEJ-C / AES-C / PLJ-C Version 2.1 11/2016 AEJ-C/AES-C/PLJ-C-BA-def-1621...
- Page 2 Weitere Sprachversionen finden Sie online unter www.kern-sohn.com/manuals Další jazykové verze najdete na webu pod adresou www.kern-sohn.com/manuals Más versiones de idiomas se encuentran online bajo www.kern-sohn.com/manuals Vous trouverez d’autres versions de langue online sous www.kern-sohn.com/manuals Muut kieliversiot löytyvät osoitteesta www.kern-sohn.com/manuals Further language versions you will find online under www.kern-sohn.com/manuals Trovate altre versioni di lingue online in www.kern-sohn.com/manuals...
-
Page 3: Table Of Contents
KERN AEJ-C/AES-C/PLJ-C Version 2.1 11/2016 Betriebsanleitung Analysen- und Präzisionswaagen Inhaltsverzeichnis T ec hnis c he Daten ....................6 K onformitäts erklärung ..................11 G eräteübers ic ht ....................12 Anzeigen- und Tastaturübersicht ..................15 3.1.1 Navigationstasten / Numerische Eingabe ................16 G rundlegende Hinweis e (Allgemeines ) ............ - Page 4 9.3.8 <P2.2.4> Informationszeile ....................... 49 9.3.9 <P2.2.5> Sonderinformationen ....................50 9.3.10 <P2.2.6> Funktionstaste belegen ..................51 < P 8 E INHE IT E N > ..................52 10.1 Wägeeinheit umschalten < P8.1> ..................52 10.2 Startwägeeinheit definieren < P8.2> ..................53 10.3 Frei programmierbare Wägeeinheiten definieren <...
- Page 5 K ommunikation / S etup-Menü < P 3 > ............135 27.1 <P3.1 / P3.2> RS-232 Schnittstelle konfigurieren .............. 136 27.2 <P3.3> WLAN-Schnittstelle (Factory option KERN PLJ-A06) .......... 138 27.2.1 P3.3.2 - NETZ WÄHLEN ....................139 27.2.2 <P3.3.3> - NETZPARAMETER ..................141 27.3...
- Page 6 29.6.21 Interne Justierung ausführen ..................... 166 29.6.22 Automatische interne Justierung sperren ................166 29.6.23 Automatische interne Justierung entsperren ..............167 29.6.24 Seriennummer eingeben ....................167 29.6.25 Waagetastatur sperren ....................... 167 29.6.26 Waagetastatur entsperren....................167 29.6.27 Liste der verfügbaren Betriebsmodi ................... 168 29.6.28 Betriebsmodus setzen ......................
-
Page 7: Technische Daten
1 Technische Daten KERN AEJ 100-4CM AEJ 200-4CM AEJ 200-5CM Ablesbarkeit (d) 0.1 mg 0.1 mg 0.01 mg; 0.1 mg Wägebereich (Max) 160 g 220 g 82 g; 220 g Mindestlast (Min) 10 mg 10 mg 1 mg Eichwert (e) - Page 8 KERN AES 100-4C AES 200-4C Ablesbarkeit (d) 0.1 mg 0.1 mg Wägebereich (Max) 160 g 220 g Reproduzierbarkeit 0.2 mg 0.2 mg Linearität ± 0.2 mg ± 0.2 mg Einschwingzeit 4 sec 4 sec Empfohlenes Justiergewicht nicht beigegeben 150 g (E2)
- Page 9 KERN PLJ 300-3CM PLJ 600-3CM Ablesbarkeit (d) 1 mg 1 mg Wägebereich (Max) 360 g 600 g Mindestlast (Min) 20 mg 20 mg Eichwert (e) 10 mg 10 mg Eichklasse Reproduzierbarkeit 1 mg 2 mg Linearität ± 4 mg ± 4 mg...
- Page 10 KERN PLJ 700-3CM PLJ 3000-2CM Ablesbarkeit (d) 1 mg 10 mg Wägebereich (Max) 750 g 3500 g Mindestlast (Min) 20 mg 500 mg Eichwert (e) 10 mg 100 mg Eichklasse Reproduzierbarkeit 2 mg 10 mg Linearität ±4 mg ± 40 mg...
- Page 11 Abmessungen AEJ-C/AES-C: PLJ-C: AEJ-C/AES-C/PLJ-C-BA-d-1621...
-
Page 12: Konformitätserklärung
2 Konformitätserklärung Die aktuelle EG/EU-Konformitätserklärung finden Sie online unter: www.kern-sohn.com/ce Bei geeichten Waagen (= konformitätsbewerteten Waagen) ist die Konformitätserklärung im Lieferumfang enthalten. AEJ-C/AES-C/PLJ-C-BA-d-1621... -
Page 13: Geräteübersicht
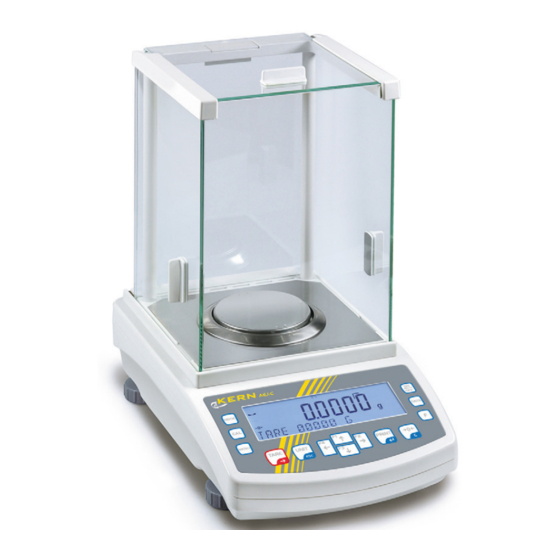
3 Geräteübersicht KERN AEJ/AES-C: Pos. Bezeichnung Glaswindschutz Wägeplatte Anzeige Tastatur Fußschraube AEJ-C/AES-C/PLJ-C-BA-d-1621... - Page 14 KERN PLJ-C: Pos. Bezeichnung Glaswindschutz Wägeplatte Anzeige Tastatur Fußschraube AEJ-C/AES-C/PLJ-C-BA-d-1621...
- Page 15 Anschlüsse (alle Modelle): Pos. Bezeichnung Netzanschluss COM 2-Anschluss COM 1-Anschluss USB 2-Anschluss (z.B. Drucker, PC) USB 1-Anschluss (z.B. Tastatur) AEJ-C/AES-C/PLJ-C-BA-d-1621...
-
Page 16: Anzeigen- Und Tastaturübersicht
3.1 Anzeigen- und Tastaturübersicht Beispiel AEJ-C: Pos. Bezeichnung Stabilitätsanzeige Indikator „Nullanzeige“ Informationszeile Bei geeichten Waagen ist der nicht geeichte Wert geklammert Wägeeinheit „g“ Taste Funktion • Betriebsart wählen • Justierung starten • Setup-Menü aufrufen • Gerät ein-/ausschalten • Datenbank-Menü aufrufen AEJ-C/AES-C/PLJ-C-BA-d-1621... -
Page 17: Navigationstasten / Numerische Eingabe
• Funktionstaste / Schnellzugriff auf Grundfunktionen • Tarieren • Datensatz hinzufügen • Wägeeinheit umschalten • Menü verlassen • Funktionstaste für häufig wiederkehrende Funktionen und Einstellungen (Belegung, s. Kap. 9.3.10) • Navigationstasten, s. Kap. 2.1.1 • Datenausgabe an externes Gerät (Wägemodus) •... -
Page 18: Grundlegende Hinweise (Allgemeines)
Die Waage darf nicht konstruktiv verändert werden. Dies kann zu falschen Wäger- gebnissen, sicherheitstechnischen Mängeln sowie der Zerstörung der Waage führen. Die Waage darf nur gemäß den beschriebenen Vorgaben eingesetzt werden. Abwei- chende Einsatzbereiche/Anwendungsgebiete sind von KERN schriftlich freizugeben. 4.3 Gewährleistung Gewährleistung erlischt bei •... -
Page 19: Prüfmittelüberwachung
Art und den Umfang dieser Prüfung zu definieren. Informationen bezüglich der Prüfmittelüberwachung von Waagen sowie der hierfür notwendigen Prüfgewichte sind auf der KERN- Homepage (www.kern-sohn.com) verfügbar. In seinem akkredi- tierten DKD- Kalibrierlaboratorium können bei KERN schnell und kostengünstig Prüf- gewichte und Waagen kalibriert werden (Rückführung auf das nationale Normal). - Page 20 • Vor dem Versand alle angeschlossenen Kabel und losen/beweglichen Teile trennen. Abbildungsbeispiel KERN AEJ/AES-C • Evt. vorgesehene Transportsicherungen wieder anbringen. • Alle Teile z.B. Glaswindschutz, Wägeplatte, Netzteil etc. gegen Verrut- schen und Beschädigung sichern. AEJ-C/AES-C/PLJ-C-BA-d-1621...
- Page 21 AEJ-C/AES-C/PLJ-C-BA-d-1621...
-
Page 22: Auspacken, Aufstellung Und Inbetriebnahme
7 Auspacken, Aufstellung und Inbetriebnahme 7.1 Aufstellort, Einsatzort Die Waagen sind so konstruiert, dass unter den üblichen Einsatzbedingungen zuver- lässige Wägeergebnisse erzielt werden. Exakt und schnell arbeiten Sie, wenn Sie den richtigen Standort für Ihre Waage wäh- len. Beachten Sie deshalb am Aufstellort folgendes: •... -
Page 23: Aufstellen
7.3 Aufstellen Zur Genauigkeit der Wägeresultate von hochauflösenden Analysen- und Präzisionswaagen trägt der richtige Standort entscheidend bei (s. Kap. 7.1). Modelle AEJ-CM Transportsicherung in Pfeilrichtung <OPEN> drehen und abnehmen. Zum Schutz bei einem evtl. weiteren Transport, bitte die Transportsicherung aufbewahren. AEJ-C/AES-C/PLJ-C-BA-d-1621... - Page 24 Wägeplatte installieren. Modelle AEJ/AES-C (außer AEJ-5CM) Modell AEJ-5CM • Glaswindschutz an allen Seiten • Glaswindschutz an allen Seiten öffnen öffnen • Schutzblech (1) in die Wägekammer • Transportsicherung (1) entfernen. legen • Schutzblech (2) in die Wägekammer • Zentrierring (2) auf das Schutzblech legen legen •...
- Page 25 Modelle PLJ-C: 10 mg-Modelle • Klebeband vom Gummielement (1) entfernen • Wägeplatte (2) auf die Gummielemente legen 1 mg-Modelle • Klebeband vom Gummielement (1) entfernen • Wägeplatte (2) auf die Gummielemente legen • Windschutz (3) auflegen AEJ-C/AES-C/PLJ-C-BA-d-1621...
-
Page 26: Nivellieren
7.4 Nivellieren Eine exakte Ausrichtung und stabile Installation sind Voraussetzungen für wiederhol- bare Ergebnisse. Zum Ausgleich kleiner Unebenheiten oder Neigungen der Standflä- che lässt sich die Wage nivellieren. Waage mit Fußschrauben nivellieren, bis sich die Luft- blase in der Libelle im vorgeschriebenen Kreis befindet. ... -
Page 27: Netzanschluss
Die Waage darf nur an das Stromnetz angeschlossen werden, wenn die Angaben an der Waage (Aufkleber) und die ortsübliche Netzspan- nung identisch sind. Nur KERN-Originalnetzgeräte verwenden. Die Verwendung anderer Fabrikate bedarf der Zustimmung von KERN. Wichtig: Vor Inbetriebnahme das Netzkabel auf Beschädigungen überprüfen. -
Page 28: Ein- Und Ausschalten
7.6.2 Ein- und ausschalten Die Waage ist fortwährend eingeschaltet, solange sie an die Stromversorgung ange- schlossen ist. Mit der ON/OFF-Taste wird nur die Anzeige aus- und eingeschaltet. Zum Einschalten der Anzeige ON/OFF-Taste drücken. Warten bis die Grundanzeige erscheint. Zum Ausschalten ON/OFF-Taste drücken. Die Waage geht dabei in Bereitschaftsstellung über. - Page 29 Einloggen: Zum Einloggen stehen mehrere Tasten zur Verfügung, entweder die F-Taste, DATA-Taste oder eine der Funktionstaste (sofern diese mit <LOG IN> belegt ist). -Taste Mit den Navigationstasten gewünschten Benutzer z. B. ADMIN wählen. Ggf. mit den Naviagationstasten Passwort eingeben und mit PRINT-Taste bestätigen, „Numersiche Eingabe“...
- Page 30 -Taste Mit den Naviagationstasten <ADMIN> wählen und mit PRINT- Taste bestätigen. Ggf. mit den Naviagationstasten Passwort eingeben und mit PRINT-Taste bestätigen, s. Kap. 3.1.1 „Numersiche Eingabe“. AEJ-C/AES-C/PLJ-C-BA-d-1621...
-
Page 31: Peripheriegeräten
Vor Anschluss oder Trennen von Zusatzgeräten (Drucker, PC) an die Datenschnitt- stelle muss die Waage unbedingt vom Netz getrennt werden. Verwenden Sie mit Ihrer Waage ausschließlich Zubehör und Drucker von KERN, die- se sind optimal auf Ihre Waage abgestimmt. AEJ-C/AES-C/PLJ-C-BA-d-1621... -
Page 32: Menü
8 Menü 8.1 Menüstruktur Das Menü ist in sieben Menüblöcke (P1 – P7) gegliedert. Justage Verfügbare Einstellungen P1.1 Interne Justierung s. Kap. 13.2.1 P1.2 Externe Justierung s. Kap. 13.2.2 Nur Modelle AES P1.3 Benutzerjustierung s. Kap. 13.2.3 Nur Modelle AES P1.4 Justiertest s. - Page 33 Ausdrucke P5.1 Justierprotokoll s. Kap. 14.1 P5.2 Kopfzeile s. Kap. 14.2.1 P5.3 GLP-Protokoll s. Kap. 14.2.2 P5.4 Fußzeile s. Kap. 14.2.3 P5.5 Sonderausdruck 1 P5.6 Sonderausdruck 2 s. Kap. 14.3 P5.7 Sonderausdruck 3 P5.8 Sonderausdruck 4 P5.10 Variable 1 s. Kap. 14.4 P5.11 Variable 2 Allgemeine Parameter s.
-
Page 34: Navigation Im Menü
8.2 Navigation im Menü Menü aufrufen drücken, die erste Menüblock „P1 CAL“ wird angezeigt. Menüblock anwählen Mit den Navigationstasten lassen sich die einzelnen Menüb- löcke der Reihe nach anwählen. Mit Navigationstaste vorwärts blättern. Mit Navigationstaste rückwärts blättern. Menüpunkt anwählen Ausgewählten Menüblock mit bestätigen. -
Page 35: Wägemodus
9 Wägemodus Die Durchführung einer einfachen Wägung ist im folgenden Kapitel „Wägen“ be- schrieben. Neben den dort beschriebenen Arbeitsschritten (einfaches Wägen, Null- stellen, Tarieren,) bietet die Waage weitere Möglichkeiten zur Anpassung der Appli- kation „Wägen“ an Ihre Anforderungen, verfügbare Einstellungen s. Kap. 9.3 9.1 Wägen Eine Anwärmzeit zur Stabilisierung ist erforderlich (s. -
Page 36: Wägen Mit Tara
9.1.3 Wägen mit Tara Tarieren Das Eigengewicht beliebiger Wägebehälter lässt sich auf Knopfdruck wegtarieren, damit bei nachfolgenden Wägungen das Nettogewicht des Wägegutes angezeigt wird. • Wägebehälter auf die Wägeplatte stellen und ggf. Windschutztüren schließen. • Warten bis die Stabilitätsanzeige ( ) erscheint, dann drücken. - Page 37 Numerische Eingabe des Taragewichts (PRE-TARE) Voraussetzung: Funktionstaste F1, F2, F3 oder F4 ist mit der Funktion <TARA EINGEBEN> belegt, s. Kap. 9.3.10. • Funktionstaste drücken, die Anzeige zur Eingabe des Tarawertes erscheint. • Bekanntes Taragewicht mit den Navigationstasten eingeben (s. Kap. 3.1.1) und mit bestätigen.
- Page 38 Behältergewicht aus der Datenbank laden • Entweder Funktionstaste (F1, F2, F3, F4), welche mit der Funktion <TARA WAHLEN> belegt ist (s. Kap. 9.3.10.) drücken. oder • Nach Drücken von , die Funktion <TARA WAHLEN> wählen. Die Anzeige zur Auswahl eines Taraspeichers erscheint. •...
-
Page 39: Unterflurwägung
9.2 Unterflurwägung Mit Hilfe der Unterflurwägung können Gegenstände, welche aufgrund ihrer Größe oder Form nicht auf die Waagschale passen, gewogen werden. Gehen Sie wie folgt vor: • Waage ausschalten. • Verschlussdeckel am Waagenboden öffnen. • Haken zur Unterflurwägung vorsichtig und vollständig einhängen. •... -
Page 40: Einstellungen
9.3 Einstellungen <P2.2 WÄGEN> Navigation im Menü s. Kap.8.2 Menüstruktur: Menüpunkt Parameter Verfügbare Einstellungen / Erklärung P2.2.1 P2.2.1.1 SEHR SCHNELL Filter Waage reagiert sehr empfindlich und sehr schnell, ABLESUNG sehr ruhiger Aufstellungsort. SCHNELL Waage reagiert empfindlich und schnell, ruhiger Aufstellungsort. MITTEL Standard –... - Page 41 P2.2.2 AUTOTARA wählbar ja / nein P2.2.3 P2.2.3.1 MODUS JEDER Nach Drücken der PRINT-Taste wird das Protokoll AUSDRUCK- sofort ausgegeben, unabhängig davon, ob der Wäge- MODUS wert stabil ist (Vorgaben PRINT-Taste) WENN STABIL Eine Ausgabe nach Drücken der PRINT-Taste erfolgt erst, wenn der Wägewert stabil ist AUTO Automatische Datenausgaben nach Überschreitung...
- Page 42 9.3.1 <P2.2.1.1> Filter Anpassung an die Wägeart und Umgebungsbedingungen Zu beachten ist, dass grundsätzlich eine auf höhere Stabilität ausgerichtete Daten- verarbeitung eine Verlangsamung der Reaktionszeiten bewirkt, während sich eine Beschleunigung der Reaktionszeiten zu Lasten der Stabilität auswirkt. D. h. je höher die Filterstufe, desto länger die Reaktionszeit AEJ-C/AES-C/PLJ-C-BA-d-1621...
-
Page 43: P2.2.1.2> Stillstandskontroll-Anzeige
9.3.2 <P2.2.1.2> Stillstandskontroll-Anzeige Mit dieser Einstellung wird festgelegt, wie schnell die Waage den Messwert als stabil betrachtet und freigibt. AEJ-C/AES-C/PLJ-C-BA-d-1621... -
Page 44: P2.2.1.3> Autozero Funktion
9.3.3 <P2.2.1.3> Autozero Funktion Mit dieser Funktion werden kleine Gewichtsschwankungen (z. B. geringfügige Ver- schmutzungen der Wägeplatte) automatisch tariert. Bei aktivierter Funktion wird si- chergestellt, dass jede Wägung bei Nullanzeige startet. Werden kleine Mengen vom Wägegut entnommen oder zugeführt, so können durch die in der Waage vorhandene „Stabilitätskompensation“... -
Page 45: P2.2.1.4> Letzte Ziffer Der Anzeige Ausblenden
9.3.4 <P2.2.1.4> Letzte Ziffer der Anzeige ausblenden Bei dem Instrument kann die Ablesbarkeit erforderlichenfalls um eine Stelle verringert werden. Die letzte Dezimalstelle wird in diesem Fall gerundet und aus der Anzeige ent- fernt. AEJ-C/AES-C/PLJ-C-BA-d-1621... -
Page 46: P2.2.1.5> Umgebung
9.3.5 <P2.2.1.5> Umgebung Mit dieser Funktion kann die Waage optimal an die Umgebungsbedingungen angepasst werden. Bei ruhiger Umgebung (z.B. frei von Luftzug und Erschütterungen) ist die Einstellung <STABIL> zu wählen. Bei unruhiger Umgebung mit stetig ändernden Bedingungen ist die Einstellungen <INSTABIL >... -
Page 47: P2.2.2 > Autotara /
9.3.6 <P2.2.2 > AUTOTARA / <P2.2.3.2> AUTOSCHWELLE Die automatische Tarierfunktion speichert automatisch den ersten stabilen Ge- wichtswert als Tarawert. Mit dem Parameter <P2.2.3.2> AUTOSCHWELLE wird festgelegt, welches minimale Gewicht aufliegen muss, damit dieses automatisch tariert wird. Eine weitere automatische Tarierung erfolgt erst, wenn die Anzeige unter den einge- stellten Wert der Autoschwelle geht.Autoschwelle -
Page 48: P2.2.3.> Manuelle / Automatische Datenausgabe /
Manuelle / Automatische Datenausgabe 9.3.7 <P2.2.3.> <P2.2.3.2> AUTOSCHWELLE Mit dieser Funktion wird festgelegt, ob und wie die Datenausgabe erfolgt. Verfügbare Einstellungen: Menüpunkt Verfügbare Einstellungen / Erklärung <P2.2.3.1> <WENN STABIL> Manuelle Ausgabe stabiler Wägewerte nach Drücken der PRINT-Taste MODUS <JEDER> Manuelle Ausgabe stabiler und instabiler Wä- gewerte nach Drücken der PRINT-Taste <AUTO>...Autoschwelle - Page 49 AEJ-C/AES-C/PLJ-C-BA-d-1621...
-
Page 50: P2.2.4> Informationszeile
9.3.8 <P2.2.4> Informationszeile Mit dieser Funktion wird festgelegt, welche zusätzlichen Informationen in der Zeile am unteren Rand der Anzeige eingeblendet werden. AEJ-C/AES-C/PLJ-C-BA-d-1621... -
Page 51: P2.2.5> Sonderinformationen
9.3.9 <P2.2.5> Sonderinformationen Mit dieser Funktion können benutzerspezifische Informationen definiert werden. Diese werden bei aktivierter Funktion in der Zeile am unteren Rand <P2.2.5 SINFO> der Anzeige eingeblendet AEJ-C/AES-C/PLJ-C-BA-d-1621... -
Page 52: P2.2.6> Funktionstaste Belegen
9.3.10 <P2.2.6> Funktionstaste belegen Die Funktionstaste F1, F2, F3 und F4 ermöglichen einen direkten Zugriff auf häufig benötigte Funktionen und Einstellungen. Die verfügbaren Einstellungen sind abhän- gig von der gewählten Betriebsart. Durch Antippen der entsprechenden Taste wird die Funktion ausgeführt, welche in diesem Menüpunkt für die beiden Tasten festge- legt wird. -
Page 53: P 8 Einheiten
10 < P 8 EINHEITEN > Mit dieser Funktion wird festgelegt, mit welchen Wägeeinheiten die Waage arbeitet. Verfügbare Einstellungen: Menüpunkt Verfügbare Einstellungen / Erklärung P8.1 Mit dieser Funktion werden die Einheiten festgelegt, in welche das Wägeergebnis mit der UNIT-Taste umgeschaltet werden kann. ZUGANG P8.2 Mit dieser Funktion wird die Einheit festgelegt, welche nach dem... -
Page 54: Startwägeeinheit Definieren < P8.2
Die verfügbaren Wägeeinheiten sind abhängig vom Modell und Eichung der Waage. Beim Einschalten der Waage wird die Einheit angezeigt, in welcher die Waage ausgeschaltet wurde. 10.2 Startwägeeinheit definieren < P8.2> Die verfügbaren Wägeeinheiten sind abhängig vom Modell und Eichung ... -
Page 55: Frei Programmierbare Wägeeinheiten Definieren < P8.3 / P8.4
10.3 Frei programmierbare Wägeeinheiten definieren < P8.3 / P8.4> Frei programmierbare Wägeeinheiten sind nur bei Waagen ohne Bauartzu- lassung verfügbar. • Mit den Navigationstasten Umrechnungsfaktor eingeben und mit PRINT-Taste bestätigen. • Zurück in den Wägemodus wiederholt drücken. AEJ-C/AES-C/PLJ-C-BA-d-1621... -
Page 56: Allgemeine Parameter < P 6 Andere
11 Allgemeine Parameter < P 6 ANDERE> Hier können Parameter gesetzt werden, welche die Bedienung der Waage beeinflussen, wie z.B. Bedienersprache, Datum / Uhrzeitanzeige, Tastentöne, Helligkeit der Anzeige usw. Menüstruktur: Navigation im Menü s. Kap.8.2 Menüpunkt Verfügbare Einstellungen / Erklärung P6.1 Bedienersprache wählbar: SPRACHE... - Page 57 Zum Teststart die Funktion <P6.9 AUTOTEST GLP> bestätigen. Internes Gewicht wird zweimal aufgelegt, gefolgt von 10 Wiederholungsmessungen Justierung Berechnung der Standardabweichung Automatischer Protokollausdruck Ausdruckbeispiel KERN YKB-01N ------------------- ------------------- GLP Autotest: Protokoll Modell 150854 ID Waage Bediener...
-
Page 58: Geräteinformationen Anzeigen < P 7 Info
12 Geräteinformationen anzeigen < P 7 INFO> Mit dieser Funktion können Informationen zur Waage angezeigt und ausgedruckt werden. • Mit vorwärts durch die Liste der Waageninformationen scrollen. • Zum Ausdrucken der aktuellen Waageneinstellungen den Parameter <P7.5 EINSTELLUNGEN DRUCKEN> mit bestätigen •... -
Page 59: Justierung < P1 Justage
Externe Justierung möglichst nahe an der Höchstlast der Waage durchfüh- ren (empfohlenes Justiergewicht s. Kap. 1). Die Justierung ist aber auch mit Gewichten anderer Nennwerte (>30% Max) möglich, messtechnisch aber nicht optimal. Infos zu Prüfgewichten finden Sie im Internet unter: http://www.kern-sohn.com AEJ-C/AES-C/PLJ-C-BA-d-1621... -
Page 60: Automatische Justierung Mit Internem Gewicht (Modelle Aej, Plj)
Der Justageprozess kann mehrmals unterbrochen werden. Es ist aber zu beachten, dass die Unterbrechung der Justierung zu falschen Wägeergebnissen führen kann. Bei Anschluss eines optionalen Druckers erfolgt automatisch die Ausgabe eines Jus- tierprotokolls. Justierprotokoll definieren, s. Kap. 14.1 / <P5.1 Justierprotokoll>. Ausdruckbeispiel KERN YKB-01N: AEJ-C/AES-C/PLJ-C-BA-d-1621... - Page 61 Automatische Justierung wird durchgeführt: • wenn die Waage vom Netz getrennt wurde • bei einer Temperaturänderung Unter Verwendung eines Temperaturfühlers führt die Waage eine vollautomati- sche Justierung durch, sobald eine Temperaturänderung von 3°C festgestellt wird. Die Meldung „CAL“ in Kombination mit einem Thermometersymbol zeigt die bevorstehende Justierung an.
-
Page 62: Einstellungen Im Menü
13.2 Einstellungen im Menü <P1 JUSTAGE> Navigation im Menü s. Kap. 8.2 Menüpunkt Erklärung P1.1 Interne Justierung (nur Modelle AEJ, PLJ) INT JUST P1.2 Externe Justierung (nur Modelle AES) EXT JUST P1.3 Externe Justierung mit benutzerdefiniertem Justiergewicht (nur Modelle AES) BENUTZERJUSTAGE P1.4 Justiertest (nur Modelle AEJ, PLJ) -
Page 63: P1.1 Int. Just
13.2.1 <P1.1 INT. JUST. > Automatische interne Justierung s. Kap. 13.1 Manueller Start der internen Justierung • Darauf achten, dass sich keine Gegenstände auf der Wägeplatte befinden. • Nach erfolgreicher Justierung kehrt die Waage automatisch in den Wäge- modus zurück. -
Page 64: P1.2 Ext. Just.> (Modelle Aes)
13.2.2 <P1.2 EXT. JUST. (Modelle AES) > • Justierung mit dem empfohlenen Justiergewicht (siehe Kap. 1 „Techn. Daten“) durchführen. • Stabile Umgebungsbedingungen beachten. Eine Anwärmzeit (siehe Kap. 1) zur Stabilisierung ist erforderlich. • Menüpunkt < P1.2 EXT. JUST. > aufrufen •... - Page 65 • Bei Anschluss eines optionalen Druckers erfolgt automatisch die Ausgabe eines Justierprotokolls. Justierprotokoll definieren, s. Kap. 14.1 / <P5.1 Justierprotokoll>. • Mit UNIT-Taste zurück in den Wägemodus Ausdruckbeispiel KERN YKB-01N: AEJ-C/AES-C/PLJ-C-BA-d-1621...
- Page 66 13.2.3 < P1.3 B E NUT ZE R J US T IE R UNG > Justierung mit benutzerdefiniertem externem Gewicht • Menüpunkt < P1.3 BENUTZERJUSTAGE > aufrufen • Nennwert des gewünschten Justiergewichts (>30% Max) mit den Navigations- tasten eingeben (s. Kap.3.1.1) und mit PRINT-Taste bestätigen. •...
- Page 67 • Justiergewicht abnehmen. Nach erfolgreicher Justierung erfolgt automatisch der Rücksprung ins Menü. • Bei Anschluss eines optionalen Druckers erfolgt automatisch die Ausgabe ei- nes Justierprotokolls. Justierprotokoll definieren, s. Kap. 14.1 / <P5.1 Justier- protokoll>. • Mit UNIT-Taste zurück in den Wägemodus AEJ-C/AES-C/PLJ-C-BA-d-1621...
-
Page 68: P1.4 Just.test >Justiertest
13.2.4 < P1.4 JUST.TEST >Justiertest Mit dieser Funktion wird das interne Justiergewicht mit dem gespeicherten Wert verglichen. Der Test wird automatisch ausgeführt. Das Ergebnis wird im Display angezeigt und bei Anschluss eines optionalen Druckers über die RS 232 Schnittstelle ausgegeben. AEJ-C/AES-C/PLJ-C-BA-d-1621... -
Page 69: Protokolle Definieren < P5 Ausdrucke
14 Protokolle definieren < P5 AUSDRUCKE > 14.1 Justierprotokoll <P5.1> In diesem Menüpunkt wird festgelegt, welche Informationen in den Justierprotokollen ausgedruckt werden. Einstellungen Standardprotokoll <P5.1 JUSTIERPROTOKOLL>: Navigation im Menü s. Kap. 8.2 Alle mit <ja> übernommenen Informationen werden ausgedruckt. Menüpunkt Verfügbare Einstellungen / Erklärung Bezeichnung für das Projekt eingeben, max. - Page 70 Ausdruckbeispiel 1 (KERN YKB-01N): Menüpunkt Einstellung Protokoll P5.1.2 P5.1.3 P5.1.4 P5.1.5 P5.1.6 P5.1.7 P5.1.8 P5.1.9 P5.1.10 Ausdruckbeispiel 2 (KERN YKB-01N): Menüpunkt Einstellung Protokoll P5.1.2 nein P5.1.3 P5.1.4 nein P5.1.5 P5.1.6 nein P5.1.7 P5.1.8 P5.1.9 nein P5.1.10 nein AEJ-C/AES-C/PLJ-C-BA-d-1621...
-
Page 71: Wägeprotokoll
14.2 Wägeprotokoll In diesem Menüpunkt wird festgelegt, welche Informationen in den Standardwäge- protokollen ausgedruckt werden. Navigation im Menü s. Kap. 8.2 Das Menü ist in drei Untermenüs aufgeteilt, in denen die Einstellungen für die Kopfzeile, für die Protokollierung der Wägeergebnisse und für die Fußzeile festgelegt werden können. -
Page 72: Wägeergebnis Ausdrucken / Glp-Protokoll Definieren
Ausdruckbeispiel (KERN YKB-01N): Menüpunkt Einstellung Protokoll P5.2.1 P5.2.2 P5.2.3 P5.2.4 P5.2.5 nein P5.2.6 P5.2.7 P5.2.8 nein P5.2.9 nein P5.2.10 nein P5.2.11 P5.2.12 nein P5.2.13 kein 14.2.2 Wägeergebnis ausdrucken / GLP-Protokoll definieren<P5.3> In Qualitätssicherungs-Systemen werden Ausdrucke von Wägeergebnissen sowie der korrekten Waagenjustierung unter Angabe von Datum und Uhrzeit sowie der Waagen-Identifikation verlangt. -
Page 73: Fusszeile Definieren
Ausdruckbeispiel (KERN YKB-01N): Menüpunkt Einstellung Protokoll P5.3.1 P5.3.2 P5.3.3 nein P5.3.4 nein P5.3.5 nein P5.3.6 nein P5.3.7 P5.3.8 P5.3.9 P5.3.10 kein 14.2.3 Fusszeile definieren<P5.4> In diesem Untermenü wird festgelegt, welche Informationen im Fuss der Wägeproto- kolle ausgedruckt werden sollen. Die Fusszeile wird nach Drücken der Funktionstas- te F1 oder F2 ausgedruckt (sofern diese mit <Fusszeile drucken>... -
Page 74: Benutzerdefinierte Datenausgabe < P5.5> -
14.3 Benutzerdefinierte Datenausgabe < P5.5> - <P5.8 SONDERAUSDRUCK > Im Menü <P5> können vier verschiedene Sonderausdrucke (<P5.5> - <P5.8>) defi- niert werden, mit max. je 160 Zeichen. Neben der Eingabe von Fließtext (numerische Eingabe, s. Kap. 3.1.1) sind im Menü noch folgende Variablen hinterlegt: Allgemeine Variablen: Ausdruck von 1 Zeichen „%”... - Page 75 Drucktechnische Variablen: Ausdruck von 1 Zeichen „ / ”(d.h. um ein Zeichen / auszu- drucken, müssen zwei // eingegeben werden) CRLF (carriage return line feed) Zeilenanfang nächste Zeile CR (carriage return) Zeilenanfang LF (line feed) nächste Zeile Tabulator Seitenvorschub (for PCL printers) Ende Zeichenkette Papier bei EPSON Drucker abschneiden Die Variablen sind in Großbuchstaben einzugeben.
-
Page 76: Universelle Variablen
Beispiele zur Texteingabe im Wägemodus: KERN∗SOHN DATE: <aktuelles Datum,> TIME: <aktuelle Uhrzeit> MASS: <aktuelles Nettogewicht in Standardeinheit> ∗∗∗∗∗∗SIGNATURE: Eingabe: • Gewünschten Menüpunkt P5.5 – P5.8 (Sonderausdruck 1 -4) aufrufen und Text eingeben, numerische Eingabe s. Kap. 3.1.1 oder PC-Tastatur • Eingabe mit PRINT-Taste bestätigen, die Waage kehrt zurück ins ins Menü. -
Page 77: Protokolle Auf Usb-Speichermedium Speichern / Ausdrucken
14.5 Protokolle auf USB-Speichermedium speichern / ausdrucken Die Option ermöglicht Wägeergebnisse auf ein USB- Speichermedium als Textdatei zu speichern und diese Daten auf einen am PC angeschlossenen Drucker ausdru- cken. Durchführung: USB-Speichermedium an USB-Port anschließen, <IEI IMPORT / EXPORT> wird angezeigt. -
Page 78: Datenbanken
15 Datenbanken Verfügbare Datenbanken: Datenbank Daten editierbar Benutzer <b1> 10 Benutzer s. Kap. 15.1 Produkt <b2> 1000 Produkte s. Kap. 15.2 Tarawerte <b3> 100 Behältergewichte s. Kap. 15.3 Wägungen <b4.4> 1000 Wägeergebnisse nein s. Kap.15.4 Alibi <b4.5> 100 000 Wägeergeb- nein s. -
Page 79: Benutzerdatenbank
15.1 Benutzerdatenbank In der Benutzerdatenbank < b1 Bediener / User > können 100 Benutzerprofile mit spezifischen Einstellungen und Benutzerrechten angelegt werden. Die Benutzerverwaltung sieht vor, dass es Benutzer mit unterschiedlichen Rechten gibt, den Administrator und mehrere Benutzer. Der Administrator hat vollen Zugriff auf Menü und Datenbank. Nur er kann neue Benutzer anlegen und individuelle Benutzerrechte vergeben. -
Page 80: Neuen Benutzer Anlegen
15.1.1 Neuen Benutzer anlegen Für jeden Benutzer können folgende Daten eingegeben werden: NAME max. 30 Zeichen, CODE max. 6 Zeichen PASSWORT max. 8 Ziffern BERECHTIGUNGEN Benutzer, Meisterbenutzer, Administrator SPRACHE Deutsch/Espanol/Francais/Turk/Cesky/Italiano/Magyar/ Polski/English Der Anschluss einer PC-Tastatur über die USB-Schnittestelle erleichtert die Eingabe der Benutzerparameter. -
Page 81: Benutzer Löschen
15.1.2 Benutzer löschen AEJ-C/AES-C/PLJ-C-BA-d-1621... -
Page 82: Benutzer Aufrufen
• Mit den Navigationstasten Benutzer wählen und mit löschen. • Abfrage „LOSCHEN“ mit PRINT-Taste bestätigen, die Anzeige kehrt zurück ins Menü. Mit UNITS-Taste zurück in den Wägemodus. 15.1.3 Benutzer aufrufen Siehe Kap. 7.6.4 „Einloggen“. 15.2 Produktdatenbank In der Produktdatenbank < b2 Produkt / Product > können für 1000 Produkte folgende Daten eingegeben werden: NAME max. -
Page 83: Neues Produkt Anlegen
15.2.1 Neues Produkt anlegen Produktbezeichnung festlegen AEJ-C/AES-C/PLJ-C-BA-d-1621... - Page 84 Nach Eingabe der Produktbezeichnung nacheinander alle Parameter definieren AEJ-C/AES-C/PLJ-C-BA-d-1621...
-
Page 85: Behältergewichte
15.3 Behältergewichte In der Produktdatenbank < b3 TARA > können für 10 Behältergewichte folgende Daten eingegeben werden: NAME max. 30 Zeichen TARA Behältergewicht 15.3.1 Neues Behältergewicht anlegen • Behältergewicht aus der Datenbank laden, s. Kap. 9.1.3 • Behältergewicht löschen, s. Kap. 15.1.2 AEJ-C/AES-C/PLJ-C-BA-d-1621... -
Page 86: Wägeergebnisse
15.4 Wägeergebnisse Die Datenbank < b4.4 Wägungen > ist nicht editierbar. Die Daten werden automa- tisch nach Drücken der PRINT-Taste gespeichert. Diese Datensätze können vom Anwender betrachtet, ausgedruckt oder auf einem USB-Speichermedium exportiert werden. In der Datenbank können 1000 Wägeergebnisse gespeichert werden. Ist die Kapazi- tät des Speichers erschöpft, wird der erste Datensatz der Reihenfolge nach über- schrieben. - Page 87 Bei Auswahl <Drucken> und anschlie- ßender Bestätigung mit der PRINT-Taste erfolgt die Ausgabe an einen optio- nalen Drucker. Der Inhalt der Datenausgabe ist abhängig von den Einstellun- gen im Menü <P5.3 GLP>, s. Kap. 14.2.2. Ausdruckbeispiel (KERN YKB-01N): Datum 18.05.2015 Uhrzeit...
-
Page 88: Alibispeicher
Eichgesetz im Rahmen des Verbraucherschut- zes eine elektronische Archivierung mittels eines eichfähigen, nicht-manipulierbaren Datenspeichers vorgeschrieben. Alibi-Speicher von KERN erfüllen diese Forderung. Sie dienen zur papierlosen Archivierung von 100 000 Wägeergebnissen. Alle an den PC übermittelten Daten werden mit Datum, Uhrzeit und allen wichtigen Wägewerten gespeichert. - Page 89 Bei Auswahl <Drucken> und anschlie- ßender Bestätigung mit der PRINT-Taste erfolgt die Ausgabe an einen optio- nalen Drucker. Der Inhalt der Datenausgabe ist abhängig von den Einstellun- gen im Menü <P5.3 GLP>, s. Kap. 14.2.2. Ausdruckbeispiel (KERN YKB-01N): Datum 18.05.2015 Uhrzeit...
-
Page 90: Datenbanken Auf Usb-Speichermedium Exportieren / Importieren
15.6 Datenbanken auf USB-Speichermedium exportieren / importieren Die Option ermöglicht: • die Daten der Datenbanken “Produkte“, Bediener“ und „Tara“ von einer Waa- ge zur anderen zu kopieren / übertragen. • die Daten der Datenbanken „Wägeergenisse“ und „Alibi“ zu archivieren USB-Speichermedium an USB-Port anschließen ... - Page 91 USB-Speichermedium an PC anschließen • Zum Öffnen der „Alibi“-Datei ist die optional erhältliche Software KERN PET-A16 erforderlich. • Die „NC“-Dateien können nicht geöffnet werden, sie dienen lediglich dem Import an weitere Geräte. AEJ-C/AES-C/PLJ-C-BA-d-1621...
-
Page 92: Applikationseinstellungen
16 Applikationseinstellungen Übersicht der verfügbaren Applikationen: Wägen s. Kap. 9 Stückzählen s. Kap. 17 Kontrollwägen s. Kap. 18 Dosieren s. Kap. 19 Prozentbestimmung s. Kap. 20 (Abweichung) Tierwägen s. Kap.21 Dichtebestimmung s. Kap. 22 Statistik s. Kap. 23 Summieren s. Kap. 24 Hold-Funkion s. - Page 93 Werkseitig sind über die MODE-Taste alle Applikationen verfügbar. Die Liste der verfügbaren Applikationen kann jedoch benutzerspezifisch angepasst werden. Nur die mit „JA“ eingestellten Applikationen werden nach Drücken der MODE-Taste angezeigt. Applikationen aktivieren / deaktivieren AEJ-C/AES-C/PLJ-C-BA-d-1621...
-
Page 94: Stückzählen
17 Stückzählen Bevor die Waage Teile zählen kann, muss sie das durchschnittliche Stückgewicht, die so genannte Referenz kennen. Die Waage ermittelt das Gesamtgewicht und teilt es durch die Anzahl der Teile (die so genannte Referenzstückzahl). Auf Basis des berechneten Referenzstückgewichts wird anschließend die Zählung durchgeführt. Hier gilt: Je höher die Referenzstückzahl, desto größer die Zählgenauigkeit. -
Page 95: Stückzählung Durchführen
17.2 Stückzählung durchführen Vorbereitung Zwei Funktionstasten Ihrer Wahl mit der Funktion <BEZUGSGEWICHT EINGEBEN> und <BEZUGSGEWICHT BESTIMMEN> belegen, s. Kap. 17.1 bzw. Kap. 9.3.10. 17.2.1 Ermittlung des Referenzstückgewichts durch Wägung Applikation <STÜCKZÄHLEN> wählen, s. Kap.16.1. In der Informationszeile wird das zuletzt verwendete Referenzstückgewicht angezeigt. Bei Erstinbe- triebnahme mit dem Wert 0.0000g. - Page 96 So viele Zählteile auflegen, wie die eingestellte Referenzstückzahl verlangt. Stabilitätsanzeige abwarten, dann mit PRINT-Taste bestätigen. Die Waage ermittelt das Referenzstückgewicht und zeigt dieses in der Infor- mationszeile an. Referenzgewicht abnehmen. Ab hier befindet sich Waage im Stückzähl-Modus und zählt alle Teile, die sich auf der Wägeplatte befinden.
- Page 97 Auswahl Referenzstückzahl benutzerdefiniert (z.B. 30 Stück): Falls nötig leeren Wägebehälter tarieren So viele Zählteile auflegen, wie die eingestellte Referenzstückzahl verlangt. Stabilitätsanzeige abwarten, dann mit PRINT-Taste bestätigen. Die Waage ermittelt das Referenzstückgewicht und zeigt dieses in der Infor- mationszeile an.
-
Page 98: Bekanntes Referenzstückgewicht Als Zahlenwert Eingeben
17.2.2 Bekanntes Referenzstückgewicht als Zahlenwert eingeben Applikation <STÜCKZÄHLEN> wählen, s. Kap.16.1. In der Informationszeile wird das zuletzt verwendete Referenzstückgewicht angezeigt. Bei Erstinbe- triebnahme mit dem Wert 0.0000g. Funktionstaste, welche mit der Funktion <BEZUGSGEWICHT EINGEBEN> belegt ist, drücken (Anzeigenbeispiel F2). Bekanntes Referenzstückgewicht mit den Navigationstasten eingeben, die ak- tive Stelle blinkt. -
Page 99: Referenzstückgewicht Aus Der Produktdatenbank Abrufen
17.2.3 Referenzstückgewicht aus der Produktdatenbank abrufen Vorbereitung Funktionstaste Ihrer Wahl mit der Funktion < PRODUKT WÄHLEN > belegen, s. Kap. 17.1 Funktionstaste, welche mit der Funktion < PRODUKT WÄHLEN > belegt ist, drücken (Anzeigenbeispiel F1) Mit den Navigationstasten gewünschte Produkt wählen und mit PRINT-Taste bestätigen. -
Page 100: Kontrollwägen
18 Kontrollwägen Beim Kontrollwägen können Sie einen oberen und einen unteren Grenzwert (Untere / Obere Schwelle) festlegen und damit sicherstellen, dass das eingewogene Wägegut genau innerhalb der festgelegten Toleranzgrenzen liegt. Die Über- oder Unterschreitung der Grenzwerte wird durch die eingeblendeten Indi- katoren <MIN>, <OK>... -
Page 101: Grenzwerte Über Die Funktionstaste Eingeben
18.1.1 Grenzwerte über die Funktionstaste eingeben Applikation <KONTROLLWÄGEN> wählen, s. Kap.16.1. In der Informations- zeile werden die zuletzt verwendeten Grenzwerte angezeigt. Bei Erstinbe- triebnahme mit dem Wert 0.0000g. Funktionstaste, welche mit der Funktion < SCHWELLE EINGEBEN > belegt ist, drücken (Anzeigenbeispiel F1). - Page 102 Nach Einstellung der Grenzwerte ist die Waage bereit zum Kontrollwägen. Falls nötig tarieren, Wägegut auflegen und Toleranzkontrolle starten. Die Indikatoren <MIN>, <OK> oder< MAX> zeigen das Probengewicht in Be- zug auf die Toleranz-grenzen an. Anzeigenbeispiel Zustand Wägegut unter der vorgegebenen Toleranz Wägegut innerhalb der vorgegebenen Toleranz Wägegut über der vorgegebenen Toleranz •...
-
Page 103: Grenzwerte Aus Der Produktdatenbank Abrufen
18.1.2 Grenzwerte aus der Produktdatenbank abrufen Vorbereitung Funktionstaste Ihrer Wahl mit der Funktion < PRODUKT WÄHLEN > belegen, s. Kap. 17.1 Funktionstaste, welche mit der Funktion < PRODUKT WÄHLEN > belegt ist, drücken (Anzeigenbeispiel F1) Mit den Navigationstasten gewünschte Produkt wählen und mit PRINT-Taste bestätigen. -
Page 104: Dosieren
19 Dosieren Beim Dosieren kann z.B. ein Behälter auf ein vordefiniertes Zielgewicht gefüllt oder eine Probe auf ein vordefiniertes Zielgewicht abgewogen werden. Die Indikatoren <MIN>, <OK> oder< MAX> zeigen den Füllstatus an. Mit der zusätzlichen Eingabe einer ± Toleranz kann festgelegt werden, mit welcher Genauigkeit eingewogen werden soll. -
Page 105: Zielgewicht Über Die Funktionstaste Eingeben
19.1.1 Zielgewicht über die Funktionstaste eingeben Applikation <DOSIEREN> wählen, s. Kap.16.1. In der Informationszeile wird das zuletzt verwendete Zielgewicht angezeigt. Bei Erstinbetriebnahme mit dem Wert 0.0000g. Funktionstaste, welche mit der Funktion < BEZUGSGEWICHT EINGEBEN > belegt ist, drücken (Anzeigenbeispiel F1). Die Anzeige zur Eingabe des Zielgewichts erscheint. - Page 106 Nach Einstellung des Zielgewichts /± Toleranz ist die Waage bereit zum Dosieren. Falls nötig tarieren und Wägegut dosieren. Die Indikatoren <MIN>, <OK> oder< MAX> zeigen den Füllstatus an. Anzeigenbeispiel Zustand Wägegut unter dem vorgegebenen Zielgewicht / Toleranz Zielgewicht erreicht und innerhalb der vorge- gebenen Toleranz Wägegut über dem vorgegebenen Zielgewicht / Toleranz...
-
Page 107: Zielgewicht Aus Der Produktdatenbank Abrufen
19.1.2 Zielgewicht aus der Produktdatenbank abrufen Vorbereitung Funktionstasten Ihrer Wahl mit der Funktion < PRODUKT WÄHLEN > belegen, s. Kap. 17.1 Funktionstaste, welche mit der Funktion < PRODUKT WÄHLEN > belegt ist, drücken (Anzeigenbeispiel F1) Mit den Navigationstasten gewünschte Produkt wählen und mit PRINT-Taste bestätigen. -
Page 108: Prozentwägen
20 Prozentwägen Das Prozentwägen ermöglicht die Gewichtsanzeige in Prozent, bezogen auf ein Re- ferenzgewicht (100%). Für die Ermittlung der Referenz stehen zwei verschiedene Methoden zur Verfügung (s. Kap. 20.2.1 und Kap.20.2.2). 20.1 Einstellungen <P2.6> AB W E IC HUNG > Über die applikationsspezifischen Einstellungen lassen sich die Applikationen an Ihre Bedürfnisse anpassen. -
Page 109: Prozentwägen Durchführen
20.2 Prozentwägen durchführen Vorbereitung Zwei Funktionstasten Ihrer Wahl mit der Funktion <BEZUGSGEWICHT EINGEBEN> und <BEZUGSGEWICHT BESTIMMEN> belegen, s. Kap. 20.1 bzw. Kap. 9.3.10. 20.2.1 Ermittlung des Referenzgewichts durch Wägung Applikation < ABWEICHUNG > wählen, s. Kap.16.1. In der Informationszeile wird das zuletzt verwendete Referenzgewicht angezeigt. -
Page 110: Bekanntes Referenzgewicht Als Zahlenwert Eingeben
20.2.2 Bekanntes Referenzgewicht als Zahlenwert eingeben Applikation < ABWEICHUNG > wählen, s. Kap.16.1. In der Informationszeile wird das zuletzt verwendete Referenzgewicht angezeigt. Bei Erstinbetrieb- nahme mit dem Wert 0.0000g. Funktionstaste, welche mit der Funktion <BEZUGSGEWICHT EINGEBEN> belegt ist, drücken (Anzeigenbeispiel F2). Bekanntes Referenzgewicht mit den Navigationstasten eingeben, die aktive Stelle blinkt. -
Page 111: Referenzgewicht Aus Der Produktdatenbank Abrufen
20.2.3 Referenzgewicht aus der Produktdatenbank abrufen Vorbereitung Funktionstasten Ihrer Wahl mit der Funktion < PRODUKT WÄHLEN > belegen, s. Kap. 17.1 Funktionstaste, welche mit der Funktion < PRODUKT WÄHLEN > belegt ist, drücken (Anzeigenbeispiel F1) Mit den Navigationstasten gewünschte Produkt wählen und mit PRINT-Taste bestätigen. -
Page 112: Tierwägen
21 Tierwägen Die Applikation „Tierwägen“ ermöglicht das Wägen unruhiger Wägegüter oder das Wägen unter instabilen Umgebungsbedingungen. Während einer festgelegten Zeit- spanne berechnet die Waage den Mittelwert mehrerer Wägungen. Zwei verschiedene Start- / Rücksetzmodi stehen zur Verfügung: Manuell (per Tastendruck, s. Kap. 21.1) oder ... - Page 113 AEJ-C/AES-C/PLJ-C-BA-d-1621...
-
Page 114: Tierwägen Mit Automatischem Start
Die Waage ist jetzt bereit zum Tierwägen: Applikation < TIERWAGEN > wählen, s. Kap.16.1. Bei Einsatz eines Wägebehälters mit TARE-Taste tarieren. Wägegut auflegen und mit der Funktionstaste, welche mit der Funktion <START> belegt ist, den Messzyklus starten (Anzeigenbeispiel F1) ... - Page 115 AEJ-C/AES-C/PLJ-C-BA-d-1621...
- Page 116 Die Waage ist jetzt bereit zum Tierwägen: Applikation < TIERWAGEN > wählen, s. Kap.16.1. Bei Einsatz eines Wägebehälters mit TARE-Taste tarieren. Wägegut auflegen, der Messzyklus wird automatisch nach Erreichen der ein- gestellten Schwelle gestartet. Warten bis das Ergebnis angezeigt wird. Wägegut entfernen und UNITS-Taste drücken.
-
Page 117: Dichtebestimmung Von Feststoffen Und Flüssigkeiten
22 Dichtebestimmung von Feststoffen und Flüssigkeiten Für die Dichtebestimmung empfehlen wir Ihnen mit den optional erhältlichen Dichte- bestimmungssets zu arbeiten. 1. Analysenwaagen Dichtebestimmungsset KERN YDB-03 2. Präzisionswaagen Dichtebestimmungsset KERN PLS-A01 Die Sets enthalten alle erforderlichen Aufbauten und Hilfsmittel, die Sie für eine kom- fortable und präzise Dichtebestimmung benötigen. -
Page 118: Einstellungen
22.1 Einstellungen <P2.7> oder <P2.8> DIC HT E B E S T IMMUNG > Über die applikationsspezifischen Einstellungen lassen sich die Applikationen an Ihre Bedürfnisse anpassen. Die zur Verfügung stehenden Einstellungen sind abhängig von der momentan aktiven Applikation. Ein Teil dieser Einstellungen sind global, d.h. sie sind von wenigen Ausnahmen ab- gesehen identisch mit der Applikation „Wägen“...Oder Dic Ht E B E S T Immung -
Page 119: Statistik
23 Statistik Die Applikation Statistik ermöglicht die statistische Auswertung von Wägewerten. Einstellungen <P2.10> STATISTIK > Über die applikationsspezifischen Einstellungen lassen sich die Applikationen an Ihre Bedürfnisse anpassen. Die zur Verfügung stehenden Einstellungen sind abhängig von der momentan aktiven Applikation. Ein Teil dieser Einstellungen sind global, d.h. sie sind von wenigen Ausnahmen ab- gesehen identisch mit der Applikation „Wägen“... - Page 120 Erste Probe wägen Falls nötig Waage nullstellen oder tarieren. Erste Probe auflegen, Stabilitäts- anzeige abwarten, dann PRINT-Taste drücken. In der Anzeige erscheint die Probennummer < 1 >; das Gewicht wird gespei- chert und bei Anschluss eines optionalen Druckers ausgedruckt. ...
- Page 121 Nach Drücken der F2-Taste kann mit jedem Druck der Navigationstasten der nächste Statistikwert angezeigt werden. Zur Protokollausgabe die Option <DRUCKEN> mit PRINT-Taste bestätigen. AEJ-C/AES-C/PLJ-C-BA-d-1621...
- Page 122 Musterprotokoll KERN YKB-01N ---------------------Statistik--------------- Anzahl Proben 455.60 g Summe 50.6222 g Mittelwert 49.939 g Kleinster Gewichtswert 51.380 g Größter Gewichtswert 1.441 g Differenz kleinster / größter Gewichtswert 0.39605 g Standardabweichung 0.78 % Relative Standardabweichung ---------------------------------------------- Statistikwerte löschen AEJ-C/AES-C/PLJ-C-BA-d-1621...
-
Page 123: Summieren
24 Summieren Die Applikation Statistik ermöglicht das Wägen verschiedener Proben und ds Auf- summieren der Gewichtswerte. Es können max. 30 Proben gewogen werden.. Einstellungen <P2.11> SUMMIEREN > Über die applikationsspezifischen Einstellungen lassen sich die Applikationen an Ihre Bedürfnisse anpassen. Die zur Verfügung stehenden Einstellungen sind abhängig von der momentan aktiven Applikation. - Page 124 Erste Probe wägen Falls nötig Waage nullstellen oder tarieren. Erste Probe auflegen, Stabilitäts- anzeige abwarten, dann PRINT-Taste drücken. In der Informationszeile erscheint die Probennummer < 1 >; das Gewicht wird gespeichert. Die Anzeige wird automatisch tariert. Weitere Proben wägen ...
- Page 125 Die Gesamtsumme wird angezeigt und bei Anschluss eines optionalen Druckers ausgegeben. oder Funktionstaste, welche mit der Funktion <ABSCHLIEßEN> belegt ist, drücken. Die Gesamtsumme wird angezeigt und bei Anschluss eines optionalen Dru- ckers ausgegeben. Musterprotokoll KERN YKB-01N -------------------Summieren------------- 38.000 g 100.00 g 50.000 g 10.000 g 125.000 g...
- Page 126 Summenspeicher löschen / neuen Summiervorgang starten Proben entfernen, UN IT-Taste drücken. Der Probenzähler „N“ und die Sum- me „S“ werden auf null zurück gesetzt. Die Waage ist für einen neuen Summiervorgang bereit. AEJ-C/AES-C/PLJ-C-BA-d-1621...
-
Page 127: Spitzenwertfunktion
25 Spitzenwertfunktion Diese Funktion zeigt den höchsten Lastwert (Spitzenwert) einer Wägung an. Der Spitzenwert bleibt solange in der Anzeige stehen, bis er gelöscht wird. Voreinstellungen: Über die applikationsspezifischen Einstellungen lassen sich die Applikationen an Ihre Bedürfnisse anpassen. Die zur Verfügung stehenden Einstellungen sind abhängig von der momentan aktiven Applikation. - Page 128 Die Waage ist jetzt bereit zur Ermittlung des Spitzenwerts: Applikation < F11 MAX. HOLD > wählen, s. Kap.16.1. Ab hier registriert die Waage jeden Wägewert, der größer als die eingestellte Schwelle ist. Wägegut auflegen, der Messung wird automatisch nach Erreichen der einge- stellten Schwelle gestartet.
-
Page 129: Pipettenkalibrierung
26 Pipettenkalibrierung Prüfflüssigkeit, Wägegefäß, Pipette und Pipettenspitze vor Beginn mindestens 2 Stunden akklimatisieren. Als Prüfflüssigkeit destilliertes Wasser verwenden. • Umgebungstemperatur 20 – 25°C, Temperaturschwankungen während der Kalibrierung °C ± 0,5 • Relative Luftfeuchte 50 -75 % 26.1 Einstellungen <P2.13 PIPETTENKALIBRIERUNG > Über die applikationsspezifischen Einstellungen lassen sich die Applikationen an Ihre Bedürfnisse anpassen. -
Page 130: Durchführung
26.2 Durchführung Applikation anwählen: AEJ-C/AES-C/PLJ-C-BA-d-1621... - Page 131 Testparameter eingeben: Mit den Navigationstasten die aktuelle Prüftemperatur eingeben, die aktive Stelle blinkt. Mit der PRINT-Taste bestätigen, die Anzeige zur Eingabe der Luftfeuchtigkeit wird angezeigt. Mit den Navigationstasten die aktuelle Luftfeuchtigkeit eingeben, die aktive Stelle blinkt. Mit der PRINT-Taste bestätigen, die Anzeige zur Eingabe des Luftdrucks wird angezeigt.
- Page 132 Mit den Navigationstasten Prüfvolumen <V1> eingeben (z.B. 100 µl), die akti- ve Stelle blinkt. Bei Pipetten mit festem Volumen ist die Eingabe hier beendet. Bei Pipetten mit variablem Volumen wie nachfolgend beschrieben Volumen V2 und V3 wählen. Eingabe mit der PRINT-Taste bestätigen, die Anzeige zur Eingabe für das zweite Prüfvolumens <V2>...
- Page 133 Pipettentest durchführen: 1. Messreihe für Prüfvolumen V1 : Wägegefäß aufstellen, Stabilitätsanzeige abwarten, dann mit TARE-Taste tarieren. 1. Gewähltes Prüfvolumen <V1> mit der Pipette aufziehen und die Flüssigkeit in das Wägegefäß dosieren. 2. Stabilitätsanzeige abwarten, Wägewert mit PRINT-Taste übernehmen. 3. Bei Menüeinstellung P2.13.7 AUTOTARA <Ja> erfolgt eine automatische Ta- rierung.
- Page 134 2. Messreihe für Prüfvolumen V2 : Die zweite Messreihe wie die vorhergehende durchführen, jedoch mit Prüfvolu- men <V2> 3. Messreihe für Prüfvolumen V3 : Die dritte Messreihe wie die vorhergehende durchführen, jedoch mit Prüfvolu- men <V3> Nach Drücken der PRINT-Taste bei Anzeige der systematische Messabwei- chung [E ] / Standardabweichung [S ] wird bei Anschluss eines optionalen Dru-...
- Page 135 Ausdruckbeispiel KERN YKB-01N -------------------Pipettenkalibrierung--------------------- Anzahl von Messungen Datum 05.01.2016 Uhrzeit 11:34:17 Temperatur 20.0°C Feuchtigkeit 50 % Druck 1017hPa -------------------------Prüfvolumen 1000 µl------------ 1003 µl 993 µl 1013 µl 1003 µl 993 µl 1003 µl 1013 µl 1053 µl 1003 µl 1023 µl Mittleres Volumen [Va] 1010 µl...
-
Page 136: Kommunikation / Setup-Menü < P3
4. USB 1 / Typ A (z. B. Anschluss an USB-Speichermedium oder Barcode-Scanner) 5. WLAN (Factory option KERN PLJ-A06) Je nach Peripheriegerät und gewünschter Funktion muss die Schnittstelle konfi- guriert werden, s. Kap.0 / 27.2 (die Parameter der USB-Ports sind nicht konfigu- rierbar). -
Page 137: P3.1 / P3.2> Rs-232 Schnittstelle Konfigurieren
27.1 <P3.1 / P3.2> RS-232 Schnittstelle konfigurieren Im Kommunikationsmenü <P3> die zu konfigurierende Schnittstelle <COM 1> oder <COM 2> wählen. Nach Auswahl von <COM 1> oder <COM 2> mit den Navigationstasten den Kommunikationsparameter Baudrate wählen. AEJ-C/AES-C/PLJ-C-BA-d-1621... - Page 138 Nach Auswahl der Baudrate nächsten Kommunikationsparameter <Parität> wählen. AEJ-C/AES-C/PLJ-C-BA-d-1621...
-
Page 139: P3.3> Wlan-Schnittstelle (Factory Option Kern Plj-A06)
27.2 <P3.3> WLAN-Schnittstelle (Factory option KERN PLJ-A06) Menü aufrufen: AEJ-C/AES-C/PLJ-C-BA-d-1621... -
Page 140: P3.3.2 - Netz Wählen
Verfügbare Einstellungen <P3.3> P3.3.1 - STATUS (konfigurieren / verbunden) P3.3.2 - NETZ WÄHLEN (Netz suchen) P3.3.3 - NETZPARAMETER P3.3.3.1 - NAME (Netzbezeichnung) P3.3.3.2 - PASSWORT (Passwort für Zugang zum Netz) P3.3.3.3 – KANAL-Nr. (Standard <AUTO>) P3.3.3.4- - IP (Adresse der Waage im Netzwerk) P3.3.3.5 - MASKE (Subnetz-Maske) P3.3.3.6 - GATE... - Page 141 Passwort eingeben mit PRINT-Taste bestätigen. Anmerkung: Der Anschluss einer PC-Tastatur über den USB-Port erleichtert Ihnen die Eingabe. Das Waagenprogramm führt Sie automatisch durch die Netzparameter. Angezeigte Netzparameter mit PRINT-Taste bestätigen oder bei Bedarf ändern, s. Kap. 0. Die Waage kehrt automatisch zurück ins Menü <P3.3.2 – NETZ WÄHLEN> ...
-
Page 142: P3.3.3> - Netzparameter
27.2.2 <P3.3.3> - NETZPARAMETER Der Anschluss einer PC-Tastatur über die USB-Schnittestelle erleichtert die Eingabe der Netzparameter. Menüpunkt < P3.3.3> aufrufen s. Kap. 27.2. Im Menüpunkt < P3.3.3.3> Kanal <AUTO (JA / NEIN)> wählen und mit PRINT- Taste bestätigen. Bei Einstellung <JA> wird bei der nächsten Verbindung im Netzt überprüft, ob der Kanal, auf dem der Router arbeitet, gewechselt wurde. - Page 143 Im Menüpunkt < P3.3.3.6> GATE wählen und mit PRINT-Taste bestätigen. Mit F1-Taste nächsten Menüpunkt wählen. Im Menüpunkt < P3.3.3.7> PORT <Standard 4000> wählen und mit PRINT- Taste bestätigen. Mit F1-Taste nächsten Menüpunkt wählen. Im Menüpunkt < P3.3.3.8> MAC Adresse wählen und mit PRINT-Taste bestä- tigen.
-
Page 144: Usb-Schnittstellen
USB Typ B (PC-Anschluss) Gerät über USB anschließen: Gerät von der Stromversorgung trennen. USB-Treiber installieren, verfügbar auf unserer KERN- Homepage www.kern- sohn.com, / Downloads. Die für Ihr System geeignete Treiberversion auswäh- len und exe-Datei ausführen. Dialog <Weiter> anklicken, der Treiber wird installiert. - Page 145 Gerätemanager aufrufen. Mit Klick auf „Anschlüsse“ wird der neue virtuelle COM Port für das Gerät ange- zeigt. Der korrekte Eintrag ist am Namen „KERN PLJ Series“ zu erkennen. Der angezeigte COM Port z. B. COM6 ist entsprechend in der Übertragungssoft- ware auszuwählen.
-
Page 146: Geräte / Setup-Menü < P4
28.1 Kontinuierliche Datenübertragung für Fernsteuerbefehle < P4.1 Computer > 1. Schnittstelle wählen <P4.1.1> Mit den Navigationstasten die Schnittstelle wählen, mit welchem das Gerät an den PC angeschlossen werden soll Wählbar: COM 1: RS 232 USB: Typ B WIFI: Factory option KERN PLJ-A06 AEJ-C/AES-C/PLJ-C-BA-d-1621... - Page 147 2. Typ der Kontinuierliche Datenübertragung wählen <P4.1.2> Mit den Navigationstasten die Anzeige zur Einstellung der kontinuierlichen Da- tenübertragung wählen. Mit den Navigationstasten gewünschte Einstellung wählen und mit PRINT- Taste bestätigen. Wählbar: <KEIN> Kontinuierlichen Datenübertragung ausgeschaltet <AKT. EINH> Kontinuierlichen Datenübertragung in aktueller Einheit <CAL:EINH>...
- Page 148 3. Ausgabeintervall wählen <P4.1.3> Mit den Navigationstasten die Anzeige zur Einstellung des Ausgabeintervalls für die kontinuierliche Datenübertragung wählen. AEJ-C/AES-C/PLJ-C-BA-d-1621...
- Page 149 4. Protokolltyp wählen <P4.1.5> Mit den Navigationstasten die Anzeige zur Auswahl des Protokolltyps wählen. Mit den Navigationstasten gewünschte Einstellung wählen und mit PRINT- Taste bestätigen. Wählbar: <KEIN> Keinen <STANDARD> Standardprotokoll <SNDDRUCK 1> Benutzerdefiniertes Protokoll: Sonderausdruck 1 -4, Definition s. Kap. 14.3 ...
-
Page 150: Datenübertragung Nach Drücken Der Print-Taste < P4.2 Drucker
28.2 Datenübertragung nach Drücken der PRINT-Taste < P4.2 Drucker > Im Menüpunkt <P4.2> erfolgt die Auswahl und Konfiguration der Schnittstelle für die Ausgabe nach Drücken der PRINT-Taste. Der Inhalt der Datenausgabe wird in < P5 Ausdruck > definiert, s. Kap. 14. 1. - Page 151 Messprotokolle speichern, s. Kap. 0 <USB PC> USB-Port-Typ B, PC-Anschluss in Verbindung mit Über- tragungssoftware (z. B. KERN SCD 4.0) 2. Werte (hexadezimal) für Präfix / Suffix eingeben <P4.2.1> Mit den Navigationstasten Steuercode für den Anfang des Protokolls eingeben und mit PRINT-Taste bestätigen.
- Page 152 Mit den Navigationstasten Steuercode für Ende des Protokolls eingeben (z. B. Papierabschnitt) und mit PRINT-Taste bestätigen. AEJ-C/AES-C/PLJ-C-BA-d-1621...
-
Page 153: P4.3 Barcode-Scanner
28.3 < P4.3 Barcode-Scanner > Im Menüpunkt <P4.3> erfolgt die Auswahl der Schnittstelle für den Anschluss eines Barcode-Scanners. Mit den Navigationstasten die Schnittstelle wählen, mit welcher die Datenüber- tragung erfolgen soll. Auswahl mit PRINT-Taste bestätigen. AEJ-C/AES-C/PLJ-C-BA-d-1621... -
Page 154: Kommunikation Mit Externen Geräten (Drucker / Pc)
Waage von der Stromversorgung trennen und mit einem geeigneten Kabel mit der Schnittstelle des Gerätes verbinden. Der fehlerfreie Betrieb ist nur mit dem entsprechenden KERN- Schnittstellenkabel sichergestellt. Kommunikationsparameter der RS 232 Schnittstelle (Baudrate, Bits und Pari- tät) von Waage und externes Gerät müssen übereinstimmen. -
Page 155: Schnittstellenkabel
29.2 Schnittstellenkabel Waage - PC 9-polig Waage - Drucker ( CITIZEN, EPSON) 25-polig Waage - Drucker 3 (TxD) 1 (RxD) 5 (GND) 3 (GND) 7 - 8 gebrückt AEJ-C/AES-C/PLJ-C-BA-d-1621... -
Page 156: Datenübertragungsformat
29.3 Datenübertragungsformat 1. Nach Drücken der PRINT-Taste 4-12 14-16 ˽ ˽ Stabilität Vorzeichen Wägewert Einheit Stabilitätszeichen ˽ ] stabil [ ? ] instabil [ ^ ] Überlast [ v ] Unterlast Vorzeichen ˽ ] positive Werte ] negative Werte Wägewert 9 Zeichen mit rechsbündiger Ausrichtung Einheit 3 Zeichen mit linksbündiger Ausrichtung... - Page 157 Befehl 1 - 3 Zeichen Stabilitätszeichen ˽ ] stabil [ ? ] instabil [ ^ ] Überlast [ v ] Unterlast Vorzeichen ˽ ] positive Werte ] negative Werte Wägewert 9 Zeichen mit rechsbündiger Ausrichtung Einheit 3 Zeichen mit linksbündiger Ausrichtung AEJ-C/AES-C/PLJ-C-BA-d-1621...
-
Page 158: Schnittstellenbefehle
29.4 Schnittstellenbefehle Nachfolgende Befehle werden von der Waage erkannt. Befehle Funktion Nullstellen Tarieren Tarawert abfragen Tarawert setzen Stabilen Gewichtswert in Standardwägeinheit senden Gewichtswert sofort in Standardwägeeinheit senden Gewichtswerte aller Plattformen in Standardwägeeinheit sofort senden Stabilen Gewichtswert in aktueller Wägeeinheit senden Gewichtswert sofort in aktueller Wägeeinheit senden Start der kontinuierlichen Ausgabe in Standardwägeeinheit Stop der kontinuierlichen Ausgabe in Standardwägeeinheit... -
Page 159: Generelles Antwortformat
29.5 Generelles Antwortformat Befehle Funktion ˽ Befehl akzeptiert, Ausführung des Befehls wurde begonnen A CR LF Ausführung des zuvor gestarteten Befehls wurde abgeschlossen ˽ D CR LF (tritt nur nach XX_A auf) ˽ Befehl gültig, kann aber momentan nicht ausgeführt werden. I CR LF ˽... -
Page 160: Detaillierte Informationen Zu Den Kommunikationsprotokollen
29.6 Detaillierte Informationen zu den Kommunikationsprotokollen 29.6.1 Nullstellen Befehl: Z CR LF Mögliche Antworten: ˽ Befehl akzeptiert, Ausführung des Befehls wurde begonnen A CR LF ˽ Ausführung des zuvor gestarteten Befehls wurde abgeschlossen D CR LF ˽ Befehl akzeptiert, Ausführung des Befehls wurde begonnen A CR LF ˽... -
Page 161: Tarawert Setzen
Tarawert: - 9 Zeichen mit rechtsbündiger Ausrichtung Einheit: - 3 Zeichen mit linksbündiger Ausrichtung Der Tarawert wird immer in der Justiereinheit ausgegeben. 29.6.4 Tarawert setzen ˽ Befehl: TARA CR LF, (TARA = Tarawert) Mögliche Antworten: ˽ Befehl ausgeführt OK CR LF ˽... -
Page 162: Gewichtswert Sofort In Standardwägeeinheit Senden
Beispiel: S CR LF Gesendeter Befehl: Stabilen Gewichtswert in Stan- dardwägeinheit senden ˽ Befehl akzeptiert, Ausführung des Befehls wurde A CR LF begonnen ˽˽˽˽ ˽˽˽˽˽˽ ˽ ˽˽ Befehl ausgeführt, 8 . 5 CR LF Gewichtswert wird in der Standardwägeeinheit ausgegeben Stabilitätszeichen* instabil (3Fh, 0x3F) ˽... -
Page 163: Stabilen Gewichtswert In Aktueller Wägeeinheit Senden
29.6.7 Stabilen Gewichtswert in aktueller Wägeeinheit senden Befehl: SU CR LF Mögliche Antworten: ˽ A CR LF Befehl akzeptiert, Ausführung des Befehls wurde begonnen ˽ E CR LF Zeitlimit für Stabilisierung der Waagenanzeige überschritten ˽ Befehl gültig, kann aber momentan nicht ausgeführt werden I CR LF ˽... -
Page 164: Gewichtswert Sofort In Aktueller Wägeeinheit Senden
29.6.8 Gewichtswert sofort in aktueller Wägeeinheit senden Befehl: SUI CR LF Mögliche Antworten: ˽ Befehl gültig, kann aber momentan nicht ausgeführt werden I CR LF 7-15 17-19 Stabilitäts- ˽ ˽ Vorzeichen Gewicht Einheit zeichen Beispiel: Gesendeter Befehl, s. Kap. 29.4 S U I CR LF ˽... -
Page 165: Start Der Kontinuierlichen Ausgabe In Aktueller Wägeeinheit
29.6.11 Start der kontinuierlichen Ausgabe in aktueller Wägeeinheit ˽ Befehl: CU1 CR LF Mögliche Antworten: ˽ Befehl gültig, kann aber momentan nicht ausgeführt werden I CR LF ˽ Befehl akzeptiert, Ausführung des Befehls wurde begonnen A CR LF Gewichtswerte werden in der aktuellen ausgegeben Wägeeinheit 7-15... -
Page 166: Untere Toleranzgrenze Abfragen
29.6.15 Untere Toleranzgrenze abfragen Befehl: ODH CR LF ˽ Befehl ausgeführt Antwort: MASA CR LF 4 - 12 14 - 16 ˽ ˽ ˽ Tara Einheit Gewicht: - 9 Zeichen mit rechtsbündiger Ausrichtung Einheit: - 3 Zeichen mit linksbündiger Ausrichtung 29.6.16 Obere Toleranzgrenze abfragen Befehl: OUH CR LF... -
Page 167: Referenzgewicht Eingeben (Prozentwägen)
29.6.19 Referenzgewicht eingeben (Prozentwägen) ˽ Befehl: RM XXXXX CR LF Mögliche Antworten: ˽ Befehl ausgeführt OK CR LF ˽ Befehl gültig, kann aber momentan nicht ausgeführt werden I CR LF (z. B. falscher Betriebsmodus) ES CR LF Syntaxerror (falsches Gewichtsformat) 29.6.20 Bestätigen / Simulation „PRINT-Taste drücken“... -
Page 168: Automatische Interne Justierung Entsperren
29.6.23 Automatische interne Justierung entsperren Befehl: IC0 CR LF Mögliche Antworten: ˽ Befehl ausgeführt OK CR LF ˽ Befehl gültig, kann aber momentan nicht ausgeführt werden I CR LF (Bei Waagen mit Bauartzulassung nicht verfügbar) 29.6.24 Seriennummer eingeben Befehl: NB CR LF Mögliche Antworten: ˽... -
Page 169: Liste Der Verfügbaren Betriebsmodi
29.6.27 Liste der verfügbaren Betriebsmodi Befehl: OMI CR LF Mögliche Antworten: OMI˽ CR LF Befehl akzeptiert, verfügbare Beriebsmodi werden ange- n˽Bezeichnung“ CR LF zeigt n˽Bezeichnung“ CR LF OK CR LF ˽ Befehl gültig, kann aber momentan nicht ausgeführt werden I CR LF Betriebsmodus - Wägen - Stückzählen... -
Page 170: Tonsignal Betätigen
29.6.30 Tonsignal betätigen ˽ Befehl: BP CZAS CR LF Mögliche Antworten: BP˽OK CR LF Befehl ausgeführt ˽ Kein Parameter oder falsches Format E CR LF ˽ Befehl gültig, kann aber momentan nicht ausgeführt werden I CR LF 29.6.31 Alle implementierten Meldungen senden Befehl: PC CR LF Antwort: PC_A_”Z, T, S, SI, SU, SUI, C1, C0, CU1, CU0, NB, K1, K0, SS, OMI, OMS, OMG,... -
Page 171: Wartung, Instandhaltung, Entsorgung
Lose Probenreste/Pulver können vorsichtig mit einem Pinsel oder Handstaubsauger entfernt werden. Verschüttetes Wägegut sofort entfernen. 30.2 Wartung, Instandhaltung Das Gerät darf nur von geschulten und von KERN autorisierten Servicetechni- kern geöffnet werden. Vor dem Öffnen vom Netz trennen. 30.3 Entsorgung Die Entsorgung von Verpackung und Gerät ist vom Betreiber nach gültigem nationa-... -
Page 172: Kleine Pannenhilfe / Fehlermeldungen
31 Kleine Pannenhilfe / Fehlermeldungen Mögliche Fehlerursachen: Bei einer Störung im Programmablauf sollte die Waage kurz ausgeschaltet und vom Netz getrennt werden. Der Wägevorgang muss dann wieder von vorne begonnen. Hilfe: Störung Mögliche Ursache Die Gewichtsanzeige leuch- • Die Waage ist nicht eingeschaltet. tet nicht. - Page 174 KERN AEJ-C / AES-C / PLJ-C Version 2.1 11/2016 Operating manual Analysis and precision balances Contents Technical data ....................6 Declaration of Conformity ................11 Device overview ....................12 Display and Keyboard Summary ..................15 3.1.1 Navigation keys / numeric input ....................16 Basic Information (General) ................
- Page 175 9.3.8 <P2.2.4> Informational line ...................... 49 9.3.9 <P2.2.5> Special information ....................50 9.3.10 <P2.2.6> Assigning function keys ..................51 < P 8 UNTIS > ....................52 10.1 Change weighing unit < P8.1> ....................52 10.2 Defining start-up weighing unit < P8.2> ................53 10.3 Defining freely programmable weighing units <...
- Page 176 Communication / setup menu < P3 > ............135 27.1 Configuring a <P3.1 / P3.2> RS-232 interface ..............136 27.2 <P3.3> WLAN interface (factory option KERN PLJ-A06) ..........138 27.2.1 P3.3.2 - SELECT NET ....................... 139 27.2.2 <P3.3.3> - NETWORK PARAMETER ................141 27.3...
- Page 177 29.6.22 Disable automatic internal adjustment ................166 29.6.23 Enable automatic internal adjustment ................167 29.6.24 Enter serial number ......................167 29.6.25 Disable weighing balance keyboard .................. 167 29.6.26 Enable weighing balance keyboard ................... 167 29.6.27 List of available operating modes ..................168 29.6.28 Set operating mode ......................
-
Page 178: Technical Data
1 Technical data KERN AEJ 100-4CM AEJ 200-4CM AEJ 200-5CM Readability (d) 0.1 mg 0.1 mg 0.01 mg; 0.1 mg Weighing range (max) 160 g 220 g 82 g; 220 g Minimum load (Min) 10 mg 10 mg 1 mg... - Page 179 KERN AES 100-4C AES 200-4C Readability (d) 0.1 mg 0.1 mg Weighing range (max) 160 g 220 g Reproducibility 0.2 mg 0.2 mg Linearity ± 0.2 mg ± 0.2 mg Stabilization time 4 sec. 4 sec. Recommended adjusting 150 g (E2)
- Page 180 KERN PLJ 300-3CM PLJ 600-3CM Readability (d) 1 mg 1 mg Weighing range (max) 360 g 600 g Minimum load (Min) 20 mg 20 mg Verification value (e) 10 mg 10 mg Verification class Reproducibility 1 mg 2 mg Linearity ±...
- Page 181 KERN PLJ 700-3CM PLJ 3000-2CM Readability (d) 1 mg 10 mg Weighing range (max) 750 g 3500 g Minimum load (Min) 20 mg 500 mg Verification value (e) 10 mg 100 mg Verification class Reproducibility 2 mg 10 mg Linearity ±...
- Page 182 Dimensions AEJ-C/AES-C: PLJ-C: AEJ-C/AES-C/PLJ-C-BA-e-1621...
-
Page 183: Declaration Of Conformity
2 Declaration of Conformity To view the current EC/EU Declaration of Conformity go to: www.kern-sohn.com/ce The scope of delivery for verified weighing balances (= conformity- rated weighing balances) includes a Declaration of Conformity. AEJ-C/AES-C/PLJ-C-BA-e-1621... -
Page 184: Device Overview
3 Device overview KERN AEJ/AES-C: Pos. Designation Glass wind screen Weighing pan Display Keyboard Levelling screw AEJ-C/AES-C/PLJ-C-BA-e-1621... - Page 185 KERN PLJ-C: Pos. Designation Glass wind screen Weighing pan Display Keyboard Levelling screw AEJ-C/AES-C/PLJ-C-BA-e-1621...
- Page 186 Connections (all models): Pos. Designation Mains connection COM 2 port COM 1 port USB 2 port (for devices such as printer, USB 1 port (for devices such as keyboard) AEJ-C/AES-C/PLJ-C-BA-e-1621...
-
Page 187: Display And Keyboard Summary
3.1 Display and Keyboard Summary Example AEJ-C: Pos. Designation Stability display Indicator “zero display” Information line The non-verified value is given in brackets in verified scales. Weighing unit “g“ Button Function • Select operating mode • Start adjustment • Invoke setup menu •... -
Page 188: Navigation Keys / Numeric Input
• Function key / shortcut to basic functions • Taring • Add data record • Switch-over weighing unit • Exit menu • Shortcut key for most frequently occurring functions and settings (For configuration see chap. 9.3.10) • Navigation keys, see chap. 2.1.1 •... -
Page 189: Basic Information (General)
The balance may only be used according to the described conditions. Other areas of use must be released by KERN in writing. 4.3 Warranty Warranty claims shall be voided in case •... -
Page 190: Monitoring Of Test Resources
Information is available on KERN’s home page (www.kern-sohn.com with regard to the monitoring of balance test substances and the test weights required for this. In KERN's accredited DKD calibration laboratory test weights and balances may be calibrated (return to the national standard) fast and at moderate cost. - Page 191 • Prior to dispatch disconnect all cables and remove loose/mobile parts. See example shown for KERN AEJ/AES-C • Reattach possibly supplied transport securing devices. • Secure all parts such as the glass wind screen, the weighing platform, power unit etc. against shifting and damage.
- Page 192 AEJ-C/AES-C/PLJ-C-BA-e-1621...
-
Page 193: Unpacking, Setup And Commissioning
7 Unpacking, Setup and Commissioning 7.1 Installation Site, Location of Use The balances are designed in a way that reliable weighing results are achieved in common conditions of use. You will work accurately and fast, if you select the right location for your balance. Therefore, observe the following for the installation site: •... -
Page 194: Placing
7.3 Placing The right place is decisive for the accuracy of the weighing results of high- resolution analytical and precision balances (see chap. 7.1). Model AEJ-CM Turn the transport locking device in the direction of the arrow <OPEN> and remove. Keep transport locking device in a safe place for possible future transportation. - Page 195 Installation of weighing plate Models AEJ/AES-C (except AEJ-5CM) Model AEJ-5CM • Open glass draft shields on all sides • Open glass draft shields on all sides • Place protection sheet (1) into the • Remove transport securing (1). weighing chamber •...
- Page 196 Models PLJ-C: 10 mg models • Remove adhesive tape from the rubber element (1) • Place weighing pan (2) on the rubber elements 1 mg models • Remove adhesive tape from the rubber element (1) • Place weighing pan (2) on the rubber elements •...
-
Page 197: Levelling
7.4 Levelling Exact alignment and stable installation are an essential requirement for repeatable results. You can compensate for minor unevenness or tilts of the footprint by levelling the weighing balance. Level balance with foot screws until the air bubble of the water balance is in the prescribed circle. -
Page 198: Mains Connection
Check, whether the voltage acceptance on the scales is set correctly. Do not connect the scales to the power grid unless the information on the scales (sticker) matches the local mains voltage. Only use KERN original mains adapter. Using other makes requires consent by KERN. Important: Before starting your weighing balance, check the mains cable for ... -
Page 199: Switching On And Off
7.6.2 Switching on and off The weighing balance will remain switched on as long as it is connected to the power supply. Operate the ON/OFF-key to turn on/off the display. To turn on the display, press the ON/OFF-key. Wait for the basic display to appear. To switch off, press the ON/OFF button again. - Page 200 Login: Several keys are available for logging in: You can use either, the F-key, DATA-key or one of the shortcut keys (provided it is assigned to <LOG IN>). -key Use the navigation keys to select the desired user such as ADMIN. ...
- Page 201 -key Use the navigation keys to select <ADMIN> and confirm by pressing the PRINT-key. If necessary use the navigation keys to enter the password and confirm by pressing the PRINT-key, see chap. 3.1.1 Numeric entry. AEJ-C/AES-C/PLJ-C-BA-e-1621...
-
Page 202: Peripheral Equipment
Before connecting or disconnecting of additional devices (printer, PC) to the data interface, always disconnect the balance from the power supply. With your balance, only use accessories and printers by KERN, as they are ideally tuned to your balance. AEJ-C/AES-C/PLJ-C-BA-e-1621... -
Page 203: Menu
8 Menu 8.1 Menu structure The menu is subdivided into seven menu blocks (P1 – P7). Adjustment Available settings P1.1 Internal adjustment see chap. 13.2.1. P1.2 External adjustment s. Kap. 13.2.2 only AES models P1.3 User adjustment s. Kap. 13.2.3 only AES models P1.4 Adjustment test see chap. - Page 204 Printouts P5.1 Adjustment log see chap. 14.1. P5.2 Header see chap. 14.2.1. P5.3 GLP log see chap. 14.2.2. P5.4 Footer see chap. 14.2.3. P5.5 Special printout 1 see chap. P5.6 Special printout 2 P5.7 Special printout 3 see chap. 14.3. P5.8 Special printout 4 P5.10 Variable 1 see chap.
-
Page 205: Navigation In The Menu
8.2 Navigation in the menu Call up menu Press , and the first menu block 1 CAL will be displayed. Select menu block Use the navigation buttons to select the individual menu blocks one by one. Use the navigation key to scroll down. -
Page 206: Weighing Mode
9 Weighing mode The sequence of a simple weighing process is described in the chapter on Weighing below. Apart from the work steps described there (simple weighing, reset to zero, taring) the weighing balance offers additional options for adapting the “Weighing” application to your requirements. -
Page 207: Weighing With Tare
9.1.3 Weighing with tare Taring The dead weight of any weighing container may be tared away by pressing a button, so that the following weighing procedures show the net weight of the goods to be weighed. • Place the weighing container on the weighing pan and close the draft shields, as required. - Page 208 Numerical input of tare (PRE-TARE) Condition: Shortcut keys F1, F2, F3 or F4 will be assigned to the <ENTER TARE> function, see chap. 9.3.10. • Press the shortcut key and the display for entering the tare value will appear. •...
- Page 209 Load container weight from the database. • Press shortcut key (F1, F2, F3, F4) assigned to the <SELECT TARE> function (See chap. 9.3.10.). • After pressing , select <SELECT TARE> function. The display for selecting a tare memory will appear. •...
-
Page 210: Underfloor Weighing
9.2 Underfloor weighing Objects not fitting on the weighing pan due to their weight or shape can be weight with the help of the underfloor weighing option. Proceed as follows: • Switch off the balance. • Open closing cover at the balance bottom. •... -
Page 211: Settings
9.3 Settings <P2.2 WEIGHING> Navigation in menu see chap. 8.2 Menu structure: Menu item Parameters Available settings / explanation P2.2.1 P2.2.1.1 EXTRA FAST Filter READING Weighing balance reacts very sensitively and very fast, very stable place of installation. FAST Weighing balance reacts sensitively and fast, stable place of installation. - Page 212 P2.2.2 AUTOTARE Selectable yes / no P2.2.3 P2.2.3.1 MODE Weighing log will be generated immediately after the PRINT MOD. PRINT-key has been pressed, regardless whether the (specification weighing value is stable or not s PRINT-key) WHEN STABLE Output after the PRINT-key has been pressed will not take place until the weighing value has stabilised AUTO Automatic data output after exceeding set minimum...
- Page 213 9.3.1 <P2.2.1.1> Filter Matching weighing type to ambient conditions Please note that data processing geared to higher stability will always bring about a deceleration of reaction times while an acceleration of reaction times will have a negative impact on stability, that is, the higher the filter level, the longer the reaction time.
-
Page 214: P2.2.1.2> Rest Position Control Display
9.3.2 <P2.2.1.2> Rest position control display This setting is used to define how quickly the weighing balance considers a measured value as stable for release. AEJ-C/AES-C/PLJ-C-BA-e-1621... -
Page 215: P2.2.1.3> Auto Zero Function
9.3.3 <P2.2.1.3> Auto zero function This function is used to automatically tare minor weight fluctuations (such as minor soiling on weighing pan). By enabling this function you automatically ensure that each weighing process starts with zero display. In the event that small quantities are removed or added to the material to be weighed, incorrect weighing results can be displayed due to the “stability compensation“. -
Page 216: P2.2.1.4> Hiding Last Digit Of Display
9.3.4 <P2.2.1.4> Hiding last digit of display Readability may be reduced by 1 digit on the instrument, as required. The last decimal place will be rounded and removed from the display. AEJ-C/AES-C/PLJ-C-BA-e-1621... -
Page 217: P2.2.1.5> Environment
9.3.5 <P2.2.1.5> Environment This function allows you to optimally adapt the weighing balance to ambient conditions. In a stable environment (for instance free of draft and vibrations) select <STABLE> as a setting. In an instable environment exposed to constantly changing conditions select <INSTABLE>. AEJ-C/AES-C/PLJ-C-BA-e-1621... -
Page 218: P2.2.2 > Autotare /
9.3.6 <P2.2.2 > AUTOTARE / <P2.2.3.2> AUTO THRESHOLD The automatic tare function automatically saves the first stable weighing value as tare value. The parameter <P2.2.3.2> AUTO THRESHOLD is used to define which minimum weight must be placed before automatic taring takes place. Further automatic taring ill only take place when the display drops below the set value for the auto threshold.Auto Threshold - Page 219 Manual / automatic data output / 9.3.7 <P2.2.3.> <P2.2.3.2> AUTO THRESHOLD This function is used whether and how data output is to take place. Available settings: Menu item Available settings / explanation <P2.2.3.1> <IF STABLE> Manual output of stable weighing values after pressing PRINT key MODE <ANY>...
- Page 220 AEJ-C/AES-C/PLJ-C-BA-e-1621...
-
Page 221: P2.2.4> Informational Line
9.3.8 <P2.2.4> Informational line This function is used to define which additional information is to be shown in the line of text at the lower edge of the display. AEJ-C/AES-C/PLJ-C-BA-e-1621... -
Page 222: P2.2.5> Special Information
9.3.9 <P2.2.5> Special information This function is used to define user-specific information. When this function <P2.2.5 SINFO> is enabled, it will be shown in the line of text at the lower edge of the display. AEJ-C/AES-C/PLJ-C-BA-e-1621... -
Page 223: P2.2.6> Assigning Function Keys
9.3.10 <P2.2.6> Assigning function keys The function keys F1, F2, F3 and F4 allow direct access to frequently required functions and settings. The available settings depend on the operating mode selected. The function assigned to a menu item of the two keys will be executed when the respective key is tapped. -
Page 224: P 8 Untis
10 < P 8 UNTIS > This function is used to define which weighing units are to be used in the weighing balance. Available settings: Menu item Available settings / explanation This function is used to define the units into which the P8.1 weighing result is to be converted upon pressing the UNIT- ACCESS... -
Page 225: Defining Start-Up Weighing Unit < P8.2
The weighing units available depend on the model and calibration of the weighing balance. When switching-on the balance, the unit in which the balance has been switched off, will be displayed. 10.2 Defining start-up weighing unit < P8.2> The weighing units available depend on the model and calibration of the ... -
Page 226: Defining Freely Programmable Weighing Units < P8.3 / P8.4
10.3 Defining freely programmable weighing units < P8.3 / P8.4> Freely programmable weighing units are only available for weighing balances without type approval. • Use the navigation keys to enter the conversion factor and confirm by pressing the PRINT-key. • Press several times to return to weighing mode . -
Page 227: General Parameter < P 6 Other
11 General parameter < P 6 OTHER> This allows you to configure parameters that influence the operation of the weighing balance such as user language, date / time display, key sounds, display brightness etc. Menu structure: Navigation in menu see chap. 8.2 Menu item Available settings / explanation P6.1... - Page 228 AUTOTEST GLP> by pressing The internal weight will be applied twice, followed by 10 repeat measurements. Adjustment Calculation of standard deviation Automatic log printout Printout example KERN YKB-01N ------------------- ------------------- GLP Autotest Rep. Scale Type 150854 Balance ID...
-
Page 229: Show Device Info < P 7 Info
12 Show device info < P 7 INFO> This function is used to show and print information about the weighing balance. • Use to scroll down the list of weighing balance information. • To print the current weighing balance settings confirm parameter <P7.5 PRINT SETTINGS>... -
Page 230: Adjustment < P1 Justage
(recommended adjustment weight see chap. 1). Weights of different nominal values (>30% max) may be used for adjustment but are not optimal for technical measuring. Info about test weights can be found on the Internet at: http://www.kern-sohn.com. AEJ-C/AES-C/PLJ-C-BA-e-1621... -
Page 231: Automatic Adjustment Using Internal Weight (Models Aej, Plj)
The adjustment log will be printed automatically if an optional printer is connected. For defining an adjustment log see chap. 14.1 / <P5.1 Adjustment log>. Printout example KERN YKB-01N: AEJ-C/AES-C/PLJ-C-BA-e-1621... - Page 232 Automatic adjustment is carried out: • When balance was disconnected from the mains. • When the temperature is changing The moment a change in temperature of 3°C is detected by the temperature sensor, the weighing scale will carry out a fully automatic adjustment. The message „CAL“...
-
Page 233: Settings In Menu
13.2 Settings in menu <P1 JUSTAGE> Navigation in menu see chap. 8.2 Menu item Explanation P1.1 Internal adjustment (AEJ, PLJ models only) INT JUST P1.2 External adjustment (AES models only) EXT JUST P1.3 External adjustment with user-defined adjustment weight USER (AES models only) ADJUSTMENT P1.4... -
Page 234: P1.1 Int. Just
13.2.1 <P1.1 INT. JUST. > For automatic internal adjustment see chap. 13.1 Starting internal adjustment manually • Ensure that there are no objects on the weighing pan. • After successful adjustment the balance automatically returns to weighing mode. AEJ-C/AES-C/PLJ-C-BA-e-1621... -
Page 235: P1.2 Ext. Just.> (Aes Models)
13.2.2 <P1.2 EXT. JUST.> (AES models) • Carry out adjustment with the help of the recommended adjustment weight (see chapter 1 “Technical Specifications”). • Observe stable environmental conditions. A warming up time (see chapter 1) is required for stabilization. • Invoke menu item < P1.2 EXT. JUST. > •... - Page 236 • The adjustment log will automatically be printed if an optional printer is connected. For defining an adjustment log see chap. 14.1 / <P5.1 Adjustment log>. • Press the UNIT-key to return to weighing mode Printout example KERN YKB-01N: AEJ-C/AES-C/PLJ-C-BA-e-1621...
-
Page 237: P1.3 User Adjustment > Adjustment By Using User-Defined External Weight
13.2.3 < P1.3 USER ADJUSTMENT > Adjustment by using user-defined external weight • Invoke menu item < P1.3 USER JUSTAGE > • Use the navigation keys to enter the nominal value for the desired adjustment weight (>30% max) (See chap.3.1.1) and confirm by pressing the PRINT-key. •... - Page 238 • Take away adjustment weight. If the adjustment was successful, this will be followed by automatic return to the menu. • The adjustment log will be printed automatically if an optional printer is connected. For defining an adjustment log see chap. 14.1 / <P5.1 Adjustment log>.
-
Page 239: P1.4 Just.test > Adjustment Test
13.2.4 < P1.4 JUST.TEST > Adjustment test This function is applied to compare the internal adjustment weight with the saved value. The test is carried out automatically. The result is shown on the display and, if an optional printer is connected, a printout will be issued via the RS 232 interface. -
Page 240: Define Logs < P5 Printouts
Print deviation from last adjustment, yes / no ADJUSTMENT <P5.1.9> LINES Print lines to separate signature, yes / no <P5.1.10> SIGNATURE Insert line block for signing log, yes / no Printout example 1 (KERN YKB-01N): Menu item Adjust Protocol ment P5.1.2 P5.1.3... - Page 241 Printout example 2 (KERN YKB-01N): Menu item Adjust- Protocol ment P5.1.2 P5.1.3 P5.1.4 P5.1.5 P5.1.6 P5.1.7 P5.1.8 P5.1.9 P5.1.10 AEJ-C/AES-C/PLJ-C-BA-e-1621...
-
Page 242: Weighing Log
14.2 Weighing log This menu item is used to define which information is to be printed for default weighing logs. Navigation in menu see chap. 8.2 The menu is subdivided into three submenus where you can define the settings for the header, the logging of weighing results and the footer. -
Page 243: Print Weighing Results / Define Glp Log
Printout example (KERN YKB-01N): Menu item Adjust- Protocol ment P5.2.1 P5.2.2 P5.2.3 P5.2.4 P5.2.5 P5.2.6 P5.2.7 P5.2.8 P5.2.9 P5.2.10 P5.2.11 P5.2.12 P5.2.13 none 14.2.2 Print weighing results / define GLP log<P5.3> Quality assurance systems require printouts of weighing results as well as of correct adjustment of the balance stating date and time and balance identification. -
Page 244: Define Footer
Printout example (KERN YKB-01N): Menu item Adjust- Protocol ment P5.3.1 P5.3.2 P5.3.3 P5.3.4 P5.3.5 P5.3.6 P5.3.7 P5.3.8 P5.3.9 P5.3.10 none 14.2.3 Define footer<P5.4> This submenu is used to define which information is to be printed on the footer of weighing logs. The footer will be printed on pressing the shortcut keys F1 or F2 (provided they are assigned to <Print footer>) or on pressing the F-key and selecting... -
Page 245: User-Defined Data Output < P5.5> -
14.3 User-defined data output < P5.5> - <P5.8 SPECIAL PRINTOUT > Menu <P5> provides options that allow you to define up to four different special printouts of maximal 160 characters each (<P5.5> - <P5.8>). In addition to the option for entering running text (For numeric entry see chap.) 3.1.1) the menu also provides the following variables: General variables: Printout of 1 character “%”... - Page 246 Print related variables: Printout of 1 character “/” i.e. in order to print out 1 character /, two // must be entered) CRLF (carriage return line feed) line beginning next line CR (carriage return) line beginning LF (line feed) next line tabulator Paper feed (for PCL printers) End character string...
-
Page 247: Universal Variables
Example of text input in weighing mode: KERN∗SOHN DATE: <current date,> TIME: <current time> MASS: <current net weight in default unit> ∗∗∗∗∗∗SIGNATURE: Input: • Invoke desired menu item P5.5 – P5.8 (special printout 1 -4) and enter text; for numeric entry see chap. 3.1.1 or PC keyboard •... -
Page 248: Save Logs To Usb Storage Medium / Print
14.5 Save logs to USB storage medium / print This option allows you to save weighing results as text file to a USB storage medium and to print these files on a printer connected to your PC. Procedure: You will see a prompt asking you to connect a USB storage medium to the USB PORT, <IEI IMPORT / EXPORT>. -
Page 249: Data Bases
15 Data bases Available databases: Databank Data editable User <b1> 10 users see chap. 15.1. Product <b2> 1000 products see chap. 15.2. Tare values <b3> 100 container weights see chap. 15.3. Weighing results 1000 weighing results see chap. -
Page 250: User Database
15.1 User database The user database < b1 Operator / User > allows you to create up to 100 user profiles with specific settings and user rights. The user management provides for users with different rights, the administrator and several users. The Administrator has full access to the menu and database. -
Page 251: Create New User
15.1.1 Create new user The following data can be entered for each user: NAME max. 30 characters, CODE max. 6 characters PASSWORD max. 8 digits ACCESS RIGHTS User, master user, administrator LANGUAGE Deutsch/Espanol/Francais/Turk/Cesky/Italiano/Magyar/ Polski/English The connection of a PC keyboard via USB interface makes the entry of user parameters easier. -
Page 252: Delete User
15.1.2 Delete user AEJ-C/AES-C/PLJ-C-BA-e-1621... -
Page 253: For Invoking A User
• Use the navigation keys to select and delete a user by • Confirm the query “DELETE“ by pressing the PRINT-key and the display will return to the menu. Press UNITS key to return to weighing mode. 15.1.3 For invoking a user See chap. -
Page 254: Create New Product
15.2.1 Create new product Define product name AEJ-C/AES-C/PLJ-C-BA-e-1621... - Page 255 After entering a product name define all parameters one by one AEJ-C/AES-C/PLJ-C-BA-e-1621...
-
Page 256: Container Weights
15.3 Container weights The product database < b3 TARA > allows for up to 10 container weights to be created you can enter the following data NAME max. 30 digits TARA Container weight 15.3.1 Create new container weight • For downloading container weight from database see chap. 9.1.3 •... -
Page 257: Weighing Results
15.4 Weighing results The database < b4.4 Weighing results > is not editable. Data will be saved automatically when your press the PRINT-key . These data records can be viewed, printed or exported to a USB storage medium by the user. The database allows for up to 1000 weighing results to be saved. - Page 258 <Print> followed by confirmation with the PRINT-key will trigger a printout at the optional printer. The content of the data output depends on the settings in the menu <P5.3 GLP>, see chap. 14.2.2. Printout example (KERN YKB-01N): Date 18.05.2015 Time...
-
Page 259: Alibi Memory
Alibi memories by KERN meet this requirement. They are designed for paperless recording of up to 100 000 weighing results. - Page 260 <Print> followed by confirmation with the PRINT-key will trigger a printout at the optional printer. The content of the data output depends on the settings in the menu <P5.3 GLP>, see chap. 14.2.2. Printout example (KERN YKB-01N): Date 18.05.2015 Time...
-
Page 261: Export / Import Databases To Usb Storage Medium
15.6 Export / import databases to USB storage medium This option allows to: • Copy / transmit data of the databases “Products”, “User” and “Tare” from one weighing balance to another. • Archive the data of the databases “Weighing Results” and “Alibi” ... - Page 262 Connect the USB storage medium to the PC. • To open the “alibi” file you need the optionally available KERN PET-A16 software. • It is not possible to open the „NC“-files as they merely serve the purpose of import to additional devices.
-
Page 263: Application Settings
16 Application settings Overview of available applications: Weighing see chap. 9. Parts counting see chap. 17. Checkweighing see chap. 18. Dosing see chap. 19. Percent see chap. 20. determination Animal weighing see chap. 21. Density determination see chap. 22. Statistics see chap. - Page 264 The factory-setting for the MODE-key makes all applications available. However, the list of available applications can be personalised by the user. That means, only applications set to “YES“ will be shown when the MODE-key is pressed. Enable / disable applications AEJ-C/AES-C/PLJ-C-BA-e-1621...
-
Page 265: Parts Counting
17 Parts counting Before the balance can count parts, it must know the average part weight (i.e. reference). The balance determines the total weight and divides it by the number of parts (the so-called reference quantity). Based on the calculated reference, single weight counting will follow next. -
Page 266: Carry Out Parts Counting
17.2 Carry out parts counting Preparation For assigning two function keys of your choice with the functions <ENTER SAMPLE> and <DETERMINE SAMPLE> see chap. 17.1 or chap. 9.3.10. 17.2.1 Determination of the reference piece weight by weighing Select application <PARTS COUNTING>, see chap.16.1. The reference single weight last used will be shown in the informational line of text. - Page 267 Place as many pieces to add-up as required by the set reference piece number. Wait for steady state display and confirm by pressing the PRINT key. The weighing balance will calculate the reference single weight and show it in the informational line of text.
- Page 268 Selecting reference number of parts user-defined (such as 30 items): If necessary, tare the empty balance container. Place as many pieces to add-up as required by the set reference piece number. Wait for steady state display and confirm by pressing the PRINT key. ...
-
Page 269: Enter Known Reference Single Weight As Numeric Value
17.2.2 Enter known reference single weight as numeric value Select application <PARTS COUNTING>, see chap.16.1. The reference single weight last used will be shown in the informational line of text. At the first start- up as value 0.0000g. Press the function key assigned to the <ENTER REFERENCE WEIGHT) function (Display example F2). -
Page 270: Invoking Reference Single Weight From The Product Database
17.2.3 Invoking reference single weight from the product database Preparation For assigning a function key of your choice to the < SELECT PRODUCT> function see chap. 17.1 Press the function key assigned to the <SELECT PRODUCT> function (Display example F1) ... -
Page 271: Checkweighing
18 Checkweighing In checkweighing an upper and a lower limit value (lower / upper threshold) can be established to ensure that the weighed goods are exactly within the established tolerance limits. Any falling short of or exceeding the limits will be indicated on the screen by the indicators <MIN>, <OK>... -
Page 272: Entering Limits With A Function Key
18.1.1 Entering limits with a function key Select application <CHECKWEIGHING>, see chap.16.1. The most recently used limits will be shown in the informational line of text. At the first start-up as value 0.0000g. Press the function key assigned to the <ENTER THRESHOLD> function (display example F1). - Page 273 After setting the limit values, the weighing balance will be ready for check weighing. Tare, as required, place the load on the weighing pan and start tolerance control. The indicators <MIN>, <OK> or< MAX> will show the sample weight in relation to the tolerance limits.
-
Page 274: Invoke Limits From The Product Database
18.1.2 Invoke limits from the product database Preparation For assigning the function < SELECT PRODUCT > to a function key see chap. 17.1 Press the function key assigned to the <SELECT PRODUCT> function (Display example F1) Use the navigation keys to select the desired product and confirm by pressing the PRINT-key. -
Page 275: Dosing
19 Dosing During dosing you may for instance fill a container up to a specified target weight or a sample to a specified target weight. The indicators <MIN>, <OK> or< MAX> show the filling status. The additional entry defining ± tolerance can be used to specify the degree of accuracy to be applied. -
Page 276: Enter Target Weight With The Function Key
19.1.1 Enter target weight with the function key Select application <DOSING>, see chap.16.1. The most recently used target weight will be shown in the informational line of text. At the first start-up as value 0.0000g. Press the function key assigned to the <ENTER REFERENCE WEIGHT) function (Display example F1). - Page 277 After setting the target weight /± tolerance the weighing balance will be ready for dosing. Tare, as required and dose weighing load. The indicators <MIN>, <OK> or< MAX> show the filling status. Sample display State Weighing load below the set target weight / tolerance Target weight reached and within the set tolerance...
-
Page 278: Invoke Target Weight From Product Database
19.1.2 Invoke target weight from product database Preparation For assigning function keys of your choice to the < SELECT PRODUCT > function see chap. 17.1 Press the function key assigned to the <SELECT PRODUCT> function (Display example F1) Use the navigation keys to select the desired product and confirm by pressing the PRINT-key. -
Page 279: Percent Weighing
20 Percent weighing Percent weighing allows to display weight in percent, in relation to a reference weight (100%). Two different methods are available for calculating the reference (See chap. 20.2.1 and chap.20.2.2). 20.1 Settings <P2.6> DEVIATION> Applications can be adapted to your requirements by creating application-related settings. -
Page 280: Perform Percentage Weighing
20.2 Perform percentage weighing Preparation For assigning two function keys of your choice with the functions <ENTER REFERENCE> and <DEFINE REFERENCE WEIGHT> see chap. 20.1 or chap. 9.3.10. 20.2.1 Determination of the reference weight by weighing For selecting application <DEVIATION> see chap.16.1. The reference weight used will be shown in the informational line of text. -
Page 281: Enter Known Reference Weight As Numeric Value
20.2.2 Enter known reference weight as numeric value For selecting application <DEVIATION> see chap.16.1. The reference weight used will be shown in the informational line of text. At the first start-up as value 0.0000g. Press the function key assigned to the <ENTER REFERENCE WEIGHT) function (Display example F2). -
Page 282: Invoke The Reference Weight From The Product Database
20.2.3 Invoke the reference weight from the product database Preparation For assigning function keys of your choice to the < SELECT PRODUCT > function see chap. 17.1 Press the function key assigned to the <SELECT PRODUCT> function (Display example F1) ... -
Page 283: Animal Weighing
21 Animal weighing The Animal weighing application facilitates weighing of unstable loads or weighing under unstable ambient conditions. The weighing balance calculates the mean value of several weighing results obtained over a set time. Two different start / reset modes are available. ... - Page 284 AEJ-C/AES-C/PLJ-C-BA-e-1621...
-
Page 285: Animal Weighing With Automatic Start
The weighing balance will now be ready for animal weighing: Select application < ANIMAL WEIGHING >, see chap.16.1. When using a weighing container tare with TARE-key. Place load on pan and start the measuring cycle with the function key assigned to the <START>... - Page 286 AEJ-C/AES-C/PLJ-C-BA-e-1621...
- Page 287 The weighing balance will now be ready for animal weighing: Select application < ANIMAL WEIGHING >, see chap.16.1. When using a weighing container tare with TARE-key. Place load on pan and the measuring cycle will be started automatically when the set threshold is reached.
-
Page 288: Determining The Density Of Solid Matter And Fluids
For density determination we recommend working with the optionally available density determination sets. 1. Analytical balances Density determination set KERN YDB-03 2. Precision balances Density determination set KERN PLS-A01 The sets contain all the accessories and aids required for easy and precise density determination. -
Page 289: Settings
22.1 Settings <P2.7> or <P2.8> DENSITY DETERMINATION> Applications can be adapted to your requirements by creating application-related settings. The settings available depend on the currently enabled application. A part of these settings is global, that is, they are – apart from a few exceptions – identical to the weighing application (See chap 9.3 „Settings <P2.1 WEIGHING>”.Or Density Determination -
Page 290: Statistics
23 Statistics The Statistics application facilitates the statistical evaluation of weighing values. Settings <P2.10> STATISTICS > Applications can be adapted to your requirements by creating application-related settings. The settings available depend on the currently enabled application. A part of these settings is global, that is, they are – apart from a few exceptions – identical to the weighing application (See chap 9.3 „Settings <P2.1 WEIGHING>”. - Page 291 Weight first sample If required, set weighing balance to zero or tare. Place first sample on pan, wait for stability sign, then press the PRINT-key. Number of sample <1> will appear on the display; the weight will be saved and then printed if an optional printer is connected.
- Page 292 After having pressed the F2-key you can display the next statistics value each time you press the navigation keys. To activate log output, confirm option <PRINT> by pressing the PRINT-key. AEJ-C/AES-C/PLJ-C-BA-e-1621...
- Page 293 Sample log KERN YKB-01N -------------------Statistics---------------- Number of samples 455.60 g 50.6222 g Mean Value 49.939 g Smallest weight value 51.380 g Greatest weight value 1.441 g Difference smallest / greatest weight value 0.39605 g Standard deviation 0.78 % Relative standard deviation...
-
Page 294: Totalization
24 Totalization The Statistics application allows you to weigh various samples and to add up the weighing values. The total number of samples that can be weighed is limited to 30. Settings <P2.11> ADD UP > Applications can be adapted to your requirements by creating application-related settings. - Page 295 Weight first sample If required, set weighing balance to zero or tare. Place first sample on pan, wait for stability sign, then press the PRINT-key. The informational line of text will show the number of the sample < 1 >; the weight will be saved.
- Page 296 The total will be displayed and then printed if an optional printer is connected. Press the function key assigned to the function <FINISH>. The total will be shown and then printed if an optional printer is connected. Sample log KERN YKB-01N -----------------Adding-up---------------- 38.000 g 100.00 g 50.000 g...
- Page 297 Delete totals memory / start new adding up process Remove sample, press UNIT-key. The sample counter “N” and the total “S” will be reset to zero. The weighing scale is ready for a new adding up process. AEJ-C/AES-C/PLJ-C-BA-e-1621...
-
Page 298: Peak Value Function
25 Peak value function This function displays the highest load value (peak value) of a weighing. The peak value remains in the display until it will be deleted. Preferences: Applications can be adapted to your requirements by creating application-related settings. The settings available depend on the currently enabled application. A part of these settings is global, that is, they are –... - Page 299 The weighing balance is ready to calculate a peak value: Select application < F11 MAX. HOLD >, see chap.16.1. From that point onwards the weighing balance will register every weighing value greater than the set threshold. Place load on pan and weighing will start automatically on reaching the set threshold.
-
Page 300: Pipette Calibration
26 Pipette calibration Before starting the weighing process, acclimatise the sample liquid, weighing container, pipette and pipette tip for at least 2 hours. Use distilled water as a sample fluid. • Ambient temperature 20 – 25°C, temperature fluctuations during calibration ±... - Page 301 Select application: AEJ-C/AES-C/PLJ-C-BA-e-1621...
- Page 302 Enter test parameters: Use the navigation keys to enter the current test temperature; the active digit will be flashing. Confirm by pressing the PRINT-key and the display for entering humidity will be shown. Use the navigations keys to enter the current humidity; the active digit will be flashing.
- Page 303 Use the navigation keys to enter the test volume <V1> (such as 100 µl); the active digit will be flashing. This completes the entry for pipettes with fixed volume. For pipettes with variable volume select volume V2 and V3 as described below. ...
- Page 304 Performing a pipette test: 1. Measuring sequence for test volume V1: Place weighing container on pan, wait for stability sign, then tare by pressing the TARE-key. 1. Draw up selected test volume <V1> into pipette and dispense liquid into weighing container.
- Page 305 2. Measuring sequence for test volume V2: Follow the same sequence of operations for the second measuring sequence but apply test volume <V2>wit 3. Measuring sequence for test volume V3: Follow the same sequence of operations for the third measuring sequence but apply test volume <V3>...
- Page 306 Printout example KERN YKB-01N -------------------Pipette calibration--------------------- Meas. No. Date 05.01.2016 Time 11:34:17 Temp. 20.0°C Humidity 50 % Pressure 1017hPa -------------------------Tested volume 1000 µl------------ 1003 µl 993 µl 1013 µl 1003 µl 993 µl 1003 µl 1013 µl 1053 µl 1003 µl 1023 µl...
-
Page 307: Communication / Setup Menu < P3
4. USB 1 / type A (for instance connection to USB storage medium or barcode scanner) 5. WLAN (factory option KERN PLJ-A06) The interface has to be configured according to peripheral and desired function, see chap. 0 / 27.2 (the parameters of the USB port are not configurable). -
Page 308: Configuring A
27.1 Configuring a <P3.1 / P3.2> RS-232 interface Go to Communication menu <P3> and select the interface <COM 1> or <COM 2> to be configured. After selecting <COM 1> or <COM 2> use the navigation keys to select baud rate under communication parameter.Rs-232 Interface - Page 309 After selecting baud rate, select the next communication parameter <Parity>. AEJ-C/AES-C/PLJ-C-BA-e-1621...
-
Page 310: P3.3> Wlan Interface (Factory Option Kern Plj-A06)
27.2 <P3.3> WLAN interface (factory option KERN PLJ-A06) Call up menu: AEJ-C/AES-C/PLJ-C-BA-e-1621... -
Page 311: P3.3.2 - Select Net
Available settings <P3.3> P3.3.1 - STATUS (Configure / connected) P3.3.2 - SELECT NET (Search for network) P3.3.3 - NETWORK PARAMETER P3.3.3.1 - NAME (Network name) P3.3.3.2 - PASSWORD (Password for access to network) P3.3.3.3 – CHANNEL No. (Standard <AUTO>) P3.3.3.4- - IP (Address of weighing balance in network) P3.3.3.5 - MASK (subnet mask) - Page 312 Enter password and confirm by pressing the PRINT-key. Remark: The connection of a PC keyboard via USB interface makes data entry easier. The weighing balance program will guide you automatically through the network parameters. Confirm displayed network parameters by pressing the PRINT-key or change, as required;...
- Page 313 27.2.2 <P3.3.3> - NETWORK PARAMETER The connection of a PC keyboard via USB interface makes the entry of the network parameters easier. For invoking menu item < P3.3.3> see chap. 27.2. Under menu item < P3.3.3.3> select channel <AUTO (YES / NO)>and confirm by pressing the PRINT-key.
- Page 314 Under menu item < P3.3.3.6> select GATE and confirm by pressing the PRINT-key. To select the next menu item, press the F1-key. Under menu item < P3.3.3.7> select PORT <default 4000> and confirm by pressing the PRINT-key. To select the next menu item, press the F1-key. ...
-
Page 315: Usb Interfaces
Disconnect the device from the power supply. Install the USB driver which is available from our KERN- Homepage www.kern-sohn.com, / Downloads. Select the driver version compatible with your system and execute the exe file. Click on Dialogue <Forward> and the driver will be installed. - Page 316 Invoke device manager. Click on „connections„ and the new virtual COM port for the device will be shown. Correct entry is clearly indicated by the name of KERN PLJ series. Select the shown COM Port such as COM6 according to the transmission software.
-
Page 317: Devices / Setup Menu < P4
28.1 Continuous data transmission for remote control commands < P4.1 Computer > 1. Select interface <P4.1.1> Use the navigation keys to select the interface to be applied for connecting the device to the PC. Selectable: COM 1: RS 232 USB: Type B WIFI: Factory option KERN PLJ-A06 AEJ-C/AES-C/PLJ-C-BA-e-1621... - Page 318 2. Select type of continuous data transmission <P4.1.2> Use the navigation keys to select the display for setting continuous data transmission. Use the navigation keys to select the desired setting and confirm by pressing the PRINT-key. Options: <NONE> Continuous data transmission disabled <ACT.UNIT>...
- Page 319 3. Select output interval <P4.1.3> Use the navigation keys to select the display for setting the output intervals for continuous data transmission. AEJ-C/AES-C/PLJ-C-BA-e-1621...
- Page 320 4. Select log type <P4.1.5> Use the navigation keys to select the display for selecting the log type. Use the navigation keys to select the desired setting and confirm by pressing the PRINT-key. Options: <NONE> None <DEFAULT> Standard Protocol <DEF PRINT 1>...
-
Page 321: To Start Data Transmission, Press The Print-Key < P4.2 Printer
28.2 To start data transmission, press the PRINT-key < P4.2 Printer > Go to menu item <P4.2> to select and configure the interface to be used for output after pressing the PRINT-key. The content for the data output is defined in <... - Page 322 For saving measuring logs see chap. 0 <USB PC> USB port type B, PC connection in combination with transmission software (such as KERN SCD 4.0) 2. Enter values (hexadecimal) for prefix / suffix <P4.2.1> Use the navigation keys to enter the control code for the start of the log and confirm by pressing the PRINT-key.
- Page 323 Use the navigation keys to enter the control code for the end of the log (such as paper section) and confirm by pressing the PRINT-key. AEJ-C/AES-C/PLJ-C-BA-e-1621...
-
Page 324: P4.3 Barcode Scanner
28.3 < P4.3 Barcode Scanner > To select the interface for connection to a barcode scanner, go to menu item <P4.3>. Use the navigation keys to select the interface to be used for data transmission. Confirm your entry by pressing the PRINT-key. AEJ-C/AES-C/PLJ-C-BA-e-1621... -
Page 325: Communication With External Devices (Printer / Pc)
Disconnect balance from the power supply and connect to the device interface with a suitable cable. Faultless operation requires an adequate KERN interface cable. For communication parameters of the RS 232 interface (baud rate, bits and parity) for the balance and the external device must match. -
Page 326: Interface Cable
29.2 Interface cable Balance – PC 9-pole Weighing balance - printer ( CITIZEN, EPSON) 25-pin Balance - printer 3 (TxD) 1 (RxD) 5 (GND) 3 (GND) 7 - 8 jumpered AEJ-C/AES-C/PLJ-C-BA-e-1621... -
Page 327: Data Transmission Format
29.3 Data transmission format 1. After printing the PRINT-key 4-12 14-16 Weighing ˽ ˽ Stability Sign Unit Value Stability symbol [ ˽ ] stable [ ? ] unstable [ ^ ] excess load [ v ] underload Signs [ ˽ ] positive values ] negative values Measuring Value 9 characters aligned right... - Page 328 Command 1 – 3 characters Stability symbol [ ˽ ] stable [ ? ] unstable [ ^ ] excess load [ v ] underload Signs [ ˽ ] positive values ] negative values Measuring Value 9 characters aligned right Unit 3 characters aligned left AEJ-C/AES-C/PLJ-C-BA-e-1621...
-
Page 329: Interface Commands
29.4 Interface commands The weighing balance recognises the commands listed below. Function Commands Zeroing Taring Query tare value Set tare value Send stable weighing value in standard weighing unit Send weighing value immediately in standard weighing unit Send weighing values of all weighing pans in default weighing unit immediately Send stable weighing value in current weighing value Send weighing value immediately in current weighing unit Start continuous output in standard weighing unit... -
Page 330: General Reply Format
29.5 General reply format Commands Function ˽ Command accepted, command executing A CR LF Command execution completed ˽ D CR LF (occurs after XX_A only) ˽ Command valid but cannot be executed at the moment I CR LF ˽ Command valid but range exceeded ^ CR LF ˽... -
Page 331: Detailed Information To Communication Logs
29.6 Detailed information to communication logs 29.6.1 Zeroing Command: Z CR LF Possible replies: ˽ Command accepted, command executing A CR LF ˽ Command execution completed D CR LF ˽ Command accepted, command executing A CR LF ˽ ^ CR LF Command valid but zero reset range was exceeded Command accepted, command executing ˽... -
Page 332: Set Tare Value
Unit: - 3 characters left aligned The tare value will always be shown in the adjustment unit. 29.6.4 Set tare value ˽ Command: UT TARA CR LF, (TARA = tare value) Possible replies: ˽ Command executed OK CR LF ˽ Command valid but cannot be executed at the moment I CR LF ES CR LF... -
Page 333: Send Weighing Value Immediately In Standard Weighing Unit
Example: S CR LF Sent command: Send stable weighing value in standard weighing unit ˽ Command accepted, command executing A CR LF ˽˽˽˽ ˽˽˽˽˽˽ ˽ ˽˽ Command executed, 8 . 5 CR LF Weighing value is shown in default weighing unit Stability symbol* instable (3Fh, 0x3F) ˽... -
Page 334: Send Stable Weighing Value In Current Weighing Value
29.6.7 Send stable weighing value in current weighing value Command: SU CR LF Possible replies: ˽ A CR LF Command accepted, command executing ˽ E CR LF Time limit for stabilisation of weighing balance display was exceeded ˽ Command valid but cannot be executed at the moment I CR LF ˽... -
Page 335: Send Weighing Value Immediately In Current Weighing Unit
29.6.8 Send weighing value immediately in current weighing unit Command: SUI CR LF Possible replies: ˽ Command valid but cannot be executed at the moment I CR LF 7-15 17-19 Stability ˽ ˽ Signs Weight Unit sign Example: Sent command, see chap. 29.4 S U I CR LF ˽... -
Page 336: Start Continuous Output In Current Weighing Unit
29.6.11 Start continuous output in current weighing unit ˽ Command: CU1 CR LF Possible replies: ˽ Command valid but cannot be executed at the moment I CR LF ˽ Command accepted, command executing A CR LF Weighing values are shown in current weighing unit 7-15 17-19 Stability... -
Page 337: Query Lower Tolerance Unit
29.6.15 Query lower tolerance unit Command: ODH CR LF ˽ Command executed Response: MASA CR LF 4 - 12 14 - 16 ˽ ˽ ˽ Tare Unit Weight: - 9 characters right aligned Unit: - 3 characters left aligned 29.6.16 Query upper tolerance unit Command: OUH CR LF ˽... -
Page 338: Enter Reference Weight (Percentage Weighing)
29.6.19 Enter reference weight (percentage weighing) ˽ Command: RM XXXXX CR LF Possible replies: ˽ Command executed OK CR LF ˽ Command valid but cannot be executed at the moment (e. g. I CR LF incorrect operating mode) ES CR LF Syntax error (incorrect weight format) 29.6.20 Confirm / simulation “Press PRINT-key“... -
Page 339: Enable Automatic Internal Adjustment
29.6.23 Enable automatic internal adjustment Command: IC0 CR LF Possible replies: ˽ Command executed OK CR LF ˽ Command valid but cannot be executed at the moment (Not I CR LF available in weighing balances with type approval) 29.6.24 Enter serial number Command: NB CR LF Possible replies: ˽... -
Page 340: List Of Available Operating Modes
29.6.27 List of available operating modes Command: OMI CR LF Possible replies: OMI˽ CR LF Command accepted, available operating modes are shown N° designation CR LF N° designation CR LF OK CR LF ˽ Command valid but cannot be executed at the moment I CR LF Operating mode - Weighing... -
Page 341: Confirm Sound Signal
29.6.30 Confirm sound signal ˽ Command: BP CZAS CR LF Possible replies: BP˽OK CR LF Command executed ˽ No parameter or incorrect format E CR LF ˽ Command valid but cannot be executed at the moment I CR LF 29.6.31 Send all messages implemented Command: PC CR LF Response: PC_A_”Z, T, S, SI, SU, SUI, C1, C0, CU1, CU0, NB, K1, K0, SS, OMI, OMS, OMG,... -
Page 342: Servicing, Maintenance, Disposal
Spilled weighing goods must be removed immediately. 30.2 Servicing, maintenance The appliance may only be opened by trained service technicians who are authorized by KERN. Before opening, disconnect from power supply. 30.3 Disposal Disposal of packaging and appliance must be carried out by operator according to valid national or regional law of the location where the appliance is used. -
Page 343: Troubleshooting / Error Messages
31 Troubleshooting / error messages Possible causes of errors: In case of an error in the program process, briefly turn off the balance and disconnect from power supply. The weighing process must then restart from the beginning. Help: Fault Possible cause The displayed weight does •... - Page 344 KERN AEJ-C/AES-C/PLJ-C Version 2.1 11/2016 Notice d’utilisation Balances d’analyse et de précision Table des matières Caractéristiques techniques ................6 Déclaration de conformité ................11 Vue d’ensemble de l’appareil ................. 12 Aperçu des affichages et du clavier ..................15 3.1.1 Touches de navigation / Saisie numérique ................16 Indications fondamentales (généralités) ............
- Page 345 9.3.7 <P2.2.3.> Edition de données manuelle / automatique / <P2.2.3.2> SEUIL AUTOMATIQUE 9.3.8 <P2.2.4> Ligne d'information ....................49 9.3.9 <P2.2.5> Informations spécifiques ................... 50 9.3.10 <P2.2.6> Attribution d'une touche de fonction ..............51 < P 8 UNITES > ..................... 52 10.1 Commuter l'unité...
- Page 346 Communication / menu setup < P3 > ............135 27.1 <P3.1 / P3.2> configurer l'interface RS-232 ............... 136 27.2 <P3.3> interface WLAN (Factory option KERN PLJ-A06) ..........138 27.2.1 P3.3.2 - CHOISIR RESEAU ....................139 27.2.2 <P3.3.3> - PARAMÈTRE RESEAU .................. 141 27.3...
- Page 347 29.6.20 Valider / simulation sur „appel de la touche PRINT“ ............166 29.6.21 Réaliser un ajustage interne ....................166 29.6.22 Bloquer l'ajustage interne automatique ................166 29.6.23 Débloquer l'ajustage interne automatique ................. 167 29.6.24 Saisir le numéro de série ....................167 29.6.25 Bloquer le clavier de la balance ..................
-
Page 348: Caractéristiques Techniques
1 Caractéristiques techniques KERN AEJ 100-4CM AEJ 200-4CM AEJ 200-5CM Lisibilité (d) 0.1 mg 0.1 mg 0.01 mg; 0.1 mg Plage de pesée (max) 160 g 220 g 82 g; 220 g Charge minimale (Min) 10 mg 10 mg 1 mg Echelon d’étalonnage (e) - Page 349 KERN AES 100-4C AES 200-4C Lisibilité (d) 0.1 mg 0.1 mg Plage de pesée (max) 160 g 220 g Reproductibilité 0.2 mg 0.2 mg Linéarité ± 0.2 mg ± 0.2 mg Temps de stabilisation 4 sec. 4 sec. Poids d’ajustage recommandé...
- Page 350 KERN PLJ 300-3CM PLJ 600-3CM Lisibilité (d) 1 mg 1 mg Plage de pesée (max) 360 g 600 g Charge minimale (Min) 20 mg 20 mg Echelon d’étalonnage (e) 10 mg 10 mg Classe d’étalonnage Reproductibilité 1 mg 2 mg Linéarité...
- Page 351 KERN PLJ 700-3CM PLJ 3000-2CM Lisibilité (d) 1 mg 10 mg Plage de pesée (max) 750 g 3500 g Charge minimale (Min) 20 mg 500 mg Echelon d’étalonnage (e) 10 mg 100 mg Classe d’étalonnage Reproductibilité 2 mg 10 mg Linéarité...
- Page 352 Dimensions AEJ-C/AES-C: PLJ-C: AEJ-C/AES-C/PLJ-C-BA-f-1621...
-
Page 353: Déclaration De Conformité
2 Déclaration de conformité Vous trouvez la déclaration de conformité CE- UE actuelle online sous: www.kern-sohn.com/ce Dans le cas de balances étalonnées (= de balances à la conformité évaluée) la déclaration de conformité est comprise dans les fournitures. AEJ-C/AES-C/PLJ-C-BA-f-1621... -
Page 354: Vue D'ensemble De L'appareil
3 Vue d’ensemble de l’appareil KERN AEJ/AES-C: Pos. Désignation Pare-brise en verre Plateau de pesée Afficheur Clavier Vis de nivellement AEJ-C/AES-C/PLJ-C-BA-f-1621... - Page 355 KERN PLJ-C: Pos. Désignation Pare-brise en verre Plateau de pesée Afficheur Clavier Vis de nivellement AEJ-C/AES-C/PLJ-C-BA-f-1621...
- Page 356 Connexions (tous modèles): Pos. Désignation Branchement secteur Branchement de la COM 2 Branchement de la COM 1 Branchement de l’USB 2 (p. ex. imprimante, PC) Branchement de l’USB 1 (p. ex. clavier) AEJ-C/AES-C/PLJ-C-BA-f-1621...
-
Page 357: Aperçu Des Affichages Et Du Clavier
3.1 Aperçu des affichages et du clavier Exemple AEJ-C: Pos. Désignation Affichage de la stabilité Indicateur „affichage du zéro“ Ligne d’information Dans les balances étalonnées la valeur non étalonnée apparaît entre parenthèses. Unité de pesage „g“ Touche Fonction • Sélectionner le mode de fonctionnement: •... -
Page 358: Touches De Navigation / Saisie Numérique
• Touche de fonction / accès rapide aux fonctions de base • Tarage • Ajouter un jeu de données • Commutation de l’unité de pesée • Quitter le menu • Touche d'occupation rapide pour les applications, les fonctions et les réglages fréquemment récurrents (attribution voir chap. -
Page 359: Indications Fondamentales (Généralités)
La balance ne doit être utilisée que selon les prescriptions indiquées. Les domaines d´utilisation/d´application dérogeant à ces dernières doivent faire l´objet d´une autorisation écrite délivrée par KERN. 4.3 Garantie La garantie n´est plus valable en cas de •... -
Page 360: Vérification Des Moyens De Contrôle
à cette opération sont disponibles sur le site KERN (http://www.kern-sohn.com/). Grâce à son laboratoire de calibrage accrédité DKD, KERN propose un calibrage rapide et économique pour les poids d´ajustage et les balances (sur la base du standard national). - Page 361 • Avant expédition démontez tous les câbles branchés ainsi que toutes les pièces détachées et mobiles. Exemple de reproduction KERN AEJ/AES-C • Evtl. remontez les cales de transport prévues. • Calez toutes les pièces p. ex. pare-brise en verre, plateau de pesée, bloc d’alimentation etc.
- Page 362 AEJ-C/AES-C/PLJ-C-BA-f-1621...
-
Page 363: Déballage, Installation Et Mise En Service
7 Déballage, installation et mise en service 7.1 Lieu d´installation, lieu d´utilisation La balance a été construite de manière à pouvoir obtenir des résultats de pesée fiables dans les conditions d´utilisation d´usage. Vous pouvez travailler rapidement et avec précision à condition d´installer votre balance à un endroit approprié. A cette fin, tenez compte des points suivants concernant le lieu d´installation: •... -
Page 364: Implantation
7.3 Implantation Le lieu d’installation correct (voir chap. 7.1) est important pour la précision des résultats de pesée de balances d’analyse et de précision à résolution élevée. Modèle AEJ-CM Tourner et retirer la cale de transport dans le sens de la flèche <OPEN>. Veuillez conserver la cale de transport pour la protection lors d'un éventuel autre transport. - Page 365 Installer le plateau de pesée Modèles AEJ/AES-C (hormis AEJ-5CM) Modèle AEJ-5CM • Ouvrir sur tous les côtés le brise-vent • Ouvrir sur tous les côtés le brise-vent en verre en verre • Poser le tablier de protection (1) • Retirer la cale de transport (1).
- Page 366 Modèles PLJ-C: Modèles de 10 mg • Retirer le ruban adhésif de l’élément en caoutchouc (1) • Poser le plateau de pesée (2) sur les éléments en caoutchouc Modèles de 1 mg • Retirer le ruban adhésif de l’élément en caoutchouc (1) •...
-
Page 367: Niveller
7.4 Niveller Une orientation exacte et une installation stable sont les conditions pour obtenir des résultats reproductibles. La balance peut être nivelée pour compenser de petites aspérités ou inclinaisons de la surface d'appui. Procéder à la mise à niveau de la balance à l´aide des vis des pieds, jusqu´à... -
Page 368: Branchement Secteur
La balance ne peut être branchée au réseau électrique uniquement si les données au niveau de la balance (auto-collant) et la tension du réseau électrique courant local sont identiques. N’utiliser que des bloc d'alimentation de courant KERN d’origine. L´utilisation d´autres marques n´est possible qu´avec l´autorisation de KERN. -
Page 369: Mise En Marche Et À L'arrêt
7.6.2 Mise en marche et à l'arrêt La balance reste en marche pendant tout le temps où la balance est branchée à l'alimentation en courant. Sur la touche ON/OFF n'est mis à l'arrêt et en matche que l'affichage. Pour mettre en marche l'affichage, appeler la touche ON/OFF. Attendre l'apparition de l'affichage de base: Pour mettre à... - Page 370 Connexion: Plusieurs touches sont disponibles pour la connexion, soit la touche F, soit la touche DATA ou une des touches d'attribution rapide (dans la mesure où elles ont été attribuées sur <LOG IN>). Touche Sélectionner sur les touches de navigation l'usager voulu p. ex. ADMIN. ...
- Page 371 Touche Sélectionner sur les touches de navigation <ADMIN> et valider sur la touche PRINT. Le cas échéant saisir sur les touches de navigation le mot de passe et valider sur la touche PRINT, „saisie numérique“ voit au chap. 3.1.1. AEJ-C/AES-C/PLJ-C-BA-f-1621...
-
Page 372: Appareils Périphériques
Avant le raccordement ou le débranchement d´appareils supplémentaires (imprimante, PC) à l´interface de données, la balance doit impérativement être coupée du secteur. N´utilisez avec votre balance que des accessoires et des imprimantes livrés par KERN, ces dernières étant adaptées de manière optimale à votre balance. AEJ-C/AES-C/PLJ-C-BA-f-1621... -
Page 373: Menu
8 Menu 8.1 Structure des menus Le menu est composé de sept blocs de menu (P1 – P7). Ajustage Réglages disponibles P1.1 Ajustage interne voir chap. 13.2.1. P1.2 Ajustage externe voir chap. 13.2.2 Seulement modèles AES P1.3 Ajustage par l'usager voir chap. - Page 374 Impressions P5.1 Protocole d'ajustage voir chap. 14.1. P5.2 Ligne d’en-tête voir chap. 14.2.1. P5.3 Protocole GLP voir chap. 14.2.2. P5.4 Ligne bas de page voir chap. 14.2.3. P5.5 Impression spéciale 1 voir chap. P5.6 Impression spéciale 2 P5.7 Impression spéciale 3 voir chap.
-
Page 375: Navigation Dans Le Menu
8.2 Navigation dans le menu Appel du menu Appeler , le premier bloc du menu „P1 CAL“ est affiché. Sélectionner le bloc Sur la touche de navigation peuvent être appelés de menu successivement les différents blocs de menu les uns après les autres. -
Page 376: Mode De Pesage
9 Mode de pesage L'exécution d'une pesée simple est décrite au chap. suivant „ pesée“. En plus des étapes de travail qui y sont décrites (pesée simple, zérotage, tarage) la balance offre d'autres possibilités d'adaptation de l'application „Pesée“ à vos exigences spécifiques, voir chap. -
Page 377: Pesée Avec Tare
9.1.3 Pesée avec tare Tarage Le poids propre d’un quelconque récipient de pesage peut être saisi par la tare sur simple pression d’un bouton, afin que le pesage consécutif affiche le poids net de l’objet pesé. • Poser le récipient à peser sur le plateau de la balance et fermer les portes du brise-vent s’il y a besoin. - Page 378 Saisie numérique du poids d’ajustage (PRE-TARE) Condition préliminaire: A la touche d'attribution rapide F1, F2, F3 ou F4 est attribuée la fonction ,<SAISIR TARE> voir chap. 9.3.10. • Appeler la touche d'occupation rapide, l'affichage pour la saisie de la valeur de la tare apparaît.
- Page 379 Charger le poids du récipient à partir de la banque de données • Soit appeler la touche d'occupation rapide (F1, F2, F3, F4), qui est attribuée à la fonction <SELECTIONNER TARE> (voir chap. 9.3.10). • Après appel de ,sélectionner la fonction <SELECTIONS TARE> L'affichage pour la sélection d'une mémoire de tare apparaît.
-
Page 380: Pesage En Sous-Sol
9.2 Pesage en sous-sol A l'aide dur pesage en sous-sol peuvent être pesés des objets, dont la taille ou la forme ne s'adapte pas au plateau de pesée. Procédez de la manière suivante: • Mettre la balance à l’arrêt • Ouvrir le couvercle au fond de la balance. •... -
Page 381: Réglages
9.3 Réglages <P2.2 PESÉE> Navigation dans le menu voir chap. 8.2 Structure de menu: Point du Réglages disponibles / Explication Paramètre menu P2.2.1 P2.2.1.1 TRES RAPIDE Filtre La balance réagit très sensiblement et très rapidement, site READING d'implantation très calme. RAPIDE La balance réagit sensiblement et rapidement, site d'implantation calme. - Page 382 P2.2.2 AUTOTARE en option oui / non CHACUNE P2.2.3 P2.2.3.1 MODE Après appel de la touche PRINT est immédiatement PRINT MOD. édité le protocole, indépendamment du fait que la (touche valeur de pesée soit stable ou pas PRINT SI STABLE handicap) Une édition n'a lieu après appel de la touche PRINT que si la valeur de pesée est stable...
- Page 383 9.3.1 <P2.“.1.1> Filtre Adaptation au mode de pesée et aux conditions ambiantes Prendre en compte, que par principe un traitement de données orienté à une plus grande stabilité entraîne un ralentissement des temps de réaction, tandis qu'une accélération du temps de réaction se répercute dans une perte de stabilité. Ceci revient à...
-
Page 384: P2.2.1.2> Affichage Du Contrôle De La Stabilité
9.3.2 <P2.2.1.2> Affichage du contrôle de la stabilité Par ce réglage est définie la rapidité à laquelle la balance considère la valeur de mesure comme stable et la valable. AEJ-C/AES-C/PLJ-C-BA-f-1621... -
Page 385: P2.2.1.3> Fonction Autozéro
9.3.3 <P2.2.1.3> Fonction autozéro Par cette fonction sont automatiquement tarées de petites fluctuations de pois (p. ex. de minimes salissures du plateau de pesée). Lorsque cette fonction est activée est donnée l'assurance que chaque pesée démarre avec l'affichage du zéro. Dans le cas où... -
Page 386: P2.2.1.4> Masquer Le Dernier Chiffre De L'affichage
9.3.4 <P2.2.1.4> Masquer le dernier chiffre de l'affichage Sur l’instrument la lisibilité peut le cas échéant être réduite d’une décade. La dernière place décimale sera arrondie et enlevée de l’affichage. AEJ-C/AES-C/PLJ-C-BA-f-1621... -
Page 387: P2.2.1.5> Environnement
9.3.5 <P2.2.1.5> Environnement Cette fonction permet d'adapter optimalement la balance aux conditions ambiantes. Dans un environnement calme (p. ex. sans courants d'air et de vibrations) c'est le réglage <STABIL> qui est à choisir. Dans un environnement agité avec des conditions en changement permanent ce sont les réglages <INSTABIL >... -
Page 388: P2.2.2 > Autotara /
9.3.6 <P2.2.2 > AUTOTARA / <P2.2.3.2> SEUIL AUTO La fonction de tarage automatique mémorise automatiquement la première valeur pondérale comme valeur de tare. Sur le paramètre <P2.2.3.2> SEUIL AUTO est défini le poids minimal qui doit se trouver sur la balance pour que celui-ci soit automatiquement taré. Un nouveau tarage automatique n'intervient ensuite que si l'affichage baisse en dessous de la valeur établie pour le seuil automatique.Seuil Auto - Page 389 Edition de données manuelle / automatique 9.3.7 <P2.2.3.> <P2.2.3.2> SEUIL AUTOMATIQUE Par cette fonction est défini, s'il y a édition de données et par quel moyen. Réglages disponibles: Point du menu Réglages disponibles / Explication <P2.2.3.1> <SI STABLE> Emission de valeurs stables de pesée après pression de la touche PRINT MODE <CHAQUE>...
- Page 390 AEJ-C/AES-C/PLJ-C-BA-f-1621...
-
Page 391: P2.2.4> Ligne D'information
9.3.8 <P2.2.4> Ligne d'information Par cette fonction sont définies les informations additionnelles qui sont à afficher dans la marge du bas du visuel. AEJ-C/AES-C/PLJ-C-BA-f-1621... -
Page 392: P2.2.5> Informations Spécifiques
9.3.9 <P2.2.5> Informations spécifiques Cette fonction permet de définir des informations spécifiques à l'usager. Celles-ci sont affichées lorsque la fonction est activée dans la ligne <P2.2.5 SINFO> au bas du visuel AEJ-C/AES-C/PLJ-C-BA-f-1621... -
Page 393: P2.2.6> Attribution D'une Touche De Fonction
9.3.10 <P2.2.6> Attribution d'une touche de fonction Les touches d'attribution rapide F1, F2, F3 et F4 permettent un accès direct à des fonctions et à des réglages fréquemment utilisés. Les réglages disponibles dépendent du mode de fonctionnement sélectionné. La fonction est exécutée par effleurement de la touche respective, qui a été... -
Page 394: P 8 Unites
10 < P 8 UNITES > Par cette fonction sont définies les unités de pesée avec lesquelles fonctionne la balance. Réglages disponibles: Point du menu Réglages disponibles / Explication Par cette fonction sont définies les unités, dans lesquelles P8.1 le résultat de la pesée peut être commuté sur la touche ACCES UNIT P8.2... -
Page 395: Définir L'unité De Pesée De Départ < P8.2
La liste des unités de pesée disponibles dépend du modèle et de l'étalonnage de la balance. A la mise en marche de la balance est affichée l’unité sélectionnée à la mise hors circuit de la balance. 10.2 Définir l'unité de pesée de départ < P8.2> La liste des unités de pesée disponibles dépend du modèle et de ... -
Page 396: Définir Les Unités De Pesée Librement Programmables < P8.3 / P8.4
10.3 Définir les unités de pesée librement programmables < P8.3 / P8.4> Des unités de pesée librement programmables ne sont disponibles que pour les balances sans homologation de type • Saisir sur les touches de navigation la valeur de température et valider sur la touche PRINT. -
Page 397: Paramètres Généraux < P 6 Autres
11 Paramètres généraux < P 6 AUTRES> Des paramètres peuvent être établis ici, qui influencent la commande de la balance, tels que p. ex, la langue de l'utilisateur, l'affichage de la date / de l'heure, bips de touches, luminosité de l'affichage etc. Structure de menu: Navigation dans le menu voir chap. - Page 398 Le poids interne est chargé à deux reprises, suivies de 10 mesures répétées Ajustage Extrapolation de l'écart standard Edition automatique du protocole Exemple d’édition KERN YKB-01N ------------------- ------------------- GLP Autotest Rep. Scale Type Balance ID 150854...
-
Page 399: Afficher Les Informations Sur Les Appareils < P 7 Info
12 Afficher les informations sur les appareils < P 7 INFO> Par cette fonction peuvent être affichées et imprimées des informations concernant la balance. • Sur défiler en avant à travers la liste des informations sur la balance. • Pour l'impression des informations actuelles sur la balance valider le paramètre <P7.5 IMPRIMER REGLAGES>... -
Page 400: Ajustage < P1 Justage
L’ajustage peut également être réalisé avec des poids d’autres valeurs nominales (>30% max), mais n’est pas optimal au point de vue métrologique. Vous trouverez de plus amples informations sur les poids de http://www.kern-sohn.com/ contrôle sur le site internet: http://www.kern- sohn.com. -
Page 401: Ajustage Automatique Avec Poids Interne (Modèles Aej, Plj)
En cas de raccordement d'une imprimante en option a lieu le démarrage automatique de l'édition d'un protocole d'ajustage. Définir le protocole d'ajustage, voir chap. 14.1 / <P5.1 Protocole d’ajustage>. Exemples d’édition KERN YKB-01N AEJ-C/AES-C/PLJ-C-BA-f-1621... - Page 402 L’ajustage automatique est réalisé: • lorsque la balance a été coupée du réseau • lors d’un changement de température En utilisant un capteur de température la balance réalise un ajustage entièrement automatique dès que un changement de température de 3°C est constaté.
-
Page 403: Réglages Dans Le Menu
13.2 Réglages dans le menu <P1 JUSTAGE> Navigation dans le menu voir chap. 8.2 Point du menu Explication P1.1 Ajustage interne (uniquement modèles AEJ, PLJ) INT JUST P1.2 Ajustage externe (uniquement modèles AES) EXT JUST P1.3 Ajustage externe par poids d'ajustage défini par l'usager AJUSTAGE USAGER (uniquement modèles AES) P1.4... -
Page 404: P1.1 Int. Just
13.2.1 <P1.1 INT. JUST. > Ajustage interne automatique voir chap. 13.1. Lancement manuel de l’ajustage interne • Aucun objet ne doit se trouver sur le plateau de pesage. • Une fois l’ajustage correctement réalisé la balance revient automatiquement en mode de pesée. -
Page 405: P1.2 Ext. Just.> (Modèles Aes)
13.2.2 <P1.2 EXT. JUST. (modèles AES) > • L’ajustage devrait s’effectuer avec le poids d’ajustage recommandé (voir chap. 1 "Données techniques"). • Veillez à avoir des conditions environnementales stables. Un temps de préchauffage (voir chap. 1) est nécessaire pour la stabilisation. •... - Page 406 • En cas de raccordement d'une imprimante en option a lieu automatiquement l'édition d'un protocole d'ajustage. Définir le protocole d'ajustage, voir chap. 14.1 / <P5.1 Protocole d’ajustage>. • Sur la touche UNIT retourner en mode de pesée. Exemples d’édition KERN YKB-01N AEJ-C/AES-C/PLJ-C-BA-f-1621...
-
Page 407: P1.3 Ajustage Usager > Ajustage Avec Poids Externe Défini Par L'usager
13.2.3 < P1.3 AJUSTAGE USAGER > Ajustage avec poids externe défini par l'usager • Appeler le point du menu < P1.3 AJUSTAGE USAGER> • Saisir la valeur nominale du poids d'ajustage voulu (>30% max) sur les touches de navigation (voir chap. 3.1.1) et valider sur la touche PRINT. •... - Page 408 • Oter le poids d’ajustage. Après un ajustage couronné de succès a automatiquement lieu un retour au menu. • En cas de raccordement d'une imprimante en option a lieu le démarrage automatique de l'édition d'un protocole d'ajustage. Définir le protocole d'ajustage, voir chap.
-
Page 409: P1.4 Just.test >Test D'ajustage
13.2.4 < P1.4 JUST.TEST >Test d'ajustage Grâce à cette fonction, le poids d’ajustage interne est comparé avec la valeur enregistrée. Le test est réalisé automatiquement. Le résultat est affiché dans l’afficheur et imprimé par l’interface RS 232 si l’imprimante en option est branchée. -
Page 410: 14 Définir Les Protocoles < P5 Impressions
Imprimer l'écart par rapport au dernier ajustage, oui / non <P5.1.9> TRAITS Imprimer les traits pour la séparation de la signature, oui / non <P5.1.10> SIGNATURE Insérer un bloc de lignes pour la signature du protocole, oui / non Exemple d’impression (KERN YKB-01N): Point Réglage Protocole menu P5.1.2... - Page 411 Exemple d’impression (KERN YKB-01N): Point Réglage Protocole menu P5.1.2 P5.1.3 P5.1.4 P5.1.5 P5.1.6 P5.1.7 P5.1.8 P5.1.9 P5.1.10 AEJ-C/AES-C/PLJ-C-BA-f-1621...
-
Page 412: Protocole De Pesée
14.2 Protocole de pesée Avec cette fonction est défini quelles sont les informations dans les protocoles de pesée standards qui doivent être imprimées. Navigation dans le menu voir chap. 8.2 Le menu est subdivisé en trois menus subsidiaires, dans lesquels peuvent être définis les réglages pour la ligne d'en-tête, pour le protocole des résultats de pesée et pour la ligne de bas de page. -
Page 413: Imprimer Le Résultat De La Pesée / Définir Le Protocole Glp
Exemple d’impression (KERN YKB-01N): Point menu Réglage Protocole P5.2.1 P5.2.2 P5.2.3 P5.2.4 P5.2.5 P5.2.6 P5.2.7 P5.2.8 P5.2.9 P5.2.10 P5.2.11 P5.2.12 P5.2.13 aucun 14.2.2 Imprimer le résultat de la pesée / définir le protocole GLP<P5.3> Les systèmes de suivi de la qualité prescrivent des impressions des résultats de pesée ainsi que de l’ajustage correct de la balance avec indication de la date et de... -
Page 414: Définir Ligne De Bas De Page
Exemple d’impression (KERN YKB-01N): Point Réglage Protocole menu P5.3.1 P5.3.2 P5.3.3 P5.3.4 P5.3.5 P5.3.6 P5.3.7 P5.3.8 P5.3.9 P5.3.10 aucun 14.2.3 Définir ligne de bas de page<P5.4> Dans ce menu subsidiaire est défini quelles sont les informations qui doivent être imprimées dans la ligne de bas de page des protocoles de pesée. La ligne de bas de page est imprimée après appel de la touche d'occupation rapide F1 ou F2 (dans la... -
Page 415: Edition Des Données Définie Par L'usager < P5.8 Tirage Special
14.3 Edition des données définie par l'usager < P5.8 TIRAGE SPECIAL > Dans le menu <P5> peuvent être définis quatre différents impressions spéciales (<P5.5> - <P5.8>) , avec au max. resp 160 caractères. En plus de la saisie de texte brut (saisie numérique, voir chap. 3.1.1) sont encore consignées les variables suivantes dans le menu: Variables générales: Impression d’... - Page 416 Variables de technique d’impression: Impression d’ 1 caractère „/” (c’est à dire que pour obtenir l’impression d’un caractère /, il faut entrer deux //) CRLF (carriage return line feed) commencement de ligne dans ligne suivante CR (carriage return) commencement de ligne LF (interlignage) ligne suivante Tabulateur Saut de page (pour imprimantes PCL)
-
Page 417: Variables Universelles
Exemples d’entrée de texte en mode de pesée: KERN∗SOHN DATE: <date actuelle,> TIME: <heure actuelle> MASS: <poids net actuel dans l'unité standard> ∗∗∗∗∗∗SIGNATURE: Saisie: • Appeler le point du menu voulu P5.5 – P5.8 (impression spéciale 1 -4) et saisir le texte, saisie numérique voir chap. -
Page 418: Mémoriser / Imprimer Les Protocoles Sur Le Support De Mémorisation Usb
14.5 Mémoriser / imprimer les protocoles sur le support de mémorisation USB L'option permet de mémoriser les résultats de pesée sur un support d'information USB sous forme de fichier de texte et d'imprimer ces données sur une imprimante - raccordée au PC. Exécution : ... -
Page 419: Banques De Données
15 Banques de données Banques de données disponibles: Banque de Données éditable données Usager <b1> 10 Usager voir chap. 15.1. Produit <b2> 1000 Produits voir chap. 15.2. Valeurs de 100 poids du récipient voir chap. 15.3. tare<b3> ... -
Page 420: Banque Des Données De L'usager
15.1 Banque des données de l'usager Dans la banque de données usager <b1 Opérateur / User> peuvent être constitués cent profils d'usager avec des réglages et des droits d'usagers spécifiques. La gestion des usagers prévoit qu'il y a des usagers avec différents droits, l'administrateur et plusieurs utilisateurs. -
Page 421: Constitution D'un Nouvel Usager
15.1.1 Constitution d’un nouvel usager Pour chaque utilisateur peuvent être saisies les données suivantes: max. 30 caractères, CODE max. 6 caractères MOT DE PASSE max. 8 chiffres HABILITATIONS Usager, usager-maître, administrateur LANGUE Allemand/Espagnol/Français/Turque/Cesky/Italiano/ Magyar/Polski/English Le raccordement d'un clavier de PC par le truchement d'une interface de clé USB facilite la saisie des paramètres opérateur. -
Page 422: Effacement De L'usager
15.1.2 Effacement de l’usager AEJ-C/AES-C/PLJ-C-BA-f-1621... -
Page 423: Appel De L'utilisateur
• Sélectionner sur les touches de navigation l'opérateur et l'effacer sur • Valider l'interrogation „EFFACER“ sur la touche PRINT, l'affichage retourne dans le menu. Retour au mode de pesée sur la touche UNITS. 15.1.3 Appel de l'utilisateur Voir chap. 7.6.4 „Ouvrir session“. 15.2 Banque de donnés produit Dans la banque de données produit <... -
Page 424: Constituer Un Nouveau Produit
15.2.1 Constituer un nouveau produit Définir une désignation de produit AEJ-C/AES-C/PLJ-C-BA-f-1621... - Page 425 Après saisie de la désignation du produit définir successivement tous les paramètres AEJ-C/AES-C/PLJ-C-BA-f-1621...
-
Page 426: Poids Des Récipients
15.3 Poids des récipients Dans la banque de données du produit < b3 TARA > peuvent être saisies pour10 poids de récipients les données suivantes: NAME 30 caractères au max. TARA Poids du récipient 15.3.1 Constituer un nouveau poids de récipient •... -
Page 427: Résultats De Pesées
15.4 Résultats de pesées La banque de données <b4.4 Pesées > n'est pas susceptible d'être éditée. Les données sont automatiquement mémorisés après appel de la touche PRINT. Ces jeux de données peuvent être examinés par l'usager, imprimés ou être exportés sur un support d'information USB. - Page 428 <Imprimer> et la validation consécutive sur la touche PRINT. La teneur de l'édition de données dépend des réglages dans le menu<P5.3 GLP>, voir chap. 14.2.2. Exemple d’impression (KERN YKB-01N): Date 18.05.2015...
-
Page 429: Mémoire Alibi
électronique au moyen d'une mémoire susceptible d'étalonner non manipulable. Les mémoires - alibi de KERN satisfont à cette exigence. Elles servent à l'archivage sans papier de 100 000 résultats de pesées. Toutes les données transmises au PC sont mémorisées avec leur date, leur heure et toutes les valeurs importantes de la pesée. - Page 430 <Imprimer> et la validation consécutive sur la touche PRINT. La teneur de l'édition de données dépend des réglages dans le menu<P5.3 GLP>, voir chap. 14.2.2. Exemple d’impression (KERN YKB-01N): Date 18.05.2015...
-
Page 431: Exporter / Importer Les Banques De Données Sur Le Support De Mémorisation Usb
15.6 Exporter / importer les banques de données sur le support de mémorisation USB L'option permet: • de copier / de transférer les données des banques de données „produits“, „opérateurs“ et „tare“ d'une balance à une autre. • d'archiver les données des banques de données „résultats des pesées“ et „alibi“... - Page 432 Brancher le support de mémorisation USB au PC • Pour l'ouverture du fichier „Alibi“ est nécessaire le logiciel KERN PET-A16 disponible en option. • Les fichiers „NC“-ne peuvent pas être ouverts, ils servent simplement à l'importation vers d'autres configurations.
-
Page 433: 16 Réglages Des Applications
16 Réglages des applications Vue d'ensemble des applications disponibles Pesage 9voir chap. 9. Comptage de pièces voir chap. 17. Pesée de contrôle voir chap. 18. Dosage voir chap. 19. Détermination du pourcentage voir chap. 20. Pesée d'animaux voir chap. 21. Détermination de la densité... - Page 434 Au départ de l'usine toutes les applications sont disponibles via la touche MODE. La liste des applications disponibles peut cependant être adaptée aux besoins spécifiques de l'opérateur. Uniquement les applications réglées par „OUI“ peuvent être affichées après appel de la touche MODE. Activer / désactiver les applications AEJ-C/AES-C/PLJ-C-BA-f-1621...
-
Page 435: Comptage De Pièces
17 Comptage de pièces La balance, avant de pouvoir compter les pièces, doit connaître le poids unitaire moyen ce qu’il est convenu d’appeler la référence. La balance détermine le poids total et le divise par le nombre de pièces (ce qu’il est convenu d’appeler la quantité de référence). -
Page 436: Faire Comptage De Pièces
17.2 Faire comptage de pièces Préparation Attribuer à deux touches de fonction de votre choix les fonctions <ENTER SAMPLE> et <DETERMINE SAMPLE> - DETERMINE SAMPLE, voir chap. 17.1 ou au chap. 9.3.10. 17.2.1 Détermination du poids de référence de pièce par pesée ... - Page 437 Poser sur la balance le nombre de pièces à compter correspondant au nombre de pièces de référence demandé par le réglage. Attendre l’affichage de la stabilité, puis valider sur la touche PRINT. La balance extrapole le poids unitaire de référence et l'affiche dans la ligne d'information.
- Page 438 Sélection de la quantité de référence définie par l'opérateur (p. ex. 30 pièces): Le cas échéant tarez le récipient de pesée vide Poser sur la balance le nombre de pièces à compter correspondant au nombre de pièces de référence demandé par le réglage. Attendre l’affichage de la stabilité, puis valider sur la touche PRINT.
-
Page 439: Saisir Le Poids Unitaire De Référence Connu Comme Valeur Numérique
17.2.2 Saisir le poids unitaire de référence connu comme valeur numérique Sélectionner l'application <COMPTAGE DE PIÈCES> , voir chap.16.1. Dans la ligne d'information s'affiche le poids unitaire de référence utilisé en dernier lieu. Pour la première mise en œuvre avec la valeur 0.0000g. ... -
Page 440: Appeler Le Poids Unitaire De Référence À Partir De La Banque De Données Des Produits
17.2.3 Appeler le poids unitaire de référence à partir de la banque de données des produits Préparation Attribuer à la touche de fonction votre choix avec la fonction < SELECTIONNER PRODUIT >, voir chap. 17.1 Appeler la touche de fonction, à laquelle est attribuée la fonction < SELECTIONNER PRODUIT >... -
Page 441: Pesée De Contrôle
18 Pesée de contrôle Dans le cas de la pesée de contrôle peut être définie une valeur-limite supérieure et inférieure (seuil inférieur/supérieur) et de garantir par là que le produit pesé se trouve exactement entre les limites de tolérance définies. Le dépassement des valeurs de seuil dans un sens ou dans l'autre est affiché... -
Page 442: Saisir Les Valeurs-Limites Par Une Touche De Fonction
18.1.1 Saisir les valeurs-limites par une touche de fonction Sélectionner l'application <PESAGE DE CONTRÔLE>, voir chap. 16.1. Dans la ligne d'information sont affichées les valeurs de seuil utilisées en dernier. Pour la première mise en œuvre avec la valeur 0.0000g. ... - Page 443 Après réglages de valeurs de seuil la balance est prête à exécuter une pesée de contrôle. Tarer si nécessaire, mettre sur la balance le produit à peser et démarrer le contrôle de la tolérance. Les indicateurs <MIN>, <OK> ou< MAX> indiquent le poids de l'échantillon par rapport à...
-
Page 444: Appeler Les Valeurs Limite De La Banque De Données Des Produits
18.1.2 Appeler les valeurs limite de la banque de données des produits Préparation Attribuer à la touche de fonction votre choix avec la fonction < SELECTIONNER PRODUIT>, voir chap. 17.1 Appeler la touche de fonction, à laquelle est attribuée la fonction < SELECTIONNER PRODUIT >... -
Page 445: Dosage
19 Dosage Lors du dosage un conteneur peut par exemple être rempli jusqu'à un poids ciblé prédéfini ou un échantillon peut être pesé en fonction d'un poids ciblé prédéfini. Les indicateurs <MIN>, <OK> ou< MAX> indiquent le niveau de remplissage. Avec la saisie additionnelle d'une tolérance ±... -
Page 446: Saisir Le Poids Ciblé Sur Les Touches De Fonction
19.1.1 Saisir le poids ciblé sur les touches de fonction Sélectionner l'application <DOSAGE>, voir chap. 16.1. Dans la ligne d'information s'affiche le poids ciblé utilisé en dernier Pour la première mise en œuvre avec la valeur 0.0000g. Appeler la touche de fonction, à laquelle est attribuée la fonction < SAISIR POIDS DE REFERENCE>... - Page 447 Après réglage du poids ciblé /± tolérance la balance est prête pour le dosage. Tarer le cas échéant et doser le produit à peser Les indicateurs <MIN>, <OK> ou< MAX> indiquent le niveau de remplissage. Exemple d‘affichage État Produit à peser en deçà du poids ciblé / tolérance préétabli Le poids ciblé...
-
Page 448: Appeler Le Poids Ciblé À Partir De La Banque Des Donnés Des Produits
19.1.2 Appeler le poids ciblé à partir de la banque des donnés des produits Préparation Attribuer à la touche de fonction de votre choix la fonction < SELECTIONNER PRODUIT >, voir chap. 17.1 Appeler la touche de fonction, à laquelle est attribuée la fonction < SELECTIONNER PRODUIT >... -
Page 449: Pesée À Pourcentage
20 Pesée à pourcentage Le mode pesée à pourcentage permet l’affichage du poids en pourcent, rapporté à un poids de référence (100%). Deux diverses méthodes sont disponibles pour l'extrapolation de la référence (voir chap. 20.2.1 et chap. 20.2.2). 20.1 Réglages <P2.6> ECART> Par le truchement des réglages spécifiques aux applications peuvent être adaptées les applications à... -
Page 450: Exécuter Pesée À Pourcentage
20.2 Exécuter pesée à pourcentage Préparation Attribuer à deux touches de fonction de votre choix les fonctions <SAISIR POIDS DE REFERENCE> et <DETERMINER POIDS DE REFERENCE>, voir chap. 20.1 ou chap. 9.3.10. 20.2.1 Détermination du poids de référence par pesée ... -
Page 451: Saisir Le Poids De Référence Connu Comme Valeur Numérique
20.2.2 Saisir le poids de référence connu comme valeur numérique Sélectionner l'application < ECART >, voir chap. 16.1. Dans la ligne d'information s'affiche le poids de référence utilisé en dernier lieu. Pour la première mise en œuvre avec la valeur 0.0000g. ... -
Page 452: Appeler Le Poids De Référence À Partir De La Banque De Données Des Produits
20.2.3 Appeler le poids de référence à partir de la banque de données des produits Préparation Attribuer à la touche de fonction de votre choix la fonction < SELECTIONNER PRODUIT >, voir chap. 17.1 Appeler la touche de fonction, à laquelle est attribuée la fonction < SELECTIONNER PRODUIT >... -
Page 453: Pesée D'animaux
21 Pesée d'animaux L'application „Pesée d'animaux“ permet la pesée d'objets de pesée agités ou la pesée dans des conditions environnementales instables. Pendant le laps de temps donné la balance extrapole la moyenne de plusieurs pesées. Deux différents modes de démarrage / de RAZ sont disponibles: ... - Page 454 AEJ-C/AES-C/PLJ-C-BA-f-1621...
-
Page 455: Pesée D'animaux Avec Démarrage Automatique
La balance est maintenant prête à une pesée d’animaux: Sélection de l'application <PESÉE D’ANIMAUX>, voir chap. 16.1. Pour la mise en œuvre d'un récipient de pesée tarer par appel de la touche TARE. Poser le produit à peser sur la balance et démarrer sur la touche de fonction à laquelle est attribuée la fonction <START>, le cycle de mesure (exemple d'affichage F1) ... - Page 456 AEJ-C/AES-C/PLJ-C-BA-f-1621...
- Page 457 La balance est maintenant prête à une pesée d’animaux: Sélection de l'application <PESÉE D’ANIMAUX>, voir chap. 16.1. Pour la mise en œuvre d'un récipient de pesée tarer par appel de la touche TARE. Mettre sur la balance le produit à peser, le cycle de mesure est automatiquement démarrée à...
-
Page 458: 22 Détermination De La Densité De Corps Solides Et De Liquides
Pour la détermination de la densité nous vous recommandons de travailler avec les kits de détermination de la densité en option. 1. Balances analytiques Kit de détermination de la densité KERN YDB-03 2. Balances de précision Kit de détermination de la densité KERN PLS-A01 Les kits contiennent toutes les structures et ressources nécessaires pour une... -
Page 459: Réglages
22.1 Réglages <P2.7> ou <P2.8> DETERMINATION DE LA DENSITÉ Par le truchement des réglages spécifiques aux applications peuvent être adaptées les applications à vos besoins. Les réglages disponibles dépendent de l'application momentanément active. Une partie de ces réglages est globale, c. à d. qu'à part quelques exceptions ils sont identiques avec l'application „pesée“...Ou Determination De La Densité -
Page 460: Statistique
23 Statistique L'application statistique permet l'exploitation statistique des valeurs de pesée. Réglages <P2.10> STATISTIQUE Par le truchement des réglages spécifiques aux applications peuvent être adaptées les applications à vos besoins. Les réglages disponibles dépendent de l'application momentanément active. Une partie de ces réglages est globale, c. à d. qu'à part quelques exceptions ils sont identiques avec l'application „pesée“... - Page 461 Peser le premier échantillon Le cas échéant mettre la balance à zéro ou tarer. Poser le premier échantillon sur la balance, attendre l'affichage de la stabilité, puis appeler la touche PRINT. Sur l'affichage apparaît le numéro de l'échantillon < 1 >; le poids est mémorisé et imprimé...
- Page 462 Après appel de la touche F2 peut être affichée par chaque appel des touches de navigation la valeur statistique suivante. Pour l'édition du protocole valider l'option <IMPRIMER> au moyen de la touche PRINT AEJ-C/AES-C/PLJ-C-BA-f-1621...
- Page 463 Protocole modèle KERN YKB-01N --------------------Statistique------------- ------ Nombre d'échantillons 455.60 g Somme 50.6222 g Valeur moyenne 49.939 g Plus petite valeur pondérale 51.380 g Plus grande valeur pondérale 1.441 g Différence entre la plus petite / la plus grande valeur pondérale 0.39605 g...
-
Page 464: Totalisation
24 Totalisation L'application statistique permet la pesée de différents échantillons et la totalisation des valeurs pondérales. 30 échantillons peuvent être pesés au max. Réglages <P2.11> TOTALISATION> Par le truchement des réglages spécifiques aux applications peuvent être adaptées les applications à vos besoins. Les réglages disponibles dépendent de l'application momentanément active. - Page 465 Peser le premier échantillon Le cas échéant mettre la balance à zéro ou tarer. Poser le premier échantillon sur la balance, attendre l'affichage de la stabilité, puis appeler la touche PRINT. Dans la ligne d'information s'affiche le numéro de l'échantillon < 1 >; le poids est mémorisé.
- Page 466 Appeler la touche de fonction, à laquelle est attribuée la fonction <CLÔTURER>. La somme totale est affichée et éditée en cas de branchement d’une imprimante en option. Protocole modèle KERN YKB-01N -------------------Totaliser------------------ 38.000 g 100.00 g 50.000 g 10.000 g...
- Page 467 Effacer la mémoire totalisatrice / lancer une nouvelle procédure de totalisation Retirer les échantillons, appeler la touche UNIT. Le compteur d'échantillons „N“ et la somme „S“ sont remis à zéro. La balance est prête pour une nouvelle procédure de totalisation. AEJ-C/AES-C/PLJ-C-BA-f-1621...
-
Page 468: Fonction Valeur De Crête
25 Fonction valeur de crête Cette fonction affiche la valeur de charge la plus élevée (valeur de crête) d’une pesée. La valeur de crête demeure affichée aussi longtemps sur l’affichage jusqu’à ce que soit effacée. Préréglages: Par le truchement des réglages spécifiques aux applications peuvent être adaptées les applications à... - Page 469 La balance est maintenant prête pour l'extrapolation de la valeur de crête: Sélectionner l'application < F11 MAX. HOLD >, voir chap.16.1. A partir de là la balance enregistre chaque valeur pondérale, qui est supérieure au seuil réglé. Mettre sur la balance le produit à peser, la mesure est automatiquement démarrée à...
-
Page 470: Calibrage Par Pipette
26 Calibrage par pipette Acclimater le liquide de test, le récipient à peser, la pipette et la pointe de pipette avant le début pendant au moins 2 heures. Utiliser de l'eau distillée comme liquide de test. • Température ambiante 20 – 25°C, fluctuations de température pendant le calibrage °C ±... -
Page 471: Réalisation
26.2 Réalisation Sélectionner l'application: AEJ-C/AES-C/PLJ-C-BA-f-1621... - Page 472 Saisir paramètre de test: Sur les touches de navigation saisir la température d'essai, la position active clignote. Valider sur la touche PRINT, l'affichage pour la saisie de l'humidité de l'air apparaît. Sur les touches de navigation saisir la température d'essai actuelle, la position active clignote.
- Page 473 Saisir sur les touches de navigation le volume d'essai <V1> (p.ex. 100 µl), la position active clignote. Dans le cas de pipettes avec volume fixe la saisie est ici terminée. Dans le cas de pipettes avec volume variable sélectionner comme décrit ci-après les volumes V2 et V3.
- Page 474 Exécuter le test de pipettes: 1. Série de mesures pour le volume d'essai V1 : Mettre en place un récipient de pesée, attendre l'affichage de la stabilité, puis tarer par appel de la touche TARE. 1. Aspirer avec la pipette le volume d'essai sélectionné <V1> et doser le fluide dans le récipient de pesée.
- Page 475 2. Série de mesures pour le volume d'essai V2 : Exécuter la deuxième série de mesures comme la précédente, cependant avec le volume d'essai <V2> 3. Série de mesures pour le volume d'essai V3 : Exécuter la troisième série de mesures comme la précédente, cependant avec le volume d'essai <V3>...
- Page 476 Exemple d’édition KERN YKB-01N -------------------Pipette calibration--------------------- Meas. No. Date 05.01.2016 Time 11:34:17 Temp. 20.0°C Humidity 50 % Pressure 1017hPa -------------------------Tested volume 1000 µl------------ 1003 µl 993 µl 1013 µl 1003 µl 993 µl 1003 µl 1013 µl 1053 µl 1003 µl 1023 µl...
-
Page 477: Communication / Menu Setup < P3
(p. ex. raccordement d' un support de mémorisation USB ou à un scanner de code à barres) 5. WLAN (Factory option KERN PLJ-A06) L'interface doit être configurée en fonction de l'appareil périphérique et de la fonction voulue, voir chap. 0 / 27.2 (les paramètres des ports USB ne sont pas susceptibles d'être configurés). - Page 478 27.1 <P3.1 / P3.2> configurer l'interface RS-232 Sélectionner dans le menu de communication <P3> l'interface à configurer <COM 1> ou <COM 2>. Après sélection de <COM 1> ou <COM 2> sélectionner sur les touches de navigation le paramètre de communication vitesse de transmission en bauds. AEJ-C/AES-C/PLJ-C-BA-f-1621...
- Page 479 Après sélection de la vitesse de transmission en bauds sélectionner le paramètre de communication <Parité> suivant. AEJ-C/AES-C/PLJ-C-BA-f-1621...
-
Page 480: P3.3> Interface Wlan (Factory Option Kern Plj-A06)
27.2 <P3.3> interface WLAN (Factory option KERN PLJ-A06) Appel du menu: AEJ-C/AES-C/PLJ-C-BA-f-1621... -
Page 481: P3.3.2 - Choisir Reseau
Réglages disponibles <P3.3> P3.3.1 - STATUT (configurer / relié) P3.3.2 - CHOISIR RESEAU (chercher réseau) P3.3.3 - PARAMETRE RESEAU P3.3.3.1 - NOM (identificateur réseau) P3.3.3.2 MOT DE PASSE (mot de passe pour l'accès au réseau) P3.3.3.3 – N° de CANAL (Standard <AUTO>) P3.3.3.4- - IP (Adresse de la balance dans le réseau) - Page 482 Saisir le mot de passe et valider avec la touche PRINT. Remarque: Le raccordement d'un clavier de PC par le truchement d'un portail USB facilite la saisie Le programme de la balance vous conduit automatiquement à travers les paramètres réseau.
- Page 483 27.2.2 <P3.3.3> - PARAMÈTRE RESEAU Le raccordement d'un clavier de PC par le truchement d'une interface USB facilite la saisie des paramètres réseau. Appeler le point de menu < P3.3.3> , voir chap. 27.2. Sélectionner sous le point de menu < P3.3.3.3> le canal <AUTO (OUI / NON)> et valider sur la touche PRINT.
- Page 484 Sélectionner sous le point du menu < P3.3.3.6> GATE et valider sur la touche PRINT. Sélectionner sur la touche F1 le point de menu suivant. Sélectionner sous le point du menu < P3.3.3.7> PORT <standard 4000> et valider sur la touche PRINT. Sélectionner sur la touche F1 le point de menu suivant.
-
Page 485: Interface Usb
USB, disponible sur notre KERN- Homepage , www.kern-sohn.com, / Downloads. Sélectionner la version de circuit d'attaque adapté à votre système et exécuter le fichier exe. Cliquer sur le dialogue <Continuer>, le circuit d'attaque est installé. - Page 486 Appeler le gestionnaire des appareils. Par un click sur „Connexions“ - branchements est affiché le nouveau port virtuel COM Port pour l'appareil. Le report correct est reconnaissable au nom „KERN PLJ Series“. Le port COM affiché p. ex. COM6 est à sélectionner en fonction du logiciel de transmission.
-
Page 487: Appareils / Menu Setup < P4
28.1 Transfert en continu de données pour les ordres de télécommande < P4.1 Computer > 1. Sélectionner l'interface <P4.1.1> Sélectionner sur les touches de navigation l'interface par lequel l'appareil doit être raccordé au PC Au choix: COM 1: RS 232 USB: Type B WIFI: Factory option KERN PLJ-A06 AEJ-C/AES-C/PLJ-C-BA-f-1621... - Page 488 2. Sélectionner le type de transfert en continu des données <P4.1.2> Sélectionner sur la touche de navigation l'affichage pour le réglage du transfert en continu des données. Sélectionner sur les touches de navigation le réglage voulu et valider sur la touche PRINT.
- Page 489 3. Sélectionner l'intervalle d'édition <P4.1.3> Sélectionner sur la touche de navigation l'affichage pour le réglage de l'intervalle d'édition pour le transfert en continu des données. AEJ-C/AES-C/PLJ-C-BA-f-1621...
- Page 490 4. Sélectionner le type de protocole <P4.1.5> Sélectionner sur la touche de navigation l'affichage pour la sélection du type de protocole. Sélectionner sur les touches de navigation le réglage voulu et valider sur la touche PRINT. En option: <NEANT>.
-
Page 491: Transfert Des Données Après Appel De La Touche Print
28.2 Transfert des données après appel de la touche PRINT <Imprimante P4.2> Sous le point du menu <P4.2>a lieu la sélection et la configuration de l'interface pour l'édition après appel de la touche PRINT. La teneur de l'´édition des données est définie sous <... - Page 492 0Mémorisation de protocoles de mesure, voir chap. 0 <USB PC> Type B de port USB, raccordement à un PC en association avec un logiciel de transfert (p, ex. KERN SCD 4.0) 2. Saisie des valeurs (hexadécimales) pour le préfixe / suffixe <P4.2.1>...
- Page 493 Saisir sur les touches de navigation le code de commande pour la fin du protocole (p. ex. section du papier) et valider sur la touche PRINT. AEJ-C/AES-C/PLJ-C-BA-f-1621...
-
Page 494: Scanner Du Code À Barres P4.3
28.3 < Scanner du code à barres P4.3 > Sous le point du menu<P4.3> a lieu la sélection de l'interface pour le raccordement d'un scanner de code à barres. Sélectionner sur les touches de navigation l'interface par lequel doit avoir lieu le transfert des données. -
Page 495: Communication Avec Des Appareils Externes (Imprimante / Pc)
Couper le balance de l’alimentation électrique et le relier par un câble approprié avec l’interface de l’appareil. Seul un câble d’interface KERN correspondant vous assure une exploitation sans panne. Les paramètres de communication de l'interface RS 232 (vitesse de transmission en bauds, bits et parité) doivent coïncider entre le balance et... -
Page 496: Câble D'interface
29.2 Câble d'interface Balance - PC à 9 pôles Balance - imprimante ( CITIZEN, EPSON) à 25 pôles Balance - imprimante 3 (TxD) 1 (RxD) 5 (GND) 3 (GND) 7 - 8 shunté AEJ-C/AES-C/PLJ-C-BA-f-1621... -
Page 497: Format De Transfert Des Données
29.3 Format de transfert des données 1. Après appel de la touche PRINT 4-12 14-16 Valeur de ˽ ˽ Stabilité Signe Unité pesée Signe de stabilité ˽ ] stable [ ? ] instable [ ^ ] surcharge [ v ] charge insuffisante Signe ˽... - Page 498 Ordre 1 - 3 caractères Signe de stabilité ˽ ] stable [ ? ] instable [ ^ ] surcharge [ v ] charge insuffisante Signe ˽ ] valeurs positives ] valeurs négatives Valeur de pesée 9 caractères avec alignement à droite Unité...
-
Page 499: Ordres D'interface
29.4 Ordres d'interface Les ordres suivants sont reconnus par la balance Fonction Co m m an d e s Remise à zéro Tarage Questionnement de la valeur de la tare Installer un valeur de tare Envoyer valeur de poids stable dans l’unité de pesée standard Envoyer immédiatement valeur de poids stable dans l’unité... -
Page 500: Format De Réponse Général
29.5 Format de réponse général Commandes Fonction ˽ Ordre accepté, l'exécution de l'ordre est commencée A CR LF L'exécution de l'ordre démarré auparavant est terminée ˽ D CR LF (n'intervient qu'après XX_A) ˽ Ordre valide, mais ne pouvant pas être exécuté pour le moment. I CR LF ˽... -
Page 501: Informations Détaillées Concernant Les Protocoles De Communication
29.6 Informations détaillées concernant les protocoles de communication 29.6.1 Remise à zéro Z CR LF Ordre: Réponses possibles: ˽ Ordre accepté, l'exécution de l'ordre est commencée A CR LF ˽ L'exécution de l'ordre démarré auparavant est terminée D CR LF ˽... -
Page 502: Installer Un Valeur De Tare
Unité: - 3 caractères avec alignement à gauche La valeur de la tare est toujours éditée dans l'unité d'ajustage. 29.6.4 Installer un valeur de tare ˽ Ordre: UT TARA CR LF, (TARA = valeur tare) Réponses possibles: ˽ Ordre exécuté OK CR LF ˽... -
Page 503: Envoyer Immédiatement Valeur De Poids Stable Dans L'unité De Pesée Standard
Exemple: S CR LF Ordre envoyé: Envoyer valeur de poids stable dans l’unité de pesée standard ˽ Ordre accepté, l'exécution de l'ordre est A CR LF commencée ˽˽˽˽ ˽˽˽˽˽˽ ˽ ˽˽ Ordre exécuté, la valeur pondérale est éditée en 8 . 5 CR LF unités de pesée standard Caractère de stabilité*... -
Page 504: Envoyer Valeur De Poids Stable Dans L'unité De Pesée Actuelle
29.6.7 Envoyer valeur de poids stable dans l’unité de pesée actuelle Ordre: SU CR LF Réponses possibles: ˽ A CR LF Ordre accepté, l'exécution de l'ordre est commencée ˽ E CR LF Limite de temps pour la stabilisation de l'affichage de la balance dépassé... -
Page 505: Envoyer Immédiatement Valeur De Poids Dans L'unité De Pesée Actuelle
29.6.8 Envoyer immédiatement valeur de poids dans l’unité de pesée actuelle SUI CR LF Ordre: Réponses possibles: ˽ Ordre valide, mais ne pouvant pas être exécuté pour le moment. I CR LF 7-15 17-19 Signe de ˽ ˽ Signe Poids Unité... -
Page 506: Lancement De L'édition En Continu Dans Unité De Pesée Actuelle
29.6.11 Lancement de l’édition en continu dans unité de pesée actuelle ˽ Ordre: CR LF Réponses possibles: ˽ Ordre valide, mais ne pouvant pas être exécuté pour le moment. I CR LF ˽ Ordre accepté, l'exécution de l'ordre est commencée A CR LF Les valeurs pondérales sont éditées dans l'unité... -
Page 507: Interroger Le Seuil De Tolérance Inférieur
29.6.15 Interroger le seuil de tolérance inférieur Ordre: ODH CR LF ˽ Ordre exécuté Réponse: MASA CR LF 4 - 12 14 - 16 ˽ ˽ ˽ Tare Unité Poids: - 9 caractères avec alignement à droite Unité: - 3 caractères avec alignement à gauche 29.6.16 Interroger le seuil de tolérance supérieur Ordre: OUH CR LF ˽... -
Page 508: Saisir Le Poids De Référence (Pesée À Pourcentage)
29.6.19 Saisir le poids de référence (pesée à pourcentage) ˽ Ordre: XXXXX CR LF Réponses possibles: ˽ Ordre exécuté OK CR LF ˽ Ordre valable, ne pouvant pas être exécuté momentanément I CR LF (p. ex. mode de fonctionnement erroné) ES CR LF Erreur de syntaxe (format de poids erroné) 29.6.20 Valider / simulation sur „appel de la touche PRINT“... -
Page 509: Débloquer L'ajustage Interne Automatique
29.6.23 Débloquer l'ajustage interne automatique Ordre: IC0 CR LF Réponses possibles: ˽ Ordre exécuté OK CR LF ˽ Ordre valable, ne pouvant pas être exécuté momentanément I CR LF (pas disponible pour les balances avec homologation de type) 29.6.24 Saisir le numéro de série Ordre: NB CR LF Réponses possibles:... -
Page 510: Liste Des Modes De Fonctionnement Disponibles
29.6.27 Liste des modes de fonctionnement disponibles Ordre: OMI CR LF Réponses possibles: OMI˽ CR LF Ordre accepté, les modes de fonctionnement disponibles N° “désignation“ CR LF sont affichés N° “désignation“ CR LF OK CR LF ˽ Ordre valide, mais ne pouvant pas être exécuté pour le I CR LF moment. -
Page 511: Valider Le Signal Sonore
29.6.30 Valider le signal sonore ˽ Ordre: CZAS CR LF Réponses possibles: BP˽OK CR LF Ordre exécuté ˽ Pas de paramètre ou erreur de format E CR LF ˽ Ordre valide, mais ne pouvant pas être exécuté pour le I CR LF moment. -
Page 512: Maintenance, Entretien, Élimination
Retirer immédiatement les matières à peser renversées sur la balance. 30.2 Maintenance, entretien L´appareil ne doit être ouvert que par des dépanneurs formés à cette fin et ayant reçu l´autorisation de KERN. Avant d´ouvrir l´appareil, couper ce dernier du secteur. 30.3 Mise au rebut L´élimination de l´emballage et de l´appareil doit être effectuée par l´utilisateur selon... -
Page 513: Petit Dépannage / Messages D'erreur
31 Petit dépannage / messages d'erreur Causes possibles des erreurs: En cas d´anomalie dans le déroulement du programme, la balance doit être arrêtée pendant un court laps de temps et coupée du secteur. Le processus de pesée doit alors être recommencé depuis le début. Aide: Panne Cause possible...
Need help?
Do you have a question about the AEJ-C Series and is the answer not in the manual?
Questions and answers