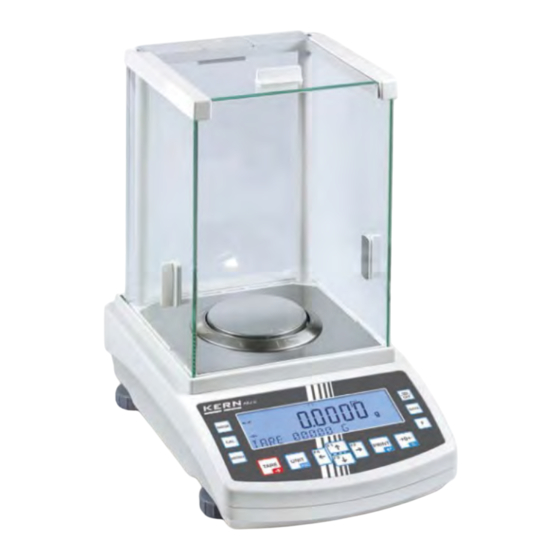
KERN AEJ 100-4DM Operating Manual

KERN AEJ 100-4DM Operating Manual

Analysis and precision balances
Table of Contents

Advertisement

Quick Links

Operating manual
Analysis and precision balances
KERN AEJ-C / AES-C / PLJ-C
Type AEJ_D / AES_C / PLJ_D
Version 3.0
2017-07
GB
KERN & Sohn GmbH
Ziegelei 1
D-72336 Balingen
E-Mail: info@kern-sohn.com
AEJ-C / AES-C / PLJ-C-BA-e-1730
Phone: +49-[0]7433- 9933-0
Fax: +49-[0]7433-9933-149
Internet: www.kern-sohn.com

Advertisement

Table of Contents
loading

Summary of Contents for KERN AEJ 100-4DM

  • Page 1 KERN & Sohn GmbH Ziegelei 1 Phone: +49-[0]7433- 9933-0 D-72336 Balingen Fax: +49-[0]7433-9933-149 E-Mail: info@kern-sohn.com Internet: www.kern-sohn.com Operating manual Analysis and precision balances KERN AEJ-C / AES-C / PLJ-C Type AEJ_D / AES_C / PLJ_D Version 3.0 2017-07 AEJ-C / AES-C / PLJ-C-BA-e-1730...
  • Page 2: Table Of Contents

    KERN AEJ-C / AES-C / PLJ-C Type AEJ_D / AES_C / PLJ_D Version 3.0 2017-07 Operating manual Analysis and precision balances Contents Technical data ....................6 Declaration of Conformity ................11 Device overview ....................12 Display and Keyboard Summary ..................15 3.1.1...
  • Page 3 9.3.6 <P2.2.2 > AUTOTARE / <P2.2.3.2> AUTO THRESHOLD ............46 9.3.7 <P2.2.3.> Manual / automatic data output / <P2.2.3.2> AUTO THRESHOLD ....... 47 9.3.8 <P2.2.4> Informational line ...................... 49 9.3.9 <P2.2.5> Special information ....................50 9.3.10 <P2.2.6> Assigning function keys ..................51 <...
  • Page 4 Communication / setup menu < P3 > ............135 27.1 Configuring a <P3.1 / P3.2> RS-232 interface ..............136 27.2 <P3.3> WLAN interface (factory option KERN PLJ-A06) ..........138 27.2.1 P3.3.2 - SELECT NET ....................... 139 27.2.2 <P3.3.3> - NETWORK PARAMETER ................141 27.3...
  • Page 5 29.6 Detailed information to communication logs ..............159 29.6.1 Zeroing ..........................159 29.6.2 Taring ..........................159 29.6.3 Query tare value ......................... 159 29.6.4 Set tare value ........................160 29.6.5 Send stable weighing value in standard weighing unit ............160 29.6.6 Send weighing value immediately in standard weighing unit ..........
  • Page 6: Technical Data

    1 Technical data KERN (Type) AEJ 100-4DM AEJ 200-4DM AEJ 200-5DM Trade name AEJ 100-4CM AEJ 200-4CM AEJ 200-5CM Readability (d) 0.1 mg 0.1 mg 0.01 mg; 0.1 mg Weighing range (max) 160 g 220 g 82 g; 220 g...
  • Page 7 KERN AES 100-4C AES 200-4C Readability (d) 0.1 mg 0.1 mg Weighing range (max) 160 g 220 g Reproducibility 0.2 mg 0.2 mg Linearity ± 0.2 mg ± 0.2 mg Stabilization time 4 sec. 4 sec. Recommended adjusting 150 g (E2)
  • Page 8 KERN (Type) PLJ 300-3DM PLJ 600-3DM Trade name PLJ 300-3CM PLJ 600-3CM Readability (d) 1 mg 1 mg Weighing range (max) 360 g 600 g Minimum load (Min) 20 mg 20 mg Verification value (e) 10 mg 10 mg Verification class...
  • Page 9 KERN (Type) PLJ 700-3DM PLJ 3000-2DM Trade name PLJ 700-3CM PLJ 3000-2CM Readability (d) 1 mg 10 mg Weighing range (max) 750 g 3500 g Minimum load (Min) 20 mg 500 mg Verification value (e) 10 mg 100 mg Verification class...
  • Page 10 Dimensions AEJ / AES: PLJ: AEJ-C/AES-C/PLJ-C-BA-e-1730...
  • Page 11: Declaration Of Conformity

    2 Declaration of Conformity To view the current EC/EU Declaration of Conformity go to: www.kern-sohn.com/ce The scope of delivery for verified weighing balances (= conformity- rated weighing balances) includes a Declaration of Conformity. AEJ-C/AES-C/PLJ-C-BA-e-1730...
  • Page 12: Device Overview

    3 Device overview AEJ / AES: Pos. Designation Glass wind screen Weighing pan Display Keyboard Levelling screw AEJ-C/AES-C/PLJ-C-BA-e-1730...
  • Page 13 PLJ: Pos. Designation Glass wind screen Weighing pan Display Keyboard Levelling screw AEJ-C/AES-C/PLJ-C-BA-e-1730...
  • Page 14 Connections (all models): Pos. Designation Mains connection COM 2 port COM 1 port USB 2 port (for devices such as printer, USB 1 port (for devices such as keyboard) AEJ-C/AES-C/PLJ-C-BA-e-1730...
  • Page 15: Display And Keyboard Summary

    3.1 Display and Keyboard Summary Pos. Designation Stability display Indicator “zero display” Information line The non-verified value is given in brackets in verified scales. Weighing unit “g“ Button Function • Select operating mode • Start adjustment • Invoke setup menu •...
  • Page 16: Navigation Keys / Numeric Input

    • Function key / shortcut to basic functions • Taring • Add data record • Switch-over weighing unit • Exit menu • Shortcut key for most frequently occurring functions and settings (For configuration see chap. 9.3.10) • Navigation keys, see chap. 2.1.1 •...
  • Page 17: Basic Information (General)

    The balance may only be used according to the described conditions. Other areas of use must be released by KERN in writing. 4.3 Warranty Warranty claims shall be voided in case •...
  • Page 18: Monitoring Of Test Resources

    Information is available on KERN’s home page (www.kern-sohn.com with regard to the monitoring of balance test substances and the test weights required for this. In KERN's accredited DKD calibration laboratory test weights and balances may be calibrated (return to the national standard) fast and at moderate cost.
  • Page 19 • Prior to dispatch disconnect all cables and remove loose/mobile parts. See example shown for KERN AEJ/AES-C • Reattach possibly supplied transport securing devices. • Secure all parts such as the glass wind screen, the weighing platform, power unit etc. against shifting and damage.
  • Page 20 AEJ-C/AES-C/PLJ-C-BA-e-1730...
  • Page 21: Unpacking, Setup And Commissioning

    7 Unpacking, Setup and Commissioning 7.1 Installation Site, Location of Use The balances are designed in a way that reliable weighing results are achieved in common conditions of use. You will work accurately and fast, if you select the right location for your balance. Therefore, observe the following for the installation site: •...
  • Page 22: Placing

    7.3 Placing The right place is decisive for the accuracy of the weighing results of high- resolution analytical and precision balances (see chap. 7.1). Model AEJ-CM Turn the transport locking device in the direction of the arrow <OPEN> and remove. Keep transport locking device in a safe place for possible future transportation.
  • Page 23  Installation of weighing plate Models AEJ/AES-C (except AEJ-5CM) Model AEJ-5CM • Open glass draft shields on all sides • Open glass draft shields on all sides • Place protection sheet (1) into the • Remove transport securing (1). weighing chamber •...
  • Page 24 Models PLJ-C: 10 mg models • Remove adhesive tape from the rubber element (1) • Place weighing pan (2) on the rubber elements 1 mg models • Remove adhesive tape from the rubber element (1) • Place weighing pan (2) on the rubber elements •...
  • Page 25: Levelling

    7.4 Levelling Exact alignment and stable installation are an essential requirement for repeatable results. You can compensate for minor unevenness or tilts of the footprint by levelling the weighing balance.  Level balance with foot screws until the air bubble of the water balance is in the prescribed circle.
  • Page 26: Mains Connection

    Check, whether the voltage acceptance on the scales is set correctly. Do not connect the scales to the power grid unless the information on the scales (sticker) matches the local mains voltage. Only use KERN original mains adapter. Using other makes requires consent by KERN. Important: Before starting your weighing balance, check the mains cable for ...
  • Page 27: Switching On And Off

    7.6.2 Switching on and off The weighing balance will remain switched on as long as it is connected to the power supply. Operate the ON/OFF-key to turn on/off the display. To turn on the display, press the ON/OFF-key. Wait for the basic display to appear. To switch off, press the ON/OFF button again.
  • Page 28 Login: Several keys are available for logging in: You can use either, the F-key, DATA-key or one of the shortcut keys (provided it is assigned to <LOG IN>). -key  Use the navigation keys to select the desired user such as ADMIN. ...
  • Page 29 -key  Use the navigation keys to select <ADMIN> and confirm by pressing the PRINT-key.  If necessary use the navigation keys to enter the password and confirm by pressing the PRINT-key, see chap. 3.1.1 Numeric entry. AEJ-C/AES-C/PLJ-C-BA-e-1730...
  • Page 30: Peripheral Equipment

    Before connecting or disconnecting of additional devices (printer, PC) to the data interface, always disconnect the balance from the power supply. With your balance, only use accessories and printers by KERN, as they are ideally tuned to your balance. AEJ-C/AES-C/PLJ-C-BA-e-1730...
  • Page 31: Menu

    8 Menu 8.1 Menu structure The menu is subdivided into seven menu blocks (P1 – P7). Adjustment Available settings P1.1 Internal adjustment see chap. 13.2.1. P1.2 External adjustment s. Kap. 13.2.2 only AES models P1.3 User adjustment s. Kap. 13.2.3 only AES models P1.4 Adjustment test see chap.
  • Page 32 Printouts P5.1 Adjustment log see chap. 14.1. P5.2 Header see chap. 14.2.1. P5.3 GLP log see chap. 14.2.2. P5.4 Footer see chap. 14.2.3. P5.5 Special printout 1 see chap. P5.6 Special printout 2 P5.7 Special printout 3 see chap. 14.3. P5.8 Special printout 4 P5.10 Variable 1 see chap.
  • Page 33: Navigation In The Menu

    8.2 Navigation in the menu Call up menu Press , and the first menu block 1 CAL will be displayed. Select menu block Use the navigation buttons to select the individual menu blocks one by one. Use the navigation key to scroll down.
  • Page 34: Weighing Mode

    9 Weighing mode The sequence of a simple weighing process is described in the chapter on Weighing below. Apart from the work steps described there (simple weighing, reset to zero, taring) the weighing balance offers additional options for adapting the “Weighing” application to your requirements.
  • Page 35: Weighing With Tare

    9.1.3 Weighing with tare  Taring The dead weight of any weighing container may be tared away by pressing a button, so that the following weighing procedures show the net weight of the goods to be weighed. • Place the weighing container on the weighing pan and close the draft shields, as required.
  • Page 36  Numerical input of tare (PRE-TARE) Condition: Shortcut keys F1, F2, F3 or F4 will be assigned to the <ENTER TARE> function, see chap. 9.3.10. • Press the shortcut key and the display for entering the tare value will appear. •...
  • Page 37  Load container weight from the database. • Press shortcut key (F1, F2, F3, F4) assigned to the <SELECT TARE> function (See chap. 9.3.10.). • After pressing , select <SELECT TARE> function. The display for selecting a tare memory will appear. •...
  • Page 38: Underfloor Weighing

    9.2 Underfloor weighing Objects not fitting on the weighing pan due to their weight or shape can be weight with the help of the underfloor weighing option. Proceed as follows: • Switch off the balance. • Open closing cover at the balance bottom. •...
  • Page 39: Settings

    9.3 Settings <P2.2 WEIGHING> Navigation in menu see chap. 8.2 Menu structure: Menu item Parameters Available settings / explanation P2.2.1 P2.2.1.1 EXTRA FAST Filter READING Weighing balance reacts very sensitively and very fast, very stable place of installation. FAST Weighing balance reacts sensitively and fast, stable place of installation.
  • Page 40 P2.2.2 AUTOTARE Selectable yes / no P2.2.3 P2.2.3.1 MODE Weighing log will be generated immediately after the PRINT MOD. PRINT-key has been pressed, regardless whether the (specification weighing value is stable or not s PRINT-key) WHEN STABLE Output after the PRINT-key has been pressed will not take place until the weighing value has stabilised AUTO Automatic data output after exceeding set minimum...
  • Page 41: P2.2.1.1> Filter Matching Weighing Type To Ambient Conditions

    9.3.1 <P2.2.1.1> Filter Matching weighing type to ambient conditions Please note that data processing geared to higher stability will always bring about a deceleration of reaction times while an acceleration of reaction times will have a negative impact on stability, that is, the higher the filter level, the longer the reaction time.
  • Page 42: P2.2.1.2> Rest Position Control Display

    9.3.2 <P2.2.1.2> Rest position control display This setting is used to define how quickly the weighing balance considers a measured value as stable for release. AEJ-C/AES-C/PLJ-C-BA-e-1730...
  • Page 43: P2.2.1.3> Auto Zero Function

    9.3.3 <P2.2.1.3> Auto zero function This function is used to automatically tare minor weight fluctuations (such as minor soiling on weighing pan). By enabling this function you automatically ensure that each weighing process starts with zero display. In the event that small quantities are removed or added to the material to be weighed, incorrect weighing results can be displayed due to the “stability compensation“.
  • Page 44: P2.2.1.4> Hiding Last Digit Of Display

    9.3.4 <P2.2.1.4> Hiding last digit of display Readability may be reduced by 1 digit on the instrument, as required. The last decimal place will be rounded and removed from the display. AEJ-C/AES-C/PLJ-C-BA-e-1730...
  • Page 45: P2.2.1.5> Environment

    9.3.5 <P2.2.1.5> Environment This function allows you to optimally adapt the weighing balance to ambient conditions. In a stable environment (for instance free of draft and vibrations) select <STABLE> as a setting. In an instable environment exposed to constantly changing conditions select <INSTABLE>. AEJ-C/AES-C/PLJ-C-BA-e-1730...
  • Page 46: P2.2.2 > Autotare / Auto Threshold

    9.3.6 <P2.2.2 > AUTOTARE / <P2.2.3.2> AUTO THRESHOLD The automatic tare function automatically saves the first stable weighing value as tare value. The parameter <P2.2.3.2> AUTO THRESHOLD is used to define which minimum weight must be placed before automatic taring takes place. Further automatic taring ill only take place when the display drops below the set value for the auto threshold.
  • Page 47: P2.2.3.> Manual / Automatic Data Output / Auto Threshold

    Manual / automatic data output / 9.3.7 <P2.2.3.> <P2.2.3.2> AUTO THRESHOLD This function is used whether and how data output is to take place. Available settings: Menu item Available settings / explanation <P2.2.3.1> <IF STABLE> Manual output of stable weighing values after pressing PRINT key MODE <ANY>...
  • Page 48 AEJ-C/AES-C/PLJ-C-BA-e-1730...
  • Page 49: P2.2.4> Informational Line

    9.3.8 <P2.2.4> Informational line This function is used to define which additional information is to be shown in the line of text at the lower edge of the display. AEJ-C/AES-C/PLJ-C-BA-e-1730...
  • Page 50: P2.2.5> Special Information

    9.3.9 <P2.2.5> Special information This function is used to define user-specific information. When this function <P2.2.5 SINFO> is enabled, it will be shown in the line of text at the lower edge of the display. AEJ-C/AES-C/PLJ-C-BA-e-1730...
  • Page 51: P2.2.6> Assigning Function Keys

    9.3.10 <P2.2.6> Assigning function keys The function keys F1, F2, F3 and F4 allow direct access to frequently required functions and settings. The available settings depend on the operating mode selected. The function assigned to a menu item of the two keys will be executed when the respective key is tapped.
  • Page 52: P 8 Untis

    10 < P 8 UNTIS > This function is used to define which weighing units are to be used in the weighing balance. Available settings: Menu item Available settings / explanation This function is used to define the units into which the P8.1 weighing result is to be converted upon pressing the UNIT- ACCESS...
  • Page 53: Defining Start-Up Weighing Unit < P8.2

    The weighing units available depend on the model and calibration of the  weighing balance. When switching-on the balance, the unit in which the balance has been  switched off, will be displayed. 10.2 Defining start-up weighing unit < P8.2> The weighing units available depend on the model and calibration of the ...
  • Page 54: Defining Freely Programmable Weighing Units < P8.3 / P8.4

    10.3 Defining freely programmable weighing units < P8.3 / P8.4> Freely programmable weighing units are only available for weighing balances without type approval. • Use the navigation keys to enter the conversion factor and confirm by pressing the PRINT-key. • Press several times to return to weighing mode .
  • Page 55: General Parameter < P 6 Other

    11 General parameter < P 6 OTHER> This allows you to configure parameters that influence the operation of the weighing balance such as user language, date / time display, key sounds, display brightness etc. Menu structure: Navigation in menu see chap. 8.2 Menu item Available settings / explanation P6.1...
  • Page 56 AUTOTEST GLP> by pressing  The internal weight will be applied twice, followed by 10 repeat measurements.  Adjustment  Calculation of standard deviation Automatic log printout  Printout example KERN YKB-01N ------------------- ------------------- GLP Autotest Rep. Scale Type 150854 Balance ID...
  • Page 57: Show Device Info < P 7 Info

    12 Show device info < P 7 INFO> This function is used to show and print information about the weighing balance. • Use to scroll down the list of weighing balance information. • To print the current weighing balance settings confirm parameter <P7.5 PRINT SETTINGS>...
  • Page 58: Adjustment < P1 Justage

    (recommended adjustment weight see chap. 1). Weights of different nominal values (>30% max) may be used for adjustment but are not optimal for technical measuring. Info about test weights can be found on the Internet at: http://www.kern-sohn.com. AEJ-C/AES-C/PLJ-C-BA-e-1730...
  • Page 59: Automatic Adjustment Using Internal Weight (Models Aej, Plj)

    The adjustment log will be printed automatically if an optional printer is connected. For defining an adjustment log see chap. 14.1 / <P5.1 Adjustment log>. Printout example KERN YKB-01N: AEJ-C/AES-C/PLJ-C-BA-e-1730...
  • Page 60 Automatic adjustment is carried out: • When balance was disconnected from the mains. • When the temperature is changing The moment a change in temperature of 3°C is detected by the temperature sensor, the weighing scale will carry out a fully automatic adjustment. The message „CAL“...
  • Page 61: Settings In Menu

    13.2 Settings in menu <P1 JUSTAGE> Navigation in menu see chap. 8.2 Menu item Explanation P1.1 Internal adjustment (AEJ, PLJ models only) INT JUST P1.2 External adjustment (AES models only) EXT JUST P1.3 External adjustment with user-defined adjustment weight USER (AES models only) ADJUSTMENT P1.4...
  • Page 62: P1.1 Int. Just

    13.2.1 <P1.1 INT. JUST. >  For automatic internal adjustment see chap. 13.1  Starting internal adjustment manually • Ensure that there are no objects on the weighing pan. • After successful adjustment the balance automatically returns to weighing mode. AEJ-C/AES-C/PLJ-C-BA-e-1730...
  • Page 63: P1.2 Ext. Just.> (Aes Models)

    13.2.2 <P1.2 EXT. JUST.> (AES models) • Carry out adjustment with the help of the recommended adjustment weight (see chapter 1 “Technical Specifications”). • Observe stable environmental conditions. A warming up time (see chapter 1) is required for stabilization. • Invoke menu item < P1.2 EXT. JUST. > •...
  • Page 64 • The adjustment log will automatically be printed if an optional printer is connected. For defining an adjustment log see chap. 14.1 / <P5.1 Adjustment log>. • Press the UNIT-key to return to weighing mode Printout example KERN YKB-01N: AEJ-C/AES-C/PLJ-C-BA-e-1730...
  • Page 65: P1.3 User Adjustment > Adjustment By Using User-Defined External Weight

    13.2.3 < P1.3 USER ADJUSTMENT > Adjustment by using user-defined external weight • Invoke menu item < P1.3 USER JUSTAGE > • Use the navigation keys to enter the nominal value for the desired adjustment weight (>30% max) (See chap.3.1.1) and confirm by pressing the PRINT-key. •...
  • Page 66 • Take away adjustment weight. If the adjustment was successful, this will be followed by automatic return to the menu. • The adjustment log will be printed automatically if an optional printer is connected. For defining an adjustment log see chap. 14.1 / <P5.1 Adjustment log>.
  • Page 67: P1.4 Just.test > Adjustment Test

    13.2.4 < P1.4 JUST.TEST > Adjustment test This function is applied to compare the internal adjustment weight with the saved value. The test is carried out automatically. The result is shown on the display and, if an optional printer is connected, a printout will be issued via the RS 232 interface.
  • Page 68: Define Logs < P5 Printouts

    Print deviation from last adjustment, yes / no ADJUSTMENT <P5.1.9> LINES Print lines to separate signature, yes / no <P5.1.10> SIGNATURE Insert line block for signing log, yes / no Printout example 1 (KERN YKB-01N): Menu item Adjust Protocol ment P5.1.2 P5.1.3...
  • Page 69 Printout example 2 (KERN YKB-01N): Menu item Adjust- Protocol ment P5.1.2 P5.1.3 P5.1.4 P5.1.5 P5.1.6 P5.1.7 P5.1.8 P5.1.9 P5.1.10 AEJ-C/AES-C/PLJ-C-BA-e-1730...
  • Page 70: Weighing Log

    14.2 Weighing log This menu item is used to define which information is to be printed for default weighing logs.  Navigation in menu see chap. 8.2  The menu is subdivided into three submenus where you can define the settings for the header, the logging of weighing results and the footer.
  • Page 71: Print Weighing Results / Define Glp Log

    Printout example (KERN YKB-01N): Menu item Adjust- Protocol ment P5.2.1 P5.2.2 P5.2.3 P5.2.4 P5.2.5 P5.2.6 P5.2.7 P5.2.8 P5.2.9 P5.2.10 P5.2.11 P5.2.12 P5.2.13 none 14.2.2 Print weighing results / define GLP log<P5.3> Quality assurance systems require printouts of weighing results as well as of correct adjustment of the balance stating date and time and balance identification.
  • Page 72: Define Footer

    Printout example (KERN YKB-01N): Menu item Adjust- Protocol ment P5.3.1 P5.3.2 P5.3.3 P5.3.4 P5.3.5 P5.3.6 P5.3.7 P5.3.8 P5.3.9 P5.3.10 none 14.2.3 Define footer<P5.4> This submenu is used to define which information is to be printed on the footer of weighing logs. The footer will be printed on pressing the shortcut keys F1 or F2 (provided they are assigned to <Print footer>) or on pressing the F-key and selecting...
  • Page 73: User-Defined Data Output < P5.5> -

    14.3 User-defined data output < P5.5> - <P5.8 SPECIAL PRINTOUT > Menu <P5> provides options that allow you to define up to four different special printouts of maximal 160 characters each (<P5.5> - <P5.8>). In addition to the option for entering running text (For numeric entry see chap.) 3.1.1) the menu also provides the following variables: General variables: Printout of 1 character “%”...
  • Page 74 Print related variables: Printout of 1 character “/” i.e. in order to print out 1 character /, two // must be entered) CRLF (carriage return line feed) line beginning next line CR (carriage return) line beginning LF (line feed) next line tabulator Paper feed (for PCL printers) End character string...
  • Page 75: Universal Variables

    Example of text input in weighing mode: KERN∗SOHN DATE: <current date,> TIME: <current time> MASS: <current net weight in default unit> ∗∗∗∗∗∗SIGNATURE: Input: • Invoke desired menu item P5.5 – P5.8 (special printout 1 -4) and enter text; for numeric entry see chap. 3.1.1 or PC keyboard •...
  • Page 76: Save Logs To Usb Storage Medium / Print

    14.5 Save logs to USB storage medium / print This option allows you to save weighing results as text file to a USB storage medium and to print these files on a printer connected to your PC. Procedure:  You will see a prompt asking you to connect a USB storage medium to the USB PORT, <IEI IMPORT / EXPORT>.
  • Page 77: Data Bases

    15 Data bases Available databases: Databank Data editable  User <b1> 10 users see chap. 15.1.  Product <b2> 1000 products see chap. 15.2.  Tare values <b3> 100 container weights see chap. 15.3.  Weighing results 1000 weighing results see chap.
  • Page 78: User Database

    15.1 User database The user database < b1 Operator / User > allows you to create up to 100 user profiles with specific settings and user rights. The user management provides for users with different rights, the administrator and several users. The Administrator has full access to the menu and database.
  • Page 79: Create New User

    15.1.1 Create new user The following data can be entered for each user: NAME max. 30 characters, CODE max. 6 characters PASSWORD max. 8 digits ACCESS RIGHTS User, master user, administrator LANGUAGE Deutsch/Espanol/Francais/Turk/Cesky/Italiano/Magyar/ Polski/English The connection of a PC keyboard via USB interface makes the entry of user parameters easier.
  • Page 80: Delete User

    15.1.2 Delete user AEJ-C/AES-C/PLJ-C-BA-e-1730...
  • Page 81: For Invoking A User

    • Use the navigation keys to select and delete a user by • Confirm the query “DELETE“ by pressing the PRINT-key and the display will return to the menu. Press UNITS key to return to weighing mode. 15.1.3 For invoking a user See chap.
  • Page 82: Create New Product

    15.2.1 Create new product  Define product name AEJ-C/AES-C/PLJ-C-BA-e-1730...
  • Page 83  After entering a product name define all parameters one by one AEJ-C/AES-C/PLJ-C-BA-e-1730...
  • Page 84: Container Weights

    15.3 Container weights The product database < b3 TARA > allows for up to 10 container weights to be created you can enter the following data NAME max. 30 digits TARA Container weight 15.3.1 Create new container weight • For downloading container weight from database see chap. 9.1.3 •...
  • Page 85: Weighing Results

    15.4 Weighing results The database < b4.4 Weighing results > is not editable. Data will be saved automatically when your press the PRINT-key . These data records can be viewed, printed or exported to a USB storage medium by the user. The database allows for up to 1000 weighing results to be saved.
  • Page 86 <Print> followed by confirmation with the PRINT-key will trigger a printout at the optional printer. The content of the data output depends on the settings in the menu <P5.3 GLP>, see chap. 14.2.2. Printout example (KERN YKB-01N): Date 18.05.2015 Time...
  • Page 87: Alibi Memory

    Alibi memories by KERN meet this requirement. They are designed for paperless recording of up to 100 000 weighing results.
  • Page 88 <Print> followed by confirmation with the PRINT-key will trigger a printout at the optional printer. The content of the data output depends on the settings in the menu <P5.3 GLP>, see chap. 14.2.2. Printout example (KERN YKB-01N): Date 18.05.2015 Time...
  • Page 89: Export / Import Databases To Usb Storage Medium

    15.6 Export / import databases to USB storage medium This option allows to: • Copy / transmit data of the databases “Products”, “User” and “Tare” from one weighing balance to another. • Archive the data of the databases “Weighing Results” and “Alibi” ...
  • Page 90  Connect the USB storage medium to the PC. • To open the “alibi” file you need the optionally available KERN PET-A16 software. • It is not possible to open the „NC“-files as they merely serve the purpose of import to additional devices.
  • Page 91: Application Settings

    16 Application settings Overview of available applications: Weighing see chap. 9. Parts counting see chap. 17. Checkweighing see chap. 18. Dosing see chap. 19. Percent see chap. 20. determination Animal weighing see chap. 21. Density determination see chap. 22. Statistics see chap.
  • Page 92 The factory-setting for the MODE-key makes all applications available. However, the list of available applications can be personalised by the user. That means, only applications set to “YES“ will be shown when the MODE-key is pressed. Enable / disable applications AEJ-C/AES-C/PLJ-C-BA-e-1730...
  • Page 93: Parts Counting

    17 Parts counting Before the balance can count parts, it must know the average part weight (i.e. reference). The balance determines the total weight and divides it by the number of parts (the so-called reference quantity). Based on the calculated reference, single weight counting will follow next.
  • Page 94: Carry Out Parts Counting

    17.2 Carry out parts counting Preparation For assigning two function keys of your choice with the functions <ENTER SAMPLE> and <DETERMINE SAMPLE> see chap. 17.1 or chap. 9.3.10. 17.2.1 Determination of the reference piece weight by weighing  Select application <PARTS COUNTING>, see chap.16.1. The reference single weight last used will be shown in the informational line of text.
  • Page 95  Place as many pieces to add-up as required by the set reference piece number. Wait for steady state display and confirm by pressing the PRINT key.  The weighing balance will calculate the reference single weight and show it in the informational line of text.
  • Page 96 Selecting reference number of parts user-defined (such as 30 items):  If necessary, tare the empty balance container.  Place as many pieces to add-up as required by the set reference piece number. Wait for steady state display and confirm by pressing the PRINT key. ...
  • Page 97: Enter Known Reference Single Weight As Numeric Value

    17.2.2 Enter known reference single weight as numeric value  Select application <PARTS COUNTING>, see chap.16.1. The reference single weight last used will be shown in the informational line of text. At the first start- up as value 0.0000g.  Press the function key assigned to the <ENTER REFERENCE WEIGHT) function (Display example F2).
  • Page 98: Invoking Reference Single Weight From The Product Database

    17.2.3 Invoking reference single weight from the product database Preparation For assigning a function key of your choice to the < SELECT PRODUCT> function see chap. 17.1  Press the function key assigned to the <SELECT PRODUCT> function (Display example F1) ...
  • Page 99: Checkweighing

    18 Checkweighing In checkweighing an upper and a lower limit value (lower / upper threshold) can be established to ensure that the weighed goods are exactly within the established tolerance limits. Any falling short of or exceeding the limits will be indicated on the screen by the indicators <MIN>, <OK>...
  • Page 100: Entering Limits With A Function Key

    18.1.1 Entering limits with a function key  Select application <CHECKWEIGHING>, see chap.16.1. The most recently used limits will be shown in the informational line of text. At the first start-up as value 0.0000g.  Press the function key assigned to the <ENTER THRESHOLD> function (display example F1).
  • Page 101 After setting the limit values, the weighing balance will be ready for check weighing.  Tare, as required, place the load on the weighing pan and start tolerance control. The indicators <MIN>, <OK> or< MAX> will show the sample weight in relation to the tolerance limits.
  • Page 102: Invoke Limits From The Product Database

    18.1.2 Invoke limits from the product database Preparation For assigning the function < SELECT PRODUCT > to a function key see chap. 17.1  Press the function key assigned to the <SELECT PRODUCT> function (Display example F1)  Use the navigation keys to select the desired product and confirm by pressing the PRINT-key.
  • Page 103: Dosing

    19 Dosing During dosing you may for instance fill a container up to a specified target weight or a sample to a specified target weight. The indicators <MIN>, <OK> or< MAX> show the filling status. The additional entry defining ± tolerance can be used to specify the degree of accuracy to be applied.
  • Page 104: Enter Target Weight With The Function Key

    19.1.1 Enter target weight with the function key  Select application <DOSING>, see chap.16.1. The most recently used target weight will be shown in the informational line of text. At the first start-up as value 0.0000g.  Press the function key assigned to the <ENTER REFERENCE WEIGHT) function (Display example F1).
  • Page 105 After setting the target weight /± tolerance the weighing balance will be ready for dosing.  Tare, as required and dose weighing load. The indicators <MIN>, <OK> or< MAX> show the filling status. Sample display State Weighing load below the set target weight / tolerance Target weight reached and within the set tolerance...
  • Page 106: Invoke Target Weight From Product Database

    19.1.2 Invoke target weight from product database Preparation For assigning function keys of your choice to the < SELECT PRODUCT > function see chap. 17.1  Press the function key assigned to the <SELECT PRODUCT> function (Display example F1)  Use the navigation keys to select the desired product and confirm by pressing the PRINT-key.
  • Page 107: Percent Weighing

    20 Percent weighing Percent weighing allows to display weight in percent, in relation to a reference weight (100%). Two different methods are available for calculating the reference (See chap. 20.2.1 and chap.20.2.2). 20.1 Settings <P2.6> DEVIATION> Applications can be adapted to your requirements by creating application-related settings.
  • Page 108: Perform Percentage Weighing

    20.2 Perform percentage weighing Preparation For assigning two function keys of your choice with the functions <ENTER REFERENCE> and <DEFINE REFERENCE WEIGHT> see chap. 20.1 or chap. 9.3.10. 20.2.1 Determination of the reference weight by weighing  For selecting application <DEVIATION> see chap.16.1. The reference weight used will be shown in the informational line of text.
  • Page 109: Enter Known Reference Weight As Numeric Value

    20.2.2 Enter known reference weight as numeric value  For selecting application <DEVIATION> see chap.16.1. The reference weight used will be shown in the informational line of text. At the first start-up as value 0.0000g.  Press the function key assigned to the <ENTER REFERENCE WEIGHT) function (Display example F2).
  • Page 110: Invoke The Reference Weight From The Product Database

    20.2.3 Invoke the reference weight from the product database Preparation For assigning function keys of your choice to the < SELECT PRODUCT > function see chap. 17.1  Press the function key assigned to the <SELECT PRODUCT> function (Display example F1) ...
  • Page 111: Animal Weighing

    21 Animal weighing The Animal weighing application facilitates weighing of unstable loads or weighing under unstable ambient conditions. The weighing balance calculates the mean value of several weighing results obtained over a set time. Two different start / reset modes are available. ...
  • Page 112 AEJ-C/AES-C/PLJ-C-BA-e-1730...
  • Page 113: Animal Weighing With Automatic Start

    The weighing balance will now be ready for animal weighing:  Select application < ANIMAL WEIGHING >, see chap.16.1. When using a weighing container tare with TARE-key.  Place load on pan and start the measuring cycle with the function key assigned to the <START>...
  • Page 114 AEJ-C/AES-C/PLJ-C-BA-e-1730...
  • Page 115 The weighing balance will now be ready for animal weighing:  Select application < ANIMAL WEIGHING >, see chap.16.1. When using a weighing container tare with TARE-key.  Place load on pan and the measuring cycle will be started automatically when the set threshold is reached.
  • Page 116: Determining The Density Of Solid Matter And Fluids

    For density determination we recommend working with the optionally available density determination sets. 1. Analytical balances Density determination set KERN YDB-03 2. Precision balances Density determination set KERN PLS-A01 The sets contain all the accessories and aids required for easy and precise density determination.
  • Page 117: Settings Or Density Determination

    22.1 Settings <P2.7> or <P2.8> DENSITY DETERMINATION> Applications can be adapted to your requirements by creating application-related settings. The settings available depend on the currently enabled application. A part of these settings is global, that is, they are – apart from a few exceptions – identical to the weighing application (See chap 9.3 „Settings <P2.1 WEIGHING>”.
  • Page 118: Statistics

    23 Statistics The Statistics application facilitates the statistical evaluation of weighing values. Settings <P2.10> STATISTICS > Applications can be adapted to your requirements by creating application-related settings. The settings available depend on the currently enabled application. A part of these settings is global, that is, they are – apart from a few exceptions – identical to the weighing application (See chap 9.3 „Settings <P2.1 WEIGHING>”.
  • Page 119 Weight first sample  If required, set weighing balance to zero or tare. Place first sample on pan, wait for stability sign, then press the PRINT-key. Number of sample <1> will appear on the display; the weight will be saved and then printed if an optional printer is connected.
  • Page 120  After having pressed the F2-key you can display the next statistics value each time you press the navigation keys.  To activate log output, confirm option <PRINT> by pressing the PRINT-key. AEJ-C/AES-C/PLJ-C-BA-e-1730...
  • Page 121 Sample log KERN YKB-01N -------------------Statistics---------------- Number of samples 455.60 g 50.6222 g Mean Value 49.939 g Smallest weight value 51.380 g Greatest weight value 1.441 g Difference smallest / greatest weight value 0.39605 g Standard deviation 0.78 % Relative standard deviation...
  • Page 122: Totalization

    24 Totalization The Statistics application allows you to weigh various samples and to add up the weighing values. The total number of samples that can be weighed is limited to 30. Settings <P2.11> ADD UP > Applications can be adapted to your requirements by creating application-related settings.
  • Page 123 Weight first sample  If required, set weighing balance to zero or tare. Place first sample on pan, wait for stability sign, then press the PRINT-key. The informational line of text will show the number of the sample < 1 >; the weight will be saved.
  • Page 124 The total will be displayed and then printed if an optional printer is connected.  Press the function key assigned to the function <FINISH>. The total will be shown and then printed if an optional printer is connected. Sample log KERN YKB-01N -----------------Adding-up---------------- 38.000 g 100.00 g 50.000 g...
  • Page 125 Delete totals memory / start new adding up process  Remove sample, press UNIT-key. The sample counter “N” and the total “S” will be reset to zero. The weighing scale is ready for a new adding up process. AEJ-C/AES-C/PLJ-C-BA-e-1730...
  • Page 126: Peak Value Function

    25 Peak value function This function displays the highest load value (peak value) of a weighing. The peak value remains in the display until it will be deleted. Preferences: Applications can be adapted to your requirements by creating application-related settings. The settings available depend on the currently enabled application. A part of these settings is global, that is, they are –...
  • Page 127 The weighing balance is ready to calculate a peak value:  Select application < F11 MAX. HOLD >, see chap.16.1. From that point onwards the weighing balance will register every weighing value greater than the set threshold.  Place load on pan and weighing will start automatically on reaching the set threshold.
  • Page 128: Pipette Calibration

    26 Pipette calibration  Before starting the weighing process, acclimatise the sample liquid, weighing container, pipette and pipette tip for at least 2 hours.  Use distilled water as a sample fluid. • Ambient temperature 20 – 25°C, temperature fluctuations during calibration ±...
  • Page 129 Select application: AEJ-C/AES-C/PLJ-C-BA-e-1730...
  • Page 130 Enter test parameters:  Use the navigation keys to enter the current test temperature; the active digit will be flashing.  Confirm by pressing the PRINT-key and the display for entering humidity will be shown. Use the navigations keys to enter the current humidity; the active digit will be flashing.
  • Page 131  Use the navigation keys to enter the test volume <V1> (such as 100 µl); the active digit will be flashing. This completes the entry for pipettes with fixed volume. For pipettes with variable volume select volume V2 and V3 as described below. ...
  • Page 132 Performing a pipette test: 1. Measuring sequence for test volume V1:  Place weighing container on pan, wait for stability sign, then tare by pressing the TARE-key. 1. Draw up selected test volume <V1> into pipette and dispense liquid into weighing container.
  • Page 133 2. Measuring sequence for test volume V2:  Follow the same sequence of operations for the second measuring sequence but apply test volume <V2>wit 3. Measuring sequence for test volume V3:  Follow the same sequence of operations for the third measuring sequence but apply test volume <V3>...
  • Page 134 Printout example KERN YKB-01N -------------------Pipette calibration--------------------- Meas. No. Date 05.01.2016 Time 11:34:17 Temp. 20.0°C Humidity 50 % Pressure 1017hPa -------------------------Tested volume 1000 µl------------ 1003 µl 993 µl 1013 µl 1003 µl 993 µl 1003 µl 1013 µl 1053 µl 1003 µl 1023 µl...
  • Page 135: Communication / Setup Menu < P3

    4. USB 1 / type A (for instance connection to USB storage medium or barcode scanner) 5. WLAN (factory option KERN PLJ-A06) The interface has to be configured according to peripheral and desired function, see chap. 0 / 27.2 (the parameters of the USB port are not configurable).
  • Page 136: Configuring A Rs-232 Interface

    27.1 Configuring a <P3.1 / P3.2> RS-232 interface  Go to Communication menu <P3> and select the interface <COM 1> or <COM 2> to be configured.  After selecting <COM 1> or <COM 2> use the navigation keys to select baud rate under communication parameter.
  • Page 137  After selecting baud rate, select the next communication parameter <Parity>. AEJ-C/AES-C/PLJ-C-BA-e-1730...
  • Page 138: P3.3> Wlan Interface (Factory Option Kern Plj-A06)

    27.2 <P3.3> WLAN interface (factory option KERN PLJ-A06) Call up menu: AEJ-C/AES-C/PLJ-C-BA-e-1730...
  • Page 139: P3.3.2 - Select Net

    Available settings <P3.3> P3.3.1 - STATUS (Configure / connected) P3.3.2 - SELECT NET (Search for network) P3.3.3 - NETWORK PARAMETER P3.3.3.1 - NAME (Network name) P3.3.3.2 - PASSWORD (Password for access to network) P3.3.3.3 – CHANNEL No. (Standard <AUTO>) P3.3.3.4- - IP (Address of weighing balance in network) P3.3.3.5 - MASK (subnet mask)
  • Page 140  Enter password and confirm by pressing the PRINT-key. Remark: The connection of a PC keyboard via USB interface makes data entry easier.  The weighing balance program will guide you automatically through the network parameters. Confirm displayed network parameters by pressing the PRINT-key or change, as required;...
  • Page 141: P3.3.3> - Network Parameter

    27.2.2 <P3.3.3> - NETWORK PARAMETER The connection of a PC keyboard via USB interface makes the entry of the network parameters easier.  For invoking menu item < P3.3.3> see chap. 27.2.  Under menu item < P3.3.3.3> select channel <AUTO (YES / NO)>and confirm by pressing the PRINT-key.
  • Page 142  Under menu item < P3.3.3.6> select GATE and confirm by pressing the PRINT-key. To select the next menu item, press the F1-key.  Under menu item < P3.3.3.7> select PORT <default 4000> and confirm by pressing the PRINT-key. To select the next menu item, press the F1-key. ...
  • Page 143: Usb Interfaces

     Disconnect the device from the power supply.  Install the USB driver which is available from our KERN- Homepage www.kern-sohn.com, / Downloads. Select the driver version compatible with your system and execute the exe file. Click on Dialogue <Forward> and the driver will be installed.
  • Page 144 Invoke device manager. Click on „connections„ and the new virtual COM port for the device will be shown. Correct entry is clearly indicated by the name of KERN PLJ series.  Select the shown COM Port such as COM6 according to the transmission software.
  • Page 145: Devices / Setup Menu < P4

    28.1 Continuous data transmission for remote control commands < P4.1 Computer > 1. Select interface <P4.1.1>  Use the navigation keys to select the interface to be applied for connecting the device to the PC. Selectable: COM 1: RS 232 USB: Type B WIFI: Factory option KERN PLJ-A06 AEJ-C/AES-C/PLJ-C-BA-e-1730...
  • Page 146 2. Select type of continuous data transmission <P4.1.2>  Use the navigation keys to select the display for setting continuous data transmission.  Use the navigation keys to select the desired setting and confirm by pressing the PRINT-key. Options: <NONE> Continuous data transmission disabled <ACT.UNIT>...
  • Page 147 3. Select output interval <P4.1.3>  Use the navigation keys to select the display for setting the output intervals for continuous data transmission. AEJ-C/AES-C/PLJ-C-BA-e-1730...
  • Page 148 4. Select log type <P4.1.5>  Use the navigation keys to select the display for selecting the log type.  Use the navigation keys to select the desired setting and confirm by pressing the PRINT-key. Options: <NONE> None <DEFAULT> Standard Protocol <DEF PRINT 1>...
  • Page 149: To Start Data Transmission, Press The Print-Key < P4.2 Printer

    28.2 To start data transmission, press the PRINT-key < P4.2 Printer > Go to menu item <P4.2> to select and configure the interface to be used for output after pressing the PRINT-key. The content for the data output is defined in <...
  • Page 150 For saving measuring logs see chap. 0 <USB PC> USB port type B, PC connection in combination with transmission software (such as KERN SCD 4.0) 2. Enter values (hexadecimal) for prefix / suffix <P4.2.1>  Use the navigation keys to enter the control code for the start of the log and confirm by pressing the PRINT-key.
  • Page 151  Use the navigation keys to enter the control code for the end of the log (such as paper section) and confirm by pressing the PRINT-key. AEJ-C/AES-C/PLJ-C-BA-e-1730...
  • Page 152: P4.3 Barcode Scanner

    28.3 < P4.3 Barcode Scanner > To select the interface for connection to a barcode scanner, go to menu item <P4.3>.  Use the navigation keys to select the interface to be used for data transmission. Confirm your entry by pressing the PRINT-key. AEJ-C/AES-C/PLJ-C-BA-e-1730...
  • Page 153: Communication With External Devices (Printer / Pc)

    Disconnect balance from the power supply and connect to the device interface with a suitable cable. Faultless operation requires an adequate KERN interface cable. For communication parameters of the RS 232 interface (baud rate, bits and parity) for the balance and the external device must match.
  • Page 154: Interface Cable

    29.2 Interface cable  Balance – PC 9-pole  Weighing balance - printer ( CITIZEN, EPSON) 25-pin  Balance - printer 3 (TxD) 1 (RxD) 5 (GND) 3 (GND) 7 - 8 jumpered AEJ-C/AES-C/PLJ-C-BA-e-1730...
  • Page 155: Data Transmission Format

    29.3 Data transmission format 1. After printing the PRINT-key 4-12 14-16 Weighing ˽ ˽ Stability Sign Unit Value Stability symbol [ ˽ ] stable [ ? ] unstable [ ^ ] excess load [ v ] underload Signs [ ˽ ] positive values ] negative values Measuring Value 9 characters aligned right...
  • Page 156 Command 1 – 3 characters Stability symbol [ ˽ ] stable [ ? ] unstable [ ^ ] excess load [ v ] underload Signs [ ˽ ] positive values ] negative values Measuring Value 9 characters aligned right Unit 3 characters aligned left AEJ-C/AES-C/PLJ-C-BA-e-1730...
  • Page 157: Interface Commands

    29.4 Interface commands The weighing balance recognises the commands listed below. Function Commands Zeroing Taring Query tare value Set tare value Send stable weighing value in standard weighing unit Send weighing value immediately in standard weighing unit Send weighing values of all weighing pans in default weighing unit immediately Send stable weighing value in current weighing value Send weighing value immediately in current weighing unit Start continuous output in standard weighing unit...
  • Page 158: General Reply Format

    29.5 General reply format Commands Function ˽ Command accepted, command executing A CR LF Command execution completed ˽ D CR LF (occurs after XX_A only) ˽ Command valid but cannot be executed at the moment I CR LF ˽ Command valid but range exceeded ^ CR LF ˽...
  • Page 159: Detailed Information To Communication Logs

    29.6 Detailed information to communication logs 29.6.1 Zeroing Command: Z CR LF Possible replies: ˽ Command accepted, command executing A CR LF ˽ Command execution completed D CR LF ˽ Command accepted, command executing A CR LF ˽ ^ CR LF Command valid but zero reset range was exceeded Command accepted, command executing ˽...
  • Page 160: Set Tare Value

    Unit: - 3 characters left aligned The tare value will always be shown in the adjustment unit. 29.6.4 Set tare value ˽ Command: UT TARA CR LF, (TARA = tare value) Possible replies: ˽ Command executed OK CR LF ˽ Command valid but cannot be executed at the moment I CR LF ES CR LF...
  • Page 161: Send Weighing Value Immediately In Standard Weighing Unit

    Example: S CR LF Sent command: Send stable weighing value in standard weighing unit ˽ Command accepted, command executing A CR LF ˽˽˽˽ ˽˽˽˽˽˽ ˽ ˽˽ Command executed, 8 . 5 CR LF Weighing value is shown in default weighing unit Stability symbol* instable (3Fh, 0x3F) ˽...
  • Page 162: Send Stable Weighing Value In Current Weighing Value

    29.6.7 Send stable weighing value in current weighing value Command: SU CR LF Possible replies: ˽ A CR LF Command accepted, command executing ˽ E CR LF Time limit for stabilisation of weighing balance display was exceeded ˽ Command valid but cannot be executed at the moment I CR LF ˽...
  • Page 163: Send Weighing Value Immediately In Current Weighing Unit

    29.6.8 Send weighing value immediately in current weighing unit Command: SUI CR LF Possible replies: ˽ Command valid but cannot be executed at the moment I CR LF 7-15 17-19 Stability ˽ ˽ Signs Weight Unit sign Example: Sent command, see chap. 29.4 S U I CR LF ˽...
  • Page 164: Start Continuous Output In Current Weighing Unit

    29.6.11 Start continuous output in current weighing unit ˽ Command: CU1 CR LF Possible replies: ˽ Command valid but cannot be executed at the moment I CR LF ˽ Command accepted, command executing A CR LF Weighing values are shown in current weighing unit 7-15 17-19 Stability...
  • Page 165: Query Lower Tolerance Unit

    29.6.15 Query lower tolerance unit Command: ODH CR LF ˽ Command executed Response: MASA CR LF 4 - 12 14 - 16 ˽ ˽ ˽ Tare Unit Weight: - 9 characters right aligned Unit: - 3 characters left aligned 29.6.16 Query upper tolerance unit Command: OUH CR LF ˽...
  • Page 166: Enter Reference Weight (Percentage Weighing)

    29.6.19 Enter reference weight (percentage weighing) ˽ Command: RM XXXXX CR LF Possible replies: ˽ Command executed OK CR LF ˽ Command valid but cannot be executed at the moment (e. g. I CR LF incorrect operating mode) ES CR LF Syntax error (incorrect weight format) 29.6.20 Confirm / simulation “Press PRINT-key“...
  • Page 167: Enable Automatic Internal Adjustment

    29.6.23 Enable automatic internal adjustment Command: IC0 CR LF Possible replies: ˽ Command executed OK CR LF ˽ Command valid but cannot be executed at the moment (Not I CR LF available in weighing balances with type approval) 29.6.24 Enter serial number Command: NB CR LF Possible replies: ˽...
  • Page 168: List Of Available Operating Modes

    29.6.27 List of available operating modes Command: OMI CR LF Possible replies: OMI˽ CR LF Command accepted, available operating modes are shown N° designation CR LF N° designation CR LF OK CR LF ˽ Command valid but cannot be executed at the moment I CR LF Operating mode - Weighing...
  • Page 169: Confirm Sound Signal

    29.6.30 Confirm sound signal ˽ Command: BP CZAS CR LF Possible replies: BP˽OK CR LF Command executed ˽ No parameter or incorrect format E CR LF ˽ Command valid but cannot be executed at the moment I CR LF 29.6.31 Send all messages implemented Command: PC CR LF Response: PC_A_”Z, T, S, SI, SU, SUI, C1, C0, CU1, CU0, NB, K1, K0, SS, OMI, OMS, OMG,...
  • Page 170: Servicing, Maintenance, Disposal

    Spilled weighing goods must be removed immediately. 30.2 Servicing, maintenance  The appliance may only be opened by trained service technicians who are authorized by KERN.  Before opening, disconnect from power supply. 30.3 Disposal Disposal of packaging and appliance must be carried out by operator according to valid national or regional law of the location where the appliance is used.
  • Page 171: Troubleshooting / Error Messages

    31 Troubleshooting / error messages Possible causes of errors: In case of an error in the program process, briefly turn off the balance and disconnect from power supply. The weighing process must then restart from the beginning. Help: Fault Possible cause The displayed weight does •...

Table of Contents