Table of Contents
Advertisement
Quick Links
"Graphics and specfications may change without notice".
Specifications
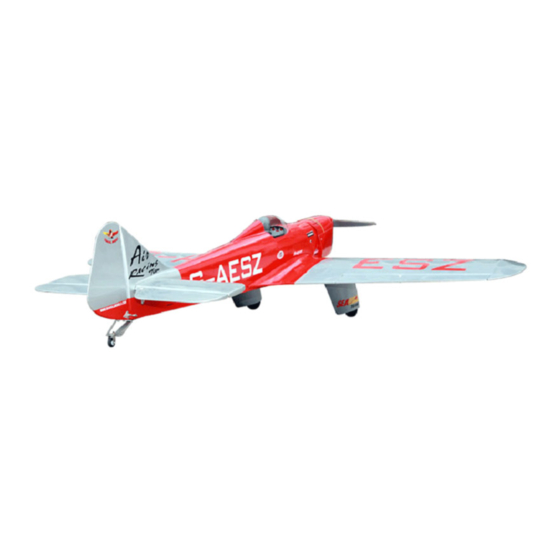
Wingspan------------------------------------- 70.9 in---------------------------- 180cm.
Wing area-------------------------------------945.5 sq.in------------------- 61 sq.dm.
Approximate flying weight-------------- 10.6 - 11.5 lbs----------------4.8-5.2kg.
Length-------------------------------------------- 61.3 in------------------------- 155cm.
Recommended engine size--------------1.6 cu.in ---------------------2-stroke.
Radio System required 4 channels with 6 digital servos/karbonite
or metal gear.
Flying skill level Intermediate/advanced.
Kit features.
•
Ready-made—minimal assembly & finishing required.
•
Ready-covered covering.
•
Photo-illustrated step-by-step Assembly Manual.
Made in Vietnam.
ASSEMBLY MANUAL
Item code : 71
1.8-2.0 cu.in--------------------- 4-stroke.
MS: SEA 71
Advertisement
Table of Contents

Related Manuals for Seagull Models SPARROW HAWK 1.6-2.0


Summary of Contents for Seagull Models SPARROW HAWK 1.6-2.0
- Page 1 MS: SEA 71 ASSEMBLY MANUAL “Graphics and specfications may change without notice”. Item code : 71 Specifications Wingspan------------------------------------- 70.9 in---------------------------- 180cm. Wing area-------------------------------------945.5 sq.in------------------- 61 sq.dm. Approximate flying weight-------------- 10.6 - 11.5 lbs----------------4.8-5.2kg. Length-------------------------------------------- 61.3 in------------------------- 155cm. Recommended engine size--------------1.6 cu.in ---------------------2-stroke. 1.8-2.0 cu.in--------------------- 4-stroke.
-
Page 2: Fuselage Assembly
Instruction Manual INTRODUCTION. Thank you for choosing the SPARROW HAWK ARTF by SEAGULL MODELS. The SPARROW HAWK was designed with the intermediate/advanced sport flyer in mind. It is a scale airplane which is easy to fly and quick to assemble. The airframe is conventionally built using balsa, plywood to make it stronger than the average ARTF , yet the design allows the aeroplane to be kept light. -
Page 3: Hinging The Ailerons
www.seagullmodels.com NOTE: To avoid scratching your new aero- plane we suggest that you cover your workbench with an old towel. Keep a couple of jars or bowls handy to hold T-pins the small parts after you open the bags. Please trial fit all parts. Make sure you have the correct parts and that they fit and are aligned properly before Hinge... -
Page 4: Engine Mount Installation
SPARROW HAWK Instruction Manual 5) Turn the wing panel over and deflect the aileron in the opposite direction from the opposite side. Apply thin C/A glue to each hinge, making sure that the C/A penetrates into both the aileron and wing panel. 6) Using C/A remover/debonder and a paper towel, remove any excess C/A glue that may have accumulated on the wing or in the... -
Page 5: Installing The Stopper Assembly
www.seagullmodels.com Balsa wood. Thread locker glue. Silicon tubing not inclued. Vent tube. Fuel pick up tube. Fuel fill tube. INSTALLING THE STOPPER ASSEMBLY. 1) Using a modeling knife, carefully cut Carefully use a lighter or heat gun to off the rear portion of one of the 3 nylon tubes permenently set the angle of the vent tube. -
Page 6: Installing The Battery
SPARROW HAWK Instruction Manual INSTALLING THE BATTERY. Battery. Attach the silicone fuel and pressure pipes to the tank. The lower pipe is the ‘feed’ and the upper two the ‘pressure and fill’. The fill pipe is the next pipe. THROTTLE SERVO ARM INSTALLATION. -
Page 7: Cowling Installation
www.seagullmodels.com 4) Remove the engine. Using an drill bit, Trim and cut. drill the mounting holes through the engine mount at the four locations marked. 3 x 15mm. 150mm. Trim and cut. 5.2mm. Trim and cut. 2) While keeping the back edge of the cowl flush with the marks, align the front of Pushrod wire. -
Page 8: Installing The Spinner
SPARROW HAWK Instruction Manual THROTTLE-ELEVETOR-RUDDER SERVO INSTALLING. Because the size of servos differ, you may need to adjust the size of the precut open- ing in the mount. The notch in the sides of the mount allow the servo lead to pass through. 1) Install the rubber grommets and brass collets onto the throttle servo. -
Page 9: Installing The Switch
www.seagullmodels.com Using a small weight ( Weighted fuel pick-up INSTALLING THE SWITCH. ) and string, feed the string through works well the wing as indicated. Install the switch into the precut hole in the side of the fuselage. String. Small weight. Small weight. -
Page 10: Aileron Control Horn Installation
SPARROW HAWK Instruction Manual 1) Aileron control horn: Mix a small amount of 30 minute epoxy and lightly coat the inside of the hole in the aileron and the 3x45mm control horn screw. String. Wing. Aileron. 2) Thread the screw (insert the washer) into the hole from the top of surface. -
Page 11: Aileron Pushrod Installation
www.seagullmodels.com INSTALLING THE MAIN GEAR WIRES. AILERON PUSHROD INSTALLATION. Aileron pushrods assembly follow pictures 3 x 15mm. below. Pushrod L= 114mm. M lock Metal Levis. Center the servo using the radio system. Support mounting block. 1) Using a modeling knife, remove the covering from over the two main gear mount- ing slots located in the bottom of the wing. - Page 12 SPARROW HAWK Instruction Manual Support mounting block possition. Remove covering. 1.5mm. 1.5mm. Epoxy glue. 6) Reinstall the gear wire and install the 3) The landing gear wire is held in place straps using the four 3 x 15mm wood screws. using two nylon landing gear straps and four Tighten the screws completely to secure the 3mm x 15mm wood screws.
-
Page 13: Wing Assembly
www.seagullmodels.com WING ASSEMBLY. NOTE: We highly recommend using 30 minute epoxy as it is stronger and provides more working time, allowing the builder to properly align the parts. Using fast cure epoxy when joining the wing halves could result in the glue drying before the wing halves are aligned properly which may result in failure of the wing centre section during flight. - Page 14 SPARROW HAWK Instruction Manual Carefully slide the two wing halves together Remove the covering. and firmly press them together, allowing the excess epoxy to run out. There should not be any gap in the wing halves. Use rubbing alcohol and a paper tower to clean up any excess epoxy.
-
Page 15: Elevator - Control Horn Installation
www.seagullmodels.com 4) Slide the two horizontal fin halves together and carefully align them at possition on the fuselage. Wipe away any excess epoxy using paper towels. Hinge. C/A glue. Hinge. Covering strip. C/A glue. Epoxy. Epoxy. INSTALLING HORIZONTAL FIN. 1) Remove the covering as same as pictures shown below. -
Page 16: Rudder Control Horn Installation
SPARROW HAWK Instruction Manual 2) Elevator pushrods assembly follow pictures below. Right side. Pushrod L= 210mm. 3.2mm. M lock Elevator control horn. Metal Levis. RUDDER CONTROL HORN INSTALLATION. Rudder control horn: Using the same tectniques used aileron control horn. See picture below. control horn. -
Page 17: Mounting The Tail Wheel
www.seagullmodels.com MOUNTING THE TAIL WHEEL. See picture below. M3 lock nut. Cable wire. M3 x10 mm. 3x25mm. 3x25mm. With the radio on, check the operation of the rudder. Adjust the cables so when the rudder servo is centered, the rudder is centered as well. -
Page 18: Installing The Receiver
SPARROW HAWK Instruction Manual INSTALLATION PILOT. Receiver. Tie Wrap. 2 x8 mm. Silicon glue. 10 mm. Antenna. ATTACHMENT WING - FUSELAGE. Bolt the wing to fuselage. Machine screw 2 x 8mm. Wing bolt. Silicon glue. INSTALLING THE RECEIVER. 1) Plug the servo leads and the switch lead into the receiver. -
Page 19: Control Throws
www.seagullmodels.com 2) If the nose of the plane falls, the plane is 4) By moving the position of the adjust- nose heavy. To correct this first move the bat- able control horn out from the control surface, tery pack further back in the fuselage. If this is you will decrease the amount of throw of that not possible or does not correct it, stick small control surface. - Page 20 SPARROW HAWK Instruction Manual 6) Check to ensure the control surfaces 8) Properly balance the propeller. An out are moving the proper amount for both low of balance propeller will cause excessive vi- and high rate settings. bration which could lead to engine and/or air- frame failure.
- Page 21 www.seagullmodels.com Inspection or Repairs If this Product needs to be inspected or repaired, please call for a Return Merchandise Authorization (RMA). Pack the Product securely using a shipping carton. Please note that original boxes may be included, but are not designed to withstand the rigors of shipping without additional protection.
Need help?
Do you have a question about the SPARROW HAWK 1.6-2.0 and is the answer not in the manual?
Questions and answers