Table of Contents
Advertisement
Quick Links
WWW.SEAGULLMODELS.COM
ASSEMBLY MANUAL
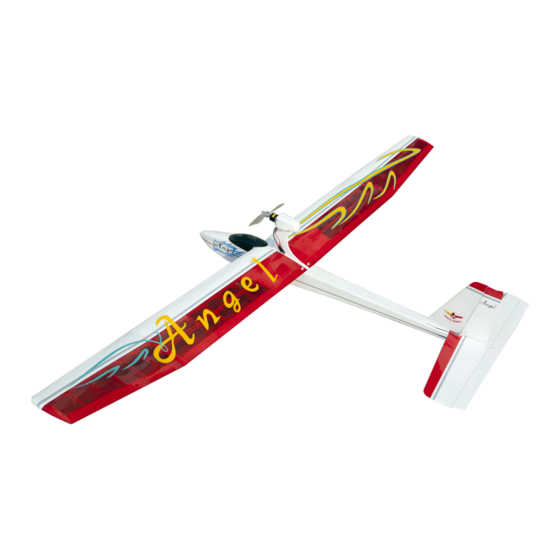
AN GE L
2000 glider
" Graphics and specifications may change without notice " .
MS: 129
Specifications:
Wingspan---------------78.7 in ( 200cm).
Wing area---------------582.8sq.in ( 37.6sq.dm).
Weight-------------------2.4lbs ( 1.1 kg).
ARF
Length-------------------45.1 in ( 114.6cm).
Motor-------------------15 brushless outrunner motor.
Radio--------------------4 channel with 2 servos.
Electric conversion: Optional.
www.seagullmodels.com
1
Advertisement
Table of Contents

Related Manuals for Seagull Models ANGEL GLIDER 2000


Summary of Contents for Seagull Models ANGEL GLIDER 2000
- Page 1 WWW.SEAGULLMODELS.COM ASSEMBLY MANUAL AN GE L 2000 glider “ Graphics and specifications may change without notice “ . MS: 129 Specifications: Wingspan---------------78.7 in ( 200cm). Wing area---------------582.8sq.in ( 37.6sq.dm). Weight-------------------2.4lbs ( 1.1 kg). Length-------------------45.1 in ( 114.6cm). Motor-------------------15 brushless outrunner motor. Radio--------------------4 channel with 2 servos.
-
Page 2: Kit Contents
Instruction Manual. INTRODUCTION. Thank you for choosing the ANGEL 2000 GLIDER ARTF by SEAGULL MODELS COMPANY LTD,. The ANGEL 2000 GLIDER was designed with the intermediate/ad- vanced sport flyer in mind. It is a semi scale airplane which is easy to fly and quick to as- semble. -
Page 3: Hinging The Rudder
WWW.SEAGULLMODELS.COM HINGING THE RUDDER. KIT CONTENTS. Note : The control surfaces, including the ailer- SEA12901 Fuselage ons, elevators, and rudder, are prehinged with SEA12902 Wing set hinges installed, but the hinges are not glued in SEA12903 Tail set place. It is imperative that you properly adhere the hinges in place per the steps that follow us- ing a high-quality thin C/A glue. -
Page 4: Hinging The Elevators
Angel 2000 Glider Instruction Manual. 3) Slide the stabilizer into place in the precut HINGING THE ELEVATORS. slot in the rear of the fuselage. The stabilizer should be pushed firmly against the front of Glue the elevator hinges in place using the slot. - Page 5 WWW.SEAGULLMODELS.COM 8) Next assemble and install the elevator When cutting through the covering to control horn. remove it, cut with only enough pressure to only cut through the covering itself. Cutting Start each screw partway into the holes into the balsa structure may weaken it. in the control horn, as shown.
-
Page 6: Installing Vertical Stabilizer
Angel 2000 Glider Instruction Manual. 2) Using a modeling knife, remove the cov- ering from over the precut hinge slot cut into the lower rear portion of the fuselage. 2x15mm Remove covering. INSTALLING VERTICAL STABILIZER. 3) Next assemble and install the rudder con- trol horn as the process for elevator control horn. -
Page 7: Installing The Fuselage Servos
WWW.SEAGULLMODELS.COM INSTALLING THE FUSELAGE SERVOS. Vertical Because the size of servos differ, you Stabilizer. Horizontal 90º may need to adjust the size of the precut Stabilizer. opening in the mount. The notch in the sides of the mount allow the servo lead to pass through. - Page 8 Angel 2000 Glider Instruction Manual. ELEVATOR - RUDDER PUSHROD Nylon Snap keeper. HORN INSTALLATION. 1) Install the elevator control horn using the same method as with the aileron con- trol horns. 2) Position the elevator control horn on the both side of elevator. M2 clevis.
-
Page 9: Wing Assembly
WWW.SEAGULLMODELS.COM WING ASSEMBLY. Remove covering. ELECTRIC POWER CONVERSION. Locate the items neccessary to install the electric power conversion included with your model. -
Page 10: Installing The Spinner
Angel 2000 Glider Instruction Manual. 2x8 mm INSTALLING THE SPINNER. Install the spinner backplate, propeller and spinner cone. The propeller should not touch any part of the spinner cone. If it does, use a sharp modeling knife and carefully trim away the spinner cone where the propel- ler comes in contact with it. - Page 11 WWW.SEAGULLMODELS.COM ATTACHMENT WING- FUSELAGE. INSTALLING THE BATTERY - RECEIVER. 1) Plug the five servo leads and the switch lead into the receiver. Plug the battery pack lead into the switch also. 2) Wrap the receiver and battery pack in the protective foam rubber to protect them from vibration.
- Page 12 Angel 2000 Glider Instruction Manual. BALANCING. 1) It is critical that your airplane be balanced correctly. Improper balance will cause your plane to lose control and crash. THE CENTER OF GRAV- ITY IS LOCATED 86MM BACK FROM THE LEADING EDGE OF THE WING AT THE WING ROOT.
-
Page 13: Control Throws
WWW.SEAGULLMODELS.COM Moving the balance aft makes the model more agile with a lighter and snappier ”feel”. In any case,please start at the lo- 86 mm cation we recommend . With the wing attached to the fuselage, all parts of the model installed ( ready to fly), and empty fuel tanks, hold the mod- el at the marked balance point with the stabilizer level. -
Page 14: Flight Preparation
Angel 2000 Glider Instruction Manual. FLIGHT PREPARATION. PREFLIGHT CHECK. 1) Completely charge your trans- mitter and receiver batteries before Check the operation and direction your first day of flying. of the elevator, rudder, ailerons and throttle. 2) Check every bolt and every glue joint in the ANGEL 2000 GLIDER to ensure that everything is tight and well bonded.
Need help?
Do you have a question about the ANGEL GLIDER 2000 and is the answer not in the manual?
Questions and answers