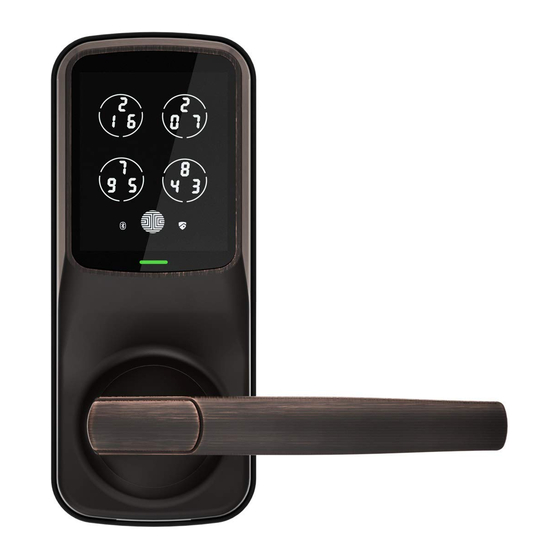
Lockly LATCH EDITION SECURE PGD628 Installation Manual
Hide thumbs
Also See for LATCH EDITION SECURE PGD628:
- Installation manual (30 pages) ,
- Installation manual (23 pages) ,
- Installation manual (21 pages)
Advertisement
Quick Links
Advertisement

Subscribe to Our Youtube Channel
Related Manuals for Lockly LATCH EDITION SECURE PGD628


Summary of Contents for Lockly LATCH EDITION SECURE PGD628
- Page 1 SECURE INSTALLATION MANUAL LATCH EDITION...
- Page 3 BM4 x 32MM Screw Spindle Positioning Rod Exterior Assembly For installing mounting plate (LK) Latch AUTHENTIC LOCKLY PRODUCT | DESIGNED IN USA | CARD IS PRINTED WITH A SPECIFIC PATTERN Locking Pin KA4 x 20MM Screw Keys LOCK SERIAL Strike Plate PGDxxxxxxxxxx...
- Page 5 GETTING STARTED - YOU WILL NEED All the parts you need to install the Lockly Secure Latch Edition is included in your package. ® You will require the following tools with some optional items for ease of installation. Required Tools...
-
Page 6: Step 1: Preparing The Door
STEP 1: PREPARING THE DOOR If you are installing the Lockly Secure ® smart lock on an existing door, please remove existing door hardware and latch or bolts before installing the new lock. You can remove most existing door locks with a screwdriver. - Page 7 " - 2" (35mm - 50mm) Measure and confirm your door is between 1 " - 2" ( 35mm - 50mm). Measure and confirm the hole in the door is 2 " (54mm). 1" 25mm " Measure and confirm that the backset 54mm is between 2 "...
- Page 8 STEP 2: INSTALLING THE LOCKSET 2.1 Measure the distance between center of front door hole to the edge of your door and select the correct lockset. Select F1 if 2-3/8"(60mm) or F2 if 2-3/4"(70mm). 2-3/8" (60mm) 2-3/4" (70mm) 2.2 Install the lockset with the slanted side of the latch facing towards the closing direction. Example 2 Example 1 Slanted side Facing Door Frame when closing...
- Page 9 STEP 3: CHANGING HANDLE ORIENTATION FOR RIGHT OR LEFT SWING DOORS How to determine if your door is a Right Swing or Left Swing door? While facing the door, if the door hinges are on the right side of the door, you have a Right Swing Door.
- Page 10 Use the provided Clamping tool (R) to push in the two metal pins at the base of the lock handle, located at the 3 o’clock and 9 o’clock positions, and remove the handle once the pins are compressed. Rotate the handle 180 degrees to the other side of the lock.
- Page 11 Confirm that your installation was complete by checking if the pins are flush against the handle, and has popped out. Adjust the handle accordingly to make sure the pins are fully decompressed and sits flush against the surface. Check that your handle works smoothly by giving it a turn up and down.
- Page 12 Changing the Interior Handle Orientation Remove the screw by turning counter clockwise and rotate the handle 180° in the direction of the arrow as shown. Make sure the screw hole is aligned with the marker as illustrated. Securely screw clockwise as shown to complete your handle orientation change.
- Page 13 STEP 4: PREPARING LOCK FOR INSTALLATION If you drilled a hole in Step 1, use Slotted Barrel Extension (U) and securely tighten with a flat head screwdriver by turning it clockwise onto the lock. If you did not drill a hole in step 1, you can leave this pole removed. Install Spindle (C) with the holes side into the base of the lock Carefully bend the end of the locking...
- Page 14 STEP 5: INSTALLING THE LOCK (EXTERIOR) Install the exterior lock as shown to the left by aligning the lock straight and passing the cable and attached rods through the lockset. Exterior Pass the Spindle (C) through Align the lock straight and press the center of the lockset, and hard (if you use the Adhesive tape the round rods through the sides...
- Page 15 STEP 6: INSTALLING THE LOCK (INTERIOR) Insert Positioning Rods (V) into Interior the holes to the left and right of the Spindle (C). The holes are located at the 3 o’clock and 9 o’clock positions. Interior Mounting Plate (LK) will go against the interior side of your door.
- Page 16 Screw (O) Pull the cable from the lock exterior through the rectangular hole underneath the positioning rods and spindle. Secure the hole above the spindle with screws (O). Remove the position rods (V) *Secure top with M1 or M2 and replace them with screws (O) Tighten clockwise until the mounting plate is secure.
- Page 17 Plug the cable that is coming through the door into the lock interior. Make sure you match the direction of the plug correctly and matching the red side of the plug with the red side on the lock. Secure the connection by ensuring the snap is inserted tightly.
- Page 18 Once the lock interior is flush against the mounting plate, secure the lock to the P (3X) plate by screwing clockwise using provided screws (P). Insert 4 AA batteries into the lock by aligning the positive (+) and negative (-) orientation markings on the batteries to the battery chamber.
- Page 19 STEP 7: INSTALLING THE DOOR STRIKE Close your door to see if your lock closes securely with your existing door strike. If the lock closes securely, you may keep the existing door strike without removing the old hardware. However, it’s recommended that you use our door strike.
- Page 20 STEP 8: DOWNLOAD THE LOCKLY ® Congratulations! You have completed the Lockly Secure physical lock installation. To complete ® your setup, download the Lockly app from the iOS or Google Play app Store and follow on-screen ® instructions. Scan or visit Lockly.com/app...
- Page 21 PGH200 SECURE LINK You can add live status monitoring and voice control capabilities to your Lockly Smart Lock with ® Amazon Alexa or Google Assistant via installing the Secure Link Wi-Fi Hub and Door Sensors (Sold Separately) Know it’s Closed.
- Page 22 Certified FCC Warning: This device complies with Part 15 of the FCC Rules. Operation is subject to the following two conditions: (1) This device may not cause harmful interference, and (2) this device must accept any interference received, including interference that may cause undesired operation. NOTE 1: This equipment has been tested and found to comply with the limits for a Class B digital device, pursuant to part 15 of the FCC Rules.
- Page 23 WARNING: This product can expose you to chemicals including Lead, which is known to the State of California to cause cancer. For more information go to www.P65Wamings.ca.gov. SECURE We’re here to help! help@lockly.com https://lockly.com/help IMPGD62820200429...
- Page 24 SECURE For the latest version of this manual, please visit the following link: http://lockly.com/help...
Need help?
Do you have a question about the LATCH EDITION SECURE PGD628 and is the answer not in the manual?
Questions and answers