Table of Contents
Advertisement
Quick Links
Installation, Operation,
and Maintenance
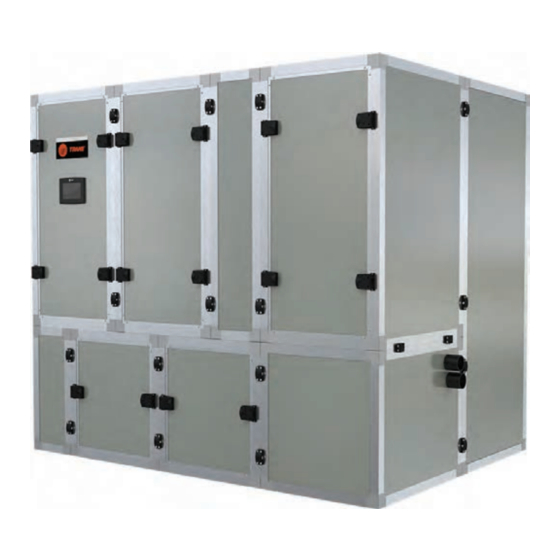
Modular Self-Contained
40 to 80 Tons
SCWM
40 to 80 Tons
Only qualified personnel should install and service the equipment. The installation, starting up, and servicing
of heating, ventilating, and air-conditioning equipment can be hazardous and requires specific knowledge and
training. Improperly installed, adjusted or altered equipment by an unqualified person could result in death or
serious injury. When working on the equipment, observe all precautions in the literature and on the tags,
stickers, and labels that are attached to the equipment.
October 2019
SAFETY WARNING
PKG-SVX027A-EN
Advertisement
Table of Contents

Related Manuals for Trane SCWM Series


Summary of Contents for Trane SCWM Series
- Page 1 Installation, Operation, and Maintenance Modular Self-Contained 40 to 80 Tons SCWM 40 to 80 Tons SAFETY WARNING Only qualified personnel should install and service the equipment. The installation, starting up, and servicing of heating, ventilating, and air-conditioning equipment can be hazardous and requires specific knowledge and training.
- Page 2 ALWAYS refer to the appropriate MSDS/SDS and compounds have the same potential impact to the OSHA/GHS (Global Harmonized System of environment. Trane advocates the responsible handling of Classification and Labelling of Chemicals) guidelines all refrigerants-including industry replacements for CFCs for information on allowable personal exposure...
- Page 3 Copyright This document and the information in it are the property of Trane, and may not be used or reproduced in whole or in part without written permission. Trane reserves the right to revise this publication at any time, and to make changes to its content without obligation to notify any person of such revision or change.
-
Page 4: Table Of Contents
Table of Contents Overview Preliminary Refrigerant Charging ..29 ....... 7 R-410A Compressors Charging and Wiring the Unit . - Page 5 Table of Contents quence of Operation Pre-Startup ....43 ......58 Occupied Supply Air Temperature Control Pre-Startup Checklist .
- Page 6 Table of Contents Flow Switch ..... . . 69 Maintenance Periodic Checklists ..69 Monthly Checklist .
-
Page 7: Overview
Overview Modular Self-Contained Unit Note: One copy of this document ships inside the control panel of each unit and is customer property. It must Components be retained by the unit’s maintenance personnel. This manual describes proper installation, operation, and Modular self-contained units are complete HVAC systems maintenance procedures for water cooled systems. -
Page 8: Standard Controls
The Modular Series self-contained unit is controlled by a microelectronic programmable control system that has Standard controls supplied with the unit include the Trane been programmed from the factory specifically for the UC600 unit controls and the TD-7 touch screen display. All Modular Series self-contained application. -
Page 9: Model Number Descriptions
Model Number Descriptions Modular Self Contained Digit 1 — Unit Model Digit 16 — Economizer Digit 28 — Control Interface Options S = Self Contained 0 = No Economizer W = With Water Side Economizer A = UC600 VAV Control Scheme Digit 2 —... -
Page 10: General Data
No. of fans Note: All performance data is provided in the Performance Selection Program. Contact Trane Sales at 770-988-8338 for more information. (a) All performance data is provided in the Performance Selection Program. Contact MJC Sales at 770-988-8338 for more information. - Page 11 General Data Table 2. SCWM EER/IEER ratings (continued) AHRI Net Cooling Capacity Tonnage Model No. IEER (VAV) (BTUH) SCWMN05LF 15.8 19.5 SCWMN050F 14.9 19.5 SCWMN05L4 15.8 19.5 SCWMN0504 14.9 19.5 SCWMN06LF 15.7 18.5 SCWMN060F 14.8 18.5 SCWMN06L4 15.7 18.5 SCWMN0604 14.8 18.5 SCWMN07LF...
- Page 12 Unit Size Rows Height Length 40 Ton 50 Ton 60 Ton MSC* 70 Ton MSC* 80 Ton *QTY (2) Important: All performance data is provided in the Performance Selection Program. Contact your local Trane Sales office for more information. PKG-SVX027A-EN...
-
Page 13: Pre-Installation
• Verify that the nameplate data matches the sales order Note: Notify your Trane representative of the damage and bill of lading. and arrange for repair. Have the carrier inspect the •... -
Page 14: Inspection For Concealed Damage
Pre-Installation Inspection for Concealed Damage • Take photos of the damage, if possible. • The owner must provide reasonable evidence that the Visually inspect the components for concealed damage as damage did not occur after delivery. soon as possible after delivery and before it is stored. Repair If concealed damage is discovered: •... -
Page 15: Dimensional Data
Dimensional Data Figure 3. Unit dimensions (in inches) WIDTH DEPTH Condenser pipe Connections Table 6. Unit dimensions (in inches) Model Width Height Depth 40/40L 50/50L 60/60L 70/70L 80/80L PKG-SVX027A-EN... - Page 16 Dimensional Data Figure 4. Fan assembly footprint (in inches) TOP VIEW [1384] 54.49 [700] [876] 34.50 27.56 FRONT VIEW SIDE VIEW PKG-SVX027A-EN...
- Page 17 Dimensional Data Figure 5. Variable speed compressor assembly footprint (in inches) TOP VIEW [749] 29.50 [870] [700] 34.26 27.56 FRONT VIEW SIDE VIEW PKG-SVX027A-EN...
- Page 18 Dimensional Data Figure 6. Starter cassette assembly footprint (in inches) 1384 54.49 HEIGHT 27.56 34.50 WIDTH DEPTH PKG-SVX027A-EN...
- Page 19 Dimensional Data Figure 7. Evaporator cassette assembly footprint (in inches) DEPTH WIDTH HEIGHT Table 7. Evaporator cassette dimensions (in inches) Model Width Height Depth 40/40L 50/50L 60/60L 70/70L 80/80L PKG-SVX027A-EN...
-
Page 20: Service Clearances
Dimensional Data Drain is shown exiting left hand side of unit (as facing 'fan side' of unit). Drain is located 30.7" from 'filter side' of unit. Figure 8. Condensate drain location 1.5 DIA CONDENSATE 30.7 DRAIN PIPE Note: Unit is not internally trapped. Installer must externally trap the condensate line. -
Page 21: Weights
Weights Table 9. Unit weights Base Weight Waterside Economizer Tonnage (lbs) (kg) (lbs) (kg) 40 Ton 3041 1379 50 Ton 3506 1590 60 Ton 3641 1652 70 Ton 4733 2146 80 Ton 4733 2146 Note: All unit weights include refrigerant, water, and controllers. Table 10. - Page 22 Weights Table 12. Unit shipping weights (starter cassette) Unit Weight Starter Cassette Weight Tonnage Overall dimensions Starter Cassette (lbs) (230 VAC) 40 Ton 70"x 84" x 95.5" 2933 34.5"x 54.5"x 27.6" 50 Ton 70"x 84" x 95.5" 3365 34.5"x 54.5"x 27.6" 60 Ton 70"x 84"...
-
Page 23: Installation - Mechanical
Important: Vibration isolation is not necessary for the unit since the factory internally isolates the compressors, thus creating double isolation. Trane strongly recommends that you consult a vibration specialist when considering double isolation. In general, Trane does not recommend double- isolation. -
Page 24: Typical Unit Layout
Installation - Mechanical Typical Unit Layout Figure 10. Typical layout of units (40 to 80 tons) left hand electrical and right hand water 40 TON 50 TON EVAP STARTER EVAP STARTER FAN 1,2 FAN 3 FAN 1,2 FAN 3 DOOR CONTROL DOOR CONTROL... -
Page 25: Installation Summary
Installation - Mechanical Installation Summary 3. Add fixed speed compressor B condensing unit The steps below provide a summary of Installation steps for installing the modular self-contained. Read all installation instructions before starting installation as the below is not a complete summary of all steps required. Note: The installation images that follow depict a 60 ton, right-hand electrical, left-hand water unit. - Page 26 Installation - Mechanical 6. Add fans 3 and 4 cassette (for left hand electrical unit, 9. Add starter/control panel cassette add this cassette on right side of unit). 10. Complete unit 7. Add fan spacer 8. Add fans 1 & 2 cassette PKG-SVX027A-EN...
- Page 27 Use the services of a qualified water treatment specialist to determine what water treatment, if any, is required. Trane assumes no responsibility for equipment failures which result from untreated or improperly treated water, or saline or brackish water.
-
Page 28: Condensate Drain Connections
Installation - Mechanical 9. Install differential pressure switch on the water inlet Figure 15. Condenser water piping components for and water outlet. Unit control scheme will trend water cooling tower system pressure drop and alert user when internal 20 mesh screen needs to be cleaned. -
Page 29: Interconnecting Piping
Installation - Mechanical If no nitrogen escapes the access valve, leak test the unit Remove caps with a tube cutter to minimize risk of getting refrigerant system to determine the leak source, and chips inside piping. repair. See Maintenance section, “Refrigerant Leak Test Cleanliness is extremely important during system Procedure,”... -
Page 30: Charging And Wiring The Unit
Installation - Mechanical NOTICE WARNING Compressor Damage! Explosion Hazard! Failure to follow instructions below could result in Failure to properly regulate pressure could result in a compressor failure. violent explosion, which could result in death, serious injury, or equipment or property-only- damage. If it becomes necessary to remove or recharge the system with refrigerant, it is important that the When using dry nitrogen cylinders for pressurizing... - Page 31 Installation - Mechanical Figure 17. Fixed speed compressor power and Figure 19. Fixed speed compressor power and communication wiring communication wire routing Figure 20. Compressor communication terminations Figure 18. Variable speed power and communication wiring Note: Pluggable connectors are color coded and individually keyed for ease of installation PKG-SVX027A-EN...
-
Page 32: Fan Installation
Installation - Mechanical 4. Verify oil is present in each compressor sight glass. Figure 21. Compressor power wire routing to starter (Adjust if necessary). panel 5. Turn field-supplied unit disconnect ON to energize crankcase heaters on fixed speed compressors. Verify crankcase heaters are operating. -
Page 33: Duct Connections
Installation - Mechanical Figure 24. Fan power and communication wire routing Figure 26. Fan communication terminations - pluggable connectors are color coded for ease of installation Figure 25. Fan power and communication wiring Figure 27. Fan power terminations Duct Connections Return air enters the rear of the unit and conditioned supply air discharges through the top. -
Page 34: Final Installation
Make duct connections to the unit with a flexible material Figure 29. 3D-Intelliclamp™ such as heavy canvas. If a fire hazard exists, Trane recommends using Flex weave 1000, type FW30 or equivalent canvas. Use three inches for return duct and three inches for discharge duct. -
Page 35: Electrical Installation
Installation - Mechanical e. Discharge air temperature Figure 31. TD7 Face plate Electrical Installation CAUTION Live Electrical Components! Failure to follow all electrical safety precautions when exposed to live electrical components could result in death or serious injury. When it is necessary to work with live electrical components, have a qualified licensed electrician or other individual who has been properly trained in handling live electrical components perform these... -
Page 36: Installation - Electrical
Installation - Electrical Unit Wiring Diagrams Voltage Range Voltages must be within ±10% the nameplate voltage. Specific unit wiring diagrams are provided on the inside of Ensure the unit voltage is balanced by measuring at the the control panel door. Use these diagrams for compressor terminals. -
Page 37: Selection Procedures
Installation - Electrical Selection Procedures • RLA = Rated Load Amps • Compressor Output = VFD drive output • Compressor LRA = Locked Rotor Amps • Voltage utilization range is ±10% • Compressor Input = VFD drive Input Determination of Minimum Circuit Ampacity (MCA) MCA = 1.25 x Largest motor amps/VFD Input + the sum of If the rating value calculation does not equal a standard the remaining motor amps. - Page 38 Installation - Electrical Table 18. Electrical service sizing data — motors — 40 to 80 tons Motor Data Compressor (EA) Fan (EA) Unit Wiring Fixed Speed Variable Speed Model Nameplate Voltage Input Tonnage Number Voltage Range MCA MOP Disc Qty SCWMN04LF 208-230/60/3 187 - 253 186.6 250...
- Page 39 Installation - Electrical Table 19. Electrical data — 40 to 80 tons Compressor (EA) Fan (EA) Fixed Speed Variable Speed Max Input Tonnage Model Number Nameplate Voltage SCWMN04LF 208-230/60/3 55.77 18.6 SCWMN040F 208-230/60/3 55.77 6.15 18.6 SCWMN04L4 460/60/3 23.72 SCWMN0404 460/60/3 23.72 6.15...
-
Page 40: Static Pressure Transducer Installation (Vav Units Only)
Installation - Electrical Table 20. Compressor electrical data — 40 to 80 tons (continued) Compressor (EA) Fixed Speed Variable Speed Tonnage Model Number Nameplate Voltage Max Input (A) SCWMN08LF 208-230/60/3 55.77 SCWMN080F 208-230/60/3 55.77 SCWMN08L4 460/60/3 23.72 SCWMN0804 460/60/3 23.72 Table 21. -
Page 41: Zone Sensor Options For Control Units
Sheet Metal Screws energized. For variable frequency drives or other energy (provided by installer) NOTE: storing components provided by Trane or others, refer to Pleace sensor inlet perpendicular to airflow. the appropriate manufacturer’s literature for allowable waiting periods for discharge of capacitors. Verify with a CAT III or IV voltmeter rated per NFPA 70E that all capacitors have discharged. -
Page 42: Mounting Location
Installation - Electrical convention of connecting zone sensor terminals to like NOTICE numbered unit terminals (1 to 1, 2 to 2, etc.).The connection detail is shown on the unit wiring Use Copper Conductors Only! diagrams, which are located in the unit control panel. Failure to use copper conductors could result in 3. -
Page 43: Operating Principles
Fan Operation ® ® 2. Tracer — The Trane Tracer system can control the occupied/unoccupied status of the self- contained unit. When all alarms are cleared, the unit is occupied, and the local auto stop is in auto, all fans that are available will start 3. -
Page 44: Fan Operation
Operating Principles • The amount of protection the compressor is receiving Inadvertently applying 24 VAC to the VS against flooding. drive terminal block will permanently damage the drive. The expected range for superheat is 11-15°F at full load conditions. At part load, expect a properly adjusted On the fixed speed compressors, if an HPC opens, the 24 expansion valve to control to 8-12°F superheat. -
Page 45: Fixed Speed Compressor (Fs)
Operating Principles Variable Speed Compressor (VS) circuit is locked out on a fault and a diagnostic is annunciated. The VS compressor does not have an external crankcase Fixed Speed Compressor (FS) heater (like FS compressors). Instead, whenever the VS compressor is off, the VS drive applies a voltage to the Each FS compressor has two 24 VAC, 30 W crankcase compressor motor stator such that the compressor heaters. - Page 46 Operating Principles The Unit Controller's TD7 will annunciate a Limit High Pressure Limit conditions can be caused by the following: Condition if an FS compressor circuit enters one. If the unit is equipped with WRV, the Unit Controller can open the •...
-
Page 47: Compressor Staging
Use the services of a qualified water treatment specialist to determine what water treatment, if any, is required. Trane assumes no responsibility for equipment failures which result from untreated or improperly treated water, or saline or brackish water. -
Page 48: Water Flow Switch Option
Operating Principles The valve can also be used for condenser system chemical aid the mechanical cooling process or, if the water purge and condenser cooling loop system balance. temperature is low enough, provide total system cooling. The waterside economizer includes a coil, modulating Water Flow Switch Option valves, controls, and piping. -
Page 49: Controls
Open = Alarm, Closed = Normal Compressor 3 Safety Circuit Status Open = Circuit Open, Closed = Circuit Complete Discharge Air Temperature Local 10K Ohm Resistor Trane Type 2 Entering Air Temperature Local 10K Ohm Resistor Trane Type 2 ESTOP... - Page 50 Supply Fan 3 VFD Fault Open = Normal, Closed = Fault Supply Fan 4 VFD Fault Open = Normal, Closed = Fault Space Temperature Local 10K Ohm Resistor Trane Type 2 — — Compressor 1 VFD Fault Open = Normal, Closed = Alarm...
- Page 51 Compressor 2 Suction Pressure 0.5VDC = 0 PSI, 4.5VDC = 667 PSI XM30.9 AO3/UI3 Compressor 2 Suction Temperature 10K Ohm Resistor Trane Type 2 AO4/UI4 Compressor 2 Condenser Regulating Valve 2VDC = 0% Open, 10VDC = 100% Open AO1/UI1 Compressor 3 Discharge Pressure Sensor Local 0.5VDC = 0 PSI, 4.5VDC = 667 PSI...
-
Page 52: Td7 Home Screen
Controls Navigating the TD7 TD7 Home Screen To access the TD7 home screen, press the Home button in the upper left of the screen. Figure 40. Home screen Screen Element Description Home button Displays the local Auto Stop button and displays the occupancy, Heat/Cool Mode, and Unit Information. Displays information about the Air Filter. -
Page 53: Unit Status Report
Controls TD7 Reports To access the Unit Status report: 1. Press the Reports button at the bottom of the screen. Unit Status Report 2. Press Unit Status button. The Unit Status report provides an overview of how the Use the up and down arrows in the bottom right to scroll unit is running and includes all available points that were through the report. -
Page 54: Setpoint Adjustments
Controls 3. To stop the unit, press the Stop button. Or to put the unit in Auto default mode, press Release Override. Figure 43. Local Auto/Stop Figure 44. Stop or release override Setpoint Adjustments This section details control setpoints that can be modified from factory defaults and how to modify those setpoints. - Page 55 Controls Unit Setpoints Table 24. Unit setpoints that can be modified in the TD7 Setpoint Name Description Factory Default Condenser Purge Time (on units with condenser The amount of time (in minutes) that the compressor will open its condenser 20 minutes valves only) valve during purge mode when the unit is not operating.
- Page 56 Controls Unit Setup Table 25. Unit setup setpoints that can be modified in the TD7 Setpoint Name Description Factory Default Percent of the condenser pressure design the unit will control to and is user Condenser Control % of Design adjustable between 50-100%. Condenser Tee Strainer Sensor The condenser water tee high and low pressure sensor can be calibrated to match Calibration...
-
Page 57: Compressor Alarms
3. In the Setup report, locate the appropriate point. Use specialist to determine what water treatment, if any, is the arrows to scroll through the report if needed. required. Trane assumes no responsibility for 4. Select the specific compressor. equipment failures which result from untreated or improperly treated water, or saline or brackish water. -
Page 58: Pre-Startup
Pre-Startup Water-Cooled Unit Piping Before starting up units, perform the following procedure to ensure proper unit operation. Verify condensate drain, water piping drain plugs, strainer pressure transducers Pre-Startup Checklist economizer header, , and condenser vent plug are installed. Complete this checklist after installing unit to verify all Units with Hydronic Heat recommended installation procedures are complete before startup. -
Page 59: Startup
Startup NOTICE WARNING Compressor Damage! Live Electrical Components! Overcharging system could result in compressor failure Failure to follow all electrical safety precautions when and/or reduced compressor life. exposed to live electrical components could result in death or serious injury. Do not overcharge system. Excessive refrigerant charging can cause compressor liquid slugging at When it is necessary to work with live electrical startup, and conditions where compressors and/or... -
Page 60: Operating & Programming Instructions
Startup Operating & Programming Instructions Note: Sight glass moisture indicator may show caution or wet at startup. May need up to 12 hours of See Self-Contained Programming Guide, PKG-SVP01*- operation for system to reach equilibrium and EN, for available unit operating setpoints and instructions. correctly show moisture. -
Page 61: Maintenance
For variable frequency drives or other energy storing components provided by Trane or others, refer to the appropriate manufacturer’s literature for allowable waiting periods for discharge of capacitors. Verify with a CAT III or IV voltmeter rated per NFPA 70E that all capacitors have discharged. -
Page 62: Inspecting And Cleaning The Drain Pan
For variable frequency drives or other energy Refrigerant Leak Test Procedure storing components provided by Trane or others, refer to the appropriate manufacturer’s literature for allowable waiting periods for discharge of capacitors. Verify with a... -
Page 63: System Repair
Maintenance 4. Recommend using electronic detector capable of measuring 0.1 oz/year leak rate. WARNING 5. If a leak is located, use proper procedures to remove Explosion Hazard! the refrigerant/nitrogen mixture, break connections Failure to follow these instructions could result in death and make repairs. -
Page 64: System Evacuation Procedures
Maintenance 5. If using flux, apply it sparingly to the joint. Excess flux is capable of pulling. Rotary pumps should produce will contaminate the refrigerant system. vacuums of 100 microns or less. 6. Apply heat evenly over the length and circumference NOTICE of the joint. -
Page 65: Compressors
Maintenance Figure 48. Typical vacuum pump hookup Figure 49. Evacuation time vs. pressure rise 1600 Continously increasing pressure indicates the presence of leaks, 1400 moisture, or both. 1200 State of equilibrium indicates the 1000 true amount of moisture left in the system. -
Page 66: Inspecting And Cleaning Coils
For variable frequency drives or other energy WARNING storing components provided by Trane or others, refer to Hazardous Voltage w/Capacitors! the appropriate manufacturer’s literature for allowable waiting periods for discharge of capacitors. Verify with a... -
Page 67: Refrigerant Coils
Failure to disconnect power and discharge capacitors equipment damage. before servicing could result in death or serious injury. Drain and vent coils when not in use. Trane Disconnect all electric power, including remote recommends glycol protection in all possible freezing disconnects and discharge all motor start/run capacitors applications. -
Page 68: Sequence Of Operations
Maintenance Sequence of Operations Mineral/Organic Acids Mineral acids have a strong ability to dissolve scale. They Start include hydrochloric acid, sulfamic acid, nitric acid, phosphoric acid and sulfuric acid. 1. Shut off relevant pumps. Under certain conditions, hydrochloric acid corrodes 2. -
Page 69: Chemical Cleaning Economizer Coil
Monthly Checklist energized. For variable frequency drives or other energy storing components provided by Trane or others, refer to The following check list provides the recommended the appropriate manufacturer’s literature for allowable maintenance schedule to keep the commercial self- waiting periods for discharge of capacitors. -
Page 70: Annual Maintenance
Maintenance Semi-Annual Maintenance WARNING Rotating Components! Failure to disconnect power before servicing could result in rotating components cutting and slashing technician which could result in death or serious injury. Disconnect all electric power, including remote disconnects before servicing. Follow proper lockout/ tagout procedures to ensure the power can not be inadvertently energized. -
Page 71: Diagnostics
Diagnostics Troubleshooting suction and discharge pressures. System malfunctions such as low airflow, line restrictions, incorrect refrigerant charge, malfunctioning of expansion valves, damaged System Checks compressors, etc. will result in pressure variations which are outside the normal range. WARNING Note: If phasing at the main incoming power terminal is incorrect, switch two of the three incoming power Live Electrical Components! leads. - Page 72 Diagnostics Table 28. Compressor alarming Diagnostic: Compressor (1-4) Discharge Pressure Sensor Failure (In Alarm) Notification Class Action Reason Typical Causes Reset Required • Sensor has lost its 5VDC Source Signal. Verify that the sensor has 5 VDC. • Sensor is not wired properly: Verify wiring to the Manual Reset Required once Compressor will be locked...
- Page 73 Diagnostics Table 28. Compressor alarming (continued) Diagnostic: Compressor (1-4) Suction Pressure Sensor Failure (In Fault) Notification Class Action Reason Typical Causes Reset Required • Sensor has lost its 5VDC Source Signal. Verify that the sensor has 5 VDC. • Sensor is not wired The Pressure sensor is properly: Verify wiring to the Compressor will be locked...
- Page 74 Diagnostics Table 28. Compressor alarming (continued) Diagnostic: Compressor (1-4) High Pressure Shutdown (In Alarm) Notification Class Action Reason Typical Causes Reset Required • Sensor is not wired properly: Verify sensor wiring to the XM Module. • XM Module is not The temperature sensor is Manual Reset Required once communicating.
- Page 75 Diagnostics Table 28. Compressor alarming (continued) Diagnostic: Compressor (1-4) Low Superheat (In Alarm) Notification Class Action Reason Typical Causes Reset Required • Over Charge on unit. Compressor will be locked Manual Reset Required once The Calculated superheat is • Malfunctioning TXV. out and prevented from the issue is resolved.
- Page 76 Diagnostics Table 29. Compressor warning (continued) Warning: Compressor 1 Frostat Limit Status (In Alarm) Notification Class Action Reason Typical Causes Reset Required Compressor speed will be • Low Airflow across the coil The Saturated suction • Malfunctioning TXV. limited to keep the No Reset required, Warning refrigerant temperature is •...
- Page 77 Diagnostics Table 31. General unit alarming Emergency Stop (In Alarm) Notification Class Action Reason Typical Causes Reset Required Unit will shut down and be The emergency stop input Manual reset required once • Emergency Stop Binary Input is open. prevented from operating has an open condition which the issue is resolved.
- Page 78 Diagnostics Table 31. General unit alarming (continued) Diagnostic: Discharge Air Temperature Source Failure (In Alarm) Notification Class Action Reason Typical Causes Reset Required • Sensor is not wired properly: Verify sensor wiring to the XM Module. The temperature sensor is •...
- Page 79 Diagnostics Table 31. General unit alarming (continued) Diagnostic: Software High Duct Static Alarm (In Alarm) Notification Class Action Reason Typical Causes Reset Required Unit will shut down and be The Duct Static Pressure Manual Reset Required once • VAV Boxes are closed down •...
- Page 80 Diagnostics Table 32. General unit warning (continued) Condenser Water Entering Temperature (In Fault) Notification Class Action Reason Typical Causes Reset Required • Sensor is not wired properly: Verify sensor wiring to the XM Module. The Pressure sensor is • XM Module is not Only affects the Water Side reading either above is communicating.
- Page 81 Diagnostics Table 32. General unit warning (continued) Condenser Tee Strainer Low Pressure (In Fault) Notification Class Action Reason Typical Causes Reset Required • Sensor is not wired properly: Verify sensor wiring to the XM Module. The Pressure sensor is • XM Module is not reading either above is communicating.
- Page 82 Diagnostics Table 32. General unit warning (continued) Compressor 1 E-Stop Shutdown Command (In Fault) Notification Class Action Reason Typical Causes Reset Required • XM Module is not communicating. Ensure that The UC600 Controller has Output may not function None, alarm clears once the XM Module is up and HVAC Service Required.
- Page 83 Diagnostics Table 32. General unit warning (continued) Supply Fan (1-6) Speed Command (In Fault) Notification Class Action Reason Typical Causes Reset Required • XM Module is not communicating. Ensure that The UC600 Controller has Output may not function None, alarm clears once the XM Module is up and HVAC Service Required.
- Page 84 Our people and our family of brands—including Club Car®, Ingersoll Rand®, Thermo King® and Trane®—work together to enhance the quality and comfort of air in homes and buildings; transport and protect food and perishables; and increase industrial productivity and efficiency. We are a global business committed to a world of sustainable progress and enduring results.
Need help?
Do you have a question about the SCWM Series and is the answer not in the manual?
Questions and answers