Table of Contents
Advertisement
Quick Links
Installation, Operation, and Maintenance
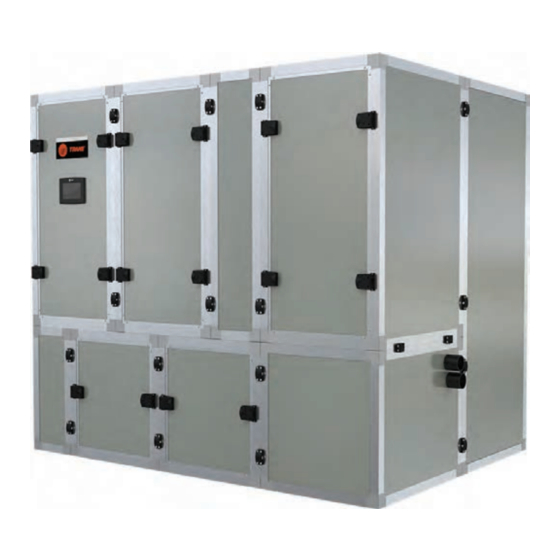
Modular Self-Contained
25 to 80 Tons
SCWM – 25 to 80 Tons
Only qualified personnel should install and service the equipment. The installation, starting up, and servicing of heating, ventilating, and air-conditioning equipment
can be hazardous and requires specific knowledge and training. Improperly installed, adjusted or altered equipment by an unqualified person could result in death or
serious injury. When working on the equipment, observe all precautions in the literature and on the tags, stickers, and labels that are attached to the equipment.
September 2023
SAFETY WARNING
PKG-SVX027D-EN
Advertisement
Table of Contents

Related Manuals for Trane SCWM Series


Summary of Contents for Trane SCWM Series
- Page 1 Installation, Operation, and Maintenance Modular Self-Contained 25 to 80 Tons SCWM – 25 to 80 Tons SAFETY WARNING Only qualified personnel should install and service the equipment. The installation, starting up, and servicing of heating, ventilating, and air-conditioning equipment can be hazardous and requires specific knowledge and training. Improperly installed, adjusted or altered equipment by an unqualified person could result in death or serious injury.
- Page 2 (HCFCs). Not all refrigerants containing these compounds bump cap, fall protection, electrical PPE and arc have the same potential impact to the environment. Trane flash clothing). ALWAYS refer to appropriate advocates the responsible handling of all refrigerants.
- Page 3 This document and the information in it are the property of opening for 30 and 35 ton) in Dimensions Data chapter. Trane, and may not be used or reproduced in whole or in part without written permission. Trane reserves the right to •...
-
Page 4: Table Of Contents
Table of Contents Overview........7 Interconnecting Piping . - Page 5 Table of Contents Supply Air Temperature Control Unit TD-7 Home Screen....57 Sequence of Operation ....48 TD-7 Reports .
- Page 6 Table of Contents System Evacuation Procedures ..68 Chemical Cleaning Economizer Coil ....... . . 74 Compressors .
-
Page 7: Overview
Control box includes a phase monitor to detect phase loss, line voltage imbalance, and reversal. Standard Controls Modular Self-Contained Unit Standard controls supplied with the unit include the Trane UC600 unit controls and the TD-7 touch screen display. All Components basic setup parameters are preset from the factory. -
Page 8: Optional Controls
Overview The Modular Series self-contained unit is controlled by a external setpoint inputs. Morning warm-up operation is microelectronic programmable control system that has available on all units. been programmed from the factory specifically for the Note: A water flow switch is required for the installation, Modular Series self-contained application. -
Page 9: Model Number Description
Model Number Description Modular Self-Contained Digit 1 — Unit Model Digit 14 — Control Valves Digit 25 — Heater S = Self-Contained 0 = None 0 = None H = Head Pressure Control Valves 1 = Hydronic 4 = Hydronic Remote Digit 2 —... -
Page 10: General Data
General Data Table 1. SCWM water-cooled self-contained Tonnage Compressor Data Quantity 1VS-1FS 1VS-1FS 1VS-1FS 1VS-1FS 1VS-2FS 1VS-2FS 1VS-2FS 1VS-2FS 1VS-3FS 1VS-3FS 1VS-3FS 1VS-3FS Nominal 10-13 10-15 10-15 15-15 10-13 15-13 10-15 15-15 10-13 15-13 10-15 15-15 Capacity Circuits Evaporator Coil Data Rows Sq. - Page 11 Number of Fans/Unit No. of fans Note: All performance data is provided in the Performance Selection Program. Contact Trane Sales at 770-988-8338 for more information. Split coils. All performance data is provided in the Performance Selection Program. Contact MJC Sales at 770-988-8338 for more information.
- Page 12 General Data Table 2. SCWM EER/IEER ratings (continued) AHRI Net Cooling Tonnage Nameplate Voltage IEER (VAV) Model Number Capacity (BTUH) SCWMN07LF Low MCA 208-230/60/3 15.8 19.5 SCWMN070F 208-230/60/3 14.9 19.5 SCWMN07L4 Low MCA 460/60/3 15.8 19.5 SCWMN0704 460/60/3 14.9 19.5 SCWMN08LF Low MCA 208-230/60/3...
- Page 13 Rows 25 Ton 30 Ton 35 Ton 40 Ton 50 Ton 60 Ton 70 Ton 80 Ton Split coils. Important: All performance data is provided in the Performance Selection Program. Contact your local Trane Sales office for more information. PKG-SVX027D-EN...
-
Page 14: Pre-Installation
Verify the nameplate data matches the sales order and damage by the carrier and consignee. bill of lading. Note: Notify your Trane representative of the damage • Verify the unit is properly equipped and there are no and arrange for repair. Have the carrier inspect material shortages. -
Page 15: Repair
Pre-Installation Repair Unpacking Notify the appropriate sales representative before Modular Self-Contained units ship dis-assembled. Figure arranging unit installation or repair. 2, p. 15 illustrates a typical shipping package. Important: Do not repair unit until the damage has been inspected by the carrier’s representative. Figure 2. -
Page 16: Dimensional Data
Dimensional Data Figure 3. Unit dimensions (in inches) WIDTH DEPTH Condenser pipe Connections Table 7. Unit dimensions (in inches) Height Depth Model Width 55.2 67.7 67.7 40/40L 50/50L 60/60L 70/70L 80/80L Does not include condensate drain connection. Add an additional 1.5 inch to width to account for drain connection. PKG-SVX027D-EN... - Page 17 Dimensional Data Figure 4. Fan assembly footprint (in mm/inches) TOP VIEW [1384] 54.49 [700] [876] 34.50 27.56 FRONT VIEW SIDE VIEW PKG-SVX027D-EN...
- Page 18 Dimensional Data Figure 5. Variable speed compressor assembly footprint (in mm/inches) TOP VIEW [749] 29.50 [870] [700] 34.26 27.56 FRONT VIEW SIDE VIEW PKG-SVX027D-EN...
- Page 19 Dimensional Data Figure 6. Starter cassette assembly footprint (in inches) TOP VIEW 34.50 27.56 SIDE VIEW FRONT VIEW PKG-SVX027D-EN...
- Page 20 Dimensional Data Figure 7. Evaporator cassette assembly footprint (in inches) Table 8. Evaporator cassette dimensions (in inches) Split Coil Width Height Depth Model Width 55.2 34.5 67.7 34.5 67.7 34.5 40/40L 34.5 50/50L 34.5 60/60L 34.5 34.5 70/70L 34.5 34.5 80/80L 34.5 Does not include condensate drain connection.
- Page 21 Dimensional Data Figure 8. Discharge opening for 25 ton AIR FLOW 28.99 DEPTH DISCHARGE OPENING 22.05 WIDTH DISCHARGE OPENING Figure 9. Discharge opening for 30 and 35 ton AIR FLOW 28.99 DEPTH DISCHARGE OPENING 34.64 WIDTH DISCHARGE OPENING PKG-SVX027D-EN...
-
Page 22: Service Clearances
Dimensional Data Figure 10. Discharge opening for 40 to 60 ton WIDTH OPENING 1580 62.205 DEPTH OPENING 28.988 AIRFLOW AIRFLOW Figure 11. Discharge opening for 70 to 80 ton DISCHARGE OPENING WIDTH 2382 93.76 DISCHARGE OPENING DEPTH 28.99 AIRFLOW Service Clearances Table 9. -
Page 23: Weights
Weights Table 10. Unit weights Base Weight Waterside Economizer Unit Size (lbs) (kg) (lbs) (kg) 25 Ton 2138 30 Ton 2688 1219 35 Ton 2688 1219 40 Ton 3041 1379 50 Ton 3506 1590 60 Ton 3641 1652 70 Ton 4733 2146 80 Ton... - Page 24 Weights Table 13. Unit shipping weights (starter cassette) (continued) Starter Cassette Unit Overall Dimensions (in) Unit Weight (lbs) Starter Cassette (in) Weight (230 Vac) (lbs) Size 40 Ton 70"x 84" x 95.5" 2933 34.5"x 54.5"x 27.6" 50 Ton 70"x 84" x 95.5" 3365 34.5"x 54.5"x 27.6"...
-
Page 25: Installation - Mechanical
Important: Vibration isolation is not necessary for the unit externally trap the condensate line. since the factory internally isolates the compressors, thus creating double isolation. Trane strongly recommends that you consult a vibration specialist when considering double isolation. In general, Trane does not recommend double- isolation. -
Page 26: Typical Unit Layout
Installation - Mechanical Typical Unit Layout Figure 13. Typical unit layout (25 tons) 25 TON FRONT VIEW 25 TON FRONT VIEW EVAP EVAP DOOR DOOR STARTER STARTER CONTROL CONTROL WATER OUT WATER OUT VARIABLE EMPTY EMPTY VARIABLE SPEED SPEED WATER IN WATER IN RH WATER AND LH ELECTRICAL LH WATER AND RH ELECTRICAL... - Page 27 Installation - Mechanical Figure 15. Typical layout of units (40 to 80 tons) left hand electrical and right hand water 40 TON 50 TON EVAP STARTER EVAP STARTER FAN 1,2 FAN 3 FAN 1,2 FAN 3 CONTROL DOOR DOOR CONTROL VARIABLE FIXED VARIABLE...
-
Page 28: Installation Summary
Installation - Mechanical Installation Summary 2. Add spacer cassette. The steps below provide a summary of installation steps for installing the modular self-contained unit. Read all installation instructions before starting the installation as the below is not a complete summary of all steps required. Recommended Tool List Note: This is a general list only. - Page 29 Installation - Mechanical 6. Add starter/control panel cassette. 8. Add fan spacer cassette. 7. Add fans 1 and 2 fan cassette. 9. Add fans 3 and 4 fan cassette. PKG-SVX027D-EN...
- Page 30 Installation - Mechanical 80 Ton Right Hand Unit 4. Unbraze caps from both evaporator and compressor first. Line up compressor A piping to the corresponding 1. Place evaporators at their final location. evaporator holes. 2. Start by attaching compressor spacer to evaporator first.
- Page 31 Installation - Mechanical 7. Complete piping and braze everything for compressor 9. Push compressor B in and clamp down to compressor A using intellaclamps. 10. Build IC pipe and braze compressor B. 8. Unbraze caps and line up compressor B. PKG-SVX027D-EN...
- Page 32 Installation - Mechanical 11. Unbraze caps and line up compressor C. 13. Build IC pipe and braze compressor C. 12. Push compressor C in and clamp down to compressor 14. Unbraze caps and line up compressor D. B using intellaclamps. PKG-SVX027D-EN...
- Page 33 Installation - Mechanical 15. Push compressor D in and clamp down to compressor 2. Apply gasket around evaporator opening. C using intellaclamps. 3. Apply caulk all around all fan cassette seem/gaps for 16. Clamp compressor D side to evaporator using good seal.
- Page 34 Use the services of a qualified water treatment specialist to determine what water treatment, if any, is required. Trane assumes no responsibility for equipment failures which result from untreated or improperly treated water, or saline or brackish water. Condenser water piping connections are located on the right or left hand side of the unit (depending upon configuration required).
-
Page 35: Condensate Drain Connections
Installation - Mechanical this time. shutoff/balancing valve on the entering and leaving waterside pipes, drain tees, and unions of each unit. 6. If using a cooling tower, refer to Figure 20, p. 35 for a typical piping circuit from the unit. Note: Unit does not have floor drains. -
Page 36: Interconnecting Piping
Installation - Mechanical discharge line (and condenser liquid line) access port Note: MSC units (and replacement compressors) ship fully valves. charged with POE oil from the factory. Scroll compressors use POE 32 oil, DO NOT substitute. If charge is present, continue with piping installation. Capped discharge and liquid line connections are located If no nitrogen escapes the access valve, leak test the unit near bottom, left side of the condensing unit cassette. -
Page 37: Charging And Wiring The Unit
Installation - Mechanical NOTICE WARNING Explosion Hazard! Compressor Damage! Failure to properly regulate pressure could result in a Failure to follow instructions below could result in violent explosion, which could result in death, serious compressor failure. injury, or equipment or property-only-damage. If it becomes necessary to remove or recharge the system with refrigerant, it is important that the When using dry nitrogen cylinders for pressurizing... - Page 38 Installation - Mechanical Figure 22. Fixed speed compressor power and Figure 24. Fixed speed compressor power and communication wiring communication wire routing Figure 23. Variable speed power and communication Figure 25. Compressor communication terminations wiring Note: Pluggable connectors are color coded and individually keyed for ease of installation.
-
Page 39: Fan Installation
Installation - Mechanical Figure 26. Compressor power wire routing to starter 8. Liquid charge 10 lbs of R410a initially. This will be panel adequate for compressor startup. More charge will be added after compressors are started. Use an accurate scale to measure and record preliminary amount of refrigerant added to each circuit. - Page 40 Installation - Mechanical Figure 29. Fan power and communication wire Figure 31. Fan communication terminations - routing pluggable connectors are color coded for ease of installation Figure 32. Fan power terminations Figure 30. Fan power and communication wiring PKG-SVX027D-EN...
-
Page 41: Duct Connections
Air Heating and Air Conditioning Systems (NFPA 90B). Make duct connections to the unit with a flexible material such as heavy canvas. If a fire hazard exists, Trane recommends using Flexweave 1000, type FW30 or equivalent canvas. Use three inches for return duct and three inches for discharge duct. -
Page 42: Td-7 Installation
Installation - Mechanical a. Verify: Figure 36. TD-7 Installation on front • No continuity between phases. • No continuity between each phase and ground. b. Do not hi-pot with variable speed compressor drives or fan fuses installed or fixed speed compressor motor protection module connected. -
Page 43: Installation - Electrical
Installation - Electrical Unit Wiring Diagrams Voltage Range Voltages must be within ±10% the nameplate voltage. Specific unit wiring diagrams are provided on the inside of Ensure the unit voltage is balanced by measuring at the the control panel door. Use these diagrams for connections compressor terminals. -
Page 44: Selection Procedures
Installation - Electrical Selection Procedures Determination of Max Fuse (MFS) and Max Circuit Breaker (MCB) Sizes • RLA = Rated Load Amps MFS and MCB = 2.25 x Largest motor amps (RLA)/VFD • Compressor LRA = Locked Rotor Amps input) + the sum of the remaining motor amps. •... -
Page 45: Static Pressure Sensor Installation
Installation - Electrical Table 15. Electrical service sizing data — motors (continued) Motor Data Unit Wiring Compressor (EA) Fan (EA) Fixed Speed Variable Speed Tonnage Model Number Nameplate Voltage MOP Disc Qty LRA Qty Voltage Range Input (A) SCWMN08LF Low MCA 208-230/60/3 187-253 335.3... -
Page 46: Zone Sensor Option Used For Discharge Air Reset By Space Temperature
For variable frequency drives or other energy storing components provided by 1. Run wires between the unit control panel and the zone Trane or others, refer to the appropriate sensor subbase. To determine the number of wires manufacturer’s literature for allowable waiting periods required, refer to the unit wiring diagrams. - Page 47 Installation - Electrical Table 16. Zone sensor maximum lengths and wire Table 16. Zone sensor maximum lengths and wire size size (continued) Distance from Unit to Recommended Wiring Size Distance from Unit to Recommended Wiring Size Controller Controller 0-150 feet 22 gauge 386-610 feet 16 gauge...
-
Page 48: Operating Principles
Operating Principles Control Sequences of Operation Head Pressure Control Water-cooled condensers: Units that are ordered with the Occupied/Unoccupied Switching optional flow control valves and configured for variable There are three ways to switch occupied/unoccupied: water flow will modulate a water valve to maintain a user- defined condensing pressure setpoint and compressor 1. -
Page 49: Heat/Cool Mode
Operating Principles Fan Operation Heat/Cool Mode The unit is in Cooling mode by default. The front end Multiple, identical fans are arranged in the fan cabinet to Building Automation System will switch the Heat/Cool meet the customer’s airflow and static requirements. Each Mode request multistate value between the Heating and fan's speed, start/stop command, and fault status are Cooling modes to get the desired control. -
Page 50: 1. Hpc
Operating Principles Compressor Suction Temperature Important: The HPC is wired into each compressors Enable circuit, and the VS and FS compressor Each compressor has its own suction temperature enable circuit are unique. The FS compressor thermistor. It is used to compute compressor suction enable circuit uses 24 Vac power sourced superheat. -
Page 51: Variable Speed Compressor (Vs)
Operating Principles It will annunciate either High Pressure Cutout Compressor • Low refrigerant charge X or Compressor Safety Circuit X. • Faulty suction pressure sensor Variable Speed Compressor (VS) High Pressure Limit conditions can be caused by the following: The VS compressor does not have an external crankcase •... -
Page 52: Compressor Staging
Use the services of a qualified water treatment specialist to determine what water treatment, if any, is required. Trane assumes no responsibility for equipment failures which result from untreated or improperly treated water, or saline or brackish water. Automatically circulate water through the economizer and condensers periodically during non-operational times. -
Page 53: Waterside Economizer Option
Operating Principles Heat Mode from the factory as an option or it can be field-provided. Whenever the flow switch detects a water flow loss prior to The BAS Heat option consists of a fin and tube hot-water or during mechanical cooling, compressor operation locks coil, an electrically actuated ball valve, and control out and a diagnostic code displays. -
Page 54: Controls
Controls Unit Controller Note: The number after the dot in the name (example: XM30.#) is the IMC bus address, which is set using The MSC uses the UC600 control platform for monitoring the rotary switches on the module. and control. XM expansion modules are used to expand Remotely mounted in the compressor cassettes, the the UC600's I/O capabilities. - Page 55 Compressor 3 Safety Circuit Status Open = Circuit Open, Closed = Circuit Complete Discharge Air Temperature Local 10K Ohm Resistor Trane Type 2 Entering Air Temperature Local 10K Ohm Resistor Trane Type 2 Open = Normal, Closed = Emergency Stop...
- Page 56 XM30.6 AO3/UI3 — — AO4/UI4 — — Condenser Water Entering Temperature 10K Ohm Resistor Trane Type 2 AO1/UI1 Condenser Water Leaving Temperature 10K Ohm Resistor Trane Type 2 AO2/UI2 XM30.7 Condenser Screen Pressure Drop High AO3/UI3 0.5 Vdc = 0 PSI, 4.5 Vdc = 500 PSI Condenser Screen Pressure Drop Low 0.5 Vdc = 0 PSI, 4.5 Vdc = 500 PSI...
-
Page 57: Navigating The Td-7
Controls Table 17. Points list (continued) Point Setup Hardware Connection Point Name Dirty Filter Alarm NO Open = Normal, NO Closed = Alarm; NC Not used Refrigeration Circuit Failure Alarm Open = Normal, Closed = Alarm XM32.13 Supply Fan Failure Alarm Open = Normal, Closed = Alarm Open = Normal, Closed = Alarm Heat Failure Alarm... -
Page 58: Td-7 Reports
Controls TD-7 Reports • Alarms are cleared • Compressors that you want to run are made available Unit Status Report or locked out. The Unit Status report provides an overview of how the unit Local Auto/Stop Value is running and includes all available points that were pre- defined for the unit. - Page 59 Controls Table 18. Unit setpoints that can be modified in the TD-7 (continued) Setpoint Name Description Factory Default Discharge Air Cooling Setpoint Sets the upper limit in the Reset Equation in Cooling Mode. This value can be adjusted to 65° F Max BAS (reset DAT units only) the desired maximum setpoint the discharge air should reach during cooling mode.
-
Page 60: Unit Setup
Controls Unit Setup Table 19. Unit setup setpoints that can be modified in the TD-7 Factory Description Default Setpoint Name Percent of the condenser pressure design the unit will control to and is user adjustable between Condenser Control % of Design 50-100%. -
Page 61: Water Purge
Trane assumes no responsibility for initiating water purge. equipment failures which result from untreated or Contrary, if a request for cooling occurs during a purge improperly treated water, or saline or brackish water. -
Page 62: Pre-Startup
Pre-Startup Water-Cooled Unit Piping Before starting up units, perform the following procedure to ensure proper unit operation. Verify condensate drain, water piping drain plugs, economizer header, strainer pressure transducers, and Pre-Startup Checklist condenser vent plug are installed. Complete this checklist after installing unit to verify all Units with Hydronic Heat recommended installation procedures are complete before startup. -
Page 63: Start-Up
Start-Up WARNING NOTICE Live Electrical Components! Compressor Damage! Failure to follow all electrical safety precautions when Failure to follow instructions below could result in exposed to live electrical components could result in compressor failure and/or reduced compressor life. death or serious injury. To prevent compressor liquid slugging, only add liquid in the suction line when the compressor is When it is necessary to work with live electrical... -
Page 64: Instructions
Start-Up Operating and Programming Instructions installer guide that ships with each VFD. See Self-Contained Programming Guide, PKG-SVP01*- Start-Up Log EN, for available unit operating setpoints and instructions. A copy ships with each unit. For units with VFD option, see Unit: Unit Location: Unit Voltage Evaporator... -
Page 65: Maintenance
Maintenance Service Access Note: Evaporator door is 75 lbs and requires two-man lift to remove safely. All service accessible areas are provided with hinged doors Access unit controls through the front. The panel is secured that allow doors to swing open or be removed completely. with two quick release hinges. -
Page 66: Inspecting And Cleaning The Drain
Confined Space Hazards! or other energy storing components provided by Failure to follow instructions below could result in Trane or others, refer to the appropriate death or serious injury. manufacturer’s literature for allowable waiting periods Do not work in confined spaces where refrigerant or for discharge of capacitors. -
Page 67: Brazing Procedures
Maintenance WARNING the refrigerant/nitrogen mixture, break connections and make repairs. Retest for leaks. Explosion Hazard! 6. Make sure all service valves are open. Failure to follow these instructions could result in death or serious injury or equipment or property-only Brazing Procedures damage. -
Page 68: System Evacuation Procedures
Maintenance NOTICE should melt the rod. 8. Continue to apply heat evenly around the joint Motor Winding Damage! circumference until the brazing material is drawn into Failure to follow instructions below could result in the joint by capillary action, making a mechanically compressor motor winding damage. -
Page 69: Compressors
Maintenance Figure 51. Typical vacuum pump hookup Figure 52. Evacuation time vs. pressure rise 1600 Continously increasing pressure indicates the presence of leaks, 1400 moisture, or both. 1200 State of equilibrium indicates the 1000 true amount of moisture left in the system. -
Page 70: Components
Maintenance Components between the coils, remove the sheet metal block off. Access the block off by removing the corner panels on Cleaning Coil Fin the left or right rear side of the unit. • If the refrigerant coil is installed back to back with the WARNING waterside economizer coil, use a cleaner that is Hazardous Chemicals! -
Page 71: Sequence Of Operations
Understanding the cleaning effectiveness or scale dissolvability of ScaleBreak-MP during a cleaning is an Drain and vent coils when not in use. Trane important part of the procedural steps. This simple practice recommends glycol protection in all possible freezing is designed to make sure the solutions activity level retains applications. -
Page 72: Circulation Pump Setup
Maintenance value of less than 3. As ScaleBreak-MP dissolves the Figure 53. Circulation pump deposits within the equipment, it absorbs the calcium into a liquid suspension, thus naturally neutralizing the solution. Frequent pH readings at intervals of every 10-15 minutes will allow you to map the solutions activity during a cleaning procedure. -
Page 73: Cleaning Instruction
Maintenance Cleaning Instruction Figure 54. Typical setup for clean in place Important: When descaling the water side of a SWEP brazed plate heat exchanger please visit https://www.goodway.com/resources/ calculators#/heat-exchanger to determine the amount of Goodway Scalebreak-MP needed and length of cleaning time. The information in the calculation tool allows you to adjust the amount of ScaleBreak-MP needed based on the thickness of scale in your SWEP BPHE. -
Page 74: Coil
This action will also flush out your pump or other energy storing components provided by system. Trane or others, refer to the appropriate 16. As an added safeguard you can reverse your hoses so manufacturer’s literature for allowable waiting periods you pump into the top and out the bottom. -
Page 75: Monthly Checklist
Maintenance Monthly Checklist 1. With power disconnected, manually rotate the fan wheel to check for obstructions in the housing or The following check list provides the recommended interference with fan blades. Remove obstructions and maintenance schedule to keep the commercial self- debris. -
Page 76: Diagnostics
Diagnostics Troubleshooting charge, malfunctioning of expansion valves, damaged compressors, etc. will result in pressure variations which System Checks are outside the normal range. Note: If phasing at the main incoming power terminal is WARNING incorrect, switch two of the three incoming power Live Electrical Components! leads. - Page 77 Diagnostics Table 22. Compressor alarming Diagnostic: Compressor (1-4) Discharge Pressure Sensor Failure (In Alarm) Typical Causes Reset Required Notification Class Action Reason HVAC Critical Alarm. Compressor will be locked The Pressure sensor is Manual Reset required once • Sensor has lost its 5 Vdc out and prevented from calculated to be in fault and the sensor is in a Normal...
- Page 78 Diagnostics Table 22. Compressor alarming (continued) HVAC Critical Alarm. Compressor will be locked The Pressure sensor is Manual Reset required once • Sensor has lost its 5 Vdc out and prevented from calculated to be in fault and the sensor is in a Normal Source Signal.
- Page 79 Diagnostics Table 22. Compressor alarming (continued) Diagnostic: Compressor (1-4) Suction Temperature Sensor Failure (In Fault) Typical Causes Reset Required Notification Class Action Reason HVAC Critical Alarm. Compressor will be locked The temperature sensor is None, alarm clears once • Sensor has lost its 5 Vdc out and prevented from reading either above is sensor is in a normal state.
- Page 80 Diagnostics Table 22. Compressor alarming (continued) HVAC Critical Alarm. The High Pressure cutout The temperature sensor is None, alarm clears once • Sensor is not wired switch is reading a closed reading either above is sensor is in a normal state. properly: Verify wiring to condition which indicates.
- Page 81 Diagnostics Table 22. Compressor alarming (continued) HVAC Critical Alarm. Compressor will be locked The Calculated superheat is Manual Reset required once • Over Charge on unit. out and prevented from below 4 degrees for 5 the issue is resolved. User •...
- Page 82 Diagnostics Table 23. Compressor warning Warning: Compressor 1 Cond Limit Status (In Alarm) Typical Causes Reset Required Notification Class Action Reason HVAC Warning. Compressor speed will be Head Pressure has No Reset required, Warning • High Condenser Water limited to keep the exceeded the condenser clears when conditions no Temperature.
- Page 83 Diagnostics Table 23. Compressor warning (continued) HVAC Warning. No action is taken on the The Saturated suction No Reset required, Warning • Low Airflow across the fixed speed compressor, this refrigerant temperature is clears when conditions no coil. is an informational warning calculated to be below 36 longer exists.
- Page 84 Diagnostics Table 25. General unit alarming (continued) Typical Causes Reset Required Notification Class Action Reason HVAC Critical Alarm. Unit will shut down and be The local auto/stop value has Emergency stop binary input None, alarm clears once prevented from operating been commanded to the local is open.
- Page 85 Diagnostics Table 25. General unit alarming (continued) Diagnostic: Discharge Air High Temperature Source Failure (In Alarm) Typical Causes Reset Required Notification Class Action Reason HVAC Critical Alarm. Unit will shut down and be The discharge air Manual Reset Required once •...
- Page 86 Diagnostics Table 25. General unit alarming (continued) Diagnostic: Software High Duct Static Alarm (In Alarm) Typical Causes Reset Required Notification Class Action Reason HVAC Critical Alarm. Unit will shut down and be The Duct Static Pressure Manual Reset Required once •...
- Page 87 Diagnostics Table 26. General unit warning (continued) Typical Causes Reset Required Notification Class Action Reason HVAC Service Required. No action taken other than to The Condenser Tee Manual Reset required once • Failed Pressure sensor. notify end user of condition. differential pressure is the issue is resolved.
- Page 88 Diagnostics Table 26. General unit warning (continued) HVAC Service Required. Affects the alarm for Dirty The Pressure sensor is None, alarm clears once • Sensor is not wired Strainer, preventing alarm reading either above is sensor is in a normal state. properly: Verify sensor from working properly.
- Page 89 Diagnostics Table 26. General unit warning (continued) Typical Causes Reset Required Notification Class Action Reason HVAC Service Required. Output may not function The UC600 Controller has None, alarm clears once • XM Module is not properly. lost communications with the sensor is in a normal state.
- Page 90 Diagnostics Table 26. General unit warning (continued) Typical Causes Reset Required Notification Class Action Reason HVAC Service Required. Output may not function The UC600 Controller has None, alarm clears once • XM Module is not properly. lost communications with the sensor is in a normal state.
- Page 91 Diagnostics Table 26. General unit warning (continued) Typical Causes Reset Required Notification Class Action Reason HVAC Service Required. Output may not function The UC600 Controller has None, alarm clears once • XM Module is not properly. lost communications with the sensor is in a normal state.
- Page 92 For more information, please visit trane.com or tranetechnologies.com. Trane has a policy of continuous product and product data improvements and reserves the right to change design and specifications without notice. We are committed to using environmentally conscious print practices.
Need help?
Do you have a question about the SCWM Series and is the answer not in the manual?
Questions and answers