
Related Manuals for StarTech.com NETRS2321P


Summary of Contents for StarTech.com NETRS2321P
- Page 1 1 Port RS232 Serial over IP Ethernet Device Server Actual product may vary from photos User Manual SKU#: NETRS2321P For the latest information and specifications visit www.startech.com/NETRS2321P Manual Revision: 09/19/2019...
-
Page 2: Compliance Statements
This manual may make reference to trademarks, registered trademarks, and other protected names and/or symbols of third-party companies not related in any way to StarTech.com. Where they occur these references are for illustrative purposes only and do not represent an endorsement of a product or service by StarTech.com, or an endorsement of the product(s) to which this manual... -
Page 3: Safety Statements
• Montering av kabelavslutningar får inte göras när produkten och/eller elledningarna är strömförda. • Kablar (inklusive elkablar och laddningskablar) ska dras och placeras på så sätt att risk för snubblingsolyckor och andra olyckor kan undvikas. To view manuals, videos, drivers, downloads, technical drawings, and more visit www.startech.com/support... -
Page 4: Table Of Contents
Using the Web Console .................11 Accessing the Web Console........................11 Changing/Setting a Login ID and Password..................11 Configuring System Network Settings ....................12 System Status ............................. 14 Load Default Setting ..........................14 To view manuals, videos, drivers, downloads, technical drawings, and more visit www.startech.com/support... - Page 5 Virtual COM Software Operation ............23 Installing the Virtual COM Software ....................23 Configuration the Virtual COM Software ..................25 Setting Up COM Mapping ........................27 TCP/UDP Settings ...................29 LED Indicators ..................31 To view manuals, videos, drivers, downloads, technical drawings, and more visit www.startech.com/support...
-
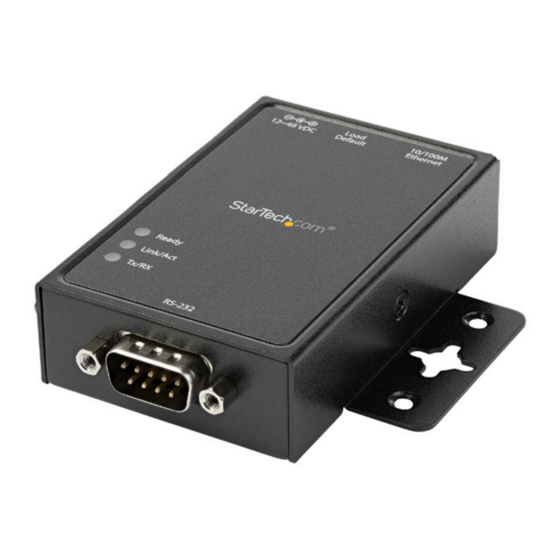
Page 6: Product Diagram
Product Diagram Top View LEDs RS-232 DB9 Serial Port Wall Mount Screw Hole DIN Rail Screw Hole To view manuals, videos, drivers, downloads, technical drawings, and more visit www.startech.com/support... -
Page 7: Rear View
Rear View RJ45 Port Load Default/Reset Button DC Jack To view manuals, videos, drivers, downloads, technical drawings, and more visit www.startech.com/support... -
Page 8: Rj45 Pin Assignment
RJ45 Pin Assignment Description To view manuals, videos, drivers, downloads, technical drawings, and more visit www.startech.com/support... -
Page 9: Rs-232 Db9 Pin Assignment
RS-232 DB9 Pin Assignment NOTE: This serial device server performs as a DTE device. Name Input Input Output Output Input Output Input To view manuals, videos, drivers, downloads, technical drawings, and more visit www.startech.com/support... -
Page 10: Product Information
“admin” and the password will be “admin”. Once logged in, you will have access to all configuration settings including the ability to change the IP address for the device server. To view manuals, videos, drivers, downloads, technical drawings, and more visit www.startech.com/support... -
Page 11: Din Rail Mounting
NOTE: Broadcast packet packets are not passed through a router. The VCom utility can only be used to monitor devices in the same segment of the LAN. To view manuals, videos, drivers, downloads, technical drawings, and more visit www.startech.com/support... -
Page 12: Using The Web Console
From the Home screen, click the Administrator link on the left-hand side of the screen. From the drop down menu select the Authentication link. The Authentication screen will appear. To view manuals, videos, drivers, downloads, technical drawings, and more visit www.startech.com/support... -
Page 13: Configuring System Network Settings
From the Home screen, click the Administrator link on the left-hand side of the screen. From the drop down menu select the System IP link. The System IP screen will appear. To view manuals, videos, drivers, downloads, technical drawings, and more visit www.startech.com/support... - Page 14 IP address will be assigned by DHCP server after resetting the device. Press the Update button to apply the network changes and reset the default for the changes to take place. To view manuals, videos, drivers, downloads, technical drawings, and more visit www.startech.com/support...
-
Page 15: System Status
From the Home screen, click the Administrator link on the left-hand side of the screen. From the drop down menu select the Load Default Settings link. The Load Default Settings screen will appear. To view manuals, videos, drivers, downloads, technical drawings, and more visit www.startech.com/support... -
Page 16: Firmware Update
Note: Please avoid loss of network connection, power or other interruption during the firmware upgrade procedure. Web: • Please type in or browse the target image file in the input • To view manuals, videos, drivers, downloads, technical drawings, and more visit www.startech.com/support... -
Page 17: Configuring Tcp Mode
TCP mode will be disabled automatically. From the Home screen, click the TCP Mode link on the left- hand side of the screen. The TCP Mode screen will appear. To view manuals, videos, drivers, downloads, technical drawings, and more visit www.startech.com/support... - Page 18 Windows XP you can try the connection using Reverse Telnet mode. CLI Mode: The Command Line Interface (CLI) allows user • to configure and control NETRS2321P directly through the UART interface. To view manuals, videos, drivers, downloads, technical drawings, and more visit www.startech.com/support...
-
Page 19: Configuring Udp Mode
Note: CLI mode is only available when NETRS2321P is in TCP Server Mode. Port Number: This assigns the TCP server port number • that the server will listen on for connecting clients (Only for TCP Server Mode). Remote Server IP Address: When in Client mode, this •... - Page 20 Normal: When in UDP Normal mode, it can both receive • and send UDP data to remote units. Local Port: Assign the UDP port that this unit listens on. • To view manuals, videos, drivers, downloads, technical drawings, and more visit www.startech.com/support...
-
Page 21: Uart
RS-232 serial port of the device. All of the port settings can be modified from the UDP screen. From the Home screen, click the UART link on the left-hand side of the screen. The UART Mode screen will appear. To view manuals, videos, drivers, downloads, technical drawings, and more visit www.startech.com/support... - Page 22 19200, 38400, 57600, 115200 and 230400bps baud rates. Character Bits: Set the number of data length of UART • interface. The NETRS2321P supports character bits of 5, 6, 7, or 8 bits. To view manuals, videos, drivers, downloads, technical drawings, and more visit www.startech.com/support...
- Page 23 TCP, (the receiver doesn’t display the character). Once you have completed making changes, press the Update button to store the data. Reset the device for the changes to take effect. To view manuals, videos, drivers, downloads, technical drawings, and more visit www.startech.com/support...
-
Page 24: Resetting The Device
Extract All. In the list of extracted files, right-click the vcomsetup.exe file and select Run as Administrator and follow the on-screen prompts to complete the installation. To view manuals, videos, drivers, downloads, technical drawings, and more visit www.startech.com/support... - Page 25 Search function searches by MAC address and not IP address, all connected devices to the LAN will be located, regardless of whether or not they are part of the same subnet as the host. To view manuals, videos, drivers, downloads, technical drawings, and more visit www.startech.com/support...
-
Page 26: Configuration The Virtual Com Software
Main Screen An Authorization screen will appear, you will be prompted to enter your User ID and Password (Default: admin / admin). Authorization Screen Click the Update button. To view manuals, videos, drivers, downloads, technical drawings, and more visit www.startech.com/support... - Page 27 The Configure Dialog screen will appear. Configure Dialog Screen The port IP and Port number can be configured. Select the OK button to save changes. To view manuals, videos, drivers, downloads, technical drawings, and more visit www.startech.com/support...
-
Page 28: Setting Up Com Mapping
Setting Up COM Mapping From the Main screen, select the Com Mapping link from the left-side of the screen. Main Screen The COM Mapping screen will appear. COM Mapping Screen To view manuals, videos, drivers, downloads, technical drawings, and more visit www.startech.com/support... - Page 29 Local Port: Enter a local port number. • COM: Enter a Virtual COM port number. • Remote Port: Enter a remote port number. • Click OK to create the COM Mapping To view manuals, videos, drivers, downloads, technical drawings, and more visit www.startech.com/support...
-
Page 30: Tcp/Udp Settings
Assigns the TCP server port number that the server will listen on TCP Client – Disabled UDP – Assign the UDP port that this unit listens on. Assign the desired virtual COM port number • To view manuals, videos, drivers, downloads, technical drawings, and more visit www.startech.com/support... -
Page 31: Remote Port
Dictates the duration that the software will automatically • attempt to reconnect the COM port to the serial port on the serial device server, for the purpose of keeping the connection alive. To view manuals, videos, drivers, downloads, technical drawings, and more visit www.startech.com/support... -
Page 32: Led Indicators
Link/Act Blinking UTP Tx/Rx is activity. UTP is not link. RS-232 port is transmitting Blinking or receiving data. Tx/Rx No data is transmitting or receiving in RS-232 port. To view manuals, videos, drivers, downloads, technical drawings, and more visit www.startech.com/support... -
Page 33: Warranty Information
Limitation of Liability In no event shall the liability of StarTech.com Ltd. and StarTech.com USA LLP (or their officers, directors, employees or agents) for any damages (whether direct or indirect, special, punitive, incidental, consequential, or otherwise), loss of profits, loss of business, or any pecuniary loss, arising out of or related to the use of the product exceed the actual price paid for the product. - Page 34 StarTech.com is an ISO 9001 Registered manufacturer of connectivity and technology parts. StarTech.com was founded in 1985 and has operations in the United States, Canada, the United Kingdom and Taiwan servicing a worldwide market.
Need help?
Do you have a question about the NETRS2321P and is the answer not in the manual?
Questions and answers