
Subscribe to Our Youtube Channel
Related Manuals for StarTech.com PM1115UW


Summary of Contents for StarTech.com PM1115UW
- Page 1 Wireless N USB 2.0 Network Print Server Actual product may vary from photos User Manual SKUs: PM1115UW, PM1115UWEU For the latest information and specifications visit www.startech.com/PM1115UW Manual Revision: 11/09/2021...
- Page 2 This equipment complies with IC RSS-102 radiation exposure limit set forth for an uncontrolled environment. This equipment should be installed and operated with minimum distance 20cm between the radiator and your body. To view manuals, videos, drivers, downloads, technical drawings, and more visit www.startech.com/support...
- Page 3 This manual may make reference to trademarks, registered trademarks, and other protected names and/or symbols of third-party companies not related in any way to StarTech.com. Where they occur these references are for illustrative purposes only and do not represent an endorsement of a product or service by StarTech.com, or an endorsement of the product(s) to which this manual...
-
Page 4: Safety Statements
• Montering av kabelavslutningar får inte göras när produkten och/eller elledningarna är strömförda. • Kablar (inklusive elkablar och laddningskablar) ska dras och placeras på så sätt att risk för snubblingsolyckor och andra olyckor kan undvikas. To view manuals, videos, drivers, downloads, technical drawings, and more visit www.startech.com/support... -
Page 5: Warning Statements
à assembler et utiliser ce produit. • Ce produit est uniquement destiné à une utilisation en intérieur et ne doit pas être utilisé à l’extérieur. To view manuals, videos, drivers, downloads, technical drawings, and more visit www.startech.com/support... - Page 6 Handbuch und vergewissern Sie sich, dass Sie die Anweisungen verstanden haben. • Dieses Produkt ist nur zum Gebrauch in Innenräumen vorgesehen und sollte nicht im Freien verwendet werden. To view manuals, videos, drivers, downloads, technical drawings, and more visit www.startech.com/support...
-
Page 7: Table Of Contents
Basic Hardware Installation ........................3 Hardware and Software Installation ....................3 Operation ....................20 LED Indicators............................. 20 Reset Button ..............................20 Troubleshooting ............................22 Warranty Information ................25 Limitation of Liability ................25 To view manuals, videos, drivers, downloads, technical drawings, and more visit www.startech.com/support... -
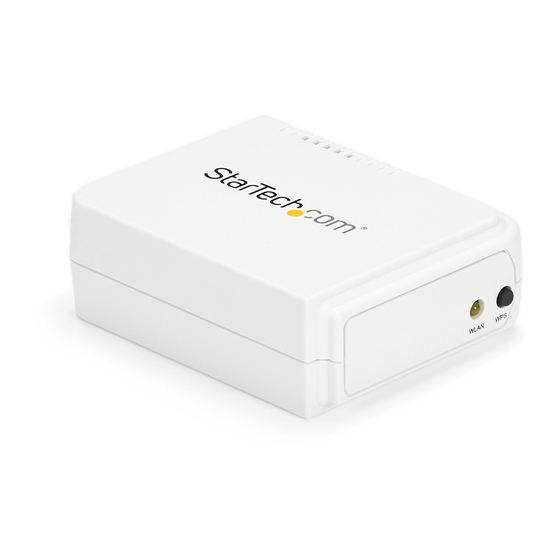
Page 8: Product Diagram
Product Diagram Front View Back View WAN LED LED Indicators WPS Button USB-A Port Reset Button RJ45 Port DC Jack To view manuals, videos, drivers, downloads, technical drawings, and more visit www.startech.com/support... -
Page 9: Product Information
Vista, 7, 8, 8.1, 10 print server on a network Embedded Web Windows, macOS, server and Linux To view manuals, videos, drivers, downloads, technical drawings, and more visit www.startech.com/support To view manuals, videos, drivers, downloads, technical drawings, and more visit www.startech.com/support... -
Page 10: Installation
The PM1115UW can be installed using two distinct methods. Method 1: For a streamlined installation, follow the steps listed in the Basic Software Installation section. Please note that this method is only available in Windows. To view manuals, videos, drivers, downloads, technical drawings, and more visit www.startech.com/support... - Page 11 Right-click the PS Wizard Shortcut and select Run as Administrator. Select Yes to allow the software to run. At the Welcome screen, select Next to begin the software installation. (Figure 1) To view manuals, videos, drivers, downloads, technical drawings, and more visit www.startech.com/support...
- Page 12 Print Server (Figure 2). Select the desired Print Server then select Next. (Figure 3) Note: If the Print Server is not detected, check the Network Connection. Figure 2 Figure 3 To view manuals, videos, drivers, downloads, technical drawings, and more visit www.startech.com/support...
- Page 13 (Optional )At the Change Settings screen, apply a Password to the Print Server’s Web Interface by selecting Yes then enter the desired Password. The Web Interface is not password protected by default. Select Next. (Figure 4) Figure 4 At the Basic Wireless Settings screen, change the Communication Type to Infrastructure.
- Page 14 Wi-Fi Password, for the Network. (Figure 6) Note: The most common Encryption type is WPA2-PSK (CCMP), also known as WPA2-AES. This may vary, depending upon the Wireless Router. Figure 6 To view manuals, videos, drivers, downloads, technical drawings, and more visit www.startech.com/support...
- Page 15 IP Address information. Select Next. (Figure 7) Note: A Gateway IP Address is not typically required. Figure 7 At the Confirm Settings screen, check for any configuration errors. Select Next. (Figure 8) Figure 8 To view manuals, videos, drivers, downloads, technical drawings, and more visit www.startech.com/support...
- Page 16 Printer. Select Next. (Figure 9) Figure 9 At the Confirm Settings screen, check for any configuration errors. Select Next. (Figure 10) Figure 10 To view manuals, videos, drivers, downloads, technical drawings, and more visit www.startech.com/support...
- Page 17 Connect the Power Adapter to the DC Jack, located on the back of the Print Server. Wait ~40 seconds for the Print Server’s Power On Self Test (POST) to complete. To view manuals, videos, drivers, downloads, technical drawings, and more visit www.startech.com/support...
- Page 18 Select Save & Restart at the bottom of the page. Allow the Print Server to Reboot. Note: If the Print Server will be utilizing a Wired Ethernet Connection, the setup is complete. To view manuals, videos, drivers, downloads, technical drawings, and more visit www.startech.com/support...
- Page 19 Wireless sub-tab. In the Basic Settings section, the SSID should now match the SSID of the Wireless Network. If the SSIDs do not match, return to Step #14. To view manuals, videos, drivers, downloads, technical drawings, and more visit www.startech.com/support...
- Page 20 If prompted, access the Web GUI for the Print Server by entering the Default Credentials listed in Step After logging in to the Web GUI, select the Setup tab then the Wireless sub-tab. To view manuals, videos, drivers, downloads, technical drawings, and more visit www.startech.com/support...
- Page 21 Navigate to the Control Panel screen and select the Devices and Printers icon. (Figure 12) Figure 12 Select Add a Printer, located at the top of the screen. To view manuals, videos, drivers, downloads, technical drawings, and more visit www.startech.com/support...
- Page 22 On the Add a Device screen, select The printer that I want isn’t listed. (Figure 13) Figure 13 On the Add Printer screen, select Add a printer using a TCP/IP address or hostname. Select Next. (Figure 14) Figure 14 To view manuals, videos, drivers, downloads, technical drawings, and more visit www.startech.com/support...
- Page 23 Figure 15 Set the Device Type field to Custom. Select Settings. (Figure 16) Figure 16 On the Configure Standard TCP/IP Port Monitor screen, set the Protocol to LPR. To view manuals, videos, drivers, downloads, technical drawings, and more visit www.startech.com/support...
- Page 24 Update has completed, select the Printer’s Manufacturer and Model from the Install the Printer Driver screen. Windows will install the Driver for the Printer. When the installation is complete, select Finish. To view manuals, videos, drivers, downloads, technical drawings, and more visit www.startech.com/support...
- Page 25 The Printers & Scanners screen will appear. From the Printers & Scanners screen, click the + icon, located on the left-hand side of the screen. (Figure 19) Figure 19 To view manuals, videos, drivers, downloads, technical drawings, and more visit www.startech.com/support...
- Page 26 Figure 21 Enter the following credentials under the IP tab: Address: (IP Address of the Print Server) • Protocol: Line Printer Daemon - LPD • Queue: lp1 • To view manuals, videos, drivers, downloads, technical drawings, and more visit www.startech.com/support...
-
Page 27: Operation
Print Server, and that the Print Server is receiving power. Press and release the Reset Button once. Note: Resetting the Print Server will stop all ongoing/ pending printing jobs. To view manuals, videos, drivers, downloads, technical drawings, and more visit www.startech.com/support... - Page 28 Power Adapter to the DC Jack, located on the back of the Print Server. Continue to Hold the Reset Button for 5 Seconds, then Release the Reset Button. The Print Server will restart with the Factory Default settings. To view manuals, videos, drivers, downloads, technical drawings, and more visit www.startech.com/support...
-
Page 29: Troubleshooting
The Print Server’s IP Contact the Network • • Address is identical to the Administrator to obtain Computer’s IP Address. an unused IP Address for the Print Server To view manuals, videos, drivers, downloads, technical drawings, and more visit www.startech.com/support... - Page 30 Connectors for damage and ensure the Power Adapter is connected to the Print Server and to a Power Source. Recheck the Print Server connection by running the PSAdmin. To view manuals, videos, drivers, downloads, technical drawings, and more visit www.startech.com/support...
- Page 31 Computer running the PSAdmin print server. to the Print Server. Download the latest Software for • the Print Server, located at one of the following locations: www.startech.com/PM1115UW www.startech.com/PM1115UWEU The Setup Possible Explanation: • • Wizard cannot The Personal Firewall is blocking •...
-
Page 32: Warranty Information
Limitation of Liability In no event shall the liability of StarTech.com Ltd. and StarTech.com USA LLP (or their officers, directors, employees or agents) for any damages (whether direct or indirect, special, punitive, incidental, consequential, or otherwise), loss of profits, loss of business, or any pecuniary loss, arising out of or related to the use of the product exceed the actual price paid for the product. - Page 33 Hard-to-find made easy. At StarTech.com, that isn’t a slogan. It’s a promise. StarTech.com is your one-stop source for every connectivity part you need. From the latest technology to legacy products — and all the parts that bridge the old and new — we can help you find the parts that connect your solutions.
Need help?
Do you have a question about the PM1115UW and is the answer not in the manual?
Questions and answers