Table of Contents

Related Manuals for StarTech.com RK1836BKF


Summary of Contents for StarTech.com RK1836BKF
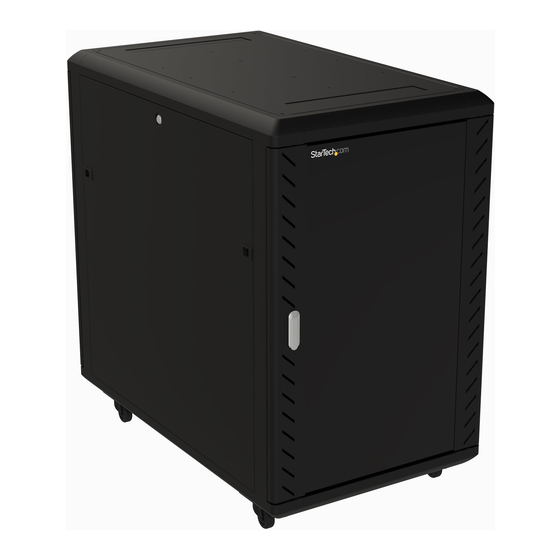
- Page 1 18U Knock-Down Server Rack Cabinet with Casters | 32 in. Deep Actual product may vary from photos User Manual SKU#: RK1836BKF For the latest information and specifications visit www.startech.com/RK1836BKF Manual Revision: 12/02/2019...
- Page 2 This manual may make reference to trademarks, registered trademarks, and other protected names and/or symbols of third-party companies not related in any way to StarTech.com. Where they occur these references are for illustrative purposes only and do not represent an endorsement of a product or service by StarTech.com, or an endorsement of the product(s) to which this manual...
-
Page 3: Warning Statements
• This product requires an earth ground connection. Do not use this product without an earth ground connection. Varningar • Se till att du monterar produkten i enlighet med instruktionerna. • Överskrid inte produktens vikt kapacitet. Överbelastning av denna produkt kan leda till skador eller skador på egendom. Denna produkt kan stödja följande vikt: stationär: 800 kg rullande: 150 kg. • Produkten är endast avsedd för användning inomhus och ska inte användas utomhus. • Detta skåp är extremt tungt. Försök aldrig flytta på skåpet eller lyfta det utan hjälp. • Risk för vältning! Att förlänga flera komponenter från detta skåp ökar risken för att det välter. Förläng inte fler än en komponent från skåpet för att undvika risk. • Placera inte saker ovanpå skåpet och ställ inte skåpet ovanpå ett annat skåp. • Håll vätskor borta från skåpet. • Se till att du installerar skåpet på en plats som kan hantera den kombinerade vikten av skåpet och utrustningen som du tänker placera inuti. To view manuals, videos, drivers, downloads, technical drawings, and more visit www.startech.com/support... - Page 4 • N’approchez aucun liquide du rack de serveur. • Veillez à installer le rack de serveur dans un endroit pouvant supporter le poids combiné du rack et des équipements que vous comptez placer à l’intérieur. • Ce produit nécessite un raccordement à la terre. N’utilisez pas ce produit sans raccordement à la terre. Warnhinweise • Beachten Sie bei der Montage dieses Produkts die Montageanweisungen. • Überschreiten Sie nicht die Tragfähigkeit dieses Produkts. Das Überladen dieses Produkts kann zu Verletzungen oder Sachschäden führen. Dieses Produkt kann das folgende Gewicht tragen: Stationär = 800 kg, rollend = 150 kg. • Dieses Produkt ist nur zum Gebrauch in Innenräumen vorgesehen und sollte nicht im Freien verwendet werden. • Dieses Gehäuse ist extrem schwer. Versuchen Sie niemals, dieses Gehäuse ohne Hilfe zu bewegen oder anzuheben. • Kippgefahr! Das Ausziehen mehrerer Komponenten aus diesem Gehäuse erhöht die Chance, dass das Gehäuse umkippt. Um dies zu vermeiden, ziehen Sie niemals mehr als eine Komponente aus diesem Gehäuse aus. To view manuals, videos, drivers, downloads, technical drawings, and more visit www.startech.com/support...
- Page 5 • Non collocare oggetti sul box esterno e non impilare un box esterno sopra un altro. • Tenere il box esterno lontano dai liquidi. • Assicurarsi di installarlo in un punto che possa sorreggere il peso combinato del box esterno e dell’apparecchiatura che si intende collocare al suo interno. • Il prodotto richiede una messa a terra. Non utilizzare il prodotto in assenza di una messa a terra. Mensagens de aviso • Certifique-se de que monta este produto de acordo com as instruções. • Não exceda a capacidade de peso deste produto. Sobrecarregar este produto pode resultar em ferimentos ou danos à propriedade. Este produto pode suportar o seguinte peso: estacionário: 800 kg. Rolando: 150 kg. • Este produto destina-se apenas a uma utilização no interior e não deve ser utilizado no exterior. • Esta caixa é extremamente resistente. Nunca tente mover ou levantar esta caixa sem assistência. To view manuals, videos, drivers, downloads, technical drawings, and more visit www.startech.com/support...
- Page 6 • La caja es extremadamente pesada. Nunca intente mover o alzar esta caja sin la debida asistencia de otra persona. • ¡Peligro de vuelco! Añadir a esta caja varios componentes aumenta las posibilidades de peligro de vuelco de la caja. Para evitar dicho riesgo, no añada más que un solo componente. • No coloque ningún elemento encima de la caja y no apile la caja encima de otra caja. • Mantenga cualquier líquido lejos de la caja. • Asegúrese de instalar la caja en un área que tenga capacidad para soportar el peso combinado de la caja y el equipo que va a instalar dentro de la misma. • Este producto requiere conexión a tierra. No utilice este producto sin conexión a tierra. Waarschuwingen • Zorg dat u dit product volgens de instructies in elkaar zet. • Overschrijd de maximale capaciteit van dit product niet. Overbelasting De maximale gewichtscapaciteit mag niet overschreden worden. Overbelasting kan kan letsel of schade tot gevolg hebben. Dit product kan het volgende gewicht ondersteunen, stationair = 800 kg. rollend = 150 kg. To view manuals, videos, drivers, downloads, technical drawings, and more visit www.startech.com/support...
- Page 7 本製品は、 室内での使用を想定しています。 戸外では使用しないで下さ い。 • 本製品は、 非常に重いエンクロージャです。 絶対に一人で持ち上げたり 動かしたり しないで下さい。 • 転倒注意 ! 本製品から複数のコンポーネントが突き出した状態にしてお く とエンクロージャが転倒する恐れがあります。 転倒リスクを回避するた めに、 エンクロージャからはコンポーネントが突き出ないようにして下 さい。 • 本製品の上に何も載せないで下さい。 複数のエンクロージャを重ねて設 置しないで下さい。 • 液体物をエンクロージャに近づけないようにして下さい。 • エンクロージャ自身と中に積載する装置の総重量に耐えられるエリアに To view manuals, videos, drivers, downloads, technical drawings, and more visit www.startech.com/support...
- Page 8 設置して下さい。 • この製品にはアースが必要です。 アース接続をしていない状態で本製品 を使用しないでください。 To view manuals, videos, drivers, downloads, technical drawings, and more visit www.startech.com/support...
-
Page 9: Safety Statements
Mesures de sécurité • Les câbles (y compris les câbles d’alimentation et de chargement) doivent être placés et acheminés de façon à éviter tout risque électrique, de chute ou de sécurité 安全対策 • ケーブル (電源ケーブルと充電ケーブルを含む) は、 適切な配置と引き回し を行い、 電気障害やつまづきの危険性など、 安全上のリスクを回避するよう にしてください。 Misure di sicurezza • I cavi (inclusi i cavi di alimentazione e di ricarica) devono essere posizionati e stesi in modo da evitare pericoli di inciampo, rischi di scosse elettriche o pericoli per la sicurezza. Säkerhetsåtgärder • Kablar (inklusive elkablar och laddningskablar) ska dras och placeras på så sätt att risk för snubblingsolyckor och andra olyckor kan undvikas. To view manuals, videos, drivers, downloads, technical drawings, and more visit www.startech.com/support... -
Page 10: Table Of Contents
Package Contents ............................. 13 Requirements ............................. 14 Assembling the Server Rack ..............15 Leveling the Server Rack ...............18 Grounding the Enclosure ..............19 Installing Equipment ................19 Adjusting the Mounting Rails ..............20 To view manuals, videos, drivers, downloads, technical drawings, and more visit www.startech.com/support... -
Page 11: Product Diagram
Product Diagram Front View Top Panel Caster/Leveling Feet Plastic Corner Caps Bottom Panel Center Beam Side Panel Front Door Rear Door To view manuals, videos, drivers, downloads, technical drawings, and more visit www.startech.com/support... -
Page 12: Product Dimensions
Product Dimensions Front To view manuals, videos, drivers, downloads, technical drawings, and more visit www.startech.com/support... -
Page 13: Side
Side To view manuals, videos, drivers, downloads, technical drawings, and more visit www.startech.com/support... -
Page 14: Product Information
Casters x 2 • Caster w/Brakes x 2 • M6 x 10 mm Phillips Bolts x 16 • Leveling Feet x 4 • Door Keys x 2 • To view manuals, videos, drivers, downloads, technical drawings, and more visit www.startech.com/support... -
Page 15: Requirements
Phillips Head Screwdriver x 1 • Door Hinge Pin x 2 • Requirements Spirt/Bubble Level x 1 • 14 mm Wrench x 1 • (Optional) Cage Nut Tool x 1 • To view manuals, videos, drivers, downloads, technical drawings, and more visit www.startech.com/support... -
Page 16: Assembling The Server Rack
Using a Phillips Head Screwdriver, tighten the M6 x 10 mm Screw, being careful not to over-tighten. Repeat steps 1 - 4 to install the other Caster and Casters with Brakes. To view manuals, videos, drivers, downloads, technical drawings, and more visit www.startech.com/support... - Page 17 Flat Head Screw is securing the Plastic Corner Cap in place. Using a Phillips Head Screwdriver, tighten the M4 x 10 mm Flat Head Screws, being careful not to over-tighten. To view manuals, videos, drivers, downloads, technical drawings, and more visit www.startech.com/support...
- Page 18 Being careful not to over-tighten. Repeat steps 13 - 14 for the remaining corners. Insert a Door Hinge Pin into the Hinge Pin Hole in the bottom corner of the Side Panel. To view manuals, videos, drivers, downloads, technical drawings, and more visit www.startech.com/support...
-
Page 19: Leveling The Server Rack
Server Rack and rack equipment installed. Determine the location of the Server Rack. Use a Spirt/ Bubble Level to ensure that the location’s surface is a flat, level surface. To view manuals, videos, drivers, downloads, technical drawings, and more visit www.startech.com/support... -
Page 20: Grounding The Enclosure
Consult the documentation that came with the equipment to determine the best mounting hardware that you should use and how you should install it. To view manuals, videos, drivers, downloads, technical drawings, and more visit www.startech.com/support... -
Page 21: Adjusting The Mounting Rails
Slide the Mounting Rail along the Depth Adjustment Rails until you have reached the desired mounting depth. Notes: The distance between each of the Mounting Rail Adjustment Hole is 7/8 inch. To view manuals, videos, drivers, downloads, technical drawings, and more visit www.startech.com/support... - Page 22 Insert the M6 Screws through the Mounting Rail and into the Depth Adjustment Rails. Using a Phillips Head Screwdriver to tighten the M6 Screws. Be careful not to over-tighten the M6 Screws. To view manuals, videos, drivers, downloads, technical drawings, and more visit www.startech.com/support...
- Page 23 Limitation of Liability In no event shall the liability of StarTech.com Ltd. and StarTech.com USA LLP (or their officers, directors, employees or agents) for any damages (whether direct or indirect, special, punitive, incidental, consequential, or otherwise), loss of profits, loss of business, or any pecuniary loss, arising out of or related to the use of the product exceed the actual price paid for the product.
- Page 24 StarTech.com is an ISO 9001 Registered manufacturer of connectivity and technology parts. StarTech.com was founded in 1985 and has operations in the United States, Canada, the United Kingdom and Taiwan servicing a worldwide market.
Need help?
Do you have a question about the RK1836BKF and is the answer not in the manual?
Questions and answers