StarTech.com NETRS232 Instruction Manual
1 port rs232 serial over ip device server
Hide thumbs
Also See for NETRS232:
- Quick installation manual (9 pages) ,
- User manual (18 pages) ,
- Quick installation manual (16 pages)
Table of Contents
Advertisement
Quick Links
1 Port RS232 Serial over IP Device Server
NETRS232
*actual product may vary from photos
DE: Bedienungsanleitung - de.startech.com
FR: Guide de l'utilisateur - fr.startech.com
ES: Guía del usuario - es.startech.com
IT: Guida per l'uso - it.startech.com
NL: Gebruiksaanwijzing - nl.startech.com
PT: Guia do usuário - pt.startech.com
For the most up-to-date information, please visit: www.startech.com
Manual Revision: 09/10/2015
Advertisement
Table of Contents

Related Manuals for StarTech.com NETRS232


Summary of Contents for StarTech.com NETRS232
- Page 1 DE: Bedienungsanleitung - de.startech.com FR: Guide de l'utilisateur - fr.startech.com ES: Guía del usuario - es.startech.com IT: Guida per l'uso - it.startech.com NL: Gebruiksaanwijzing - nl.startech.com PT: Guia do usuário - pt.startech.com For the most up-to-date information, please visit: www.startech.com Manual Revision: 09/10/2015...
- Page 2 StarTech.com. Where they occur these references are for illustrative purposes only and do not represent an endorsement of a product or service by StarTech.com, or an endorsement of the product(s) to which this manual applies by the third-party company in question. Regardless of any direct acknowledgement elsewhere in the body of this document, StarTech.com hereby...
-
Page 3: Table Of Contents
Table of Contents Introduction ....................1 Packaging Contents ..........................1 System Requirements ..........................1 Product Diagram ..................2 Front View ..............................2 Rear View ..............................2 DB-9 Connector Pinout .................3 RJ-45 Connector Pinout ................3 Installation ....................4 Hardware Installation ..........................4 Software Installation ..........................5 Operation ....................5 Specifications ..................8 Technical Support ..................10... -
Page 4: Introduction
Introduction Packaging Contents • 1x Serial over IP Device Server • 1x DIN Rail Kit • 1x Terminal Block • 1x Universal Power Adapter (NA/UK/EU) and AU in Australia • 1x Software CD • 1x Instruction Manual System Requirements • RJ45 terminated Cat5 or higher Ethernet cabling •... -
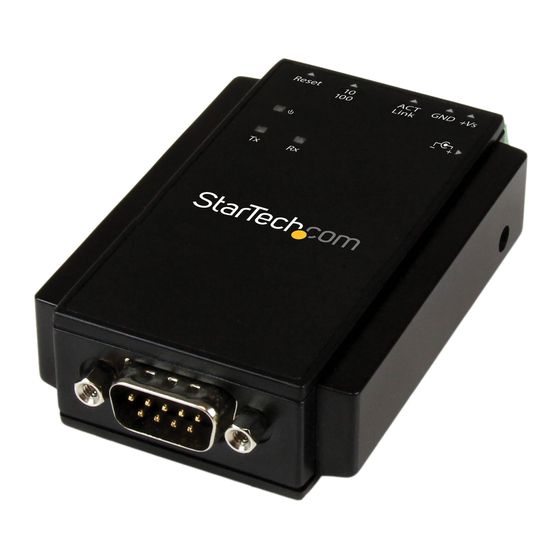
Page 5: Product Diagram
Product Diagram Front View Power LED Transmit LED Receive LED Power Jack (10~30V DC) DB-9 Serial Port Rear View RJ45 10/100 Port Terminal Block (10~30V DC) Instruction Manual... -
Page 6: Db-9 Connector Pinout
DB-9 Connector Pinout Pin 1 Pin 2 Pin 3 Pin 4 Pin 5 Pin 6 Pin 7 Pin 8 Pin 9 RJ-45 Connector Pinout Define Instruction Manual... -
Page 7: Installation
Installation Hardware Installation DIN-Rail Bracket: Follow the below procedure to install the DIN-Rail bracket to the RS232 device server. 1. Remove the included DIN-Rail bracket, and screws from the package, and align the DIN-Rail bracket flush onto the back of the device server. 2. -
Page 8: Software Installation
Software Installation 1. Connect the device server’s RJ45 interface to your Local Area Network (LAN). Note: Alternatively, you can also use a crossover cable to connect the device server directly to your system for the initial configuration. 2. Insert the provided CD into your DVD/CD-ROM drive. 3. - Page 9 3. If required, allow access to the software through the Windows Firewall by clicking the “Allow access” button. 4. Once the device is found, configure the PC to the same IP domain by clicking the “Configure” button. The default IP address of the device is “192.168.1.1”. Note: The default Gateway Address is “192.168.1.254”.
- Page 10 7. Once your settings have been customized, click the “OK” button at the bottom of the screen. Instruction Manual...
-
Page 11: Specifications
Specifications Interface Serial Industry Standards IEEE 802.3, IEEE 802.3u Ports 1x DB-9 (9 pin; D-Sub) Male 1x RJ-45 Female Connectors 1x Terminal Block (2 wire) 1x DC Power Auto MDIX Compatible Networks 10/100 Mbps Data Bits 5, 6, 7, 8 Flow Control RTS/CTS, None Max Baud Rate... - Page 12 Terminal Block: 10~30V DC (2 wire) Power Input DC Jack: 10~30V DC 3.5mm Power Consumption 1.45W Max Enclosure Material Plastic Operating Temperature 0°C to 60°C (32°F to 140°F) Storage Temperature -10°C to 70°C (-14°F to 158°F) Humidity 0~90% RH Product Weight 2.29 oz (65 g) Windows®...
-
Page 13: Technical Support
Limitation of Liability In no event shall the liability of StarTech.com Ltd. and StarTech.com USA LLP (or their officers, directors, employees or agents) for any damages (whether direct or indirect, special, punitive, incidental, consequential, or otherwise), loss of profits, loss of business, or any pecuniary loss, arising out of or related to the use of the product exceed the actual price paid for the product. - Page 14 StarTech.com is an ISO 9001 Registered manufacturer of connectivity and technology parts. StarTech.com was founded in 1985 and has operations in the United States, Canada, the United Kingdom and Taiwan servicing a worldwide market.
Need help?
Do you have a question about the NETRS232 and is the answer not in the manual?
Questions and answers