Intel Galileo Tutorial Manual
For iot
Hide thumbs
Also See for Galileo:
- Hardware manual (34 pages) ,
- User manual (19 pages) ,
- Getting started manual (13 pages)
Table of Contents
Advertisement
Quick Links
Download this manual
See also:
User Manual
Advertisement
Table of Contents

Subscribe to Our Youtube Channel
Related Manuals for Intel Galileo


Summary of Contents for Intel Galileo
- Page 1 Intel® Galileo Development Kit for IoT Tutorial Guide Revision 1.0 – 20-Feb-2014 Intel® Galileo Development Kit for IoT - Tutorial Guide (Page 1 of 32)
-
Page 2: Table Of Contents
Other sample applications ....................30 LED Blink ............................... 30 LCD Display ............................30 Naui – Not A User Interface ........................30 Troubleshooting ........................31 Revision 1.0 – 20-Feb-2014 Intel® Galileo Development Kit for IoT - Tutorial Guide (Page 2 of 32) -
Page 3: Document / Revision History
Version 20-Feb-2014 First release at MWC Reference Documents Document Name Description Intel® Galileo DevKit QSG Intel® Galileo Development Kit for IoT Quick Start Guide. Galileo Datasheet (329681-003US) Detail of Galileo board and specifications. Terminology / Definitions Term Change Description DevKit Intel®... -
Page 4: Introduction
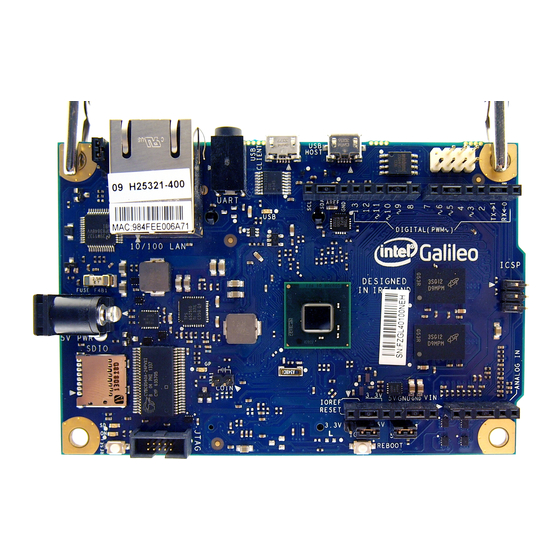
1 Introduction The DevKit is an out-of-the box evaluation and development platform based on the Intel® Galileo board. This manual describes the technical details and the process of booting the DevKit Live image and the guide for application developers. Component list Disclaimer: Please note that pictures here are just for reference, the content and parts may vary. - Page 5 USB to 9pin-D cable USB OTG adapter LCD Module For Arduino 20 X 4 Sony eye webcam to provide video and audio feed via USB Revision 1.0 – 20-Feb-2014 Intel® Galileo Development Kit for IoT - Tutorial Guide (Page 5 of 32)
-
Page 6: Devkit Live Usb Image
Ordinary user: Username: user Password: devkit The login details for your Galileo target are: Root user: Username: root Password: There is no password Revision 1.0 – 20-Feb-2014 Intel® Galileo Development Kit for IoT - Tutorial Guide (Page 6 of 32) -
Page 7: Devkit Setup
Figure 1: DevKit Development System and Target connections Connections: Insert the micro SD card supplied with the DevKit in the SD Card slot of Galileo. Connect Ethernet cable between Galileo board and your internet router. Plug-in serial cable between your Host PC (USB end) and 3.5mm stereo jack male pin in to Galileo board audio type serial connector close to Ethernet port. - Page 8 7. Select the option corresponding to your CPU architecture and Press Enter. Figure 2: Menu on Boot from Live USB Key Revision 1.0 – 20-Feb-2014 Intel® Galileo Development Kit for IoT - Tutorial Guide (Page 8 of 32)
-
Page 9: Booting Devkit Live Usb On Mac
4. Use the ‘diskutil list’ command to find out the device node of your USB key and note it down (e.g ‘/dev/disk4’ on this screenshot) Figure 4: Device list on Mac Revision 1.0 – 20-Feb-2014 Intel® Galileo Development Kit for IoT - Tutorial Guide (Page 9 of 32) - Page 10 8. You are now ready to create your virtual machine. Use the ‘diskutil unmountdisk’ command to unmount the USB key again (please see step 5 above). Revision 1.0 – 20-Feb-2014 Intel® Galileo Development Kit for IoT - Tutorial Guide (Page 10 of 32)
- Page 11 10. Assign memory to your virtual machine according to the amount of memory available on your host machine (recommended 2GB or more) -> Click ‘Continue’ Figure 9: Virtual disk Memory specifications on Mac Revision 1.0 – 20-Feb-2014 Intel® Galileo Development Kit for IoT - Tutorial Guide (Page 11 of 32)
- Page 12 Select ‘Settings’ -> Click the ‘Ports’ button -> Select the ‘USB’ tab -> Click the plus button - > Select your USB adapter from the list of available devices Figure 11: VirtualBox Serial-USB configuration on Mac Revision 1.0 – 20-Feb-2014 Intel® Galileo Development Kit for IoT - Tutorial Guide (Page 12 of 32)
- Page 13 Figure 12: VirtualBox Serial-USB configuration on Mac 14. Your virtual machine is now ready! Click ‘Start’ to boot it for the first time. Figure 13: VirtualBox Status on Mac Revision 1.0 – 20-Feb-2014 Intel® Galileo Development Kit for IoT - Tutorial Guide (Page 13 of 32)
- Page 14 3.2 kernel (486 or 686-pae depending on your hardware). Figure 14: Boot Menu on Mac Revision 1.0 – 20-Feb-2014 Intel® Galileo Development Kit for IoT - Tutorial Guide (Page 14 of 32)
-
Page 15: Capturing Target Ip Address
Capturing Target IP address: 1. Connect Galileo target and your Host PC to the same network to verify that you have network connectivity between these two. 2. Use a terminal emulator (e.g. minicom / teraterm / putty) & connect to the Galileo target console with configuration ‘115200 Bit/s, 8 Bit, 1 Stop and No parity’. -
Page 16: Setup Eclipse Devkit Ide
2. Launch the DevKit IDE by double clicking the desktop ‘Eclipse DevKit IDE’ icon on the host PC. Figure 16: Development System Desktop 3. Inserting the Galileo target IP address captured in the previous step. Select menu Window->Open Perspective->Other->Remote System Explorer Right click the ‘galileo’... - Page 17 Enter IP address captured earlier in the Host Name field. Figure 18: Connection to remote target Revision 1.0 – 20-Feb-2014 Intel® Galileo Development Kit for IoT - Tutorial Guide (Page 17 of 32)
-
Page 18: Toolchain Selection
Toolchain Selection The DevKit Development provides GNU and Intel C/C++ Compiler (ICC) Toolchain. NOTE: The build environment cannot be dynamically changed. NOTE: Please note that the build environment cannot be dynamically changed i.e. if you project was created to use the GNU compiler, you will NOT be able to dynamically convert it to build with the ICC. -
Page 19: 'Hello World' Project
Figure-20: Project creation using GCC Toolchain This will create a default “Hello World” project using the GNU Toolchain and sysroot for your Galileo target. Revision 1.0 – 20-Feb-2014 Intel® Galileo Development Kit for IoT - Tutorial Guide (Page 19 of 32) - Page 20 5. To build this created project for the first time right click on project name and select and click the option ‘Build Project’. Figure-21: GCC project build Revision 1.0 – 20-Feb-2014 Intel® Galileo Development Kit for IoT - Tutorial Guide (Page 20 of 32)
-
Page 21: Create And Build Project Using Icc
Figure-22: Project creation using ICC Toolchain This will create a default “Hello World” project using the ICC Toolchain and sysroot for your Galileo target. Revision 1.0 – 20-Feb-2014 Intel® Galileo Development Kit for IoT - Tutorial Guide (Page 21 of 32) - Page 22 Figure-23: ICC project build On successful compilation and build it will generate a binary file suitable to debug / run on Galileo target board. Revision 1.0 – 20-Feb-2014 Intel® Galileo Development Kit for IoT - Tutorial Guide (Page 22 of 32)
-
Page 23: Debug Project
Debug project 1. To transfer, run and debug your application remotely on your Galileo target, right-click your project folder→ Debug As → Debug Configurations. Figure-24: Debug project configuration Revision 1.0 – 20-Feb-2014 Intel® Galileo Development Kit for IoT - Tutorial Guide... - Page 24 Figure-25: Debug configuration remote path setup 3. By clicking the 'Browse' button next to the 'Remote Absolute File Path for C/C++ Application'. 4. For the first time access to the Galileo board, the system will prompt you to enter root password optionally.
- Page 25 7. In the 'Commands to execute before application' use the chmod command to make your application executable on the target e.g. chmod 755 /tmp/myICCproject Figure-28: Command setup for binary on remote target Revision 1.0 – 20-Feb-2014 Intel® Galileo Development Kit for IoT - Tutorial Guide (Page 25 of 32)
- Page 26 9. Modify your program as needed and use the build and debug steps described above for the rest of the development process. Once your program is finalized you can use the 'mv' command on the Galileo console to move the application binary to its final location e.g: mv /tmp/my_project /usr/bin/my_final_app Revision 1.0 –...
-
Page 27: Manually Transfer Binary To Remote Target
Manually transfer binary to remote target After your application is finalized you can transfer it to your Galileo target using the DevKit IDE. 1. Open the ‘Remote System Explored’ perspective Window -> Open Perspective - > Remote System Explorer 2. Locate the application binary in the ‘Remote System Explorer’ tab and copy it e.g. Expand the ‘Local’... - Page 28 3. Transfer the binary to its desired location on the Galileo target e.g. Expand the ‘galileo’ tab in the ‘Remote System Explored’ window -> ‘Sftp Files’ -> ‘Root’ -> ‘/‘-> right click ‘tmp’ -> Click ‘Paste’ Figure-31: Destination for copy on remote target 4.
-
Page 29: Sample Applications
IoT Web Server This application below shows an example of how you can utilize the DevKit development environment and the web server running on the Galileo target. Revision 1.0 – 20-Feb-2014 Intel® Galileo Development Kit for IoT - Tutorial Guide... -
Page 30: Other Sample Applications
Please refer to the provided source code of sample applications the SD card. LED Blink LCD Display Naui – Not A User Interface Revision 1.0 – 20-Feb-2014 Intel® Galileo Development Kit for IoT - Tutorial Guide (Page 30 of 32) -
Page 31: Troubleshooting
Solution 1: Please use the ‘diskutil list’ command to verify that the device node of your USB key matched the device node in the virtual machine disk file: Revision 1.0 – 20-Feb-2014 Intel® Galileo Development Kit for IoT - Tutorial Guide (Page 31 of 32) - Page 32 Solution 2: Please use the ‘diskutil unmountdisk’ command to unmount the USB key before starting the virtual machine Revision 1.0 – 20-Feb-2014 Intel® Galileo Development Kit for IoT - Tutorial Guide (Page 32 of 32)
Need help?
Do you have a question about the Galileo and is the answer not in the manual?
Questions and answers