Table of Contents
Advertisement
Quick Links
Advertisement
Table of Contents
Troubleshooting

Related Manuals for Comtrol DeviceMaster DM-2000 Series


Summary of Contents for Comtrol DeviceMaster DM-2000 Series
- Page 1 Installation and Configuration Guide...
- Page 2 Copyright © 2001 - 2018. Comtrol Corporation. All Rights Reserved. Comtrol Corporation makes no representations or warranties with regard to the contents of this document or to the suitability of the Comtrol product for any particular purpose. Specifications subject to change without notice. Some software or features may not be available at the time of publication.
-
Page 3: Table Of Contents
Table of Contents Introduction ..........................9 Supported DeviceMaster Models ....................... 9 DeviceMaster Port Usage ..........................9 Installation Overview ..........................10 NS-Link COM Port Driver Installation Overview .................. 10 NS-Link tty Port Installation Overview....................11 TCP/IP Socket Port Installation Overview....................11 Locating Software and Documentation ....................11 Connectivity Requirements ........................ - Page 4 Table of Contents Device Driver (NS-Link) Installation ................47 Overview................................ 47 Before Installing the NS-Link Driver...................... 47 Linux Installations ............................47 Windows Installations ..........................49 Supported Operating Systems ......................... 49 Installation Overview for Windows ......................49 NS-Link for Windows Installation......................49 Configuring the NS-Link Driver for Windows..................
- Page 5 Table of Contents Connecting Serial Devices ....................87 DB9 Connectors ............................88 DB9 Null-Modem Cables (RS-232) ......................89 DB9 Null-Modem Cables (RS-422) ......................89 DB9 Straight-Through Cables (RS-232/485)................... 89 DB9 Loopback Plugs..........................90 Connecting DB9 Serial Devices ....................... 90 RJ45 Connectors ............................91 RJ45 Null-Modem Cables (RS-232) ......................
- Page 6 Table of Contents Using Driver Configuration Files ......................110 Saving Driver Configuration Files......................110 Saving Device-Level Configuration....................110 Saving Port-Level Configuration..................... 111 Loading Driver Configuration Files....................... 112 Loading Device Configuration ......................112 Loading Port Configuration ......................113 Changing the Bootloader Timeout ......................114 PortVision DX - Changing Bootloader Timeout ..................
- Page 7 Troubleshooting Checklist ........................147 General Troubleshooting......................... 149 Testing Ports Using Port Monitor (PMon2) ..................151 Overview ..............................151 Testing Comtrol COM Ports........................151 Testing Ports Using Test Terminal ....................... 154 Overview ..............................154 Opening Ports ............................154 Sending and Receiving Test Data (RS-232/422/485: 4-Wire) ............... 155 Loopback Test (RS-232)..........................
- Page 8 Table of Contents viii - Table of Contents DeviceMaster Installation and Configuration Guide: 2000594 Rev. F...
-
Page 9: Introduction
Introduction This section discusses the following topics: • Supported DeviceMaster Models on Page 9 • DeviceMaster Port Usage (below) • Installation Overview on Page 10 NS-Link COM Port Driver Installation Overview on Page 10 NS-Link tty Port Installation Overview on Page 11 TCP/IP Socket Port Installation Overview on Page 11 •... -
Page 10: Installation Overview
Note: PortVision DX replaces PortVision Plus. PortVision Plus does not support operating systems above Windows 7 and SocketServer versions above 9.00. Comtrol recommends connecting the DeviceMaster to a PC or laptop running Windows and that you install PortVision DX for easy IP address configuration and firmware updates. See... -
Page 11: Ns-Link Tty Port Installation Overview
1. After connecting the DeviceMaster, programming the IP address, and uploading the latest version of SocketServer, you are ready to install the driver. 2. Locate and unpackage the driver assembly: http://downloads.comtrol.com/dev_mstr/rts/drivers/linux/. Refer to the readme file packaged with the Linux driver assembly for driver installation and configuration procedures for the tty port. -
Page 12: Connectivity Requirements
Connectivity Requirements Software Description/Documentation File Install if you want tty ports. Refer to the Readme file Linux compressed in the Linux driver assembly for driver configuration procedures. Install if you want COM ports. Windows Server 2008 R2 through Windows Refer to the DeviceMaster Device Driver (NS-Link) User Guide. -
Page 13: Hardware Installation
Hardware Installation Installation Overview Use the links below to locate installation procedures for the following models: DeviceMaster RTS 1-Port - Panel Mount (DB9) Installation 1-Port DB9 serial port - panel mount Page 14 DM-2201 DM-2201: 1-Port DIN Rail (Terminal Block) 1-Port Screw terminal serial port - DIN rail Installation... -
Page 14: Product Name Change Notification
Hardware Installation Product Name Change Notification Comtrol has implemented a product name change for our DeviceMaster 2-port DIN rail models to align with our new 1-port and 4-port DIN rail model names. Old Name/Description New Model Name Part Number DeviceMaster RTS 2-Port 1E... - Page 15 Hardware Installation 5-30VDC with Screw Terminal Power Connector Use the following procedure power on this model. Observe proper ESD techniques when connecting and disconnecting the DeviceMaster. • Insert the earth ground wire into the earth ground screw terminal. • Insert the DC positive wire into the positive screw terminal and the Return Earth Gnd DC return wire into the return screw terminal.
-
Page 16: Dm-2201: 1-Port Din Rail (Terminal Block) Installation
Hardware Installation DM-2201: 1-Port DIN Rail (Terminal Block) Installation Use the following procedure to install DM-2201. See DM-2101: 1-Port DIN Rail (DB9) Installation on Page 17 if the DeviceMaster has DB9 serial connectors. 1. Attach the DM-2201 1-Port to the DIN rail adapter. 2. -
Page 17: Dm-2101: 1-Port Din Rail (Db9) Installation
Hardware Installation 5. Go to Initial Configuration on Page 33 to configure the DeviceMaster for use. DM-2101: 1-Port DIN Rail (DB9) Installation Use the following procedure to install a DM-2101. 1. Attach the DM-2101 to the DIN rail adapter. 2. Connect the power supply and apply power to the DM-2101 using the power supply specifications on the product label and the following information. -
Page 18: Dm-2202 And Dm-2402: 2-Port Din Rail (Terminal Block) Installation
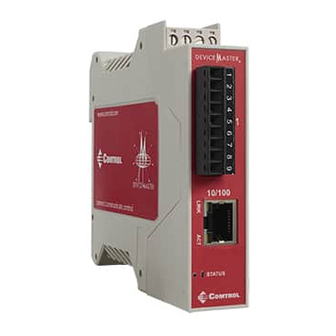
Hardware Installation Do not connect RS-422/485 devices until the IP address is configured and an appropriate port interface type has been configured. The default port setting is RS-232. Caution 5. Go to Initial Configuration on Page 33 to configure the DM-2101 for use. DM-2202 and DM-2402: 2-Port DIN Rail (Terminal Block) Installation Use the following procedure to install the DM-2202 and DM-2402. - Page 19 Hardware Installation 4. Verify that the Status LED has completed the boot cycle and network connection for the DeviceMaster is functioning properly using the following table. DM-2202 and DM-2402 (2-Port with Serial Terminal Connectors) LED Descriptions The STATUS LED on the device is lit, indicating you have power and it has completed the boot cycle.
-
Page 20: Dm-2102 And Dm-2302: 2-Port Din Rail (Db9) Installation
Hardware Installation DM-2102 and DM-2302: 2-Port DIN Rail (DB9) Installation Use the following procedure to install DM-2102 and DM-2302. 1. Attach the DeviceMaster to the DIN rail adapter. 2. Connect the power supply and apply power to the DeviceMaster using the power supply specifications on the product label and the following information. - Page 21 Hardware Installation 3. Use the appropriate method for network attachment of your DeviceMaster 2-port: • DM-2102: Connect the 10/100 port to the same Ethernet network segment as the host PC using a standard network cable. • DM-2302: Connect either 10/100 port to the same Ethernet network segment as the host PC using a standard network cable.
-
Page 22: Dm-2304: 4-Port Din Rail (Db9) Installation
Hardware Installation DM-2304: 4-Port DIN Rail (DB9) Installation Use the following procedure to install DM-2304. 1. Attach the DeviceMaster to the DIN rail adapter. 2. Connect the power supply and apply power to the DeviceMaster using the power supply specifications on the product label and the following information. -
Page 23: 4-Port And 8-Port Installation
Hardware Installation Do not connect RS-422/485 devices until the IP address is configured and an appropriate port interface type has been configured. The default port setting is RS-232. Caution 5. Go to Initial Configuration on Page 33 to configure the DeviceMaster for use. 4-Port and 8-Port Installation Use the following procedure to install the DeviceMaster 4-port or 8-port. - Page 24 Hardware Installation 4. Verify that the PWR LED has completed the boot cycle and the network connection for the DeviceMaster is functioning properly. 4-Port and 8-Port LED Descriptions LED on the front panel of the DeviceMaster is lit, indicating you have power and it has completed the boot cycle.
-
Page 25: 16-Port (Devicemaster Rts - External Power Supply) Installation
Hardware Installation 16-Port (DeviceMaster RTS - External Power Supply) Installation Use the following procedure to install the DeviceMaster RTS 16-port with an external power supply. 1. Place the DeviceMaster RTS on a stable surface, or optionally mount the DeviceMaster in a rack. Rack Installation: a. - Page 26 Hardware Installation 3. Apply power to the DeviceMaster RTS by connecting the AC power adapter to the DeviceMaster, the power cord to the power adapter, and plugging the power cord into a power source. See External Power Supply Specifications on Page 139 if you want to provide your own power supply. 4.
-
Page 27: 16-Port (Devicemaster Pro) Installation
Hardware Installation 16-Port (DeviceMaster PRO) Installation Use the following procedure to install the DeviceMaster PRO 16-port with an external power supply. 1. Place the DeviceMaster PRO on a stable surface, or optionally mount the DeviceMaster PRO in a rack. Rack Installation: a. - Page 28 Hardware Installation 5. Verify that the PWR LED has completed the boot cycle and network connection for the DeviceMaster is functioning properly using the table below. DeviceMaster PRO 16-Port LED Description Red LED on the front panel of the DeviceMaster PRO is lit, indicating you have power and it has completed the boot cycle.
-
Page 29: 16/32-Port Rack Mount Models (Internal Power Supply) Installation
Hardware Installation 16/32-Port Rack Mount Models (Internal Power Supply) Installation Use the following procedure to install the DeviceMaster 16-port or 32-port with an internal power supply. 1. Place the DeviceMaster on a stable surface, or optionally mount the DeviceMaster in a rack. Rack Installation: a. -
Page 30: Adding A Unit To An Existing Installation
Hardware Installation Do not connect RS-422/485 devices until the IP address is configured and an appropriate port interface type has been configured (Step 5). The default port setting is RS-232. Caution 3. Apply power to the DeviceMaster by connecting the appropriate power cord into the power socket on the DeviceMaster, plugging the power cord into a power source, and turning on the power switch. -
Page 31: Replacing Hardware
Hardware Installation Replacing Hardware Use this procedure to replace hardware. 1. Remove the old unit and attach a new or spare DeviceMaster. 2. Connect the new DeviceMaster to the network hub or server NIC. 3. Apply power to the new DeviceMaster and verify that it passes the power on self-test. 4. - Page 32 Hardware Installation 32 - Hardware Installation DeviceMaster Installation and Configuration Guide: 2000594 Rev. F...
-
Page 33: Initial Configuration
• RocketLinx switches In addition to identifying Comtrol Ethernet attached products, you can use PortVision DX to display any third-party switch and hardware that may be connected directly to those devices. All non-Comtrol products and unmanaged RocketLinx switches are treated as non-intelligent devices and have limited feature support. -
Page 34: Portvision Dx Requirements
Windows 10 operating systems. PortVision DX requires that you connect the Comtrol Ethernet attached product to the same network segment as the Windows host system if you want to be able to scan and locate it automatically during the configuration process. -
Page 35: Installing Portvision Dx
During initial configuration, PortVision DX automatically detects and identifies DeviceMaster units, if they are in the same network segment. 1. Download PortVision DX: http://downloads.comtrol.com/dev_mstr/portvision_dx. Note: Depending on your operating system, you may need to respond to a Security Warning to permit access. - Page 36 Installing PortVision DX 5. Click I accept the terms in the License Agreement and Next. 6. Click Next or optionally, browse to a different location and then click Next. 7. Click Next to configure the shortcuts. 36 - Initial Configuration DeviceMaster Installation and Configuration Guide: 2000594 Rev.
- Page 37 Save time, only scan for DeviceMasters. Note: If the Comtrol Ethernet attached product is not on the local segment and it has been programmed with an IP address, it will be necessary to manually add the Comtrol Ethernet attached product to PortVision DX.
-
Page 38: Configuring The Network Settings
(Installing PortVision DX on Page 35). 2. Start PortVision DX using the PortVision DX desktop shortcut or from the Start button, click Comtrol > PortVision DX. 3. Depending on your operating system, you may need to click Yes to the Do you want to allow the following program to make changes to this computer? query. - Page 39 Configuring the Network Settings 6. Highlight the DeviceMaster for which you want to program network information and open the Properties screen using one of these methods. • Double-click the DeviceMaster in the Device Tree or Device List pane. • Highlight the DeviceMaster in the Device Tree or Device List pane and click the Properties button. •...
- Page 40 Configuring the Network Settings 7. Optionally, rename the DeviceMaster in the Device Name field. Note: SocketServer versions previous to v9.00 did not support the Bootloader Timeout option in the PortVision DX Properties screen. Note: The MAC address and Device Status fields are automatically populated and you cannot change those values.
-
Page 41: Checking The Socketserver Version
2. Check the SocketServer version number of the Software Version for the DeviceMaster. 3. Check the Comtrol ftp site to see if a later version is available by accessing the ftp subdirectory that contains the latest version of SocketServer. -
Page 42: Uploading Socketserver With Portvision Dx
1. Make sure that you have downloaded the latest SocketServer version from: http://downloads.comtrol.com/dev_mstr/rts/software/socketserver. 2. If necessary, open PortVision DX: Comtrol > PortVision DX or use the desktop shortcut. 3. Right-click the DeviceMaster or DeviceMasters for which you want to update, click Advanced > Upload Firmware, browse to the SocketServer .cmtl file, and then click Open. -
Page 43: Customizing Portvision Dx
Customizing PortVision DX 4. Click Yes to the Upload Firmware message that warns you that this is a sensitive process. It may take a few moments for the firmware to upload onto the DeviceMaster. The DeviceMaster reboots itself during the upload process. 5. -
Page 44: Accessing Devicemaster Documentation From Portvision Dx
PortVision DX. How to Download Documentation Use this procedure to initially download a document or documents. 1. If necessary, open PortVision DX: Comtrol > PortVision DX or use the desktop shortcut. 2. Click Help > Documentation. 3. Optionally, click the DOWNLOAD THE CURRENT DOCUMENTATION CATALOG ONLINE button to make sure that the latest documentation is available to PortVision DX. -
Page 45: How To Open Previously Downloaded Documents
How to Open Previously Downloaded Documents Use the following procedure to access previously downloaded documents in PortVision DX. Note: Optionally, you can browse to the Program Files (x86) > Comtrol > PortVision DX > Docs subdirectory and open the document. - Page 46 How to Open Previously Downloaded Documents 46 - Initial Configuration DeviceMaster Installation and Configuration Guide: 2000594 Rev. F...
-
Page 47: Device Driver (Ns-Link) Installation
(Socket Port Configuration on Page 61). Linux Installations Download the latest device driver for Linux: fhttp://downloads.comtrol.com/dev_mstr/rts/drivers/linux. Note: Although the download link displays rts in the path, the driver supports the DeviceMaster models discussed in this User Guide. Refer to the README file packaged with the Linux driver for driver installation and configuration procedures. - Page 48 Open SocketServer to check the version by opening your browser and entering the IP address of the DeviceMaster. b. Check the download site for the latest version: http://downloads.comtrol.com/dev_mstr/rts/software/ SocketServer. If necessary, download the latest version. Note: Technical Supports recommends that you update to the latest version of SocketServer before installing an NS-Link device driver.
-
Page 49: Windows Installations
1. If necessary, locate the NS-Link device driver and make it available to the host system. The driver assembly is available at: http://downloads.comtrol.com/dev_mstr/rts/drivers/win7. Note: Although the download link displays win7 in the path, the driver supports the previously listed Windows operating systems. - Page 50 6. Leave the Launch DeviceMaster Driver Installation box checked. If you do not check this box, you can use the shortcut under the Start button at: Comtrol > DeviceMaster Driver Installation Wizard. 7. Click Finish to complete the installation of the wizard.
- Page 51 NS-Link for Windows Installation 8. Click Next to start the driver installation. 9. Click Install and Next. 10. Select the DeviceMaster model that you are installing from the list. DeviceMaster Installation and Configuration Guide: 2000594 Rev. F Device Driver (NS-Link) Installation - 51...
- Page 52 NS-Link for Windows Installation 11. Enter the quantity of this DeviceMaster model that you want to install and click Ok. 12. Repeat Steps and 11 for each DeviceMaster that you are installing and then click Next. 13. Click Proceed. You may see the popup at the right for each port, depending on the operating system. 52 - Device Driver (NS-Link) Installation DeviceMaster Installation and Configuration Guide: 2000594 Rev.
- Page 53 NS-Link for Windows Installation 14. Return to the Installation Wizard and click Close. 15. Go to the next subsection for NS-Link driver configuration procedures. DeviceMaster Installation and Configuration Guide: 2000594 Rev. F Device Driver (NS-Link) Installation - 53...
-
Page 54: Configuring The Ns-Link Driver For Windows
The DeviceMaster must be connected to the local network segment or directly to a NIC on the host system to operate in MAC mode to perform the following configuration steps. 1. Access the Drivers Management Console using the desktop shortcut or under the start menu > Comtrol > DeviceMaster Driver Management Console. - Page 55 Configuring the NS-Link Driver for Windows 4. Click Apply to program the driver with the MAC address of the DeviceMaster or Ok to save the change and close the Drivers Management Console. If you do not Apply the changes before leaving this screen, you will be prompted to Apply, Ignore, or Cancel the changes.
- Page 56 SSL/TLS. • Since SSL/TLS can not be used for either UDP data streams or for the Comtrol proprietary MAC mode Ethernet driver protocol, both UDP and MAC mode serial data transport features are disabled.
- Page 57 Configuring the NS-Link Driver for Windows 9. Configure the remainder of the device properties: a. If desired, change the User-Friendly Device Name. b. Optionally, set a different Keep Alive Timeout period. You can set the amount of time in seconds that this DeviceMaster waits until it closes this connection and frees all the ports associated with it.
-
Page 58: Configuring Com Port Properties For Windows
User Guide or the NS-Link Help system for detailed configuration information. You can download the NS-Link User Guide from the download site: http://downloads.comtrol.com. 1. Highlight the first port you want to configure. 2. Complete the screen appropriately for the serial device that you plan on connecting to the port and click the Ok button. -
Page 59: Enabling Secure Data Mode
Enabling Secure Data Mode 9. Optionally, you may need to configure one or more ports for socket mode (Socket Port Configuration Page 61). Enabling Secure Data Mode In addition to enabling SSL Mode in the driver, you must Enable Secure Data Mode in the NS-Link web page. Use the following procedure to implement the Enable Secure Data Mode option. - Page 60 Enabling Secure Data Mode Click the appropriate Browse button to locate your key or certificate and click Save when you are done Click the Help button if you need information about key and certificate management. 60 - Device Driver (NS-Link) Installation DeviceMaster Installation and Configuration Guide: 2000594 Rev.
-
Page 61: Socket Port Configuration
Socket Port Configuration This section provides an overview of SocketServer and provides basic operating procedures. SocketServer and DeviceMaster security are discussed in detail in DeviceMaster Security on Page 65. Note: Technical Supports recommends that you update to the latest version of SocketServer before installing an NS-Link device driver or configuring socket ports. -
Page 62: Web Page Help System
SocketServer Architecture Page 62. The Help system for the web page is available at: http://downloads.comtrol.com/dev_mstr/rts/software/ socketserver/help/ssvr_help.zip. To use the help system: 1. Unzip the files in a folder. 2. Open the ssvr_help.htm file. -
Page 63: Accessing Socket Configuration
Accessing Socket Configuration Accessing Socket Configuration There are several ways to access the socket configuration pages. Use the method that fits your environment best. • Web Browser • PortVision DX Web Browser To access the socket configuration web interface for the DeviceMaster, follow this procedure. 1. -
Page 64: Socketserver Versions
SocketServer Versions SocketServer Versions SocketServer Overview discusses the that the default SocketServer web page is the same as the NS-Link web page. If the NS-Link driver is not running (not installed or disabled), SocketServer loads when you open a web browser session. Note: The top illustration shows the web page before an NS-Link device driver installation and the bottom ... -
Page 65: Devicemaster Security
† All DeviceMaster units are shipped from the factory with identical configurations. They all have the identical, self-signed, Comtrol Server RSA Certificates, Server RSA Keys, Server DH Keys, and no Client Authentication Certificates. For maximum data and access security, you should configure all DeviceMaster units with custom certificates and keys. - Page 66 Understanding Security Methods and Terminology Term or Issue Explanation (Continued) A digital certificate is an electronic credit card that establishes your credentials when doing business or other transactions on the Web. It is issued by a certification authority (CA). It contains your name, a serial number, expiration dates, a copy of the certificate holder's public key (used for encrypting messages and digital signatures), and the digital signature of Digital...
- Page 67 Understanding Security Methods and Terminology Term or Issue Explanation (Continued) This is an algorithm for public-key cryptography. It is the first algorithm known to be suitable for signing as well as encryption. RSA is widely used in electronic commerce protocols, and is believed to be sufficiently secure given sufficiently long keys and the use of up-to-date implementations.
- Page 68 Understanding Security Methods and Terminology Term or Issue Explanation (Continued) Unencrypted access to administrative and diagnostic functions are disabled. See Security Secure Config Modes on Page 71 and Configure/Enable Security Features Overview on Page 79 for more Mode information. Allows monitoring of a single serial port on the DeviceMaster while the port is configured for Secure Monitor Secure Data Mode.
- Page 69 Understanding Security Methods and Terminology Term or Issue Explanation (Continued) The following topic references are from: http://searchsecurity.techtarget.com/ • PKI (public key infrastructure) • How Public/Private Key Cryptography Works • Who Provides the Infrastructure • Digital Certificate • DH Key • Man in the Middle attack The RSA Key pair topic reference is from: http://en.wikipedia.org/wiki/RSA...
-
Page 70: Tcp And Udp Socket Ports Used By The Devicemaster
TCP and UDP Socket Ports Used by the DeviceMaster TCP and UDP Socket Ports Used by the DeviceMaster Following list is all of the logical TCP and UDP socket ports implemented in DeviceMasters. Socket Port Number Descriptions TCP Ports 22 (ssh) and 23 (telnet) are used for administrative and diagnostic 22 SSH purposes and aren't required for normal use and are enabled by default and Port 23 Telnet... -
Page 71: Devicemaster Security Features
DeviceMaster Security Features DeviceMaster Security Features The following subsections provide information about DeviceMaster security features. Security Modes The DeviceMaster supports two security modes. Security Mode Descriptions SSL encryption for serial port data streams for both NS-Link and SocketServer. Secure Data mode: •... -
Page 72: Secure Data Mode And Secure Config Mode Comparison
Secure Data Mode and Secure Config Mode Comparison Secure Data Mode and Secure Config Mode Comparison This table provides information that compares Secure Data and Secure Config modes. Secure Data/ Feature Secure Data Secure Config Secure Config MAC (admin) enabled disabled disabled †... -
Page 73: Security Comparison
Security Comparison Security Comparison This table displays addition information about security feature comparisons. Weakest Strongest Supported by None Password Authentication Secure Config Secure Data Key & Certificate RedBoot SocketServer NS-Link Driver/MAC NS-Link Driver/IP Serial Monitoring yes † TCP to Serial Ports SSH to Serial Ports UDP to Serial Ports disabled... -
Page 74: Ssl Overview
SSL Overview SSL Overview DeviceMaster SSL provides the following features: • Provides both encryption and authentication. Encryption prevents a third-party eavesdropper from viewing data that is being transferred. Authentication allows both the client (that is, web browser) and server (that is. DeviceMaster) to ensure that only desired parties are allowed to establish connections. -
Page 75: Client Authentication
Client Authentication Client Authentication Client Authentication is the mechanism by which the DeviceMaster verifies the identity of clients (that is, web browsers and so forth). • Clients can generally be configured to accept a particular unknown server certificate so that the user is not subsequently warned. -
Page 76: Ssl Performance
SSL Performance DH Key pair used by SSL servers This is a private/public key pair that is used by some cipher suites to encrypt the SSL/TLS handshaking messages. Possession of the private portion of the key pair allows an eavesdropper to decrypt traffic on SSL/TLS connections that use DH encryption during handshaking. -
Page 77: Ssl Cipher Suites
SSL Cipher Suites SSL Cipher Suites This subsection provides information about SSL cipher suites. • An SSL connection uses four different facilities, each of which can use one of several different ciphers or algorithms. A particular combination of four ciphers/algorithms is called a “cipher suite”. •... -
Page 78: Ssl Resources
SSL Resources SSL Resources You can refer to the following SSL resources for more information: • Standard reference book is SSL and TLS by Eric Rescorla • Wikipedia page on SSL/TLS provides a good overview: http://en.wikipedia.org/wiki/TLS • openssl contains command-line tools to do the following. More information is available at: http:// www.openssl.org/ Create/examine keys/certificates... -
Page 79: Configure/Enable Security Features Overview
Configure/Enable Security Features Overview Configure/Enable Security Features Overview You can enable DeviceMaster security features the web page (SocketServer or the NS-Link version). Key and Certificate Management must be done using the Security tab in the DeviceMaster web pages. If you want secure COM ports, you must also Enable SSL Mode and enter any applicable server or client certificates in the NS-Link device driver for Windows. - Page 80 Comtrol proprietary serial driver protocol are encrypted using SSL/TLS. Enable Secure Data • Since SSL/TLS can not be used for either UDP data streams or for the Comtrol Mode proprietary MAC mode Ethernet driver protocol, both UDP and MAC mode serial data transport features are disabled.
-
Page 81: Example 1
Example 1 Security Option Descriptions (Continued) When checked, this allows the monitor command to be used while Secure Data Mode is enabled. When unchecked, the monitor command can only be used if Secure Data Mode is not enabled. You must click Save and reboot the DeviceMaster for the change to go into affect. -
Page 82: Example 3
Example 2 Example 2 The following example shows how the -a option enables displaying of ASCII representation of data in a column to the right the hex representation: dm> monitor -a 1 Serial monitoring started for port 1 -- press [Enter] to stop. >... -
Page 83: Key And Certificate Management
Key and Certificate Management Key and Certificate Management Key and Certificate management is only available in Network | Keys/Cert web page. Key and Certificate Management Option Descriptions This is a private/public key pair that is used for two purposes: It is used by some cipher suites to encrypt the SSL/TLS handshaking messages. Possession of the private portion of this key pair allows an eavesdropper to both decrypt traffic on SSL/TLS connections that use RSA encryption during handshaking. - Page 84 Page 75 for more detailed information • All DeviceMaster units are shipped from the factory with identical configurations. They all have the identical, self-signed, Comtrol Server RSA Certificates, Server RSA Keys, Server DH Keys, and no Client Authentication Certificates. •...
-
Page 85: Using A Web Browser To Set Security Features
Using a Web Browser to Set Security Features Using a Web Browser to Set Security Features The follow procedures are discussed below: • Changing Security Configuration • Changing Keys and Certificates on Page 86 Changing Security Configuration Use the following steps to change security settings in the DeviceMaster. 1. -
Page 86: Changing Keys And Certificates
Changing Keys and Certificates Changing Keys and Certificates Use the following steps to update security keys and certificates in the DeviceMaster. Refer to the help system Key and Certificate Management subsection on Page 86 for detailed information. 1. If necessary, enter the IP address of the DeviceMaster in the Address field of your web browser and press the Enter key. -
Page 87: Connecting Serial Devices
Connecting Serial Devices This section discusses connecting your serial devices to the DeviceMaster. It also provides you with information to build serial or test cables and loopback connectors to test the serial ports. • DB9 Connectors • RJ45 Connectors on Page 91 •... -
Page 88: Db9 Connectors
Connecting Serial Devices DB9 Connectors This subsection provides the following information: • Connector pin assignments (below) • DB9 Null-Modem Cables (RS-232) on Page 89 • DB9 Null-Modem Cables (RS-422) on Page 89 • DB9 Straight-Through Cables (RS-232/485) on Page 89 •... -
Page 89: Db9 Null-Modem Cables (Rs-232)
Connecting Serial Devices DB9 Null-Modem Cables (RS-232) Use the following figure if you need to build an RS-232 null-modem cable. A null-modem cable is required for connecting DTE devices. DB25 RJ45 Signal Pins Pins Pins Pins Signal Note: You may want to purchase or build a straight-through cable and purchase a null-modem adapter. DB9 Null-Modem Cables (RS-422) Use the following figure if you need to build an RS-422 null-modem cable. -
Page 90: Db9 Loopback Plugs
Connecting Serial Devices DB9 Loopback Plugs Loopback connectors are DB9 female serial port plugs with pins wired together that are used in conjunction with application software (Test Terminal or minicom) to test serial ports. The DeviceMaster is shipped with a a single loopback plug (RS-232/422). -
Page 91: Rj45 Connectors
Connecting Serial Devices RJ45 Connectors This subsection provides the following information: • Connector pin assignments (below) • RJ45 Null-Modem Cables (RS-232) • RJ45 Null-Modem Cables (RS-422) on Page 92 • RJ45 Straight-Through Cables (RS-232/485) on Page 92 • RJ45 Loopback Plugs on Page 92 •... -
Page 92: Rj45 Null-Modem Cables (Rs-422)
Connecting Serial Devices RJ45 Null-Modem Cables (RS-422) Use the following figure if you need to build an RS-422 null-modem RJ45 cable. A null-modem cable is required for connecting DTE devices. RJ45 Signal Pins Signal TxD+ RxD+ TxD- RxD- RxD+ TxD+ RxD- TxD- Note: RS-422 pin outs are not standardized. -
Page 93: Connecting Rj45 Devices
Connecting Serial Devices Connecting RJ45 Devices You can use this information to connect serial devices to RJ45 connectors. 1. Connect your serial devices to the appropriate serial port on the DeviceMaster using the appropriate cable. Note: Refer to the hardware manufacturer’s installation documentation if you need help with connector pin outs or cabling for the peripheral device. -
Page 94: Four Screw Terminals (Dm-2202)
Connecting Serial Devices Four Screw Terminals (DM-2202) This subsection discusses the following topics for the DM-2202 with 4 serial screw terminals. See Eight Screw Terminals (DM-2402) on Page 97 if the DeviceMaster has eight serial terminals. • Serial Terminal (4) Connectors on Page 94 •... -
Page 95: Serial Terminal (4) Null-Modem Cables (Rs-232)
Connecting Serial Devices Serial Terminal (4) Null-Modem Cables (RS-232) An RS-232 null-modem cable is required for connecting DTE devices. RS-232 Null-Modem Cable DB25 Serial Terminal (4) Null-Modem Cables (RS-422) An RS-422 null-modem cable is required for connecting DTE devices. RS-422 Null-Modem Cable RxD- RxD+ TxD-... -
Page 96: Serial Terminal (4) Straight-Through Cables (Rs-232/485)
Connecting Serial Devices Serial Terminal (4) Straight-Through Cables (RS-232/485) RS-232 or RS-485 straight-through cables are used to connect modems and other DCE devices. RS-232/422 Straight-Through Cable TRxD- TRxD+ DB25 Serial Terminal (4) Loopback Signals Use this drawing to wire a loopback, which is used in conjunction with application software (Test Terminal for Windows or minicom for Linux) to test serial ports. -
Page 97: Eight Screw Terminals (Dm-2402)
Connecting Serial Devices Eight Screw Terminals (DM-2402) This subsection discusses the following topics for the DeviceMaster with 8 serial screw terminals. • Screw Terminal (8) Connectors on Page 97 • Screw Terminal (8) Null-Modem Cables (RS-232) on Page 98 • Screw Terminal (8) Null-Modem Cables (RS-422) on Page 98 •... -
Page 98: Screw Terminal (8) Null-Modem Cables (Rs-232)
Connecting Serial Devices Screw Terminal (8) Null-Modem Cables (RS-232) An RS-232 null-modem cable is required for connecting DTE devices. RS-232 Null-Modem Cable RxD CTS DCD DTR TxD RTS DB25 Screw Terminal (8) Null-Modem Cables (RS-422) An RS-422 null-modem cable is required for connecting DTE devices. RS-422 Null-Modem Cable DSR RI RxD CTS... -
Page 99: Screw Terminal (8) Straight-Through Cables (Rs-232/485)
Connecting Serial Devices Screw Terminal (8) Straight-Through Cables (RS-232/485) RS-232 or RS-485 straight-through cables are used to connect modems and other DCE devices. RS-232/485 Straight-Through Cable RxD CTS DCD DSR RxD CTS TRxD- TRxD+ DB25 Screw Terminal (8) Loopback Signals Use the drawing below to wire a loopback, which is used in conjunction with application software (Test Terminal or minicom) to test serial ports. -
Page 100: Nine Screw Terminals (Dm-2201)
Connecting Serial Devices Nine Screw Terminals (DM-2201) This subsection discusses the following topics for the DM-2201 with 9 serial screw terminals. • Screw Terminal Connectors (9) on Page 100 • Screw Terminal (9) Null-Modem RS-232 Cables on Page 100 • Screw Terminal (9) Null-Modem RS-422 Cables on Page 101 •... -
Page 101: Screw Terminal (9) Null-Modem Rs-422 Cables
Connecting Serial Devices Screw Terminal (9) Null-Modem RS-422 Cables An RS-422 null-modem cable is required for connecting DTE devices. RS-422 Null-Modem Cable DSR RI RxD CTS Sig Gnd RxD- RxD+ TxD- TxD+ DB25 Note: RS-422 pin outs are not standardized. Each peripheral manufacturer uses different pin outs. Please refer to the documentation for the peripheral to determine the pin outs for the signals above. -
Page 102: Screw Terminal (9) Loopback Signals
Connecting Serial Devices Screw Terminal (9) Loopback Signals Use this drawing to wire a loopback, which is used in conjunction with application software (Test Terminal for Windows or minicom for Linux) to test serial ports. CD DSR Wire the terminals together to create a loopback. •... -
Page 103: Managing The Devicemaster
Managing the DeviceMaster This section discusses the following DeviceMaster maintenance procedures: • Rebooting the DeviceMaster • Uploading SocketServer to Multiple DeviceMasters on Page 104 • Configuring Multiple DeviceMasters Network Addresses on Page 105 Note: You can configure the network addresses for multiple DeviceMasters, configure common settings for the DeviceMasters, and save the settings to a configuration file that you can use to load settings up to all or selected DeviceMasters. -
Page 104: Uploading Socketserver To Multiple Devicemasters
Managing the DeviceMaster Uploading SocketServer to Multiple DeviceMasters If an older version of the NS-Link driver for Windows (before v9.xx) has been installed, make sure that the driver is disabled through the Device Manager before uploading SocketServer. You can use this procedure if your DeviceMaster is connected to the host PC, laptop, or if the DeviceMaster resides on the local network segment. -
Page 105: Configuring Multiple Devicemasters Network Addresses
Managing the DeviceMaster Configuring Multiple DeviceMasters Network Addresses You can configure the network addresses for multiple DeviceMasters using the Assign IP to Multiple Devices option. In addition, you can also configure common settings for the DeviceMaster SocketServer or NS-Link web page and save the settings to a configuration file that you can load to all or selected DeviceMasters. -
Page 106: Local Using The Ip Address Or Mac Address
Managing the DeviceMaster 7. Enter the IP Address for the DeviceMaster. It is not necessary to enter the Subnet Mask and Default Gateway. 8. Click Ok to close the Add New Device window. It may take a few moments to save the DeviceMaster. 9. -
Page 107: Using The Socketserver Configuration Files
Managing the DeviceMaster 7. Enter the MAC address or network information. Note: A MAC address label is attached to all DeviceMaster units. The first three pairs of digits start with 00 C0 4E. 8. Optionally, enter the serial number in the Serial Number list box. 9. -
Page 108: Portvision Dx - Loading A Socketserver Configuration File
Managing the DeviceMaster 4. Click the All check box or click only the properties that you want saved for each property page in the configuration file and click Done. 5. Click Ok to close the Save Configuration Completed message. PortVision DX - Loading a SocketServer Configuration File Use the following procedure to load a previously saved a DeviceMaster configuration file. -
Page 109: Socketserver - Saving Configuration Files
Managing the DeviceMaster SocketServer - Saving Configuration Files You can use the procedure to save a configuration files using the web page. 1. If necessary, access SocketServer by entering the IP address in your web browser. 2. Click System | Configuration File. 3. -
Page 110: Using Driver Configuration Files
Saving Device-Level Configuration Use the following procedure to create and save a configuration file. 1. If necessary, open the Driver Management Console located under Comtrol> DeviceMaster Driver Management Console. 2. Depending on your operating system, you may need to click Yes to the Do you want to allow the following program to make changes to this computer? User Account Control message. -
Page 111: Saving Port-Level Configuration
Use the following procedure to create and save a port configuration file. Port configuration, must be saved on a port-by-port basis. 1. If necessary, open the Driver Management Console located under Comtrol> DeviceMaster Driver Management Console. 2. Depending on your operating system, you may need to click Yes to the Do you want to allow the following program to make changes to this computer? User Account Control message. -
Page 112: Loading Driver Configuration Files
DeviceMaster. 1. If necessary, open the Driver Management Console located under Comtrol> DeviceMaster Driver Management Console. 2. Depending on your operating system, you may need to click Yes to the Do you want to allow the... -
Page 113: Loading Port Configuration
DeviceMaster PRO configuration file onto a DeviceMaster RTS or a configuration file for a 32-port DeviceMaster RTS onto a 4-port DeviceMaster RTS. 1. If necessary, open the Driver Management Console located under Comtrol> DeviceMaster Driver Management Console. -
Page 114: Changing The Bootloader Timeout
Bootloader timeout to 15 seconds after you have successfully uploaded SocketServer. 1. If necessary, start PortVision DX, from Comtrol > PortVision DX > PortVision DX. 2. Right-click the DeviceMaster in the Device Tree or Device List pane and click Properties. -
Page 115: Socketserver - Changing Bootloader Timeout
Managing the DeviceMaster SocketServer - Changing Bootloader Timeout Use the following procedure to change the Bootloader timeout to 45 seconds. You can use this procedure to return the Bootloader timeout to 15 seconds after you have successfully uploaded SocketServer. 1. If necessary, use your browser to access the DeviceMaster using the IP address. 2. -
Page 116: Managing Bootloader
Use the following procedure to upload Bootloader to the DeviceMaster. Typically, you should not update the Bootloader unless advised to do so by Comtrol Technical Support or a notice has been posted to the firmware download page on the ftp site. - Page 117 Managing the DeviceMaster If an older version of the NS-Link driver for Windows (before v9.xx) has been installed, make sure that the driver is disabled through the Device Manager before uploading Bootloader. 1. If you have not done so, install PortVision DX (Installing PortVision DX on Page 35) and Scan the network.
-
Page 118: Checking The Ns-Link Version
1. Start PortVision DX. 2. If necessary, click Scan to locate the DeviceMaster. The Device List pane displays the NS-Link (SocketServer) version. 3. Check the Comtrol ftp site to see if a later version is available. To check the NS-Link version,... -
Page 119: Restoring Factory Defaults (Specific Models)
5. If a higher version of SocketServer is available and you want to update the DeviceMaster with the latest software: a. Update SocketServer using Uploading SocketServer with PortVision DX on Page 42. b. Download the latest driver from http://downloads.comtrol.com/dev_mstr/rts/drivers/win7. Update to the latest driver using the DeviceMaster Device Driver (NS-Link) User Guide, which can be downloaded using Locating Software and Documentation on Page 11. -
Page 120: Restoring Serial Port Settings
NS-Link COM Port You can use this procedure to reset NS-Link serial port settings. 1. Open the Driver Management Console using Comtrol > DeviceMaster Driver Management Console. 2. Highlight the first port that you want reset to default values. 3. Click the Defaults button (and if appropriate, Clone). - Page 121 Managing the DeviceMaster You will be able to log in after the reboot cycle. DeviceMaster Installation and Configuration Guide: 2000594 Rev. F Managing the DeviceMaster - 121...
-
Page 122: Accessing Socketserver Commands In Telnet/Ssh Sessions (Portvision Dx)
Managing the DeviceMaster Accessing SocketServer Commands in Telnet/SSH Sessions (PortVision DX) You can open a Telnet or SSH session using PortVision DX. Use the appropriate procedure for your site: • Telnet Session (below) • SSH Session on Page 124 Telnet Session Use the following procedure to access a telnet session with PortVision DX. - Page 123 Managing the DeviceMaster 3. If necessary, enter the password and press Enter. If a password has not been set, press Enter. 4. You can type help to refer to available commands supported by SocketServer/NS-Link. DeviceMaster Installation and Configuration Guide: 2000594 Rev. F Managing the DeviceMaster - 123...
-
Page 124: Ssh Session
Managing the DeviceMaster SSH Session Use the following procedure to access an SSH session with PortVision DX. 1. In PortVision DX, PortVision DX, right-click the DeviceMaster in the Device List pane for which you want to open an SSH session, and click Telnet/SSH Session. 2. - Page 125 Managing the DeviceMaster 6. You can type help to refer to available SocketServer/NS-Link commands. DeviceMaster Installation and Configuration Guide: 2000594 Rev. F Managing the DeviceMaster - 125...
-
Page 126: Accessing Redboot Commands In Telnet/Ssh Sessions (Portvision Dx)
Managing the DeviceMaster Accessing RedBoot Commands in Telnet/SSH Sessions (PortVision DX) You can open a Telnet or SSH session using PortVision DX to access RedBoot commands. Use the following procedure to access a telnet or SSH session with PortVision DX. 1. - Page 127 Managing the DeviceMaster 3. If necessary, enter the password and press Enter. If a password has not been set, press Enter. If using an SSH session, press Enter to the login as prompt. Note: If the PuTTY screen flashes in the background and does not appear as shown above, make sure that Enable Telnet/ssh has not been disabled in SocketServer.
- Page 128 Managing the DeviceMaster 5. Quickly re-open the telnet or SSH session using the previous steps. 6. Select Telnet or SSH, leave the Selected Port number, and click Ok. 128 - Managing the DeviceMaster DeviceMaster Installation and Configuration Guide: 2000594 Rev. F...
- Page 129 Managing the DeviceMaster 7. Press Enter. You can type help to review the RedBoot commands. You can also refer to RedBoot Command Overview on Page 137. Note: The dm prompt should be replaced by a redboot prompt. If not, you can reset the Bootloader timeout for a longer time period and retry this procedure.
- Page 130 Managing the DeviceMaster 130 - Managing the DeviceMaster DeviceMaster Installation and Configuration Guide: 2000594 Rev. F...
-
Page 131: Redboot Procedures
RedBoot Procedures You can use this section as a reference if you want to perform tasks in RedBoot. • Accessing RedBoot Overview on Page 131 • Establishing a Serial Connection on Page 132 • Establishing a Telnet Connection on Page 133 •... -
Page 132: Establishing A Serial Connection
RedBoot Procedures Establishing a Serial Connection Use the following procedure to set up a serial connection with a terminal server program. You can use HyperTerminal (Windows) or Minicom (Linux) or optionally, Test Terminal (WCom2), which can be accessed from PortVision DX using Tools > Applications > Test Terminal (WCom2). 1. -
Page 133: Establishing A Telnet Connection
RedBoot Procedures Establishing a Telnet Connection Use the following procedure to telnet to the DeviceMaster. 1. Open a telnet session, enter the DeviceMaster IP address. If using Windows, you can use PortVision DX, see Accessing RedBoot Commands in Telnet/SSH Sessions (PortVision DX) on Page 126. -
Page 134: Determining The Network Settings
RedBoot Procedures Determining the Network Settings If you are not sure what the network information is on a DeviceMaster, you can perform the following procedure. The default network settings are: • IP address: 192.168.250.250 • Subnet mask: 255.255.0.0 • Gateway address: 192.168.250.1 1. -
Page 135: Changing The Bootloader Timeout
RedBoot Procedures Changing the Bootloader Timeout Use the following procedure to change the Bootloader timeout value. 1. Establish communications with the DeviceMaster using the serial (Page 132) or telnet (Page 133) method. 2. At the RedBoot prompt, type timeout. RedBoot> dis Loading disabled RedBoot>... -
Page 136: Resetting The Devicemaster
RedBoot Procedures Resetting the DeviceMaster When you have completed your tasks in RedBoot, you must enter a reset command at the RedBoot> prompt for the DeviceMaster to begin operation. Note: The LEDs on the DeviceMaster will go through the power up sequence. The DeviceMaster has completed its reset cycle when the PWR or Status LED is lit and it stops flashing. -
Page 137: Redboot Command Overview
Enter key. For more detailed information, see the eCos Reference Manual that you can download from: http:// downloads.comtrol.com/dev_mstr/rts/software/redboot/user_guide. RedBoot Commands Sets or displays web authentication. The default is set to none, which means that there is no authentication required to access the web server. - Page 138 RedBoot Procedures RedBoot Commands (Continued) sernum [prefix] [serial_number] Displays device serial number (if available). sernum [serial_number]† Displays short help. snmp [disable|enable] Sets or displays SNMP enable. Displays a summary that includes the bootloader version, network summary address information, MAC address, and security settings. telnet [disable | enable} Sets or displays telnet server enable.
-
Page 139: External Power Supply Specifications
1-Port 5VDC Panel Mount Power Supply This subsection only provides information for the DeviceMaster 1-port 5VDC panel Power Connector mount model. +VDC Comtrol Power Supply: 1-Port 5VDC Coaxial 5.5±0.1 x 2.1 mm Input line frequency 47 - 63 Hz 90 - 260VAC ... -
Page 140: 1-Port Panel Mount 5-30Vdc Power Supply
Wire gauge: Output current 500 mA @ 24VDC AWG 12-22 This table provides the specifications, if you intend on using your own power supply. Comtrol device 1-Port 5-30VDC External Power Supply Output voltage† 5-30VDC Current† 100 mA (Min) @ 24VDC Power 2.5 W... -
Page 141: Dm-2202 And Dm-2402: 2-Port (Serial Terminals) Power Supply
Signal Ground is used to connect RS-232 devices later in the installation. This table provides specifications if you intend on using your own power supply. Comtrol device 2-Port DIN Rail (Serial Terminals) (DM-2202 and DM-2402) External Power Supply Output voltage†... -
Page 142: Dm-2102 And Dm-2302: 2-Port Db9 Power Supply (Bottom)
External Power Supply Specifications DM-2102 and DM-2302: 2-Port DB9 Power Supply (Bottom) This table provides the specifications to purchase a power supply for a DeviceMaster 2-port 1E/2E models (DM-2102 and DM-2302) with DB9 connectors. Return† Positive† Positive† Chassis 6-30VDC 6-30VDC Ground†... -
Page 143: Dm-2102 And Dm-2302: 2-Port Db9 Power Supply (Top)
External Power Supply Specifications DM-2102 and DM-2302: 2-Port DB9 Power Supply (Top) This table provides the specifications to purchase a power supply for a DeviceMaster DM-2102 and DM-2302 2-port DB9 DIN rail. Note: The power supply for this model is on the top of the unit. The product serial numbers are above xxxx- 030000, where xxxx is the first four digits of the serial number. -
Page 144: Dm-2304: 4-Port Din Rail Models Power Supply
4-Port Panel Mount Power Supply This table provides the specifications for the power supply shipped with the +VDC DeviceMaster 4-port. V Return - GND Comtrol Power Supply: 4-Port Shield GND Input line frequency 47 - 63 Hz Housing Molex P/N: Input line voltage... -
Page 145: 8-Port Power Supply
† Any power supply that meets current consumption, voltage, power, and connector pin outs requirements can be used. 16-Port Power Supplies The following table provides the specifications for the Comtrol-supplied power supply for the DeviceMaster 16-port models. +VDC V Return - GND... - Page 146 External Power Supply Specifications 146 - External Power Supply Specifications DeviceMaster Installation and Configuration Guide: 2000594 Rev. F...
-
Page 147: Troubleshooting And Technical Support
• Verify that you are using the correct types of cables on the correct connectors and that all cables are connected securely. Note: Most customer problems reported to Comtrol Technical Support are eventually traced to cabling or network problems. Ethernet... - Page 148 COM20, use \\.\COM20 as the file or port name. • If using a driver for Windows, you can use one of the Comtrol tools. Advanced tab in the DeviceMaster Drivers Management Console which helps identify problems. PortVision DX contains two applications that can be used to test or monitor the DeviceMaster: Test Terminal program, which can be used to troubleshoot communications on a port-by-port basis.
-
Page 149: General Troubleshooting
Contact Technical Support. The NS-Link driver uses Port 4606 (11FE h) to communicate with the DeviceMaster. Can ping the Comtrol device, but cannot open the When using a sniffer to track NS-Link packets, filtering for Port 4606 will ports from a remote easily track the packet. - Page 150 Troubleshooting and Technical Support General Condition Explanation/Action The problem is caused by a L2 bridging feature called Spanning Tree Algorithm (STA) in the switch. This feature is enabled by default in some switches. This features causes time-out problems on certain L2 protocols, such as our MAC mode.
-
Page 151: Testing Ports Using Port Monitor (Pmon2)
Installing PortVision DX on Page 35 to install PortVision DX, which contains Port Monitor. 1. Start PortVision DX from the Start menu, select Comtrol > PortVision DX or click the desktop shortcut. 2. Select Tools > Applications > Port Monitor (PMon2). - Page 152 Troubleshooting and Technical Support 4. Click Driver, click RPSHSI/NSLINK. 5. If the DeviceMaster is communicating with the device driver for Windows, Port Monitor should display CLOSED status. If a port is open for an application, it displays as OPEN, and displays Actual Throughput, TxTotal and RxTotal statistics.
- Page 153 Troubleshooting and Technical Support 6. You can view additional statistics to Port Monitor by adding columns. Click Tools and Add Columns. 7. Highlight or shift-click to add multiple statistics and click Ok. Note: See the Port Monitor help system if you need an explanation of a column. 8.
-
Page 154: Testing Ports Using Test Terminal
If another application is controlling the port, then Test Terminal will be unable to open the port and an error message will be shown. 2. Start Test Terminal (WCom2). If necessary, start PortVision DX from the Start menu, select Comtrol > PortVision DX or click the desktop shortcut. -
Page 155: Sending And Receiving Test Data (Rs-232/422/485: 4-Wire)
Troubleshooting and Technical Support 3. Select Tools > Applications > Test Terminal (WCom2). 4. Select File > Open Port, the appropriate port (or ports) from the Open Ports drop list and Ok. Note: If you left Port Monitor open from the previous subsection, you should show that the port is open. -
Page 156: Loopback Test (Rs-232)
Troubleshooting and Technical Support Loopback Test (RS-232) The Loopback Test tests the modem control (hardware handshaking) signals. It only has meaning in RS-232 mode on serial connector interfaces with full RS-232 signals. If performed under the following conditions, the test will always fail because full modem control signals are not present: •... - Page 157 Troubleshooting and Technical Support Test Terminal will open two windows, note that both ports show Receiving on the status bar. 3. Right-click in both COM windows and remove the check mark for Receive. DeviceMaster Installation and Configuration Guide: 2000594 Rev. F Troubleshooting and Technical Support - 157...
- Page 158 Troubleshooting and Technical Support Both COM ports show Ready on the status bar. 4. Right-click in ONE window and select the Receive option from the pop up. 5. Right-click the OPPOSITE window and click Send. The Status line shows Sending or Receiving. In this case, COM40 is sending data and COM41 is receiving the data which is visually confirmed by the data scrolling across the COM41 window.
- Page 159 Troubleshooting and Technical Support 7. Right-click and remove the check mark on the Receiving COM port. Neither COM port is sending or receiving data but shows Ready on the Status bar. 8. Reverse the sending/receiving windows one at a time. Set the Receive option first, then in the opposite window, select the Send option.
-
Page 160: Socket Mode Serial Port Testing
Troubleshooting and Technical Support Socket Mode Serial Port Testing This procedure illustrates using Putty, which is available in PortVision DX. Optionally, you can use any other Winsock compatible application. Note: The following procedure starts with resetting DeviceMaster to factory default values. You may want to save the DeviceMaster socket configuration using PortVision DX - Saving a SocketServer Configuration File... - Page 161 Troubleshooting and Technical Support 6. Under the TCP Connection Configuration section, click the Enable option, and leave all other settings on this page at their default values. Note: The Port number as it is needed later in this procedure. In this example, the port number is 8000. 7.
- Page 162 Troubleshooting and Technical Support 8. Verify that the port has been enabled. 9. Leave the web page open. 10. Attach the loopback plug that was shipped with the DeviceMaster to the serial port of the DeviceMaster. Connecting Serial Devices on Page 87 if you need to build a loopback plug. 162 - Troubleshooting and Technical Support DeviceMaster Installation and Configuration Guide: 2000594 Rev.
- Page 163 Troubleshooting and Technical Support 11. Right-click the DeviceMaster in the Device List pane and click Telnet / SSH Session. 12. Enter the socket number of the port that you are testing (Step 6) and click Ok. PuTTY loads. 13. Type 123. DeviceMaster Installation and Configuration Guide: 2000594 Rev.
- Page 164 Troubleshooting and Technical Support If 112233 displays, you need to disable local echo. Use the following steps to disable local echo. a. Go to c: \Program Files (x86)\Comtrol\PortVision DX. b. Execute PUTTY.EXE to open the application. Click Terminal and click Force off for the Local echo option.
- Page 165 Troubleshooting and Technical Support Close the telnet (PuTTY) session that you opened from PortVision DX. g. Re-open the telnet session by right-clicking the DeviceMaster, and select the Telnet / SSH Session option. h. Enter the Socket Port number and then click Ok. Enter 123, single digits should appear.
-
Page 166: Daisy-Chaining Devicemaster 4/8/16-Port Units
Comtrol has tested with seven DeviceMaster 4/8/16 units daisy-chained together using 10 foot CAT5 cables, but this is not the theoretical limit. You may experience a performance hit on the devices at the end of the chain, so it is recommended that you overload and test for performance in your environment. -
Page 167: Devicemaster Leds
This subsection discusses RX and TX LEDs on the following products: • DB9: Comtrol device 4-port (panel mount) and 8-port models and the DeviceMaster Serial Hub 16-port. • RJ45: DeviceMaster RTS 16-port and 32-port models and the DeviceMaster PRO 16-port. - Page 168 Troubleshooting and Technical Support (Continued) Ports Model Network LEDs • The Status LED on the front of the unit is lit, which indicates that it has power and has completed the boot cycle. Note: The Status LED flashes while booting and it takes approximately 15 DM-2101 seconds for the Bootloader to complete the cycle.
-
Page 169: Removing Devicemaster Security Features
It may be necessary to use the DeviceMaster debug dongle provided with the Software Developers Kit (SDK) or return the DeviceMaster to Comtrol after obtaining an return material authorization (RMA) so that Comtrol can re-flash the DeviceMaster with default values. - Page 170 Note: If the Bootloader timeout has been set too low to allow console port access, and the IP address cannot be discovered, then the DeviceMaster must be returned to Comtrol for re-flashing. 10. Connect the DeviceMaster directly to the PC/laptop running PortVision DX.
-
Page 171: Returning The Devicemaster To Factory Defaults
Troubleshooting and Technical Support 16. Enter secureconf disable and press Enter. 17. Enter securedata disable and press Enter. Returning the DeviceMaster to Factory Defaults The DeviceMaster uses two types of memory, volatile and non-volatile. The volatile memory is in the form of DRAM and SRAM. -
Page 172: Clearing The Flash
Troubleshooting and Technical Support The EEPROM memory is programmed with a number of default values. The values that you can modified are shown in the following table. Parameter User Web or Console Default Value Port Name Configurable Telnet Port Authentication None IP Address 192.168.250.250 Yes IP Mask... -
Page 173: Serial Port Access
Troubleshooting and Technical Support 3. To reset the password, type password and press Enter. 4. To reset the telnet timeout value, type teltimeout 300 and press Enter. 5. To reset the bootloader timeout value, type timeout 15 and press Enter. 6. -
Page 174: Technical Support
If you need technical support use one of the following methods. Comtrol Contact Information Downloads (FTP) ftp://ftp.comtrol.com/html/default.htm Downloads (HTTP) http://downloads.comtrol.com/html/default.htm...
Need help?
Do you have a question about the DeviceMaster DM-2000 Series and is the answer not in the manual?
Questions and answers