Table of Contents
Advertisement
Quick Links
Advertisement
Chapters
Table of Contents

Related Manuals for American Standard Advanced Clean 3.0 SpaLet


Summary of Contents for American Standard Advanced Clean 3.0 SpaLet
- Page 1 Advanced Clean 3.0 ® 2018 I - EN 760297-100EN...
-
Page 2: Table Of Contents
TABLE OF CONTENTS Be Sure to Follow the Important Safeguards Important Safeguards ......................1 Precautions for Preventing Failure Handling Precautions ......................5 Please Read This First Names of Parts ........................6 Preparation and Checks Before Use 1. Open the Water shut-off Valve .................. 7 2. - Page 3 TABLE OF CONTENTS Useful Information Other References ....................... 21 If You Have These Problems ....................22 If the Water in the Tank is Frozen ..................23 ® Preparing the SpaLet Seat if not using for a long time ............. 25 Cleaning and Maintenance Cleaning and Maintenance ....................
-
Page 4: Important Safeguards
Unplug immediately. In the event that an accident occurs as a result of WARNING improper usage, American standard will assume no responsibility for damages. Risk of burns, electric shock, fires and/ or personal injury:... - Page 5 GUARDS IMPORTANT SAFE BE SURE TO FOLLOW THE – Children GROUNDING INSTRUCTIONS: – Elderly persons This product should be grounded in the event of an electrical short circuit, grounding reduces the – Persons with an illness risk of electric shock by providing an –...
- Page 6 GUARDS IMPORTANT SAFE BE SURE TO FOLLOW THE CAUTION Be mindful of the following when handling batteries: Risk of minor injuries and property damage: – Do not store batteries carelessly together with other metal objects (necklaces, hair pins etc.). For care of the plastic parts, –...
- Page 7 GUARDS IMPORTANT SAFE BE SURE TO FOLLOW THE This product is not intended to be used by Do not supply the SpaLet seat with a hot water, ® young children, persons with physical and/or or do not expose the SpaLet seat to any impact. mental disabilities, or persons lacking experi- There is a risk of injury from damaged parts.
-
Page 8: Precautions For Preventing Failure
PRECAUTIONS FOR PREVENTING FAILURE HANDLING PRECAUTIONS Do not expose the SpaLet seat to direct ® sunlight. It can cause discoloration of the plastic parts. Direct sunlight can further- more lead to the remote control and the sensor not working properly. Do not open and close the SpaLet seat or lid roughly. -
Page 9: Names Of Parts
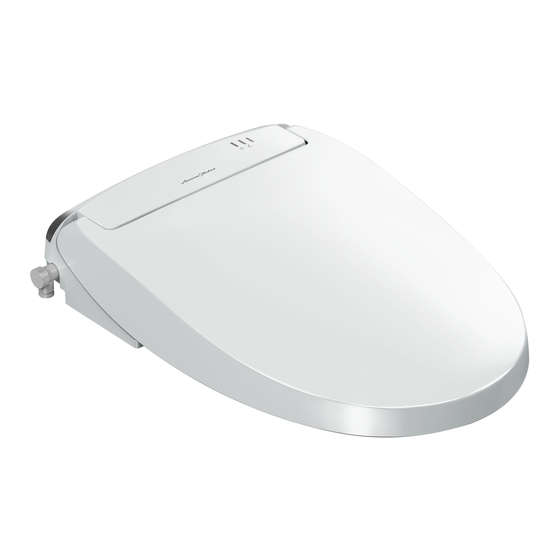
Names of Parts Overview Toilet tank Seat lid Caution label Product model nameplate Seat unit indicator section Junction fitting (See the enlarged view below.) Seat sensor switch Water supply pipe or tank (built into the seat unit) water supply hose Large nozzle shutter Power plug Nozzle (Back cleansing) -
Page 10: Open The Water Shut-Off Valve
Names of Parts/Preparation and Checks Before Use Open the Water Shut-off Valve. STEP Vacuum Breaker * If the water shut-off valve is closed, turn it counterclockwise to open. Vacuum breaker If the valve is already open, its position has been adjusted. Be sure to set the valve to the original position if you turn it. - Page 11 Preparation and Checks Before Use Remote Control Bidet Cleansing Stop Spray Strength Transmitter Nozzle Position Transmitter Dryer Water Temp. Power Deodorizer Seat Temp. Power Save Mild Massage Nozzle Cleaning (Reference) • All indicator LEDs will be lit for several seconds when the [Power] button on the remote control unit is turned •...
-
Page 12: Operate The Spray
Preparation and Checks Before Use STEP Operate the Spray Roll up your sleeve and set ® your arm on the SpaLet seat. * The SpaLet seat is equipped with a seat sensor that detects the presence of someone sitting on the SpaLet seat. -
Page 13: Adjust The Temperature
STEP Adjust the Temperature ● Change the temperature * Press the corresponding switch to change the dif- ferent temperatures. Seat Temp. * There are 6 levels of seat temperature available including "Off", "Low (approximately 82.4°F)", "High (approximately (96.8°F)", and the other levels between low and high. Select your tem- perature preference in accordance with the season. -
Page 14: Functions
Functions The product model number is indicated on the product model nameplate attached on the inner side of the seat lid ( Page 6). Check the functions provided on your product. Cleansing Functions Bowl spray Sprays mist on the bowl surface to minimize stains. Nozzle shutter Store the nozzles when not in use. -
Page 15: Operation
Comfort Functions Warm air dryer Provides warm air for quick drying. Produces an air current to deodorize the inside of the toilet bowl Air shield deodorizer thoroughly and powerfully. Deodorizer-turbo Provides a powerful deodorizing effect when the switch is operated. ®... -
Page 16: General Operation
General Operation Automatic Spray of Mist on the Toilet Bowl When STEP ® a Person Sits on the SpaLet Seat [Bowl Spray] * This function is set to ON at the factory. This function sprays mist onto the inside of the toilet bowl to minimize the adhesion of waste on the bowl surface. * Mist is sprayed for approximately 6 seconds after a person sits on the SpaLet seat. - Page 17 Pressing the [Deodorizer] button on the remote control provides a more powerful deodorizing effect than the automatic deodorizing function. Press the [Deodorizer] button To turn off the Deodorizer-turbo, while the automatic deodorizing press the [Deodorizer] button function is in operation. again.
-
Page 18: Front And Back Cleansing
General Operation STEP Front and Back Cleansing Back Cleansing - Mild Oscillating Spray Super Oscillating Spray Front Cleansing Wide Cleansing Oscillating Spray - Super Press the [Cleansing] button, [Mild] , or [Bidet] button. Back Cleansing functions wash any waste still remaining after a bowel movement. Back Cleansing : Sprays water to wash Back Cleansing - mild... - Page 19 Massage Cleansing Water pressure varies between a stronger and weaker pressure during back cleansing or back cleansing - mild operation to provide a pulsating effect during the wash. * The massage function does not operate during front cleansing operation. * The pulsating effect will be felt differently by each person. Press the [Massage] button Press the [Massage] button again to stop the massage op-...
-
Page 20: Warm Air Dryer
General Operation STEP Warm Air Dryer Warm Air Drying Warm air is blown to dry the area washed by the nozzle spray. * The front cleansing nozzle extends and pushes the nozzle shutter down during the warm air drying operation. ● Press the [Dryer] button. -
Page 21: Power Save
Power Save The power save function includes the one-touch power save (8 hours) option and the advanced power save (always on) option. Using one-touch power save together with advanced power save is even more effective at reducing energy con- sumption. This function is turned off by default. One-touch Power Save (8 Hours) ®... -
Page 22: Comfort Features
Comfort Features Favorite Settings You can change various settings. Press and hold the indicated operation buttons for at least 2 seconds to change settings. Function Control Method [Water Temp.] Deodorizer You can turn the deodorizer on and off. [Nozzle Cleaning] The heater can be automatically turned off when a user sits ®... - Page 23 Restoring the Default Settings If the settings of this product have been changed using the operation as described in "Useful Functions", all settings can always be reset to the default settings whenever desired. Press and hold both the [Nozzle Position ] and [Power Save] buttons for at least 2 seconds.
-
Page 24: Other References
Other References The SpaLet Seat and Seat Lid ® The SpaLet Seat Temperature Close Slowly. is Adjusted to Set Levels. To reduce potential impact when the SpaLet seat and Seat The temperature of the SpaLet seat is maintained at lid close unexpectedly, the SpaLet seat is constant temperatures in accordance with the tem- equipped with a slow close seat mecha- perature set with the switch. -
Page 25: If You Have These Problems
If You Have These Problems Suitable Cleansers Water Discharges from a Point Near the Nozzle Tip Use a neutral cleanser suitable for plastics to clean plastic parts such as the SpaLet seat and lid. Water discharges from a Do not use chlorinated cleansers, acidic cleansers, or point near the nozzle tip disinfectants to clean the toilet bowl or other areas of immediately after a user... -
Page 26: If The Water In The Tank Is Frozen
If the Water in the Tank is Frozen ® The water in the SpaLet seat may freeze and cause damage during winter or other times when the water temperature is significantly low. Perform the following procedure to prevent freezing and related damage. Do not disconnect the power plug from the outlet. - Page 27 Draining the Water to Prevent Freezing Set the [Seat Temp.] to “High” and close ■ If water has frozen and the spray does not operate the seat lid (+ Page 10). If the water supply hose or water supply connec- tions have frozen and the spray does not operate, Turn off any active power save function use a cloth immersed in warm water to warm the...
-
Page 28: Preparing The Spalet ® Seat If Not Using For A Long Time
® Preparing the SpaLet Seat if not using for a long time Use the following procedure to drain the water and disconnect the power if the following circumstances are applicable. ● The SpaLet seat will not be used for an extended period of time due to travel. Not using the SpaLet for a long time may cause water to become contaminated. - Page 29 Draining Water (Continued) CAUTION ● Make sure to close the water shut-off valve when removing the strainer inside the water shut-off OBSERVE valve. ● Make sure to install the strainer evenly on all sides. ● Check that there is no dirt remain- ing on the O-ring before installing the strainer.
-
Page 30: Cleaning And Maintenance
Cleaning and Maintenance Make sure to use the appropriate cleaner and tools in accordance with the type of dirt and material being cleaned to ensure cleaning is effective. We also provide product recommendations for those who want to make cleaning and maintenance tasks easier. Note that certain types of cleaners and tools must not be used with this product. - Page 31 Cleaning Areas and Types of Dirt Nozzle shutter Page 34 Seat lid, SpaLet ® seat, covers, and remote Page 29 Water sludge and small water control stains Dust, hand dirt, and small water stains Nozzle Page 34 Water sludge and small water Gaps between SpaLet Page 30 stains...
-
Page 32: Cleaning Spalet ® Seats And Lids
® Cleaning SpaLet Seats and Lids Cleaning Plastic Parts Including SpaLet Seats, Seat Lids, Covers, and the Remote Control ● Use a soft cloth to wipe parts. The longer the dirt has be remaining, more difficult it will be to remove . Use a damp, thoroughly wrung soft cloth to clean such areas. -
Page 33: Removing And Cleaning Seat Lids
Removing and Cleaning Seat Lids The seat lid can be removed easily. Detach the seat lid to clean the hidden hinge areas or to wash the whole lid. Removing the Seat Lid [CAUTION] ● Make sure to disconnect the power plug before removing the seat lid. - Page 34 Removing and Cleaning Seat Lids Assembling the Seat Lid ● ● Seat unit indicator section Align and insert the pin hole on the left side of the seat lid with the pin on the left side of the toilet body. Power indicator * Align the seat lid with the angle of the toilet body pin to attach the seat lid.
- Page 35 Cleaning the Areas of the SpaLet Seat That Are Covered by the Seat Unit ® 1. Removing the seat unit 1. Remove the power plug from the wall 2. Close the water shut-off valve to cut off the water outlet. (See caution 1.) supply.
- Page 36 Removing and Cleaning Seat Lids 2. Cleaning 3. Assembling the Seat Unit Wipe the seat unit clean using a soft 1. Place the seat unit on the toilet bowl. Align the inverted triangle cloth dampened with water. mark ( ) on the mounting plate with the protrusion on the rear of the seat unit.
-
Page 37: Cleaning Nozzle Areas
Cleaning Nozzle Areas Use the following procedure to clean areas around nozzles. ● Cleaning Nozzles ® Ÿ To clean nozzles while using (sitting on) the SpaLet seat: [Cleaning Nozzles with the Remote Control (+ this page)] Ÿ To thoroughly clean nozzles: [Ejecting Nozzles (+ Page 35)] ●... - Page 38 Cleaning Nozzle Areas Extending Nozzles/Opening Shutters [Ejecting Nozzles] The nozzle can be ejected for cleaning or to replace tips. The nozzle shutter can be opened and removed, and the deodorizing filter can also be removed. ® Open the seat lid and the SpaLet seat.
- Page 39 Removing the Nozzle Shutter Assembling the Nozzle Shutter ® Open the seat lid and SpaLet seat. Attach the two lugs of the nozzle shutter into the slot in the shutter base from below. Press the [Nozzle Cleaning] button and * If the shutter base is closed, perform the procedure open the nozzle shutter.
-
Page 40: Replacing Nozzle Tips
Replacing Nozzle Tips When stains cannot be removed from the nozzle tips, the nozzle tips can be replaced with new parts. Removing the Nozzle Tips ® Raise the seat lid and SpaLet seat. Turn the nozzle tip counterclockwise and align the Detach mark on the right side of Press the [Nozzle Cleaning] button. - Page 41 Installing the Nozzle Tips * If the nozzle wand retracts, follow the steps Check the joint. in the section, "Removing the Nozzle Tips," again to extend the nozzle. Align the Detach mark on the right side of the nozzle tip with the Center mark on the Center mark on nozzle wand, and then insert the nozzle nozzle wand...
-
Page 42: Dealing With Weak Deodorizing Effect
Dealing with Weak Deodorizing Effect If dust adheres and accumulates on the deodorizing filter, the deodorizing effect weakens. When you feel that the deodorizing effect has weakened, clean the deodorizing filter. Cleaning the Deodorizing Filter Disconnect the power plug from the Reinstall the deodorizing filter. -
Page 43: Dealing With Weak Nozzle Spray
Dealing with Weak Nozzle Sprays ® If long-term use of the SpaLet seat has resulted in a weak flow of water while intermittent nozzle drain function is activated or using the spray, use the following procedure to clean the strainer. This should be performed roughly once every 2 years. Cleaning the Strainer Close the water shut-off valve to shut off [Mounting Precautions]... -
Page 44: Flashing Battery Level Indicator On The Remote Control
Flashing Battery Level Indicator on the Remote Control The battery LED on the home screen flashes when the batteries are low. (+ Page 21) [CAUTION] ● Install batteries in the correct orientation of polarity as illustrated on the remote control display. ●... -
Page 45: Disassembling Product And Installing It At Another Location Such As When Moving
Disassembling Product and Installing It at Another Location Such as When Moving Disconnecting the Water Connecting the Water Supply Hose Supply Hose Attach the water supply hose to the water * Before disconnecting the water supply hose, close the shut-off valve. water shut-off valve and press the [Cleansing] button to release internal pressure. -
Page 46: Troubleshooting
Troubleshooting Failures can be easily corrected in some cases. Please check the following items. All Functions Symptom Cause Solution Page Electricity is not supplied to power Check for a power failure, tripper outlet. breaker, etc. Press the [Power] button and make The power is turned off (power sure the power indicator on the seat All functions are... - Page 47 Back Cleansing, Back Cleansing-Mild, and Front Cleansing Symptom Cause Solution Page Turn the open/close knob 180° Water shut-off valve is closed. counterclockwise. The strainer is clogged. Clean the strainer. The water pressure is low. Water Press the [ + ] side of the [Spray pressure is set to the lowest set- Strength] button.
- Page 48 Troubleshooting Back Cleansing, Back Cleansing-Mild, and Front Cleansing (Continued) Symptom Cause Solution Page The water temperature is not set to Set the water temperature to an ap- an appropriate temperature. propriate temperature. The nozzle spray This is not a malfunction. is not warm.
- Page 49 Seat heating Symptom Cause Solution Page The seat temperature is not set to Set the seat temperature to an ap- an appropriate temperature. propriate temperature. ® The SpaLet seat is not warm. The power save function is acti- Cancel the power save function. vated.
- Page 50 Troubleshooting Warm Air Drying Symptom Cause Solution Page Warm Air Does ® Seat sensor is not triggering. Sit on the SpaLet seat. Not Come Out The warm air drying temperature is Set the warm air drying temperature not set to an appropriate tempera- to an appropriate temperature.
- Page 51 Other Symptom Cause Solution Page There are wa- Frequently wipe the water drops. ter drops on the Water drops from the spray land on Additionally, sitting further back on underside of the the underside of the SpaLet seat. the seat when using the spray will ®...
- Page 52 Troubleshooting Other (Continued) Symptom Cause Solution Page ● There is play ® in the SpaLet seat. This is not a malfunction. ● One of the feet The construction of the SpaLet seat is different at the top and bottom on the back sections.
-
Page 53: Specifications
Specifications Product model 8018A60GRC-020 Rated Power Source 120 VAC, 60 Hz Rated Power Consumption 1,300 W Minimum Required 7.25 psi (when water is flowing) Pressure Supply Water Pressure Maximum Allowed 108.7 psi (hydrostatic pressure) Pressure Operating Temperature Range 32°F to 104°F Product Dimensions 16 1/4"... - Page 54 51 - EN...
- Page 55 American Standard will repair or, at its option, exchange the product for the same or a similar model. This limited warranty applies only to the original non-commercial purchaser and installation of the products.
- Page 56 How to register the warranty: PLEASE COMPLETE AMERICAN STANDARD WARRANTY REGISTRATION AND SAVE THIS WARRANTY INFORMATION. ® IMPORTANT: Registration of the SpaLet must be completed for this warranty to become effective. Your registration will make it easier to service your product.
Need help?
Do you have a question about the Advanced Clean 3.0 SpaLet and is the answer not in the manual?
Questions and answers