Table of Contents
Advertisement
Available languages
Available languages
INSTALLATION INSTRUCTIONS
CARE AND MAINTENANCE
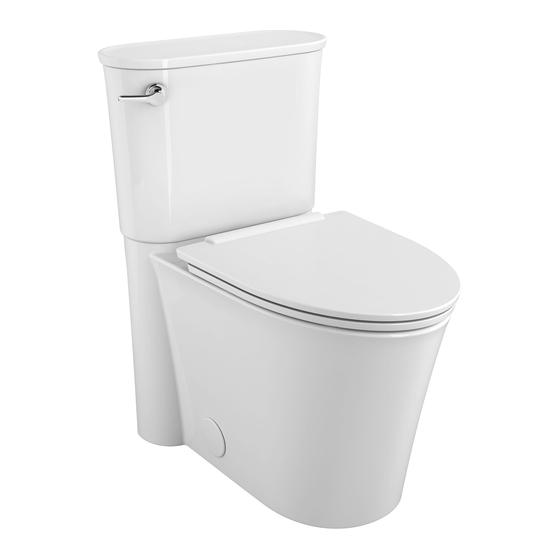
STUDIO
S, STUDIO
®
CONCEALED TRAPWAY 2-piece Toilets
Thank you for selecting American Standard - the benchmark of fine quality for over 140 years. To ensure this product
is installed properly, please read these instructions carefully before you begin. (Certain installations may require
professional help.) Also be sure your installation conforms to local codes.
CAUTION: PRODUCT IS FRAGILE. TO AVOID BREAKAGE AND POSSIBLE INJURY HANDLE WITH CARE!
!
NOTE: Pictures may not exactly define contour of china and components.
BEFORE INSTALLING YOUR TOILET: please see your product spec page to verify the dimensions and water supply connections.
Visit our website where you can search by Model number for the product spec page at: http://www.americanstandard-us.com/
TANK PACKAGE
BOWL PACKAGE
Product names listed herein are trademarks of AS America, Inc.
© AS America, Inc. 2022
, ESTATE
®
®
(INSTALLATION INSTRUCTIONS
SOLD SEPARATELY
Water Supply Line
AND CADET
3
®
EZ-INSTALL KIT INCLUDED WITH TANK
Tank To Bowl
Gasket
Metallic (Brass)
Tank Nuts (2)
EZ-INSTALL KIT INCLUDED WITH BOWL
TOILET SEAT
INCLUDED WITH SEAT)
Bowl-To-Floor
Knobs (2)
Attachment
T-Bolts with
Handle
Retainer (2)
Bolt Caps (2)
with adhesive backing
Wax Ring
7301555-100 Rev. 4 2/22
Advertisement
Table of Contents

Related Manuals for American Standard STUDIO S


Summary of Contents for American Standard STUDIO S
- Page 1 ® CONCEALED TRAPWAY 2-piece Toilets Thank you for selecting American Standard - the benchmark of fine quality for over 140 years. To ensure this product is installed properly, please read these instructions carefully before you begin. (Certain installations may require professional help.) Also be sure your installation conforms to local codes.
-
Page 2: Before You Start
Before You Start: If Removing An Existing Toilet Clean Flange Turn Off Water Supply Flush to remove water from tank; sponge remaining water from bowl before removing toilet. Caution: If leaving floor flange open for more than 1-2 hours, cover flange to prevent escaping sewer gases. - Page 3 Thread, then Tighten handles alternately hand tighten until tank contacts bowl. water supply. HAND TIGHTEN ONLY! WARNING: Overtightening of water supply line nuts could result in breakage and potential flooding. If the connection leaks after hand tightening, replace the supply line.
-
Page 4: Troubleshooting Guide
WARNING: Do not use in-tank cleaners. These products can seriously corrode fittings in the tank. This damage can cause leakage and property damage. American Standard shall not be responsible or liable for any damage caused by the use of in-tank cleaners. In the United States:... - Page 5 ESTATE et CADET Merci d’avoir choisi American Standard, la référence en matière de qualité depuis plus de 140 ans. Afin de garantir une installation adéquate, veuillez lire ces instructions attentivement avant de commencer. (Certaines installations peuvent requérir l’aide d’un professionnel.) De plus, assurez-vous que votre installation est en conformité avec le code local.
-
Page 6: Avant De Commencer
Avant de commencer : Si vous retirez une toilette installée Nettoyer la bride Fermer l’alimentation d’eau Vider l’eau du réservoir; éponger l’eau restante dans la cuvette avant de retirer la toilette. Mise en garde : Si vous laissez la collerette du sol ouverte durant plus d’une ou deux heures, couvrir afin d’éviter que les gaz des égouts ne s’échappent. - Page 7 Serrer les poignées Fileter puis serrer alternativement jusqu’à manuellement ce que le réservoir soit en l’alimentation d’eau. contact avec la cuvette. SERRER À LA MAIN UNIQUEMENT! AVERTISSEMENT : Un serrage excessif des écrous de la conduite d’alimentation d’eau pourrait entraîner une rupture et des inondations potentielles.
-
Page 8: Guide De Dépannage
AVERTISSEMENT : Ne pas utiliser d’agent nettoyant dans le réservoir. Ces produits peuvent sérieusement corroder les raccords à l’intérieur du réservoir. Cette corrosion peut entraîner des fuites et des dommages matériels. American Standard ne sera en aucun cas responsable de tout dommage causé par l’utilisation de nettoyant à installation dans le réservoir. - Page 9 ® ® Gracias por elegir American Standard, el parámetro de excelente calidad por más de 140 años. Para asegurar la instalación adecuada de este producto, por favor lea las instrucciones con atención antes de comenzar. (Algunas instalaciones pueden requerir ayuda profesional.) Asimismo, asegúrese de realizar la instalación de conformidad con los códigos locales.
-
Page 10: Antes De Comenzar
Antes de comenzar: Si va a retirar un inodoro viejo Limpiar brida Apague el suministro de agua Descargue para retirar el agua del tanque; quite el agua que queda en la taza usando una esponja antes de retirar el inodoro. Advertencia: Si deja la brida del piso abierta durante más de 1-2 horas, cúbrala para evitar... - Page 11 Ajuste las manijas alternadamente Enrosque y luego hasta que el tanque esté en contacto ajuste a mano el con la taza. suministro de agua. ¡AJUSTE A MANO ÚNICAMENTE! ADVERTENCIA: Si ajusta en exceso las tuercas de la línea del suministro de agua, podría haber roturas e inundación potencial.
-
Page 12: Guía De Resolución De Problemas
ADVERTENCIA: No use limpiadores dentro del tanque. Estos productos pueden corroer gravemente las conexiones en el tanque. Este daño puede causar fugas y daños a los bienes. American Standard no será responsable por ningún daño causado por el uso de limpiadores dentro del tanque. En Estados Unidos: En Canadá:...
Need help?
Do you have a question about the STUDIO S and is the answer not in the manual?
Questions and answers