Table of Contents
Advertisement
Quick Links
User Manual
CEAS7SS1-0100510R0
● Thank you very much for selecting Spalet®
eBidet from American Standard. Please read
the manual carefully prior to use.
● The pictures in the manual are for reference
only.
Contents
SAFEGUARDS CAUTIONS ...........................1
CAUTIONS OF USING ...................................5
CAUTIONS BEFORE INSTALLATION ...........6
COMPONENTS NAME ..................................8
Installation ....................................................10
■ Installation of E-bidet .................................................. 10
■ Installation of E-bidet water supply hose .................... 11
■ Power on confi rmation ................................................ 15
■ Test run ....................................................................... 15
OPERATION INSTRUCTION .......................16
Preparation and Confi rmation before Using ........ 16
Basic Operation ................................................... 18
cupied (auto deodorization) ........................................ 18
Oscillating .................................................. 19
■ Spray strength adjustment ......................................... 19
■ Nozzle position ........................................................... 19
Oscillating ...................................................... 19
■ Massage ..................................................................... 19
■ Warm air dryer ............................................................ 20
■ Stop (Power ON/OFF) ................................................ 20
Other Function Settings ....................................... 21
■ To prevent low temperature burn ................................ 21
■ Resume to factory settings ......................................... 21
■ Power Saving ............................................................. 22
■ Seat temp. 3 → 5 modes expansion function ............. 23
■ Warm water temp. 3 → 5 modes expansion function .............................. 23
Information to the User ........................................ 24
CLEANING AND CARE ................................25
Daily Cleaning and Care ...................................... 25
(plastic parts) .......................................................... 25
■ Cleaning and Care of Nozzle ..................................... 25
Cleaning after Removing Lid ............................... 26
Cleaning of Blocked Part of E-bidet ..................... 27
Cleaning of Nozzle Shutter .................................. 28
When Cleaning Function Decreases ................... 30
GENERAL TROUBLE SHOOTING ..............31
ANTI-BACTERIAL ........................................33
SPECIFICATIONS ........................................34
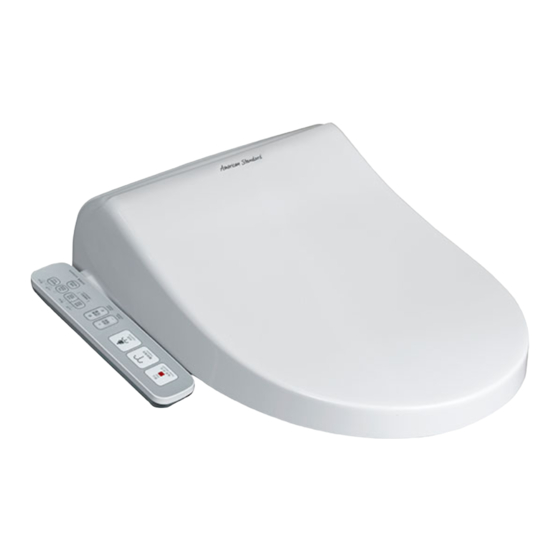
Spalet® E-bidet
Advertisement
Table of Contents

Related Manuals for American Standard Spalet CEAS7SS1


Summary of Contents for American Standard Spalet CEAS7SS1
-
Page 1: Table Of Contents
When Cleaning Function Decreases ....30 ● Thank you very much for selecting Spalet® GENERAL TROUBLE SHOOTING ....31 eBidet from American Standard. Please read the manual carefully prior to use. ANTI-BACTERIAL ........33 ● The pictures in the manual are for reference only. -
Page 2: Safeguards Cautions
SAFEGUARDS CAUTIONS SAFEGUARDS CAUTIONS SAFEGUARDS CAUTIONS Please read the following "safeguard cautions" carefully before using. Failure to observe the following safeguard cautions may result in serious accidents. Please strictly observe the following content, for your safety. Please leave these instructions and warranty info with the product Explanation of terms and marks Improper use of the product could lead to death or injury WARNING... - Page 3 ● NEVER stand on the seat, or use the lid as a support. Please use the new water supply hose attached to product. ● Ensure that the cord is not curled, twisted, folded and is free for obstructions to eliminate risk of damage. ●...
- Page 4 ● In case of any problems (abnormal noises, abnormal smell, smoking, high temperature, crack) with the main unit of eBidet, plug or power cord, please immediately unplug the power cord and contact your distributor ● If water leaks from the valve, please unplug the power cord and turn off the supply valve.
- Page 5 ● When cleaning the plastic parts of the product, do not use unsuitable detergents (toilet cleaner, apartment cleaner, decolorizer, benzene, paint thinner, scouring powder, abrasive cleaners, alcohol, etc.). ● Do not stand or sit on the seat lid. ● When removing the filter, water supply valve must be turned off . ●...
-
Page 6: Cautions Of Using
CAUTIONS OF USING CAUTIONS OF USING ■ Please strictly follow the following cautions to prevent any mal- function. In case of thunder and lightning nearby, Keep heater or warmer, etc. away from please disconnect the power plug from the E-bidet. the plug seat. -
Page 7: Cautions Before Installation
CAUTIONS BEFORE INSTALLATION CAUTIONS BEFORE INSTALLATION ■ Packing Material List Manual E-bidet body Mounting plate Seal washer Dual check alve Seal washer Mounting bolt T junction Water supply hose Fixing block Rubber expansion Plastic Clip sleeve Connector ■ Installation Tools for Preparation Adjustable wrench (with 26 mm above of adjustable range) or adjustable wrench (23~26 mm) screwdriver... - Page 8 ■ Power Supply and Water Supply ● Please use power socket with 15 amp AC 220-240V, 50 Hz and Min. power 650W. Power cord length is 1.0 m. ● As per the below diagram the power supply should sit 300mm from finished floor and appropriate distance from water supply.
-
Page 9: Components Name
COMPONENTS NAME COMPONENTS NAME ■ Integral Diagram Tank Lid bumper Power plug Seat sensor (built-in) Nozzle shutter T junction Dual check valve Warm air dryer Angle Valv e* Nozzle Water hose Seat Bowl Control panel *Not included Note: ● Use 750mm 1/2" X 90 hose supplied when valve is installed on right side. ●... - Page 10 ■ Operation Feminine Warm air dryer ● Press twice for oscillating function. ● Press for 2 seconds to start one touch cleansing mode. Power save ● Press the "Power Saving" button Posterior to start power saving mode. ● Press twice to activate oscillating mode. ●...
-
Page 11: Installation
Installation Use 750mm 1/2" X 90 hose supplied when valve is installed on right side. Plumber to install shorter hose when valve is on left side. ■ Installation of E-bidet Installation Figure Body mounting bolt Fixing washer Mounting plate Rubber expansion Ceramic mounting hole E-bidet... -
Page 12: Installation Of E-Bidet Water Supply Hose
■ Installation of E-bidet water supply hose 1. Remove 1H after 1A is closed. Installation Figure There will be small amount of Toilet Water water leakage during removal, so supply hose put a piece of cloth, etc. under it. Connector T junction 2.Install 1C to 1A. -
Page 13: Installation Of Body Water Supply Hose (Body Side)
■ Installation of body water supply hose (body side) Installation Figure Water supply joint Plastic sleeve Clip O-ring Water supply hose 1. Insert 2A into 2B. 2. Clamp 2C into 2A and 2B. The side of clip 2C with round corner faces downward. 3. - Page 14 4. Adjust the installing position of E-bidet to front, rear, left and right (1) Adjust the installing position to front, rear, left and right, so that 3F edge matches with ceramic edge curve of bowl. Adjust E-bidet to front and rear (2) Press locking handle (3L) on right side, slide 3F forward to remove it.
- Page 15 5. Fix E-bidet securely (1) Adjust 3C forward and backward and then tighten 3A. Reference torque: 1.0~3.0 N.m (about 10- Engage 30 kgf.cm). each other (2) Place 3F at front of 3C to make 3F and 3C align center. (3) Slowly push 3F backward until it reaches bottom and a slight "click"...
-
Page 16: Power On Confirmation
■ Power on confirmation 1. Connect power plug to power supply. 2. Confirm that the power is on. (1) Confirm water temperature and seat temperature. indicators on side control panel turn on. (2) To prevent dry burning of warm water tank, before the test run is done, press Power button to turn off... -
Page 17: Operation Instruction
OPERATION INSTRUCTION OPERATION INSTRUCTION Preparation and Confirmation before Using If this is your first time using the eBidet, the following steps must be confirmed. Methods of turning on/off the water supply valve written in this guide may be diff erent from the actual circumstances. - Page 18 STEP Testing shower function. (1) Press the seat to enter sitting state (press force is more than 12 N). (2) Press Posterior button. (3) Cover the front of nozzle with left hand after noz- zle is extended to block water fl ow. If this is your fi...
-
Page 19: Basic Operation
Basic Operation Seat sensor activates to sense if there is anyone sitting on the toilet seat. Without sitting on it, shower, bidet, deodorization or dryer function will not work. ■ Deodorization function is activated when the unit is occupied (auto deodorization) (1) Auto deodorization is activated when people sit down. -
Page 20: Shower Oscillating
■ Shower Oscillating ■ Bidet Oscillating Press Posterior button. Press Feminine button. Water sprays out from front of nozzle to To activate feminine setting press button once. clean posterior. Press again will enter front and rear oscillating To activate the oscillating setting press status, and the oscillating range will be for a second time. -
Page 21: Warm Air Dryer
■ Warm air dryer 2. Press "Dryer" button again to 1. Press "Dryer" button. adjust temperature. Press once to activate dryer The indicator will change every time the button is pressed allowing you to set the temperature. Each time the button is pressed, the temperature will switch in the order of "Off... -
Page 22: Other Function Settings
Other Function Settings ■ Resume to factory settings ■ Factory settings Press and hold Feminine button + "+" and "-" Function explanation button of Spray Strength simultaneously for Factory settings more than 2 seconds. Deodorizer Auto deodorizer Power saving High Efficiency power saving Off... -
Page 23: Power Saving
■ Power Saving Power saving function is divided into one touch power saving (8 hrs) and high efficiency power saving (always). Using high efficiency power saving and one touch power saving simultaneously, the power saving effect is more significant. The initial setting is "close". One Touch Power Saving (8 hrs) If the product is not used during night time etc., press POWER SAVING button to cut off power of both warm water and seat heater for up to 8 hours, to reduce power consumption. -
Page 24: Seat Temp. 3 → 5 Modes Expansion Function
■ Seat temp. 3 → 5 modes expansion function Press "Seat temp." and nozzle position "Front" for 2 3 modes 5 modes seconds or more to adjust seat temperature options Indicator Seat temp. Indicator Seat temp. from 3 modes to 5 modes. Low mid After setting, all indicators will fl... -
Page 25: Information To The User
Information to the User Information to the User Water comes out from nozzles Tips for power saving When the seat is occupied or the The following operation can effectively cleaning functions are activated, save energy. there may be water coming out from ●... -
Page 26: Cleaning And Care
CLEANING AND CARE CLEANING AND CARE Daily Cleaning and Care ■ Cleaning and care of seat, lid and protective cases (plastic parts) ●Use a soft damp cloth to clean and always clean marks off as soon as possible to prevent stains from forming. It is very easy to remove E-bidet, and it is recommended that the eBidet is removed when cleaning behind seat and lid. -
Page 27: Cleaning After Removing Lid
Cleaning after Removing Lid Press Power button for 6 seconds to turn off completely. Do not use product when lid is removed... -
Page 28: Cleaning Of Blocked Part Of E-Bidet
Cleaning of Blocked Part of E-bidet The product can be removed, so that the bowl and the internal parts of the product can be cleaned. 1. Removal Method of eBidet 1. Unplug the power plug from the plug 2. Turn off water supply valve and stop seat. -
Page 29: Cleaning Of Nozzle Shutter
Cleaning of Nozzle Shutter After applying the neutral detergent on a soft cloth or sponge, clean it with cold water or warm water. CAUTION Do not clean it with a dry cloth or toilet paper. Do not clean it with a toothbrush. Nozzle shutter can be removed for cleaning. -
Page 30: Cleaning Maintenance Of Deodorization Filter
Cleaning Maintenance of Deodorization Filter Cleaning Maintenance of Deodorization Filter Unplug the power plug from the plug seat. Install the filter on base plate of product. Remove the E-bidet from bowl. Remove the filter from installation port of deodorization filter on left side of body undersurface. Install the E-bidet on bowl. -
Page 31: When Cleaning Function Decreases
When Cleaning Function Decreases When using the product for a long period, or the spray strength decreases, please clean the strainers of product in following order. Note: It is recommended that this is cleaned every 6-12 months. Cleaning Method of Strainer 1. -
Page 32: General Trouble Shooting
GENERAL TROUBLE SHOOTING GENERAL TROUBLE SHOOTING All functions Symptoms Probable causes Recommended action Plug seat is not working Confi rm if power is turned on Power is turned off . Press power on/off button. Water (Water and seat temperature and seat temperature lights temperature functions will illuminate. - Page 33 SHOWER, BIDET Symptoms Probable causes Recommended action Seat sensor not been No action Adjust sitting position, posture etc. activated. Water supply valve is off . Turn on the water supply valve. Mesh of fi lter is blocked. Clean the fi lter. Water pressure is too low, and spray strength is Set spray strength to "HIGH".
-
Page 34: Anti-Bacterial
ANTI-BACTERIAL ANTI-BACTERIAL Anti-bacterial Toilet seat with antibacterial effect: KILAMIC antibacterial materials are used for toilet seat. And toilet seat has passed the specific certification by SIAA. KILAMIC antibacterial material has effect with inhibition of proliferation of bacteria on the surface of products. Control quality management under ISO 22196 evaluation system and Society of international sustain growth for Antimicrobial Articles (SIAA) guidelines. -
Page 35: Specifications
SPECIFICATIONS SPECIFICATIONS Model CEAS7SS1-0100510R0 Rated voltage AC 230V 50Hz Rated power 300W Water pressure range 0.06MPa (fl ow pressure) — 0.75MPa (hydrostatic pressure) Ambient temperature range ordinary temperature Product size L511mm*W472mm*H173mm Water inlet type Direct inlet fl ow Warm water supply type Warm water tank 0.7L Posterior wash volume 0.25-0.6L/min (3/5 adjustment levels) water pressure 0.2MPa... - Page 36 SPECIFICATIONS Notes: 1. It is a requirement of Australian regulators that the water supply to this product must be protected by high hazard backflow prevention device, such as a reduced pressure zone device (RPZD). As per AS/NZS 3500.1, the RPZ shall be maintained in working order and tested for operational function at intervals not exceeding 12 months.
Need help?
Do you have a question about the Spalet CEAS7SS1 and is the answer not in the manual?
Questions and answers