Table of Contents
Advertisement
Quick Links
Advertisement
Table of Contents

Subscribe to Our Youtube Channel
Related Manuals for Bay-Tek Quik Drop Duo


Summary of Contents for Bay-Tek Quik Drop Duo
-
Page 2: Factory Contact Information
FACTORY CONTACT INFORMATION BAY TEK GAMES INC. Pulaski Industrial Park 1077 East. Glenbrook Drive Pulaski, WI 54162 USA JOIN OUR SERVICE FIRST NETWORK! This free service is intended to keep you up to date on the latest game information, early notification of parts specials, pertinent technical bulletins, updates on retro fit parts, software upgrades, and much more. -
Page 3: Table Of Contents
TABLE OF CONTENTS FACTORY CONTACT INFORMATION ......2 WELCOME TO: Quik Drop ........4 GAME SPECIFICATIONS . -
Page 4: Welcome To: Quik Drop
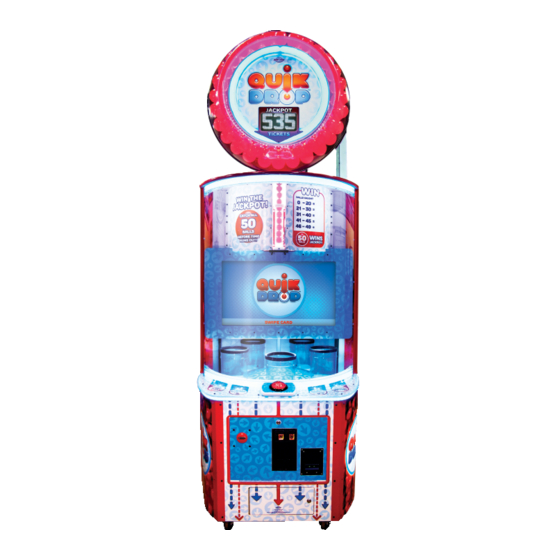
WELCOME TO: Quik Drop Congratulations on your Quik Drop purchase! Quik Drop’s attention-grabbing cabinet and fast-paced, addictive game play will have your buckets overflowing with profits! Please take a moment to read through this manual and be sure to contact our factory if you have any questions, or would like some more information. -
Page 5: Game Specifications
GAME SPECIFICATIONS WEIGHT POWER REQUIREMENTS NET WEIGHT 600 LBS. INPUT VOLTAGE 100 to 220 to RANGE 120 VAC 240 VAC SHIP WEIGHT 700 LBS. INPUT FREQUEN- DIMENSIONS 50 HZ 60 HZ CY RANGE WIDTH 38.5” MAX OPERATING DEPTH 44” CURRENT 109”... -
Page 6: Linking Kit Setup Guide
DUO SETUP GUIDE Included hardware kit for Quik Drop Linking kit Unscrew two screws Lay top of linking kit face down Unscrew and remove the back... - Page 7 DUO SETUP GUIDE Remove 4 bolts Stand bottom part of linking kit up and slide top piece in place Secure top to bottom with the 4 bolts that were previously removed Remove the back of bottom piece...
- Page 8 DUO SETUP GUIDE Red CE5861 goes up through opening to top piece of linking kit to connect to other red cord(right globe). Clip into saddle Black CE5862 goes up through opening to top piece of linking kit to connect to other black cord(left globe) CE5863 connect to matching cord...
- Page 9 DUO SETUP GUIDE Then take the cord and put it through another opening at the top of the top linking kit to attach to the left cord Connect other end of cord to the right cord on top. Then pull excess cord into the cabinet of the top part of the linking kit Screw the back of the top linking kit into...
- Page 10 DUO SETUP GUIDE Tip the whole linking kit into a vertical position Take the paper template out of the box Place paper template along top edge of the game. Tape in place Make sure there are no cords in line with template screw holes before drilling.
- Page 11 DUO SETUP GUIDE Use a 13/16 spade bit in the large hole in the paper template Drill hole all the way through Repeat process on the other Quik Drop...
- Page 12 DUO SETUP GUIDE Using the hardware below insert bolds into 3/8 inch holes in one side. Make sure there is one washer on the bolt before inserting it Included hardware: 6 bolts, 12 washers, 6 nuts Tools needed: 1/2 wrench or socket Tighten bolts by holding the wrench on...
- Page 13 DUO SETUP GUIDE Cut zip tie of black HDMI and insert through right hole of the right Quik Drop game and connect to circuit board Take one of the green and yellow cords and thread it through the right hole to the right Quik Drop game Unscrew screw from the steel and add the green and yellow cord to it.
- Page 14 DUO SETUP GUIDE Plug in ethernet crossover cable right above the HDMI cord on both games Screw the back of linking kit into place and plug in the game Pull up the main menu. Scroll down to Machine ID. When standing in front of the games, they will be numbered from left to right.The left-most unit will be #1.
-
Page 15: Linking Kit Led Diagram
DUO LED DIAGRAM Marquee AACB6505 AACB6505 LEDs LEDs... -
Page 16: Dip Switch Settings
DIP SWITCH SETTINGS If there is only one quik drop(one marquee) the dip switch settings should be set to 1 as shown above. If there is only two quik drop(two marquees linked) the dip switch settings should be set to 2 as shown above. -
Page 17: Wiring Diagrams
WIRING DIAGRAM Quick Drop Linking Kit Wiring Diagram LINKING KIT Linking Kit Quick Drop Game Quick Drop Game A5CORD31 Cross Over Ethernet AACB5801 AACB5801 Between the 2 motherboards LED Lights LED Lights AACB5801 A5CORD31 LED Lights Cross Over Ethernet AACB5801 LED Lights Game Motherboard Game Motherboard... - Page 18 WIRING DIAGRAM Linking Kit 12 Volt Wiring Diagram LINKING KIT 12 VOLT Marquee AACB5801 AACB5801 Lighting LED Lights LED Lights Black Colored Connectors Red Colored AACE5840 AACE5840 Connectors AACB5801 LED Lights AACE5860 Not Colored Connectors AACB5801 LED Lights AACE5861 AACE5872 AACE5862 12 Volt &...
-
Page 19: Troubleshooting
TROUBLESHOOTING Troubleshooting Guide Problem Probable Cause Remedy Unplugged. Check wall outlet cable to line filter (A5CORD5) (A5FI9010) in back of game. Check CE5802 cable to power supply. No power to the unit Circuit breaker tripped. Reset power strip breaker switch or building circuit breaker. - Page 20 TROUBLESHOOTING LINKING ISSUES Linking Issues If the Quick Drop games are not linking, there are 2 areas to investigate: 1.) Menu Settings 2.) Physical wire connections Menu Settings Please enter the menu of both linked games and compare to the pictures below: Game # 1 Game # 2 Verify Machine Id is 1 - one game is set to 1, the other to 2.
-
Page 21: Diagnostics
DIAGNOSTICS POWER SUPPLY Power Supply Diagnostics 1.) Verify AC power to power supply through line filter in lower section. Replace if needed. (A5FI9010) 2.) Check AC power connection to power supply. 3.) Ensure Power Supply switch is set to 115V (or 230V) (Some model power supplies may not have this) 4.) Ensure Power switch is on. -
Page 22: Parts List
PARTS LIST Parts List PART # DESCRIPTION A5BK9999 Bracket, Power Supply Mounting A5CORD31 Cord, Cross Over Ethernet A5CORD5 Cord, AC, Computer Cord A5CORD58 USB Cable , Male to Micro 3 Feet A5DE5822 Decal,Bottom Divider,Qd Link Marq A5DE5823 Decal,Top Connector,Qd Link Marq A5DE5824 Decal,Top Marquee,Qd Link Marq A5DE5825... -
Page 23: Technical Support
TECHNICAL SUPPORT Excellent customer service is very important to Bay Tek Games! We know that keeping your games in great operating condition is important to your business. When you need us, we are here to help. You can call us for free technical assistance, and you can count on us to have parts on-hand to support your game. -
Page 24: Warranty
WARRANTY Bay Tek Games warrants to the original purchaser that all game components will be free of defects in workmanship and materials for a period of 6 months from the date of purchase. If you fill out the registration card in the cashbox of the game, Bay Tek will add another 3 months to your warranty, free of charge.
Need help?
Do you have a question about the Quik Drop Duo and is the answer not in the manual?
Questions and answers