
Subscribe to Our Youtube Channel
Related Manuals for Moffat turbofan E32SUBC


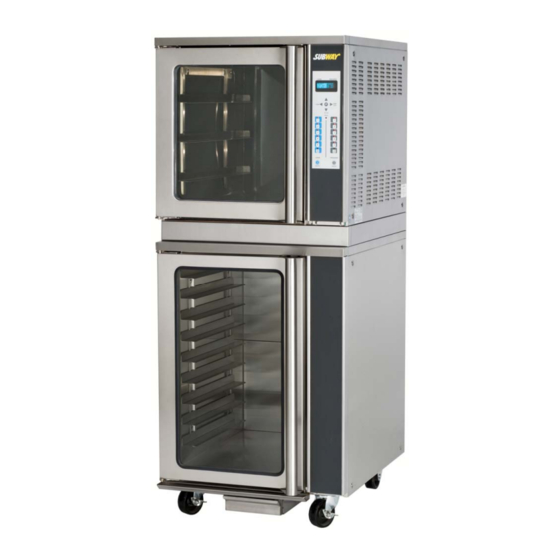
Summary of Contents for Moffat turbofan E32SUBC
- Page 1 E 3 2 S U B C Oven and Proofer S e r v i c e M a n u a l E32SUBC OVEN and PROOFER © Moffat Ltd, September 2009 Revision 3...
- Page 2 ALL INSTALLATION AND SERVICE REPAIR WORK MUST BE CARRIED OUT BY WARNING: QUALIFIED PERSONS ONLY. IMPORTANT: MAKING ALTERATIONS MAY VOID WARRANTIES AND APPROVALS. E32SUBC OVEN and PROOFER © Moffat Ltd, September 2009 Revision 3...
-
Page 3: Table Of Contents
Accessories ....................45 Replacement Parts .................. 46 Circuit Schematic ..................55 10. Wiring diagram ..................57 11. Service Contacts ..................59 12. Reference ....................61 Controller Settings Fault Codes E32SUBC OVEN and PROOFER © Moffat Ltd, September 2009 Revision 3... - Page 4 E32SUBC OVEN and PROOFER © Moffat Ltd, September 2009 Revision 3...
-
Page 5: Specifications
Oven Volume 0.18 m³ / 6.3 ft³ Proofer internal dimensions Width 460mm / 18” Height 675mm / 26 ” Depth 700mm / 27 ” Proofer Volume 0.22m³ / 7.8ft³ E32SUBC OVEN and PROOFER © Moffat Ltd, September 2009 Revision 3... -
Page 6: Installation
(If this is not carried out, uneven baking could occur). Important: THE VENT LOCATED ON THE OVEN TOP MUST NEVER BE OBSTRUCTED. E32SUBC OVEN and PROOFER © Moffat Ltd, September 2009 Revision 3... - Page 7 Press and hold for 2 seconds to cancel program. Oven + 1 Minute Key: Press to increase the cooking time in one minute increments. Oven On / Off Key: Turns the Oven only On / Off. E32SUBC OVEN and PROOFER © Moffat Ltd, September 2009 Revision 3...
- Page 8 Press and hold for 2 seconds to cancel timer. Proofer + 1 Minute Key: Press to increase the proofing time in one minute increments. Proofer On / Off Key: Turns the Proofer only On / Off. E32SUBC OVEN and PROOFER © Moffat Ltd, September 2009 Revision 3...
-
Page 9: Operation
CANCEL ALARM 20 MINS – Press timer key TIMER DONE UNLOAD PROOFER CANCEL ALARM 20 MINS – Press timer key TIMER DONE UNLOAD PROOFER CANCEL ALARM – Press timer key E32SUBC OVEN and PROOFER © Moffat Ltd, September 2009 Revision 3... - Page 10 SELECT DIFFERENT PROGRAM OVEN READY Press program key TEMP STATUS LOAD OVEN START OVEN READY – Press program key BAKE PROGRAM DONE UNLOAD OVEN CANCEL ALARM – Press program key E32SUBC OVEN and PROOFER © Moffat Ltd, September 2009 Revision 3...
-
Page 11: Field Adjustable Settings
Oven beeper tone Proofer beeper tone Beeper volume Humidity Offset -30 to + 30 %- Humidity Sampling Interval 0-120secs 30sec Water tank max temp 35-50C Water tank min temp 35-50C E32SUBC OVEN and PROOFER © Moffat Ltd, September 2009 Revision 3... - Page 12 Error counter - proofer air hi temp Error counter - humidity sensor Error counter - proofer water probe Error counter - proofer water hi temp Error counter - proofer water low E32SUBC OVEN and PROOFER © Moffat Ltd, September 2009 Revision 3...
- Page 13 Programming Key ‘P’ to save the change and return to the Service Menu. Scroll down to the ‘Exit’ menu and press the Programming Key ‘P’ to exit the Service Menu. The programming light ‘Prog’ will go out. E32SUBC OVEN and PROOFER © Moffat Ltd, September 2009 Revision 3...
- Page 14 Programming Key ‘P’ to save the change and return to the Service Menu. Scroll down to the ‘Exit’ menu and press the Programming Key ‘P’ to exit the Service Menu. The programming light ‘Prog’ will go out. E32SUBC OVEN and PROOFER © Moffat Ltd, September 2009 Revision 3...
- Page 15 Service Menu. Scroll down to the ‘Exit’ menu and press the Programming Key ‘P’ to exit the Service Menu. The programming light ‘Prog’ will go out. E32SUBC OVEN and PROOFER © Moffat Ltd, September 2009 Revision 3...
- Page 16 Programming Key ‘P’ to save the change The System Beeper Volume Setting screen will display. System Beeper Volume Settings. Range - 1 to 4. Factory Default = 2 E32SUBC OVEN and PROOFER © Moffat Ltd, September 2009 Revision 3...
- Page 17 ‘P’ to save the change and return to the Service Menu. Scroll down to the ‘Exit’ menu and press the Programming Key ‘P’ to exit the Service Menu. The programming light ‘Prog’ will go out. E32SUBC OVEN and PROOFER © Moffat Ltd, September 2009 Revision 3...
- Page 18 C to + 11 Factory Default = +2 Press either ‘Left’ or ‘Right’ keys to scroll through the Temperature Offset settings and press the Programming Key ‘P’ to save the change E32SUBC OVEN and PROOFER © Moffat Ltd, September 2009 Revision 3...
- Page 19 The temperature reading for the Proofer Water Probe screen will display. The status of the oven door microswitch will display. The status of the proofer water tank float switch will display. E32SUBC OVEN and PROOFER © Moffat Ltd, September 2009 Revision 3...
- Page 20 The Oven Fan Relay Output screen will display. Turning on operates the 24Vdc relay and not the fan. The next screen tests the pixels in the display and LED’s on the Control Panel. E32SUBC OVEN and PROOFER © Moffat Ltd, September 2009 Revision 3...
- Page 21 The Count for the number of times the Proofer Water Heater Element has operated screen will display. The Count for the number of times the Oven Temperature Probe has failed (open/ closed circuit or out of range) screen will display. E32SUBC OVEN and PROOFER © Moffat Ltd, September 2009 Revision 3...
- Page 22 The Count for the number of times the Proofer Water Low Level Alarm has operated screen will display. Scroll down to the ‘Exit’ menu and press the Programming Key ‘P’ to exit the Service Menu. The programming light ‘Prog’ will go out. E32SUBC OVEN and PROOFER © Moffat Ltd, September 2009 Revision 3...
-
Page 23: Cleaning / Maintenance
This procedure is recommended to be done once a week. Frequency of cleaning the element may be increased or decreased depending on the lime depositing on the element. E32SUBC OVEN and PROOFER © Moffat Ltd, September 2009 Revision 3... - Page 24 6 months Check door hinges for wear 12 months Check that the element resistances are correct to their rating, or that they are drawing the 12 months correct current. E32SUBC OVEN and PROOFER © Moffat Ltd, September 2009 Revision 3...
-
Page 25: Trouble-Shooting Guide
Blue or Yellow wires disconnected 97% Actual humidity reading White wire disconnected. Unit shuts down will not start Short circuit between Blue/ White wire to humidity probe Blown controller fuse. E32SUBC OVEN and PROOFER © Moffat Ltd, September 2009 Revision 3... - Page 26 Fan only operates in one direction Motor timer faulty. Replace. (Refer fault diagnosis 5.3.2) (Refer service section 6.2.9) Oven light not illuminating Blown bulb. Replace. (Refer service section 6.2.1) No power to light. Correct fault. E32SUBC OVEN and PROOFER © Moffat Ltd, September 2009 Revision 3...
- Page 27 (Refer service section 6.2.13) Door catch setting incorrect. Adjust. (Refer service section 6.4.4) Door pivot bushes / pins worn. Replace. (Refer service section 6.2.14) Door catch striker plate worn. Replace. E32SUBC OVEN and PROOFER © Moffat Ltd, September 2009 Revision 3...
- Page 28 (Refer service section 6.3.7) Door does not close Tray in way of door. Correctly position tray in rack. Interference with door. Inspect and repair. Hinges damaged. Replace. (Refer service section 6.3.12) E32SUBC OVEN and PROOFER © Moffat Ltd, September 2009 Revision 3...
- Page 29 (Refer fault diagnosis 5.4.5) (Refer service section 6.3.16) Solenoid relay faulty. Replace. (Refer fault diagnosis 5.4.5) Water tank not fitted. Fit water tank. Solenoid valve dirty. Clean solenoid valve. E32SUBC OVEN and PROOFER © Moffat Ltd, September 2009 Revision 3...
-
Page 30: Fault Diagnosis-Oven
- replace. If the capacitor is infinite resistance straight away then it is open- circuit - replace. If the resistance never goes very high then the capacitor is leaky - replace. Figure 5.3.2b E32SUBC OVEN and PROOFER © Moffat Ltd, September 2009 Revision 3... - Page 31 Correct operation will make an audible noise when closing contacts and on front face contactor contact mechanism will visibly pull in. If not, contactor is faulty—replace. E32SUBC OVEN and PROOFER © Moffat Ltd, September 2009 Revision 3...
-
Page 32: Fault Diagnosis-Proofer
If relay is operating check continuity through re- lay contacts. Replace if no continuity through lay contacts. Replace if no continuity through contacts contacts Relay #6 Relay #5 Figure 5.4.2 Figure 5.4.3 E32SUBC OVEN and PROOFER © Moffat Ltd, September 2009 Revision 3... - Page 33 SOLENOID RELAY - TANK FULL Figure 5.4.5b E32SUBC OVEN and PROOFER © Moffat Ltd, September 2009 Revision 3...
- Page 34 6.3.11 Door Glass ....................... 40 6.3.12 Door Pivot bushes ..................... 41 6.3.13 Autofill Relay ......................41 6.3.14 Water Solenoid ......................41 6.3.15 Water Solenoid Cleaning.................... 41 6.3.16 Float Switch......................41 E32SUBC OVEN and PROOFER © Moffat Ltd, September 2009 Revision 3...
-
Page 35: Service Procedures
Door Roller Catch Adjustment ..................43 6.4.5 Oven Probe Calibration ....................44 6.4.6 Proofer Air Probe Calibration ..................44 6.4.7 Proofer Water Heater Probe Calibration............... 44 6.4.8 Proofer Door Reversal ....................44 E32SUBC OVEN and PROOFER © Moffat Ltd, September 2009 Revision 3... -
Page 36: Access
1) Undo the four screws holding the panel. 1) Undo the four screws holding the panel. 2) Remove side panel. 2) Remove side panel. Four Screws Four Screws Figure 6.1.4 Figure 6.1.2 E32SUBC OVEN and PROOFER © Moffat Ltd, September 2009 Revision 3... -
Page 37: Replacement- Oven
4) Adjust micro-switch (refer 6.4.1). Figure 6.2.1 6.2.2 Controller fuse 1) Remove RH oven panel locate fuse carrier in bottom LH corner. Open carrier and replace fuse. Fuse Figure 6.2.2 E32SUBC OVEN and PROOFER © Moffat Ltd, September 2009 Revision 3... -
Page 38: Temperature Probe
3) Clip new contactor onto gear plate. 4) Transfer wires from old contactor to new con- tactor, ensuring all wires are in their correct positions. Two screws Figure 6.2.4a Thermostat probe Figure 6.2.4b E32SUBC OVEN and PROOFER © Moffat Ltd, September 2009 Revision 3... -
Page 39: Elements
Use high temperature (232°C / 450°F minimum) RTV silicone sealant to seal ele- ment against side wall of oven. Figure 6.2.8 4) Replace motor and reassemble in reverse order. E32SUBC OVEN and PROOFER © Moffat Ltd, September 2009 Revision 3... -
Page 40: Motor
‘Low E’ glass. 5) Reassemble in reverse order and refit door to oven. Motor capacitor Figure 6.2.10 3) Remove the capacitor wires, noting their positions. 4) Fit capacitor reassemble reverse order. E32SUBC OVEN and PROOFER © Moffat Ltd, September 2009 Revision 3... -
Page 41: Inner Glass
3) Refit new seals. NOTE: Fit top and bottom seals first, with open side of seal facing downwards. Fit side seals with open side facing outwards. Door Seals Figure 6.2.13 E32SUBC OVEN and PROOFER © Moffat Ltd, September 2009 Revision 3... -
Page 42: Replacement-Proofer
3) Undo the two screws holding the element cover and remove cover. 4) Unscrew the element from RH side (outside) of proofer. Pull element carefully to remove from inside of proofer. Figure 6.3.2 E32SUBC OVEN and PROOFER © Moffat Ltd, September 2009 Revision 3... -
Page 43: Wet Element
3) Remove baffle from inside proofer (4 screws) 4) Undo nut from centre of fan and remove blade. 5) Undo 4 screws that secure fan motor to proofer. 6) Re-assemble in reverse order. Centre nut E32SUBC OVEN and PROOFER © Moffat Ltd, September 2009 Revision 3... -
Page 44: Door Handle
4) Clean glass and replace in reverse order. Ensure silicone seals have been displaced from door outer and door inner. 5) Reassemble and refit door in reverse order. E32SUBC OVEN and PROOFER © Moffat Ltd, September 2009 Revision 3... -
Page 45: Door Pivot Bushes
2) Remove wires from solenoid, noting their 4) Remove RH side rack and water trough from positions. inside proofer. 3) Remove brass fitting from solenoid. Figure 6.3.14 Figure 6.3.16a E32SUBC OVEN and PROOFER © Moffat Ltd, September 2009 Revision 3... - Page 46 NOTE: Ensure float switch bracket is RTV silicone sealed to prevent steam leakage. Float switch sleeve Float switch nut Float switch Figure 6.3.16b E32SUBC OVEN and PROOFER © Moffat Ltd, September 2009 Revision 3...
-
Page 47: Adjustment/Calibration
Adjust again if necessary. Roller Catch Adjustment Figure 6.4.2 3) Secure the door hinges and oven door to the right hand side of the oven door opening. Figure 6.4.4 E32SUBC OVEN and PROOFER © Moffat Ltd, September 2009 Revision 3... -
Page 48: Oven Probe Calibration
3) Remove four cover screws covering alternate head when closed. hinge holes. Refit cover screws on opposite side. 10) Refit LH side panel. E32SUBC OVEN and PROOFER © Moffat Ltd, September 2009 Revision 3... -
Page 49: Accessories
Accessories E32SUBC OVEN and PROOFER © Moffat Ltd, September 2009 Revision 3... - Page 50 Oven Doors ......................49 8.1.3 Oven gear Plate ......................50 8.1.4 Oven Control Panel ....................51 8.2 Proofer ..................... 52 8.2.1 Proofer Main Spare Parts ................... 52 8.2.2 Proofer Door......................54 E32SUBC OVEN and PROOFER © Moffat Ltd, September 2009 Revision 3...
-
Page 51: Replacement Parts
Replacement Parts 8.1.1 Oven Main Spare Part List E32SUBC OVEN and PROOFER © Moffat Ltd, September 2009 Revision 3... - Page 52 PIVOT BUSH -PLATED 044210 SPIRE NUT SFR 2158ST 021637 MICROSWITCH BUTTON 024791 MICROSWITCH ROD 017929 DAMPER ROD CLIP 024802 DOOR MICROSWITCH 013977 MICROSWITCH INSULATOR 024584 MICROSWITCH BRACKET 010761 GROMMET 1½" RUBBER E32SUBC OVEN and PROOFER © Moffat Ltd, September 2009 Revision 3...
-
Page 53: Oven Doors
SIL.EXTR Y DOOR SEAL 1.74m 090415 DOOR INSULATION 2340 DOOR GLASS 026187 GLASS CLAMP ANGLE 5019 DOOR INNER WA SUB 024809 ROLLER CATCH ASSY 020082 TOP HINGE ASSY 020083 BOTTOM HINGE ASSY E32SUBC OVEN and PROOFER © Moffat Ltd, September 2009 Revision 3... -
Page 54: Oven Gear Plate
228660 TRANSFORMER WORKED 024432 CAPACITOR 3µF 229033 FUSE HOLDER 6.3X32mm 233689 FUSE 1.5A (F) 32 X 6.3MM GLASS 024567 MOTOR TIMER 240V 024637 RELAY BASE 233311 RELAY G2R 24VDC E32SUBC OVEN and PROOFER © Moffat Ltd, September 2009 Revision 3... -
Page 55: Oven Control Panel
Replacement Parts 8.1.4 Oven Control Panel OVEN CONTROL PANEL SPARE PART LIST Part No. Description 233269 OVERLAY 32SUBC OVEN - MOFFAT 233696 OVERLAY 32SUBC OVEN - BLUESEAL 233257 CONTROL PANEL 233308 CONTROLLER 233315 FARADY COVER 024694 CONTROL PANEL HOOK WIRING HARNESS (NOT SHOWN) -
Page 56: Proofer
Replacement Parts 8.2.1 Proofer Main Spare Part List E32SUBC OVEN and PROOFER © Moffat Ltd, September 2009 Revision 3... - Page 57 022253 ADAPTOR & LOCKNUT 022998 REDUCING SOCKET ⅜” x ⅛” BSP 025574 WATER TUBE 020851 WATER SOLENOID 021619 REAR SERVICE PANEL TOP 024702 WATER SOLENOID BRACKET 020869 FEMALE CONNECTOR E32SUBC OVEN and PROOFER © Moffat Ltd, September 2009 Revision 3...
-
Page 58: Proofer Door
DOOR GLASS 90203 INNER FRAME SEAL 2.2m 26215 DOOR INNER FRAME 25887 DOOR SEAL 2.61m 25600 MAGNET MOUNTING PLATE 18947 MAGNETIC CATCH 26604 CATCH CLIP 20082 TOP HINGE ASSY E32SUBC OVEN and PROOFER © Moffat Ltd, September 2009 Revision 3... -
Page 59: Circuit Schematic
Circuit Schematics 380—415Vac, 3P + N + E BOTTOM E32SUBC OVEN and PROOFER © Moffat Ltd, September 2009 Revision 3... - Page 60 Circuit Schematics 208—240Vac, 3P+E B O TTOM E32SUBC OVEN and PROOFER © Moffat Ltd, September 2009 Revision 3...
-
Page 61: Wiring Diagram
Wiring Diagrams 380—415Vac, 3P + N + E PRO BE E32SUBC OVEN and PROOFER © Moffat Ltd, September 2009 Revision 3... - Page 62 Wiring Diagrams 208—240Vac, 3P+E PROBE E32SUBC OVEN and PROOFER E32SUBC OVEN and PROOFER © Moffat Ltd, September 2009 © Moffat Ltd, July 2009 Revision 2 Revision 3...
-
Page 63: Service Contacts
Mulgrave VIC 3170 Fax (03) 9518 3838 Spare Parts Department Free Call 1800 337 963 Fax (03) 9518 3895 NEW SOUTH WALES - MOFFAT PTY Unit 8/142 James Ruse Drive Tel (02) 8833 4111 Rosehill NSW 2142 Spare Parts Free Call 1800 337 963... - Page 64 MOFFAT INC. 3765 Champion Blvd Winston-Salem Tel 1800 551 8795 NC27115 Fax 336 661 9546 NATIONAL COVERAGE FOR SERVICE OR MAINTENANCE DIAL FREE CALL 1800 551 8795 (USA ONLY) E32SUBC OVEN and PROOFER © Moffat Ltd, September 2009 Revision 3...
-
Page 65: Reference
Oven beeper tone Proofer beeper tone Beeper volume Humidity Offset -30 to + 30 %- Humidity Sampling Interval 0-120secs 30sec Water tank max temp 35-50C Water tank min temp 35-50C E32SUBC OVEN and PROOFER © Moffat Ltd, September 2009 Revision 3... - Page 66 Proofer water heater relay output status displays ON or OFF status Proofer power ON relay output status displays ON or OFF status Oven fan realy output status displays ON or OFF status E32SUBC OVEN and PROOFER © Moffat Ltd, September 2009 Revision 3...
-
Page 67: Fault Codes
Blue or Yellow wires disconnected 97% Actual humidity reading White wire disconnected. Unit shuts down will not start Short circuit between Blue/ White wire to humidity probe Blown controller fuse. E32SUBC OVEN and PROOFER © Moffat Ltd, September 2009 Revision 3... - Page 68 E32SUBC OVEN and PROOFER © Moffat Ltd, September 2009 Revision 3...
Need help?
Do you have a question about the turbofan E32SUBC and is the answer not in the manual?
Questions and answers