Ingenico Move/5000 Quick Reference Manual
Wireless
Hide thumbs
Also See for Move/5000:
- Quick start manual ,
- User manual (60 pages) ,
- Quick reference manual (13 pages)
Table of Contents
Advertisement
Advertisement
Table of Contents

Subscribe to Our Youtube Channel
Related Manuals for Ingenico Move/5000


Summary of Contents for Ingenico Move/5000
- Page 1 Payments Wireless – Move/5000 Quick Reference Guide...
-
Page 2: Table Of Contents
Table of Contents 1 – Introduction ................4 2 – General Tips ................4 3 – Basic Terminal Operations ............5 Before You Begin ............... 5 Unpacking the Box ............. 5 Terminal ON/OFF .............. 5 Terminal Physical Keyboard ..........6 Virtual Keypad .............. - Page 3 To Conduct a Contactless Transaction ......18 To Conduct an EMV Chip Card Transaction ....19 To Conduct a Magnetic Stripe Transaction ..... 19 8 – Sale (Credit or Debit) Transactions ........20 9 – Pre-Auth and Completion (Optional) ........21 10 –...
-
Page 4: Introduction
This guide is your primary source of information for operating, setting up and installing the Global Payments’ Wireless - Move/5000 terminal. For terminal-related questions or support, please contact Global Payments’ Customer Care. 2 – General Tips... -
Page 5: Basic Terminal Operations
3 – Basic Terminal Operations Before You Begin The terminal (“Wireless - Move/5000”) is a point-of-sale electronic payment terminal designed to process debit and credit card transactions via Wi-Fi wireless network, Bluetooth, and/or cellular 4G or 3G wireless network. CAUTION:... -
Page 6: Terminal Physical Keyboard
and any power source. Press the yellow [Correction] key and the [Administrator] key simultaneously for one second. Terminal Physical Keyboard The terminal keypad is numeric only, and contains 10 numeric keys (0-9), a green [Enter] key, a red [Cancel] key, a yellow [Correction] key. Button Characters Accessed Red [Cancel] key... -
Page 7: Virtual Keypad
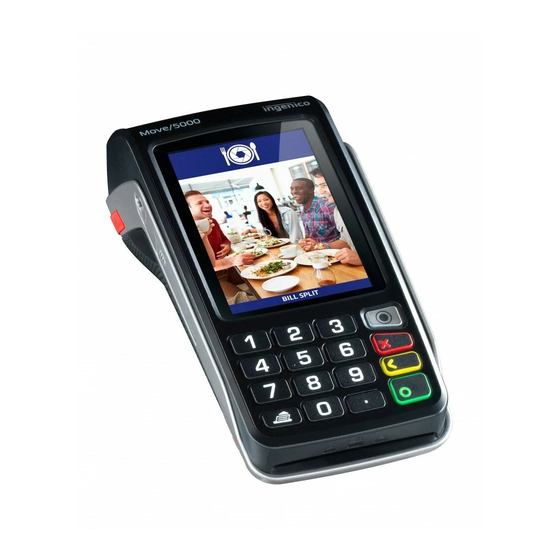
Virtual Keypad Global Payments’ Wireless - Move/5000 is equipped with a 3.5” backlit, HVGA (480x320 pixels) touchscreen which can be used with a finger or a stylus. The sample virtual alpha keypad shown below will display when the field tapped on the touch screen requires alphanumeric entry. - Page 8 displayed. To get an expanded alpha keypad, click icon located on the right end of the data entry field. Header and Condition icons The system supports graphical icons that will indicate conditions the terminal may be in at various states. The condition icons are displayed in the header of all the screens.
- Page 9 Battery Management Designed for both indoor and outdoor uses, the pocket-sized Move/5000 comes with extended battery life and better battery management. External power supply present and battery charge level are reported on status bar of mobile terminal with: A thunderbolt icon when the mobile terminal is connected to a wired power supply.
-
Page 10: Administrator Menu
Administrator Menu The Administrator Menu is the place where all terminal configuration settings are stored. It can only be accessed by pressing Administrator key. The administrator menu will be displayed on terminal screen. NOTE: Some Admin functions are password protected. 4 –... -
Page 11: Administrator Id & Password
Administrator ID & Password Your terminal is pre-programmed with a default administrator ID name of “1”, please call Global Payments’ Customer Care at 1- 800-263-2970 to set up your personalized admin password. Your administrator password is an important security feature of your terminal. -
Page 12: Set Up Your Manager/Supervisor Id And Passwords
There are up to 10 managers and 10 supervisors. The Manager/Supervisor ID is between one to seven numeric digits. Each ID must be unique and cannot be duplicated. The manager, supervisor and clerk password length is seven alpha and numeric characters. The password can consist of any number of alpha or numeric characters. -
Page 13: To Set Up Or Change The Clerk Password
There cannot be duplicate Clerk IDs. The Clerk ID is between one to six numeric digits. Clerk Name is between one to twenty alpha & numeric characters. The Clerk password is between four and seven alphanumeric digits. This password does not expire. If the Clerk forgets their password, the Administrator, Manager or Supervisor can set a new one. -
Page 14: Network Communication
6 – Network Communication The Move/5000 terminal can support the following three (3) network communications: Wi-Fi, Bluetooth, and Cellular 4G wireless. You can select any of these communication modes to use as your primary communication method. The following instructions will help... -
Page 15: For A 4G Mobile Data Set-Up
Your terminal supports both 4G and 3G wireless, and will automatically choose the best available network. If you have ordered a 4G configuration for your Move/5000, Global Payments inserts and programs the network SIM Card for your terminal prior to shipment. There is no setup required by you. -
Page 16: For Bluetooth Set-Up
For Bluetooth Set-up To connect via Bluetooth, a Bluetooth Communication Base is required. Global Payments offers two different bases for the Move/5000 – a Bluetooth Communication Base and a Charging Base. The Bluetooth Communication Base works as the Bluetooth access point when an Ethernet cable to plugged into the port. - Page 17 The Communication Base requires the close proximity of a power outlet. The Communication Base requires that an Ethernet cable be plugged into the proper port. Two (2) Communication Bases cannot be placed within two meters (6.5 feet) of each other. Additional Communication Bases should be placed as far as possible from other installed Communication Bases –...
-
Page 18: Accepting Payment Cards
The Bluetooth connection status is shown as follows: Bluetooth present but not activated Bluetooth connection is in progress Terminal connected to at least one base 7 – Accepting Payment Cards To Conduct a Contactless Transaction Tap the transaction icon on the home screen, or press [Enter] key to enter the main transaction menu and then select transaction type Follow the prompts displayed on the screen accordingly... -
Page 19: To Conduct An Emv Chip Card Transaction
To Conduct an EMV Chip Card Transaction Tap the transaction icon on the home screen, or press [Enter] key to enter the main transaction menu and then select transaction type Follow the prompts displayed on the screen accordingly Position the chip card with the chip side facing upward, as shown below Insert the chip card into the smart card reader slot in a smooth, continuous motion until it seats firmly... -
Page 20: Sale (Credit Or Debit) Transactions
8 – Sale (Credit or Debit) Transactions The sale transaction is the most common transaction. Tap Sale transaction icon on home screen, or press [Enter] to enter the main menu, and then tap Sale Enter the clerk ID and password (if enabled) and press [Enter] Enter the invoice # (if enabled) and press [Enter] Key in the transaction amount and press [Enter] Terminal displays “Pass Terminal to Customer,”... -
Page 21: Pre-Auth And Completion (Optional)
display to select whether they want to pay in home currency amount or in Canadian dollars Terminal communicates with Global Payments and terminal screen displays “Pass Terminal to Merchant.” Once the transaction is complete, the merchant copy of the receipt is printed Press [Enter] to print the customer copy of the receipt NOTE: If you are presented with a card with a chip... - Page 22 Enter the Expiry Date if the card is manually entered The cardholder enters the PIN and presses [Enter] If chip card terminal displays “Confirm Amount ”. The cardholder presses [1]-Yes or [2]-No 10. Customer presses [Enter] and terminal displays “Pass Terminal to Merchant,”...
-
Page 23: Return
10 – Return Use the Return transaction to credit a cardholder. Tap Return transaction icon on home screen, or press [Enter] to enter the main menu, and then tap Return Enter manager ID and password and press [Enter] Enter total return amount (including tip and cashback) and press [Enter] Terminal displays “Pass Terminal to Customer,”... - Page 24 transaction, use the Void transaction (instead of Refund) wherever possible. Transactions that are voided will not appear on cardholder statements. Customers must be present for a void transaction on a debit card. NOTE: Transactions can only be voided before they are settled.
-
Page 25: Performing A Settlement (Closing The Terminal)
13. Customer presses [Enter] and terminal displays “Pass Terminal to Merchant” 14. Terminal communicates with Global Payments. Once the transaction is complete, the merchant copy of the receipt is printed 15. Press [Enter] to print the customer copy of the receipt 12 –... -
Page 26: Reprint
NOTE: Auto Settle function is available on your terminal. To activate Auto Settle, please contact Global Payments’ Customer Care at 1-800-263-2970. 13 – Reprint This option allows you to reprint either the last transaction entered or search for the appropriate transaction. Tap Reprint transaction icon on home screen, or press [Enter] to enter the main menu, and then tap Reprint Press [1] - Last Transacation to reprint last transaction, or... -
Page 27: Batch Menu
NOTE: You must perform a settlement before you can enter demo mode. At home screen press [,#*] key for the administrator menu. Tap Setup Menu Key in the administrator name and password, and then press [Enter] Press [6] - Demo Press [1] Demo - ON/OFF to enable/disable demo mode Press [Cancel] 3 times to go to the demo home screen NOTE:... -
Page 28: View Batch History
View Batch History This feature will allow you to view the batch number and totals of up to thirty previous batches settled. NOTE: This feature will not be available when the application is in demo mode; “Feature Disabled” will display. Follow steps above to access Batch Menu Select [2] - View Batch History Select the batch you would like to view: [1] - Batch #, [2] - All... -
Page 29: Key Beep, Backlight And Brightness
transaction • 2 - [Summary] to print the terminal totals by card type • 3 - [Clerk], select [All], or [Clerk ID] to print card type totals for the current batch for all clerks or by individual clerk. If [Clerk ID] is selected, the terminal prompts for the clerk ID to be entered in order to print the appropriate clerk report •... -
Page 30: Semi-Integration Configuration With Ecr (For Wi-Fi Mode Only)
ECR system provider to make sure they have completed certification with Global Payments. The Move/5000 terminal can only support Semi-integration in Wi-Fi mode. Follow the steps below to configure your Move/5000 terminal to integrate with your ECR. At the home screen, press [.,#*] for the administrator menu Scroll down to select Misc.Option... -
Page 31: Auto Download (Ip Terminal Only)
Set Enable Semiinteg setting to ON Click Communication Type and then select [2] – Wi-Fi Enter the terminal Port #. Your terminal IP address will display on the screen Return to Semi-Integrated menu, and then select Receipt Options Select where you want the receipt to be printed 10. -
Page 32: Installation Procedure
download following the first successful settlement after every 60 days. The terminal will print a download status report after the auto download is completed. NOTE: If auto download failed, terminal will print a download failure report. Merchant should contact Global Payments to perform a manual download to complete application update 20 –... -
Page 33: Replacing The Paper Roll
21 – Replacing the Paper Roll When coloured stripes appear on a receipt, this is the indication to change the paper roll. NOTE: Only use paper approved by the manufacturer (roll diameter max 40 mm/1.57”, roll width 58mm/2 ¼”, roll length 17m/55’). -
Page 34: Troubleshooting
Close the paper compartment so that a little bit of the paper is coming out. NOTE: If you insert a new R40 paper roll, tear off the first length (one complete turn to avoid printing on adhesive tape footprint). To maximize the life of the thermal paper rolls, do not store them where they are exposed to fluorescent light, UV light, high humidity (above 65%) or temperature (above 25°... - Page 35 Card Reader Does Not Work Properly (Cards are Not Read) When sliding the card through the reader, make sure the magnetic stripe on the card is facing the side of the terminal display screen Swipe the card at a faster or slower steady speed Swipe the card in the other direction Perform a test transaction using one or more magnetic stripe cards to ensure the problem is not a defective card...
-
Page 36: Cleaning
23 – Cleaning NOTE: Before cleaning the terminal ensure the power is off. To clean the terminal, follow these instructions: To prevent damage to the terminal and to avoid electric shock, unplug the power supply before cleaning the terminal To remove dust from the terminal, wipe with a damp cloth For deeper cleaning, make a solution of soap and water and dampen a soft cloth with the solution and wipe the terminal’s covers. -
Page 37: Terminal Specifications
24 – Terminal Specifications This section discusses power requirements, dimensions and other specifications of the Move/5000 terminal. Name Move/5000 Application & Processor Crypto Cortex A5 54 bits processor Internal 512 MB Flash, 512 MB RAM Memory External MicroSD up to 32GB... -
Page 38: Service And Support
Field upgradable Security PCI PTS 5.x certified 25 – Service and Support For Global Payments’ Wireless - Move/5000 terminal service and repair information, contact Global Payments’ Customer Care at 1-800-263-2970. Returning a Terminal for Service When you receive a replacement terminal, always return the defective devices back promptly;... - Page 40 Global Payments Canada GP P.O. Box 4010, Station B Etobicoke, ON M9W 7H8 ©2019 Global Payments Inc. All rights reserved. SM-191886-v1.0EN...
Need help?
Do you have a question about the Move/5000 and is the answer not in the manual?
Questions and answers
I **** trying to get to the Admin page and cannot do so. How do I do that?
@Kathy Botti
To access the Admin page on the Ingenico Move/5000, press the Administrator key. The Administrator Menu will be displayed on the terminal screen. Note that some Admin functions may be password protected.
This answer is automatically generated
How do I set up for manual transactions
To set up manual transactions on the Ingenico Move/5000, follow these steps:
1. Press the Menu key.
2. Select the appropriate transaction type:
- For a Pre-Authorisation Transaction, press 4.
- For a Pre-Authorisation Completion, press 5.
3. Ask the customer to tap, insert, or swipe their card.
4. Ask the customer to enter their PIN or sign if required.
5. Enter the required transaction amount and press Enter.
6. Once approved, a confirmation message will display.
7. If necessary, ask the customer to sign the receipt and verify the signature.
8. Press Yes to print the customer receipt if required.
For voiding a transaction before settlement:
1. Tap Void Transaction on the home screen or access it via the main menu.
2. Enter the Manager ID and password, then press Enter.
3. Select whether to Void a Pre-Auth or proceed with a standard void.
4. Search for the transaction and confirm the void by pressing 1 - Yes.
For settlement:
- You can manually initiate settlement via the terminal menu before 21:00 AEST (AEDT).
- If settlement is not completed, the terminal will prompt you to settle when processing the first transaction after 18:00 local time.
These steps enable manual processing of transactions on the Ingenico Move/5000 terminal.
This answer is automatically generated