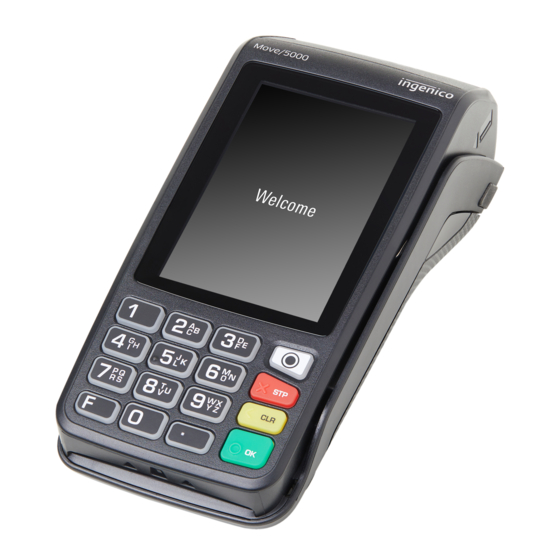
Ingenico Tetra Move/5000 Quick Reference Manual
Retail application, united states
Hide thumbs
Also See for Tetra Move/5000:
- Quick start manual ,
- User manual (60 pages) ,
- Quick reference manual (40 pages)
Advertisement
Quick Links
Quick Reference Guide
Retail
Application
Ingenico Tetra
United States
© 2018 Elavon Inc. Elavon is a registered trademark in the United States and other countries. This document
is prepared by Elavon as a service for its customers. The information presented is general in nature and may
not apply to your specific situation. RTL-QRG-1366-1118
Advertisement

Summary of Contents for Ingenico Tetra Move/5000
- Page 1 Quick Reference Guide Retail Application Ingenico Tetra United States © 2018 Elavon Inc. Elavon is a registered trademark in the United States and other countries. This document is prepared by Elavon as a service for its customers. The information presented is general in nature and may...
- Page 2 Retail Application page 2 TIPS FOR PROCESSING • Press ENTER to access the Main Menu from the F1 / START idle screen • To scroll through the menu, use the up and down ENTER / YES arrows • Select the number that corresponds to the menu option of choice or press ENTER when the...
- Page 3 Retail Application page 3 The following prompts may appear depending on terminal setup, card type and/or entry method. Clerk Prompts: Manually-Keyed Security Prompts: • Enter Clerk ID and press ENTER • Enter the CVV2 code and press ENTER • If prompted, select to Add Clerk ID •...
- Page 4 Retail Application page 4 CREDIT/DEBIT SALE SALE • Select • Select CREDIT DEBIT • If prompted, enter password and press ENTER • Enter the amount and press ENTER • Swipe, insert, or tap card, or manually enter the account # and press ENTER ENTER •...
- Page 5 Retail Application page 5 CREDIT/DEBIT RETURN RETURN • Select • Select CREDIT DEBIT • If prompted, enter password and press ENTER • Enter the amount and press ENTER • Swipe, insert, or tap card, or manually enter the account # and press ENTER ENTER •...
- Page 6 Retail Application page 6 CREDIT AUTHORIZATION ONLY • Select AUTH ONLY • Enter the amount and press ENTER • Swipe, insert, or tap card, or manually enter the account # and press ENTER ENTER • If manually keyed, enter the expiration date and press •...
- Page 7 Retail Application page 7 CREDIT/DEBIT VOID VOID • Select • Select ALL, REFERENCE CLERK INVOICE/PO ACCOUNT CUSTOMER #, RRN, or APPROVAL CODE • Locate the transaction to void (by swiping the card or entering the selected search criterion) and press SELECT •...
- Page 8 Retail Application page 8 CREDIT FORCE • Select OTHER • Select FORCE, then CREDIT • Enter the amount and press ENTER • Swipe, insert, or tap card, or manually enter the account # and press ENTER ENTER • If manually keyed, enter the expiration date and press •...
- Page 9 Retail Application page 9 SETTLEMENT • Select SETTLEMENT • Select to Close Batch and Deposit Funds or to cancel settlement • Select ACCEPT to confirm batch totals or CANCEL to cancel settlement • The Settlement processes and the Settlement Report prints REPRINT OTHER •...
- Page 10 Retail Application page 10 HOST TOTALS VIEW BATCH HISTORY • Press the ADMIN • Press the ADMIN • Enter password and press ENTER • Enter password and press ENTER • Select BATCH MENU • Select BATCH MENU • Select HOST BATCH INQUIRY •...
- Page 11 Retail Application page 11 VIEW BATCH HISTORY • Select OTHER, then select REPORTS MENU • Select DETAIL DISPLAY then select PRINT DISPLAY • If prompted, select sort method: REFERENCE INVOICE #, or CARD TYPE • The selected information will display •...


Need help?
Do you have a question about the Tetra Move/5000 and is the answer not in the manual?
Questions and answers