Table of Contents
Advertisement
Advertisement
Table of Contents

Related Manuals for Ingenico IPP350


Summary of Contents for Ingenico IPP350
- Page 1 Tupelo Installation Guide Version 1.0...
- Page 2 Copyright © Copyright 2020, Windcave Inc. www.windcave.com All rights are reserved. No part of this work may be reproduced or copied in any form or by any means, electronic or mechanical, including photocopying, without the express written permission of Windcave Inc.
- Page 3 Document Revision Information and Amendments All amendments are to be identified and the manual updated, noting the amendment on this amendment page. Version Date Section Revision Information Amended by 2020/05/01 Initial Draft 2020/05/06 Updated Screen Images 2020/05/28 Added troubleshooting section 2020/06/19 Formatting update 2020/08/05...
-
Page 4: Table Of Contents
Contents Components ................................. 4 Ingenico IPP350 ............................4 Ingenico Move5000 ..........................4 Pre-Installation Checklist ........................... 5 System Pre-requisites ..........................5 Firewall Considerations ..........................5 2.2.1 Windcave Firewall Considerations ....................5 2.2.2 Paymark NZ Connectivity ........................5 Software Installation ............................6 Downloading Windcave SCR Controller .................... -
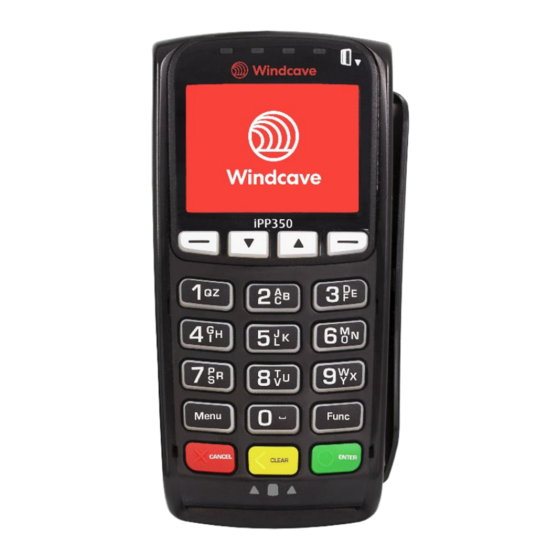
Page 5: Components
Windcave consultant know immediately. Please note the Ingenico IPP350 and Move5000 can be provided with a number of different connection methods, please speak to your Windcave Sales consultant regarding your specific cable requirements. -
Page 6: Pre-Installation Checklist
Please ensure you have the following items organized and ready before proceeding further with the installation: Your Windcave provided payment terminal and cables • Receipt printer if using IPP350, if using Move5000 on-board printer can be used • A stable broadband internet connection •... -
Page 7: Software Installation
3 Software Installation The Windcave SCR Controller application controls communications between the Point of Sale (POS) system, the Windcave Host and Tupelo terminal. To install the Windcave SCR Controller on your PC please follow the below step by step guide. Please ensure your Windcave Tupelo terminal is connected to the PC before proceeding. -
Page 8: Installing The Windcave Scr Controller
From the Download Software page choose the “SCR Tupelo Terminal Installer” to download the production installer for the SCR Controller: For development installations please choose the “Dev SCR Tupelo Terminal Installer” instead to download the development SCR Controller installer. 3.2 Installing the Windcave SCR Controller 3.2.1 Installation Location Once downloaded open the file to start the installation wizard: (It is recommended to run the application as administrator where possible.) -
Page 9: End User License Agreement
3.2.2 End User License Agreement Please ensure you read the End User License Agreement (EULA) carefully. Once you have scrolled all the way to the bottom you can accept the agreement by pressing the “Yes, I Accept”: This agreement must be accepted to proceed with the installation, if you have any questions regarding this please contact your account manager or email sales@windcave.com. -
Page 10: Ingenico Usb Drivers
3.2.3 Ingenico USB Drivers The installer will then proceed to download the proprietary USB pinpad drivers, if using the supplied USB cable please follow the below instructions. If using a serial cable please cancel the below dialogue and proceed to 3.2.2. - Page 11 Tupelo Installation Guide Version: 1.0 Page | 10 of 25...
- Page 12 Tupelo Installation Guide Version: 1.0 Page | 11 of 25...
- Page 13 Tupelo Installation Guide Version: 1.0 Page | 12 of 25...
-
Page 14: Ftdi Serial Driver
3.2.4 FTDI Serial Driver If using a serial cable to connect the pinpad to PC please follow the below instructions. If using a USB cable please press cancel button in the below dialogue and proceed to 3.2.5. Press “Extract” on the driver wizard, it is recommended to install using the default settings as such when prompted press “Next”... - Page 15 Tupelo Installation Guide Version: 1.0 Page | 14 of 25...
-
Page 16: Finalizing Installation
3.2.5 Finalizing Installation The installer will now download the Windcave SCR Controller application and configuration files, when prompted ensure the pinpad is connected and powered on: Tupelo Installation Guide Version: 1.0 Page | 15 of 25... - Page 17 Tupelo Installation Guide Version: 1.0 Page | 16 of 25...
-
Page 18: Verifying Connection To Windcave
3.2.6 Verifying Connection to Windcave To verify that your Windcave Tupelo terminal is connected to our servers, right click on the Windcave in the taskbar area and select the “Status Details” option per the below screenshot: Per above all interfaces should be Green to indicate connection to the Windcave Host, if any interfaces persist Red please contact Windcave Support. -
Page 19: Remote Key Injection (Rki)
4 Remote Key Injection (RKI) For merchants connecting with Paymark NZ Merchant/Terminal Id’s (applicable to New Zealand Merchants only), a Remote Key Injection (RKI) process must be completed prior to processing transactions. 4.1 First Time Setup If this is the first time you are installing the SCR Tupelo terminal from our website, the terminal will automatically initiate the RKI and your terminal shortly after install will display “Please Logon”... - Page 20 From the menu select the “RKI INIT” option: When prompted to enter a password, enter “6987” and press “enter”: The terminal screen will display “RKI INIT” followed by a “Processing Now” prompt indicating the RKI has been initiated: Once complete the terminal will display “Please Logon”, once you see the “Please Logon” prompt please phone the Windcave Support team to complete the RKI process and ensure you have the below information close by: Customer Name or Customer Id...
-
Page 21: Verifying The Installation
5 Verifying the Installation To verify the installation is setup and functioning please open the Windcave EFTPOS client by double clicking the Windcave icon in the system tray. A green status icon and status text should be displayed next to the OK button: 5.1 Performing a Logon A logon should be performed to confirm the terminal is able to successfully communicate with the Windcave host. - Page 22 The result of the logon request will be displayed on the pinpad screen as well as on a small receipt printed, if successful this will display approved. Please ensure the Merchant name and address printed at the top of the receipt is correct, if there are any issues please contact Windcave support as soon as possible.
-
Page 23: Troubleshooting
6 Troubleshooting 6.1 Installer Not Running/Downloading The below error occurs when there is no internet connectivity to the Windcave host, when this occurs check your internet connectivity by: Attempt to browse to Https://www.windcave.com • Ensure all fire wall considerations in section 2.2 are allowed •... -
Page 24: Cannot Detect Pinpad
6.2 Cannot Detect Pinpad The below error occurs when the SCR Controller cannot detect the Windcave terminal, when this error occurs check the connectivity by: Check physical cable connection i.e. ensure cable is securely connected both in the PC and rear •... -
Page 25: Link Failure
6.3 Link Failure The below error occurs when the SCR Controller cannot connect to the Windcave host, when this error occurs check the connectivity by: Attempt to browse to Https://www.windcave.com • Attempt to browse to Https://www.windcave.com on another device connected to the same •... -
Page 26: Logon Error
6.4 Logon Error The below error occurs when the Logon request does not reach the Windcave host, when this error occurs check the connectivity by: Attempt to browse to Https://www.windcave.com • Attempt to browse to Https://www.windcave.com on another device connected to the same •...
Need help?
Do you have a question about the IPP350 and is the answer not in the manual?
Questions and answers