Table of Contents
Advertisement
Quick Links
Advertisement
Table of Contents

Related Manuals for Electrolux ESP4SL10SP


Summary of Contents for Electrolux ESP4SL10SP
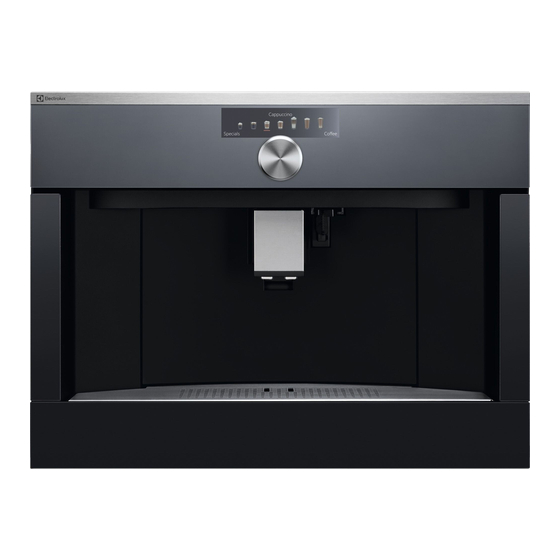
- Page 1 ESP4SL10SP ESP4SL10CN Automatic coffee maker User manual...
-
Page 2: Table Of Contents
TROUBLESHOOTING ....................25 FOR PERFECT RESULTS Thank you for choosing this Electrolux product. We have created it to give you impec- cable performance for many years, with innovative technologies that help make life simpler features you might not find on ordinary appliances. Please spend a few minutes reading to get the very best from it. -
Page 3: Safety Information
ENGLISH SAFETY INFORMATION Before the installation and use of the appliance, carefully read the supplied instructions. The manufacturer is not re- sponsible if an incorrect installation and use causes injuries and damages. Always keep the instructions with the appli- ance for future reference. 1.1 Children and vulnerable people safety The appliance is not intended for use by persons (including children) with reduced physical, sensory or mental capabili-... - Page 4 Cleaning and user maintenance shall not be made by chil- dren without supervision. Never submerge the appliance into water. CAUTION: To prevent damage to the appliance do not use alkaline cleaning agents when cleaning, use a soft cloth and a mild detergent.
-
Page 5: Safety Instructions
ENGLISH 2. SAFETY The only exception is adjusting the coffee mill which must be done with INSTRUCTIONS the machine out (see the section “Adjusting the coffee mill”). DANGER! Use original or manufacturer recom- This is an electrical appliance, it is mended accessories and spare parts therefore important to respect the fol- only. -
Page 6: Product Description
To comply with safety directives, an IMPORTANT! omnipolar switch with a minimum Safety cutout devices must be included in the mains power supply contact distance of 3 mm must be in compliance with the installation installed. regulations in the country concerned. -
Page 7: Control Panel
ENGLISH START STOP 3.2 Accessories B6 B7 “Total Hardness Test” indicator paper Cleaning brush Ground coffee measure Hot water/steam spout Descaler Connection nozzle cover Water softener filter (certain models Milk container only) CONTROL PANEL 4.1 Control panel Display Rotary Favourite icons START icon STOP icon C4 C5... - Page 8 4.2 Description of the display Demo Number of cups Menu DEMO Menu Cup size Espresso 30ml Normal Options 2 cups Options Aroma Recipes Functions and settings Basic Settings When Demo is activated the heating elements remain inac- Demo Service tive and the Coffee Machine is kept safe for the showroom.
- Page 9 ENGLISH Functions and settings Small Medium size Large Extra Large Water temperature Options Medium High Save as Favourite Keep Changes Pre-ground coffee Aroma Extra Mild Mild Normal Strong Extra Strong Coffee Ristretto Recipes Espresso Espresso lungo Long Coffee Americano + Milk Espresso Macchiato from 20% to 80% milk Macchiato...
-
Page 10: Before First Use
BEFORE FIRST USE 5.1 Controls after transport After removing the packaging, check that the appliance is intact and that all accessories are included. Do not use the appliance if it is visibly damaged. Contact Customer Services. 5.2 Initial cleaning... -
Page 11: Daily Use
ENGLISH goes off automatically. When making the first 5-6 cap- The coffee machine is now ready for puccinos, it is normal to hear the normal use. noise of boiling water. After this, the noise becomes less. The first time you use the appli- ance, you need to make 4-5 cap- To improve the performance of puccinos before it starts to give... -
Page 12: Making Coffee
6.3 Energy saving 6.4 Water temperature Use this function to enable or disable en- Use this function to modify the tem- ergy saving. When enabled, the function perature of the water used to make the reduces energy consumption in compli- coffee. - Page 13 ENGLISH While the machine is making cof- coffee, turn the dial in an anti-clockwise fee, delivery can be interrupted at direction by one click toward number 1 any moment by pressing STOP (not more than one click at a time, other- icon.
-
Page 14: Making Cappuccino And Milk-Based Coffees
8. MAKING CAPPUCCINOS AND MILK-BASED COFFEES 8.1 Using the hot water/steam correctly inserted in the bottom of the milk container lid (fig. 16 Quick spout Guide); 4. Place the lid back on the milk con- tainer; 5. Remove the hot water/steam spout (B6);... -
Page 15: Cleaning
ENGLISH user-preferred parameters) already been saved also light up. Important: Note that, “Save as Favourite” 3. The Start icon turns On. does not overwrite the current recipe, use Options /Keep Changes to change The user can overwrite a favourite by the current recipe default values. - Page 16 10.3 Cleaning coffee Guide); 2. Empty the drip tray (fig. 28 Quick ground container Guide) and ground container and wash them. When “Empty ground container” appears on the display (C1), the ground container must be emptied and cleaned. The appli- 10.5 Cleaning inside of the...
- Page 17 ENGLISH pick. 10.8 Cleaning the pre-ground coffee funnel Check regularly (about once a month ) that the pre-ground coffee funnel (A11) is not blocked. If necessary, remove coffee deposits with the brush (B5) supplied. 1. Make sure the machine is correctly turned off.
- Page 18 Turn the rotary to the 10.11 Cleaning the hot water/ CLEAN position. steam connection nozzle Clean the milk container each time you prepare milk as described below: 1.
-
Page 19: Descaling
9. Press OK to confirm that you have ised by the manufacturer only added the descaling solution. DES- (cod. 9029798718 M3BICD200) CALING UNDERWAY, please wait WebShop Electrolux: appears on the display. The descale ww.electrolux.com/shop programme starts and the descaler Using unsuitable descaler and/or... -
Page 20: Setting Water Hardness
RINSING: ity) we recommend repeating the Place the container used to collect cycle; the descaler solution empty under the After descaling, it is normal for the hot water/steam spout and press OK; ground container (A1) to contain 18. Hot water is delivered from the hot water. -
Page 21: Water Softener Filter
(B4). If this is not the case with your model, you are recommended to purchase one from Customer Services. (cod. 9029798726 M3BICF200) Web- Shop Electrolux: ww.electrolux.com/shop To use the filter correctly, follow the instructions below. 13.1 Installing the filter 7. -
Page 22: Technical Data
SPOUTS, PRESS OK TO FILL 13.3 Removing the filter FILTER: Place the container under If you want to use the appliance without the hot water/steam spout (B6), then the filter (B4), it must be removed and its press OK. Delivery begins and stops removal must be signalled to the appli- automatically. -
Page 23: Displayed Messages
ENGLISH 15. DISPLAYED MESSAGES Displayed message Possible cause Remedy FILL WATER TANK Insufficient water in the tank Fill the tank with water and/ (A6). or insert it correctly, push- ing it as far as it will go until it clicks into place. EMPTY GROUND CONTAINER The ground container (A1) is full. - Page 24 Displayed message Possible cause Remedy SELECT A MILDER Too much coffee has been Select a milder taste or TASTE OR REDUCE used. reduce the quantity of pre- PRE-GROUND COFFEE ground coffee (maximum 1 QUANTITY measure). INSERT WATER SPOUT The hot water spout (B6) is...
-
Page 25: Troubleshooting
ENGLISH 16. TROUBLESHOOTING GUIDE Below is a list of some of the possible malfunctions. If the problem cannot be resolved as described, contact Customer Services. Problem Possible cause Remedy The coffee is not hot. The cups were not pre- Warm the cups by rinsing heated. - Page 26 Problem Possible cause Remedy The appliance does not It is not plugged into the Plug into the mains socket. come on mains socket. The main switch (A10) is Press the main switch not turned on. (fig. 1). The brewing unit cannot be...
- Page 27 ENGLISH...
- Page 28 DEMO CODE 2.4.6.8...
Need help?
Do you have a question about the ESP4SL10SP and is the answer not in the manual?
Questions and answers