
Subscribe to Our Youtube Channel
Related Manuals for Primera AP550e


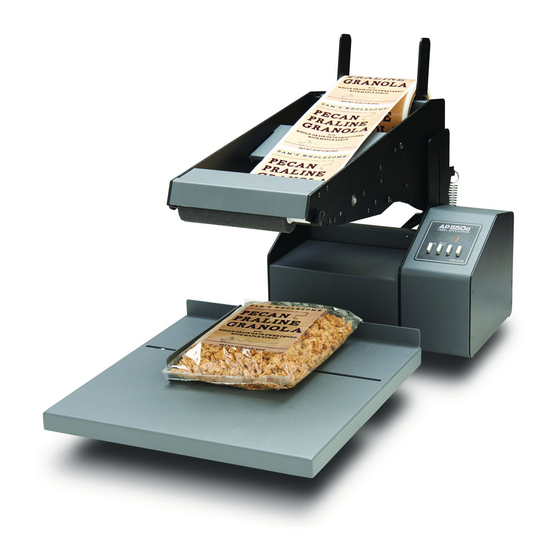
Summary of Contents for Primera AP550e
- Page 1 © 2013 All rights reserved. For the most recent version of this manual please visit www.primeralabel.eu...
- Page 2 All rights are reserved. No part of this document may be photocopied, reproduced, or translated into another language without prior written consent. Trademark Acknowledgments: Primera is a registered trademark of Primera Technology Inc. Windows is a registered trademark of Microsoft Corporation. All other trademarks are the property of their respective owners.
-
Page 3: Table Of Contents
6.2 Maintenance ........................... 25 6.3 Other Settings ......................... 25 6.4 Control Panel Functions ....................... 26 6.5 Technical Support ........................26 Section 7: Specifications ......................... 27 Appendix A: Label Path Diagram ......................28 Appendix B: Control Panel Flowchart ....................29 Index ................................30 AP550e Label Applicator 3... -
Page 4: Section 1: Unpacking And Setup
Section 1: Unpacking and Setup Thank you for purchasing the AP550e Label Applicator (hereafter referred to as "Label Applicator"). Boxes, bags, bins, bottles, packages, cans etc. will collectively be referred to as "containers." The Label Applicator includes a Power Cord, 12 volt Power Adapter and the parts shown below. -
Page 5: Section 2: Loading Label Stock And Arm Adjustment
Roll Guides to allow the uprights to be placed next to the roll. (The bottom of the guides will face away from the roll on each side.) holes to the rear labels facing up AP550e Label Applicator 5... - Page 6 Pull approximately 12" [30 cm] of label stock out beyond the front of the unit. Remove approximately the first 15" [38 cm] of labels from the liner. This will be important later when you calibrate the label sensor to the label stock. 15" [38 cm] 6 AP550e Label Applicator...
- Page 7 Push the label stock back until the leading edge of the stock is just before the Label Guide Roller. Push the Guide Collars to the sides so they are out of the label path. These will be adjusted later. slack loop behind Move Guide Collars to the sides. Label Guide Roller AP550e Label Applicator 7...
- Page 8 Guide Roller. Feed the stock forward until it enters the Sensor Housing. Label Guide Roller Label Guide Roller Important Note: Do not feed the label stock into upper slot! Feed under this plate. Label Guide Roller Do NOT feed here! Side View Label Path Sensor Housing 8 AP550e Label Applicator...
- Page 9 10. Continue feeding the stock in the same manner until it protrudes from the front of the unit. Pull the remaining slack through the applicator. 11. Feed the leading edge of the label stock between the Liner Drive and Idler Rollers. Pull remaining slack through. Liner Drive Roller Liner Idler Roller AP550e Label Applicator 9...
- Page 10 13. Once the upper and lower label paths are aligned, press up on the middle of the Liner Idler Roller firmly to lock the label stock in place. You will hear a "snap" when it locks into place. Lock Unlock Liner Idler Roller Liner Drive Roller 10 AP550e Label Applicator...
- Page 11 The weight of the liner hanging to the floor will prevent the liner from bunching up and causing problems. Motor Cover 15. Move the Guide Collars so they are close to, but not pinching the label stock. Guide Collars AP550e Label Applicator 11...
-
Page 12: Application Arm Height Adjustment
Application Roller, to touch the container or platform at any time during the application process. Keep in mind that the Application Roller is pliable and will flex during application. Application Roller and/or label should touch container first. Container 12 AP550e Label Applicator... -
Page 13: Section 3: Label/Container Settings
Section 3: Label/Container Settings 3.1 Operating Basics The AP550e has two common modes: Label Application Mode and Setup Mode. In the Label Application Mode, either the current label count or the current memory location is displayed. By default, the current label count is displayed. This allows you to keep track of the number of labels applied. -
Page 14: Die Cut/Reflective
Black marks can also be used for irregular-shaped labels or on any stock where the print starting position cannot be sensed using the label itself. Reflective Label Stock 14 AP550e Label Applicator... -
Page 15: Application Roller Position
For reflective stock, the black mark For reflective stock, the black mark should be positioned directly under this should be positioned directly under this guide roller. guide roller. AP550e Label Applicator 15... -
Page 16: Label Position
Place your container on the platform, push the container back until it touches the back edge of the platform. At the "Platform Position" [PPo] setup option, press the +/– buttons to adjust the starting Leading Edge of Label 2.50" Start Position Container Platform 6" Container 16 AP550e Label Applicator... -
Page 17: Container Guide Adjustment
Note 3: You may also install an additional Container Guide to hold containers more securely. Note 4: The Primera Container Holding Kits can be used to hold odd-shaped containers or any smaller container in place. They are Primera part numbers 074398 and 074399. -
Page 18: Platform Speed
After completing the setup options you are now ready to start labeling your containers. The applicator accepts many types of flat or tapered containers. Please see Section 5 for complete container specifications. Height Length Width 18 AP550e Label Applicator... -
Page 19: Section 4: Applying Labels
6. Lift the Application Arm to return the platform to its starting position. 7. Remove the container and repeat the process. The display will automatically indicate the number of labels applied. To reset the counter, press and hold the Recall/Reset button for two seconds. AP550e Label Applicator 19... -
Page 20: Section 5: Container And Label Specifications
Section 5: Container and Label Specifications These specifications are provided for preliminary compatibility purposes only! Any questionable container/label combinations should always be tested by Primera Technical Support! Container Specifications: Length 19 mm – 310 mm (on platform) 310 mm – 457 mm (overhanging platform) - Page 21 A wide variety of label stock can be used in the Applicator. Refer to the following specifications and settings before ordering custom stock from Primera or any stock from another company. Important! Test all custom made label stock with the intended applicator before ordering large...
- Page 22 For these reasons the weight or thickness of the liner is a variable that cannot easily be defined. Primera recommends and uses 40# liner with all label stock. It is important to test all label stock with the intended applicator before ordering large quantities! *** Inner core diameter can be greater than 3.0".
-
Page 23: Section 6: Troubleshooting, Maintenance And Other Settings
4. Left side of copy dispenses first. 4. Left side of copy dispenses first. Copy positions 5-8 (labels wound in) - NOT compatible with the Ap550e Copy positions 5-8 (labels wound in) - NOT compatible with the AP550e 5. Top of copy dispenses first. - Page 24 Bar can cause the platform to stall. Roll Guides and/or Guide Collars that pinch the label stock can also contribute to stalling. After checking and correcting these items, if the platform still stalls or if scraping or squealing is detected, replace the Platform Bearing Plate. (See Section 6.2.) 24 AP550e Label Applicator...
-
Page 25: Maintenance
Lubricating bearings Primera recommends oiling the four bearings associated with the Liner Drive Roller and Liner Idler Roller. Oil these four bearings once every 50,000 containers labeled. They should only be oiled after the first 50,000 containers as they are lubricated with a special grease at the factory. -
Page 26: Control Panel Functions
If you have difficulties operating your applicator, the procedures in this manual and the software User's Guide should, in most cases, solve the problem. If you still have difficulty, contact Primera Technical Support using one of the methods listed below. Source... -
Page 27: Section 7: Specifications
12” W x 21.3” D x 10.1”– 15.4” H [305 x 541 x 256 – 391 mm] * Container may overhang platform to the front and/or either side. ** Containers shorter than 0.8” [20.3 mm] may require adaptive spacers. Some very short containers may not be stiff enough to support label application. AP550e Label Applicator 27... -
Page 28: Appendix A: Label Path Diagram
Appendix A: Label Path Diagram 28 AP550e Label Applicator... -
Page 29: Appendix B: Control Panel Flowchart
“Mode” 4 sec. Memory Location (0-9) hold “Mode” for 2 sec. Setup Mode (for F 1) dIE/rEF r-1/r-2 press “Mode” (Press “Recall/Reset” to move to next memory location) S-1 − S-8 (Press “Recall/Reset” to move to next setting) AP550e Label Applicator 29... -
Page 30: Index
(Control Panel Display)........................14 r-2 (Control Panel Display)........................14 rEF (Control Panel Display) ........................14 Reflective ..............................14 Roller Position ............................15 SC- (Control Panel Display) ........................14 Test Mode ..............................26 Thumb Screw ............................. 15, 17 Sensor Calibration ........................... 15 30 AP550e Label Applicator... - Page 32 P/N 511371 - 101113 P/N 511371 - 101113...
Need help?
Do you have a question about the AP550e and is the answer not in the manual?
Questions and answers
I've calibrated the sensor according to the manual but the machine is still feeding multiple labels at a time.