
Related Manuals for Primera LX1000e


Summary of Contents for Primera LX1000e
- Page 1 © 2017 All rights reserved For the most recent version of this manual please visit http://primeralabel.eu/europe/manuals.html...
- Page 2 All rights are reserved. No part of this document may be photocopied, reproduced, or translated into another language without prior written consent. Trademark Acknowledgments: Primera is a registered trademark of Primera Technology Inc. Windows is a registered trademark of Microsoft Corporation. All other trademarks are the property of their respective owners.
-
Page 3: Table Of Contents
Index . . . . . . . . . . . . . . . . . . . . . . . . . . . . . . . . . . . . . . . . . . . . . . . . . . . . . . . . . . . . . . . . . . . . . . . 80 LX2000e /LX1000e Color Label Printer iii... - Page 4 LX2000e/LX1000e Color Label Printer...
-
Page 5: Section 1: Getting Started
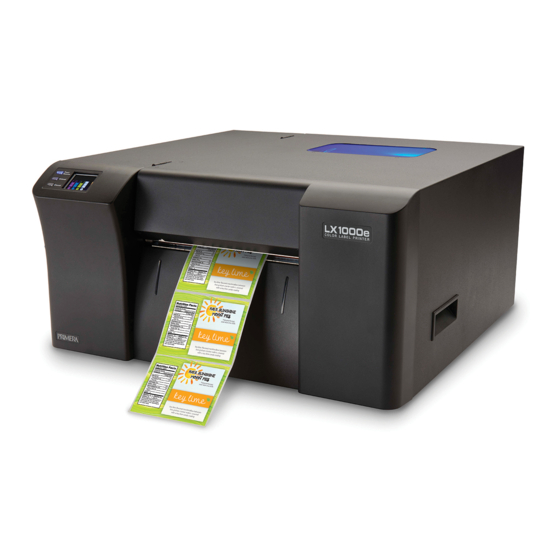
Section 1: Getting Started Thank you ..for choosing an LX2000e/LX1000e Color Label Printer. The Printer will print razor-sharp text and barcodes, vibrant colors, and even stunning photo-realistic photographs directly onto rolls of labels, card stock and a variety of other approved media. -
Page 6: Identifying The Parts
C . Identifying the Parts Top Cover Viewport Cover Handle Resume Feed Pause Unload Cancel Control Panel Label Name and Description Printhead align control panel icon. Shows that the printhead requires alignment. Ink cartridge access door open icon. Shows that the printer's ink cartridge access door or top cover is open. - Page 7 Sensor Adjustment Slide Bar Pinch Rollers Encoder Strip Maintenance Station Control Panel / Ink Display Tear Bar Maintenance Brush Ink Cartridges Cutter Track Replaceable Print Head (LX2000e Only) Ink Pads Getting Started 3...
- Page 8 Interior Label Loading Area Roll Stop Roll Arm Roll Guide Moveable Throat Fixed Throat Guide Guide Back External Paper Auxilary Port Power Port Ethernet Port Power Switch USB Port (LX2000e Only) Source (Fanfold) Slot 4 Getting Started...
-
Page 9: Section 2: Label Stock
Primera or any stock from another company. Important! Test all custom made label stock with the intended printer before ordering large quantities! Primera will only assume responsibility for custom label stock ordered from Primera. - Page 10 For these reasons the weight or thickness of the liner is a variable that can not easily be defined. Primera recommends and uses 40# liner with all label stock. It is important to test all label stock with the intended printer before ordering large...
-
Page 11: Installing Label Stock (Internal & External)
B . Installing Label Stock (Internal & External) The following steps will guide you through loading label stock in your printer: Make sure power is connected and printer is on. 1. Open the Top Cover. Lift Here 2. Lower the Roll Guide and pull it outward to make room for your label stock. 3. - Page 12 4. Place your roll of label stock on the Roll Arm and push it inward until it touches the Roll Stop. Roll Stop Do Not Pinch! Roll Guide Roll Arm 5. Flip up the Roll Guide and slide it inward until it touches the label stock. The Roll Guide will automatically pull back slightly to the correct position.
-
Page 13: Adjusting The Label Stock Tof (Top Of Form) Sensor
External Stock to "ON". Important Note: You must enable the External Feed option in the status monitor. If the External Feed is disabled, the LX1000e/LX2000e won't recognise the external label stock. C . Adjusting the Label Stock TOF (Top of Form) Sensor... - Page 14 Circular Labels If you are using Circular Labels you must adjust the TOF sensor to correspond with the very top of the label where the circles are closest together. If the sensor is too far to the right or the left the printer will still sense the label, but the image may be offset downward because the printer will start printing at the wrong position.
-
Page 15: Set The Stock Sensor Mode
Mode setting is stored on printer main board so you will not be able to access it unless the printer is turned on and properly communicating with the computer. 2. Go to Start - Programs - Primera Technology - PTStatus. 3. Click on the Alignment Tab (3rd tab from top). -
Page 16: Set The Output/Cut Mode
Go to Start - Programs - Primera Technology - PTStatus2000. Click on the Alignment Tab (3rd tab from top). - Page 17 Present Options: Do not present . In this mode the label stock does not move after the last label is printed. This means that part of the last label printed is still in the printer. This should be used only if you have a label rewinder attached.
-
Page 18: Adjusting Print Alignment
The LX2000e comes factory calibrated to print exactly to the edge of Primera label stock. However, due to variations in the left margins and other variables it may be necessary to fine tune these settings at the beginning of each roll. -
Page 19: Section 3: Status Monitor
Cost Tab (Fourth Tab) . Calculates cost per label based on last label printed. In addition to these functions you can also click the "i" icon to access the Primera Knowledgebase, contact tech support, gather version information or set applications options. -
Page 20: Monitoring Ink Levels
A: Monitoring Ink Levels Ink levels can be monitored at any time by using the Status Monitor. Immediately after printing starts the Status Monitor will display the ink levels in the lower right corner of your screen. The print status will also be displayed on the top bar. In the Ready mode, the ink percentages and Print Head life will be displayed, along with four tabs and the Print Counter. -
Page 21: Print Head Life Gauge
However, you can also access it at any time as long as the printer is turned on and communicating by going to Start - Programs - Primera Technology - PTStatus. Ink cost is automatically and continuously calculated based on the black and color cartridge costs entered. -
Page 22: Replacing Ink Cartridges/Low Ink Warning
D . Replacing Ink Cartridges / Low Ink Warning You can replace the ink cartridges at any time or wait for the Low Ink Warning to prompt you to replace the cartridges. The low ink warning will display continuously at 20% or less. - Page 23 3. The cartridge will pop out slightly. Pull out the cartridge. 4. Install the new cartridge by pushing the cartridge in as far as you can and then letting go. 5. Close the cover. The printer will prime the new ink cartridge(s) and then continue to print if it was in the middle of a print job.
-
Page 24: Alignment Print
E . Alignment Print An alignment print is required after a Print Head change. You may be prompted for an alignment after every 10,000 prints to maintain quality. This is optional. You may also manually run an alignment print to improve print quality. Follow these instructions: 1. - Page 25 4. Move the Throat Guide to the widest position and feed the alignment paper into the printer. If you do not have the alignment paper, you can use an A4 sheet, which is 210mm × 297mm (8.27" × 11.69"). 5. Once the alignment is complete, you will need to pull the finished alignment sheet from the printer.
-
Page 26: Section 4: Printing From A Pc
Section 4: Printing from a PC A . Using BarTender® Primera Special Edition BarTender UltraLite is included with the LX2000e. However, other programs can be used to print. When you open BarTender you will be given the choice to select an existing label or create a new one using a wizard. - Page 27 3. Select "Color Label 2000." Click "Next." 4. Select "Specify Custom Settings." Click "Next." Printing from a PC 23...
- Page 28 5. Set "Items Per Page" to "Single item per page." Click "Next." 6. Set "Side Edges" to "No, it does not." Click "Next." 24 Printing from a PC...
- Page 29 Set "Printed Item Shape" to "Rounded Rectangle." Click "Next." Set the page size, width and height to match the labels installed in the printer. Click "Next." Printing from a PC 25...
- Page 30 9. Check the "Picture" box to add a background photo or graphic to your label. Click "Next." If you click "Finish", the remaining default wizard options will be set and no picture will be added. 10. Select "Embedded Picture." Click the "File" Button to browse to the location of your photo/graphic file.
- Page 31 11. Review the label setup summary. If it is correct, click "Finish." Your blank label will be displayed. You can edit any of these settings by going to the File Menu and selecting "Page Setup." Basic and advanced settings are available on the various tabs. Printing from a PC 27...
-
Page 32: Add Text, Barcodes And Graphics To A Bartender Label
B . Add Text, Barcodes and Graphics to a BarTender Label Once you have created your label size you will need to add text, a barcode and/or graphics. This can be done using one of buttons on the button bar at the top of the screen. Add Text . -
Page 33: Printing From Bartender
C . Printing from BarTender 1. To print, click the Print button or go to the File Menu and select "Print." The Print Dialog window will appear. 2. Select the Color Label 2000. 3. Set the number of copies. 4. To adjust Quality Settings, click on "Document Properties Choose the Paper/ ."... -
Page 34: Printing From Other Programs
D . Printing from Other Programs Since this printer uses a standard Windows printer driver you can print from any application you would like. There are just a few things to remember that will make it much easier. 1. Set the Page/Label Size in the Driver . BarTender automatically prompts you for the size of the label that you are using. - Page 35 B. Select the Change button next to the Label Size: Set your page size. 2. Check the image or document size. The image size or document size should correspond to the Page/Label Size set in the driver. If you have set your page size to 4" x 3"...
-
Page 36: Creating A Full Bleed Print
E . Creating a Full Bleed Print 1. Adjust these settings in the status monitor and printing application (BarTender). Page Size . Increase the page size width by 1mm (0.03 inches). Increase the height by 1mm (0.03 inches) If you are using BarTender, simply change the size under the File Menu - Page Setup. - Page 37 To find Driver Settings: Click the Start button, choose Printers and Faxes (XP), Printers (Vista), Devices and Printers (Windows 7 and 8). Right-click on the Color Label 2000 Icon and select Printing Preferences from the drop-down menu. Adobe Acrobat Reader DC: Click on Properties before printing.
- Page 38 BarTender Ultralite: Click on Document Properties. The preferences screen will appear. 34 Printing from a PC...
- Page 39 Orientation (Layout Tab) . There are two settings for orientation, Portrait and Landscape. If your text and graphics print left to right or as shown on the screen, select portrait. If you wish your printing to rotate 90 degrees from what you see on the screen so it is printing horizontally, select landscape as your orientation.
- Page 40 Paper Source (Paper/Quality Tab): This setting should always be set to “Printer Auto Select”. Saturation/Ink Settings . These settings will provide the most dramatic quality differences. USE COLOR ONLY SETTINGS IF YOUR LABEL WILL CONTACT WATER. The higher saturation settings will print slower and use more ink while the lower saturation settings will print faster and use less ink.
- Page 41 Color (Paper/Quality Tab) . This setting affects which cartridges will be used to print the label. The “color” setting will use the cyan, magenta, yellow and black ink cartridges. The “Black & White” setting will use only the black cartridges. Color images will be converted to black and white when using this setting.
-
Page 42: Section 5: Printing From A Mac (Lx2000 Only)
3. Add the device by clicking the plus + 4. Select the LX2000e from the list – Make sure “Fargo Primera Color Label 2000” is selected in the “Use” menu . It may default directly to “AirPrint”. While printing via AirPrint is possible you will experienced decreased functionality if that option is selected on a Mac. -
Page 43: Lx2000 Utility
B . LX2000e Utility The LX2000e Utilily Icon can be found on the desktop. It is located in you’re Applications – Primera folder. You may also launch it via Apple – System Preferences – Printers and Scanners – select the LX2000e printer –... - Page 44 Ink Levels and Printhead Life Ink levels can be monitored at any time by using the Utility. Go to Supplies Status. Click on Printheads to display printhead life remaining. Output/Cut Mode (See Section 2D for more information) 40 Printing from a Mac...
- Page 45 Label Offsets/Print Alignment (See Section 2F for more information) Stock Sensor Mode (See Section 2D for more information) Printing from a Mac 41...
-
Page 46: Printing From Adobe Acrobat
C . Printing from Adobe Reader You can print to the printer from any program. However, Adobe Reader is free and is ideal for printing PDF files created in Adobe Illustrator or Photoshop. It does require setting up a custom page size (Section 5E) for each label. To setup a label and print follow these instructions. - Page 47 3. Click on the Page Setup… Button to adjust the page size. You can see that it is incorrect by looking at the preview. Preview Shows Incorrect Page Size and Extra Space Above and Below 4. When you click on the Page Setup… button for the first time you will see a message that indicates you are are leaving the Adobe software and instead using screens provided by the Mac OS.
- Page 48 5. You will see the page setup is not set for any printer. 6. Change “Format For” to Color Label 2000 44 Printing from a Mac...
- Page 49 7. Click on the Paper Size menu. There are several preloaded sizes available. If your size is not on the list, you may need to create a custom size. Custom sizes you have already created will be displayed in the second section. In our example we have already created a custom size (2.5 x 2.5) according to the instructions in Section 5E.
- Page 50 9. You may print at this point. However, if you would like to adjust printer quality settings, click on the Printer… button. 10. Click on the Show Details button. Show/Hide Details Button 46 Printing from a Mac...
- Page 51 11. Click on the Layout button to reveal the Saturation/Ink/Quality settings. 12. More details about Quality Settings can be found in Section 5F Printing from a Mac 47...
-
Page 52: Printing From Belight Labels And Addresses
13. When you have set the quality settings click Print. You will be brought back to the preview screen. Set the number of copies and click Print to print your labels. D . Printing from Belight Labels and Addresses You can print to the printer from any program. However, Belight’s Labels and Addresses is an affordable program that we recommend. - Page 53 If your size is not on the list, select ANY label and click Choose. You will have to setup a new label before it will appear on the Custom tab. Click on the information icon to display label size information. Click on Change Layout… Click on the custom tab.
- Page 54 The setup will contain a default name and setup. All of this information needs to be changed. First change the name to match your label size. Change the Label Size and Layout. Use this information as a guide. In this example we will setup a 2.5”...
- Page 55 6. Click OK when the label is setup. Now select the label you setup from the custom tab. Click OK. Add Images, Barcodes or text using the buttons across the top ribbon. For more information on how to setup a label and use the software, contact Belight or visit the Help menu.
- Page 56 8. Choose the Color Label 2000 as the printer and click Next. 9. You may print at this point. However, if you wish to adjust print settings, click on the Show Details button. 52 Printing from a Mac...
- Page 57 10. Next click on the Layout menu to reveal additional menu options. Choose Saturation/ Ink/Quality. 11. Set your Saturation, Ink and Quality settings according to the guide in section 5F. Click Print. Printing from a Mac 53...
-
Page 58: Setup A Custom
E . Setup a Custom Page Size If you are not using one of the preloaded label sizes, and you are not printing from Belight’s Labels and Addresses, you will need to create a custom page size for your label. This can be accomplished from any printing program. - Page 59 4. Edit the following items: a . Name . Change the Name from “Untitled” to the size or the name of the label you are printing. b . Paper Size . Paper Size should be the same as the actual label. c .
-
Page 60: Printer Driver Settings
F . Printer Driver Settings Print quality, cartridge settings and saturation are controlled by two settings in the driver. Saturation/Ink and Quality. You can access the driver settings before you print from any application by clicking the Layout drop down menu. Saturation/Ink Settings These settings will provide the most dramatic quality differences. -
Page 61: Printing Using Apple Airprint
G: Printing Using Apple AirPrint . Important! First, you will need to set the printer up in wireless mode using either the PC or Mac printer installer. See Section 5A. On your iOS device, Open the app you want to print from. Find the print option by tapping the share icon or Print. -
Page 62: Section 6: Troubleshooting And Maintenance
Section 6: Troubleshooting and Maintenance A . Solving Print Alignment Problems Image is Vertically Offset The LX2000e decides where to start printing by detecting the start of the die-cut label, detecting a black mark on the back or detecting a thru-hole that corresponds to the start of the label. -
Page 63: Solving Print Quality Problems
Left Margin Offset. This adjustment is found on the Alignment tab of the PTStatus monitor. See Section 4D. Page Size . Often the page size is not large enough for the label. If this is the case you may see white space on the right (printers left) side of the the label and no image over-lap on the opposite side. - Page 64 5. Clean the Maintenance Station . Power off the printer! Clean the maintenance station located on the right side of the print area. This includes the rubber cartridge nozzle cap and the plastic squeegee. Under normal use this can become dirty with ink. Clean with rubbing alcohol and a paper towel.
-
Page 65: Color Matching And Design Tips
(Section 4F) to achieve the best color matching. There are multiple media type options which correspond with the various types of label stock sold by Primera. Match this setting to the media installed in the printer to achieve the closest color match to the screen. -
Page 66: Save Log Files
Ink Pad Maintenance Interval: 50,000 prints Maintenance Kit Part Number: 661380 – Purchase on www.primera.com Kit includes: Ink pad tray with 2x saturation pads, 1x clear tube to clean the vacuum tube opening. - Page 67 1. Open the Cover 2. Locate the black Ink capture bin. 3. Lift the latch (1) and pull the cover forward (2). 4. Look for the tube opening behind the small plastic barrier. You may need to use a flash light to see the opening.
- Page 68 5. Locate the clear tube included with the kit. The tube is just small enough to fit inside the vacuum tube. Insert the tube into the vacuum tube opening. Tip! Use rubber gloves for this part. Tube 6. Push the tube as far as you can while still holding it with your fingers. 7.
-
Page 69: Cleaning The Print Head
F . Cleaning the Print Head It may be necessary to clean the Print Head nozzles if you notice reduced print quality, missing colors or if you suspect a cartridge nozzle has become slightly dried out or clogged. Try the following solutions: 1. -
Page 70: Replacing The Print Head
Print Heads with greater than zero percent life remaining prints may be replaced depending on the description and circumstances of the failure at the discretion of Primera Tech Support. Replaceable Print Head - Part Number 53467 G . Replacing the Print Head The Print Head may need to be replaced when the Print Head life monitor shows no life remaining. - Page 71 2. When the cover is open the Print Head will move to the center of the printer. Important! If it does not move to the center as shown do NOT attempt to remove the Print Head. It can only be removed when in the position shown below! Only remove the Print Head when it is in this position! 3.
- Page 72 4. Remove the Print Head by pulling outward and slightly upward. 5. Locate a new Print Head. Install it as shown. 6. Lower the latch on your new Print Head. 68 Troubleshooting and Maintenance...
-
Page 73: Printer Buttons And Lights
7. Install the Setup Cartridges that came with your new Print Head. These cartridges are partially filled and specially coded. The Print Head will not function until these cartridges are installed. Install the Setup Cartridges in the New Print Head. 8. -
Page 74: Technical Support
User's Guide should, in most cases, solve the problem. If you still have difficulty, contact the Technical Support using one of the methods listed below. Source Location Primera Knowledge Base www.primera.com/knowledgebase.html BarTender Software Help files Open the software. Click on the Help Menu - Contents Email Support support@primera.eu... -
Page 75: Section 7: Networking The Printer (Lx2000E Only)
Section 7: Networking the Printer (LX2000e Only) A . Enable Ethernet or Wireless The LX2000e can be networked and shared via wireless or Ethernet. During the initial setup, the installer will ask how you would like to connect your printer. At that time you can choose wireless, Ethernet or USB. - Page 76 On a Mac, when you add the printer it will detect it automatically if connected via USB or Ethernet. If connected via ethernet, it will appear in your list of available printers as a "Bonjour" kind. To setup Wireless printing you will first need to connect via Ethernet or USB according to the instructions in section 5A.
- Page 77 Launch the Wireless Setup Wizard Continue through the wizard to choose your wireless network and enter your password. Once Wireless has been enabled, disconnected the USB or Ethernet cable. Now you will need to add your printer again using the instructions in Section 5A. You will be adding a second driver for the same printer.
-
Page 78: Change Your Connection Method To Wireless
B . Change Your Connection Method to Wireless • Go to Start – All Programs - Primera Technology – Primera Color Label 2000 – Printer Setup and Software. • You may also access this utility through the PTStatus2000 software. Click the information icon - select the utilities tab - choose Wireless/Ethernet/USB Connection Utility. - Page 79 1. Choose Convert a USB connected printer to wireless. 2. If you are currently connected to your wireless network on the PC you are using choose "Yes, access the computer or router." This option will search your computer for the settings of your currently connected network and use the same settings for the LX2000e.
- Page 80 4. Enter your Password. This will only appear if you have chosen the manual method. 5. If the password was entered correctly you will get a message that you have connected to the network successfully. 76 Networking the Printer...
- Page 81 6. You will now be prompted to disconnect your USB cable. 7. A new driver will appear in your printer list. "Color Label 2000 (Network)" Networking the Printer 77...
- Page 82 C . Connect Another PC to a Wireless LX2000e or Install an Ethernet Connected LX2000e Printer 1. If you are sharing an LX2000e which has already been setup for wireless or is currently connected to an active Ethernet port, simply run the installation software on the new computer.
- Page 83 2b. If your PC does not have a wireless antennae or it is connected to your network via a different router, you will receive a prompt to connect your LX2000e via USB. You do not need to do this. Check the box "The printer is already connected to a wireless network."...
- Page 84 4. If you do not know the IP address you can find it in the PTStatus2000 software. Go to a PC that is already connected wirelessly to the LX2000e. Open PTStatus2000. Click on the info icon. Choose "More Details". The IP address is displayed at the bottom of this window.
-
Page 85: Network Settings
6. You will receive a message that the printer was successfully installed. D . Access the LX2000e Embedded Web Server for Advanced Network Settings Type the IP address of your printer in any web browser to display the embedded web server. - Page 86 If you do not know the IP address you can find it in the PTStatus2000 software. Go to a PC that is already connected wirelessly to the LX2000e. Open PTStatus2000. Click on the info icon. Choose "More Details". The IP address is displayed at the bottom of this window. 82 Networking the Printer...
-
Page 87: Section 8: Technical Specifications
Pause, Feed, Unload, Cancel Operating Systems: Windows® 7/10+ or Mac OS X 10.8-10.12 (Mac Software for LX2000e Only) Label Design Software: BarTender UltraLite Primera Edition included. Can also be used with most other popular label design and graphics software programs Electrical Rating: 12VDC, 5.0A... -
Page 88: Index
Index Adobe Reader ..........................30 AirPrint ............................57 Align Print Head........................... 59 Alignment Tab ......................... 11, 15 Belight ............................. 48 Black Mark ............................6 Cartridge Utilities Tab ........................15 Circular Labels ..........................10 Color Matching ........................60, 61 Continuous Stock .......................... 11 Cost Estimator .......................... - Page 89 Sensor Position .......................... 9, 58 Status Monitor ..........................15 Reflective ............................ 6, 11 Roll Arm ............................8 Roll Guide ............................8 Roll Specifications ........................4, 6 Roll Stop ............................8 TOF ............................9, 32, 58 Using BarTender ........................... 22 Wireless ............................71 Index 85...
- Page 90 P/N 511431 - 031317...
Need help?
Do you have a question about the LX1000e and is the answer not in the manual?
Questions and answers