Advertisement
A
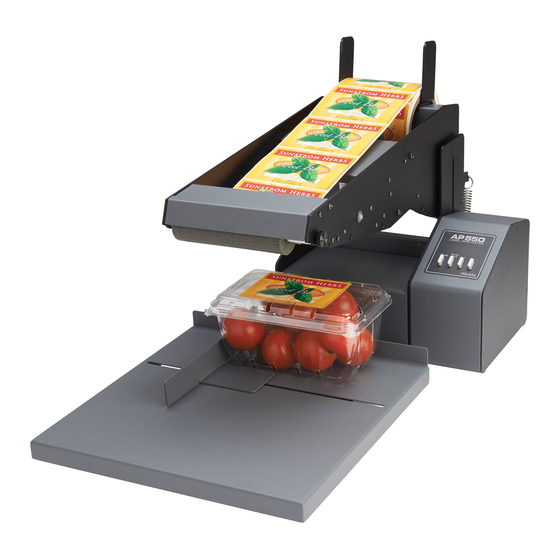
Unpack and Setup
Power Adapter
Power Cord
1. Remove the AP550 from its packaging.
2. Remove all items from the supply box.
3. Place the unit toward the back of a
table with a depth of 30" [76 cm] or
more.
4. Connect the power and switch on the
AP550.
30" [76 cm] or more
Power Switch
Power Input (12v)
AP550 Quick Start
B
Load Label Stock
5. Place the label roll on the Roll Bar as shown. For narrow rolls you may have to fl ip guides so
the "L" faces away from the roll on each side.
6. Place the Roll Drag Arm under the Roll Bar so that the rounded tip is near the center of the roll.
7. Place the Roll Bar with labels on the pins so that the bar is fully seated on the pins.
8. Remove approximately 15" [38 cm] of labels from the liner.
labels facing up
holes to the rear
9. Load the label stock according to the diagram below:
Label Path
Liner Idler Roller
Roll Guides
Roll Bar
15"
[38 cm]
Roll Drag Arm
Liner Drive Roller
Label Guide Roller
Application Roller
Peel Edge
511373-101013
Advertisement
Table of Contents

Related Manuals for Primera AP550


Summary of Contents for Primera AP550
- Page 1 Power Cord Load Label Stock 1. Remove the AP550 from its packaging. 2. Remove all items from the supply box. 5. Place the label roll on the Roll Bar as shown. For narrow rolls you may have to fl ip guides so 3.
- Page 2 Load Label Stock (continued) Label/Container Settings (for die-cut labels) 15. Access Label/Container Settings 10. Align the leading edge of the label stock Align Here with the roll as shown. 11. Make sure the labels will be fed under the Distance from Sensor Location Line.
Need help?
Do you have a question about the AP550 and is the answer not in the manual?
Questions and answers