
Related Manuals for Primera AP360e


Summary of Contents for Primera AP360e
-
Page 1: Table Of Contents
Unpacking and Setup Loading the Label Stock Loading the Container Applying the Label Label Path Diagram Troubleshooting and Maintenance 17 Specifications © 2009 All rights reserved... - Page 2 Notices: The information in this document is subject to change without notice. NO WARRANTY OF ANY KIND IS MADE WITH REGARD TO THIS MATERIAL, INCLUDING, BUT NOT LIMITED TO, THE IMPLIED WARRANTIES OF MERCHANTABILITY AND FITNESS FOR A PARTICULAR PURPOSE. No liability is assumed for errors contained herein or for incidental or consequential damages in connection with the furnishing, performance, or use of this material.
-
Page 3: Unpacking And Setup
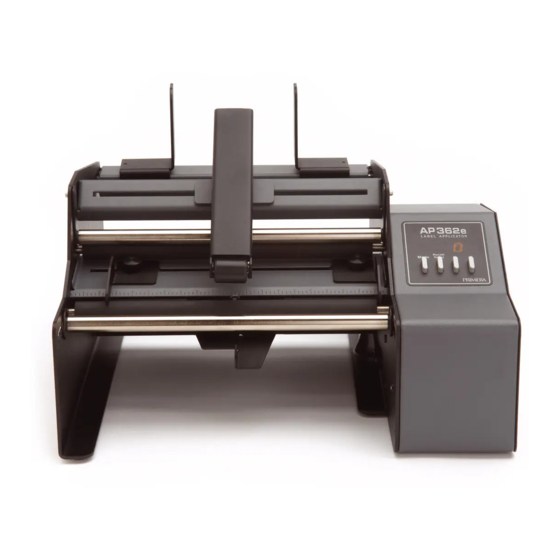
Applicator"). Bottles, cans etc. will collectively be referred to as "containers." This manual applies to two label applicator models. The AP362e has a Control Panel that allows you to count labels and apply two labels to the same container. The AP360e does not have a Control Panel or two label capability. -
Page 4: Loading The Label Stock
Tip! For smaller diameter label roll cores you may need to reverse the Roll Guides so that the bottom of the guides are facing out to allow the uprights to be placed next to the roll. 4 AP360e/362e Label Applicator... - Page 5 5. Place the removed Roll Guide back on the Roll Bar and slide it close to, but not touching the label stock roll. (Figure 2-4.) Figure 2-4. Tip! Roll Guide Uprights must not pinch the label stock roll. (The label stock roll must have free-play between guides.) AP360e/362e Label Applicator 5...
- Page 6 The labels will come out just underneath the Peel Edge. (Figure 2-5.) Figure 2-5. Tip! See Section 5 for a Label Path diagram. Label Guides 8. Pull approximately 12 inches of label stock out beyond the Peel Edge. (Figure 2-6.) Figure 2-6. Peel Edge 6 AP360e/362e Label Applicator...
- Page 7 10. Pull the stock all the way through until the end of the roll is laying over the top of the label stock roll. Adjust the label stock forward or backward so that the Peel Edge is between two labels. (Figure 2-8.) Figure 2-8. Tip! There must be no labels wrapped around the Peel Edge. AP360e/362e Label Applicator 7...
- Page 8 13. The labels are now ready for application. Note: Position the Label Applicator on the edge of a table so that the liner falls to the floor. This will prevent excess labels from interfering with label applications. 8 AP360e/362e Label Applicator...
- Page 9 14. Adjust the label guides so that they are just touching the edge of the label stock. Do not pinch the labels between the guides. If the guides are loose pull them away from the label stock and tighten the thumbscrews. When the thumbscrews are tight, you can still move the guides. Figure 2-11.
-
Page 10: Loading The Container
Section 3: Loading the Container The AP360e/362e can apply labels to a variety of containers including wine bottles, soda bottles, jars, cans, etc. Depending on the container type that you are labeling, you have several different options. You may use the Container Pressure Arm to hold the containers against the rollers, but that may not be necessary. - Page 11 3. Place the container on the Container Idler Roller and Container Drive Roller. Orient the container with the top to the left or the right, depending on the orientation of your labels on the label stock roll. (Figure 3-3.) Figure 3-3. Tip! Both Container Guides may be used, but for maximum efficiency, typically only one is used to position...
- Page 12 Important Note: For bottles with a neck such soda, beer or wine bottles only one Container Guide can be used. Move the unused Container Guide to the far right or left side of the labeling area. For cans or other containers that do not have a tapered neck, both Container Guides can be used, if desired.
-
Page 13: Applying The Label
Applicator. The AP360e/362e includes a half-speed mode that generates more power from the motors for wider label stock. To activate this mode, hold down the Foot Switch while switching on the unit. The AP360e/362e will revert back to the default mode when switched on without holding down the Foot Switch. - Page 14 4. Press the Foot Switch to apply the labels. Both labels will be applied without pressing the Foot Switch again. To set a value for another memory location, repeat this procedure. Note: The distance values are approximate. Adjusting the position of the Container Idler Roller will affect the actual distance between the labels on the container.
- Page 15 E. Change the Unit of Measure between Metric and English. The AP362e can display measurements in both centimeters and inches. Follow these steps to switch between the two. English (Inches): Turn off the unit. Press and hold both the "Mode" button and the "+" button while you switch on the unit. While the unit is booting up a "-"...
-
Page 16: Label Path Diagram
Section 5: Label Path Diagram Label Path Diagram Liner Idler Roller Liner Drive Roller Peel Edge Label Path Container Drive Roller Container Idler Roller 16 AP360/362 Label Applicator... -
Page 17: Troubleshooting And Maintenance
For label stock 6” (15.3 cm) and wider, it may be necessary to reduce the speed of the Label Applicator. The AP360e/362e includes a half-speed mode that generates more power from the motors for wider label stock. To activate this mode, hold down the Foot Switch while switching on the unit. - Page 18 Liner Drive Roller. Lubricate bearings. Primera recommends oiling the four bearings associated with the Liner Drive Roller and Liner Idler Roller. Oil these four bearings for every 50,000 containers labeled. They should only be oiled after the first 50,000 containers as they are lubricated with a special grease at the factory.
-
Page 19: Specifications
Section 7: Specifications Container width: 25.4 mm to 238 mm (1" to 9.4") Container diameter: 15 mm to 170 mm (0.6" to 6.7") Container shape: Cylindrical and many tapered Supply roll diameter: Up to 203 mm (8") Media liner width: 25.4 mm to 213 mm (1"... - Page 20 P/N 511218 - 101609 20 AP360/362 Label Applicator...
Need help?
Do you have a question about the AP360e and is the answer not in the manual?
Questions and answers