Advertisement
Quick Links
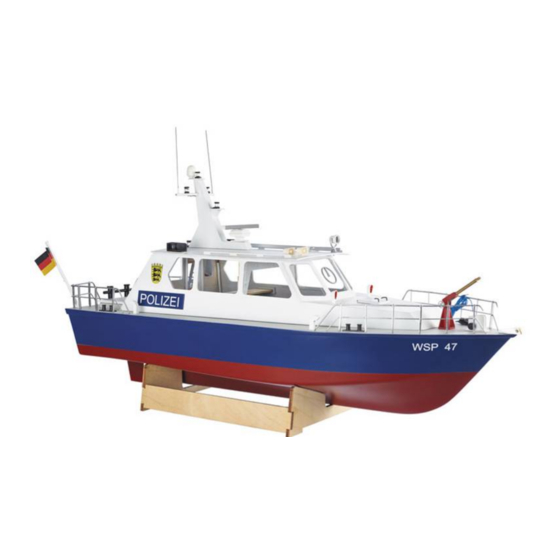
Building Instructions Policeboat WSP 47
Congratulations for buying this model kit of the
police boat WSP 47. This model is mainly de-
signed for the beginner, but is also a very in-
teresting kit for more experienced modellers as
a basis for own ideas.
For building this model you should have follow-
ing glues, fillers and paints:
- Superglue Krick ruck-zuck 20g thin (80491)
- Superglue Krick ruck-zuck 20g medium
(80495)
- 5min-Epoxy glue 100g (80479)
- wood glue UHU Holz waterresistant 75g
(48515)
- 2-component glue UHU-Plus acrylit 30g
(48315)
- Filler Micro-Fill white 295 ml (80480)
- Primer (Lord Nelson 80110)
- Clear Varnish for stairs, doors, (80112)
- paint spray blue (320053), light grey (Primer
and for deck), and white (320010)
- lacquer red, grey, silver and black for fittings
Following tools are recommended for building
WSP 47
Stand Juli 2014
Order-No. 20360
- modelling knife (416002)
- hand drill (473841)
- sandpaper files (491016)
- sanding block (490080)
- sand paper of grane 180, 320, 400 and 600
(Set 490190)
- round file ca. Ø 6 mm
- drills Ø 1 mm, 1,5 mm, 2 mm, 3 mm, 4 mm,
6,5 mm
- wet sand paper 400 und 600 for filler, primer
and paints
- side cutter (455550)
When painting use masking tape to cover the
areas not to be painted. Use a 3 mm wide
tape should be used for the water line.
For running and radio control you should have
following parts:
- 2 channel radio control including one Servo
- electronic speed control 20 A, forward/back
including BEC
- battery pack 7,2V NiCd, NiMH or lead battery
6V/1,1 Ah
- charger 220V AC or 12V DC
Seite 1
©
Krick Modelltechnik Knittlingen
Advertisement

Subscribe to Our Youtube Channel
Related Manuals for Krick 20360


Summary of Contents for Krick 20360
- Page 1 - round file ca. Ø 6 mm - drills Ø 1 mm, 1,5 mm, 2 mm, 3 mm, 4 mm, - Superglue Krick ruck-zuck 20g thin (80491) 6,5 mm - Superglue Krick ruck-zuck 20g medium...
- Page 2 To protect the model you can use some pieces of foam tape on the stand parts which will come in contact with the hull. chamfer in the front area Seite 2 © Stand Juli 2014 Krick Modelltechnik Knittlingen...
- Page 3 The superstructure will sit over this so that no water can ingress the hull. 5. Rudder 10 to 13 Make the rudder from parts 160 – 163. First glue parts 162 and 161 to each other. Seite 3 © Stand Juli 2014 Krick Modelltechnik Knittlingen...
- Page 4 Now make the battery and receiver tray with parts 19, 20 and 21. 20 20 Now glue in the rudder shaft with Uhu Acrylit and the second outer plate (160) on top. Seite 4 © Stand Juli 2014 Krick Modelltechnik Knittlingen...
- Page 5 25 mm out of the hull. Before proceeding double check that the as- sembly is placed in the centre of the hull. Seite 5 © Stand Juli 2014 Krick Modelltechnik Knittlingen...
- Page 6 Fix the deck at several points with thin super- glue. After that you can fix the deck complete with medium superglue You can use an activa- tor spray to shorten the drying process. Seite 6 © Stand Juli 2014 Krick Modelltechnik Knittlingen...
- Page 7 After this apply glue from inside, and then only at the cut outs. fix with clamps. Now fit the front part (37) to the superstructure. The upper edge needs to be sanded at an angle to fit correctly. Seite 7 © Stand Juli 2014 Krick Modelltechnik Knittlingen...
- Page 8 4. Cockpit At this stage you will make the cockpit. For this you will need parts 49, 50 and 51. First bevel the lower edge of the centre part about 45 degrees. Seite 8 © Stand Juli 2014 Krick Modelltechnik Knittlingen...
- Page 9 LEDs it is recommended to open the ends of the prepared channels for the cables now so that the cables can be pushed through later. For this open the bar at Seite 9 © Stand Juli 2014 Krick Modelltechnik Knittlingen...
- Page 10 Now the mast can be sanded and glued to the roof. drill Drill two 2mm holes at both ends of the mast yard (45) fort he antenna base (46). Seite 10 © Stand Juli 2014 Krick Modelltechnik Knittlingen...
- Page 11 For painting you a thicker handle. can now take the Rail off. 3. Radar Now make the radar and possibly the gear for it from parts 63 to 75. Seite 11 © Stand Juli 2014 Krick Modelltechnik Knittlingen...
- Page 12 Fix the motor with screws to the motor mount. Then fit the coupling tube 71 onto the shaft of the motor. Sand the rear edge of the radar bar 68 round. Seite 12 © Stand Juli 2014 Krick Modelltechnik Knittlingen...
- Page 13 (80) and capstan (81) with super glue. Take out the motor mount and finally glue the supports (74). 4. Anchor Winch Build up the anchor winch from parts 76, 77, 78, 79, 80 and 81. Seite 13 © Stand Juli 2014 Krick Modelltechnik Knittlingen...
- Page 14 Glue the parts 59 and 60 to build the stairs. Then varnish and sand the assembly Make the life saver supports from parts 109 und 110. Sand the lasered edges very carefully before painting. Seite 14 © Stand Juli 2014 Krick Modelltechnik Knittlingen...
- Page 15 Next glue the bottom tube into the base. Now fit brass parts 128 und 129 together. At last glue the axle 131 into the hand wheel 132 and fix it to the monitor. Seite 15 © Stand Juli 2014 Krick Modelltechnik Knittlingen...
- Page 16 Drill two holes 4 mm into the supports 135. round base 153. 146 153 12. Blue lamp Paint and glue the blue light from parts 148, Then glue the parts together 153, 154 and 155. Seite 16 © Stand Juli 2014 Krick Modelltechnik Knittlingen...
- Page 17 14. Miscellaneous fittings Finally fit the rest of fittings to deck and super- structure. Please note the following pictures as a reference. Seite 17 © Stand Juli 2014 Krick Modelltechnik Knittlingen...
- Page 18 Drill a 4 mm hole into the hull directly behind the propeller for adding the brass tube 159 and glue this with Uhu Acrylit into the hull. Then sand the glued parts round to a hemi- sphere. Seite 18 © Stand Juli 2014 Krick Modelltechnik Knittlingen...
- Page 19 If the rudder also moves without any tremor, your radio works For running your model on the water, you will well. need a 2 channel radio control system with one servo. Seite 19 © Stand Juli 2014 Krick Modelltechnik Knittlingen...
- Page 20 Now the first sail can start. We wish you all the best with your „WSP 47“. Klaus Krick Modelltechnik, For any questions and help you can contact Postfach 1138, 75434 Knittlingen Tel. 07043/9351-0, Fax 07043/31838 Seite 20 © Stand Juli 2014...
- Page 21 Stairs Sides Plywood Laser sheet (5) 1,5 mm Stair Steps Plywood Laser sheet (5) 1,5 mm Door Plywood Laser sheet (5) 1,5 mm Base Radar Plywood Laser sheet (5) 1,5 mm Seite 21 © Stand Juli 2014 Krick Modelltechnik Knittlingen...
- Page 22 Finished part Tube Brass tube 4 x 3 x 45 mm Stand tube Brass tube 7 x 6 x 32 mm Axle Brass 1,5 x 10 mm Hand wheel Finished part Plastic Seite 22 © Stand Juli 2014 Krick Modelltechnik Knittlingen...
- Page 23 Rudder blade inner front Plywood Laser sheet (6) 1,5 mm Rudder blade inner rear Plywood Laser sheet (6) 1,5 mm Rudder shaft Brass 3 x 85 mm Emblem Sticker Name letters Sticker Seite 23 © Stand Juli 2014 Krick Modelltechnik Knittlingen...
- Page 24 Part numbers of Laser Parts 149.2 Laser sheet 3 Laser sheet 2 Seite 24 © Stand Juli 2014 Krick Modelltechnik Knittlingen...
- Page 25 149.4 149.3 149.5 149.1 Laser sheet 1 Laser sheet 4 Laser sheet 5 Seite 25 © Stand Juli 2014 Krick Modelltechnik Knittlingen...
- Page 26 Pattern for Cutting of Window Material Seite 26 © Stand Juli 2014 Krick Modelltechnik Knittlingen...
Need help?
Do you have a question about the 20360 and is the answer not in the manual?
Questions and answers