Table of Contents
Advertisement
Advertisement
Table of Contents

Subscribe to Our Youtube Channel
Related Manuals for Welch Allyn RetinaVue 100 Imager Pro


Summary of Contents for Welch Allyn RetinaVue 100 Imager Pro
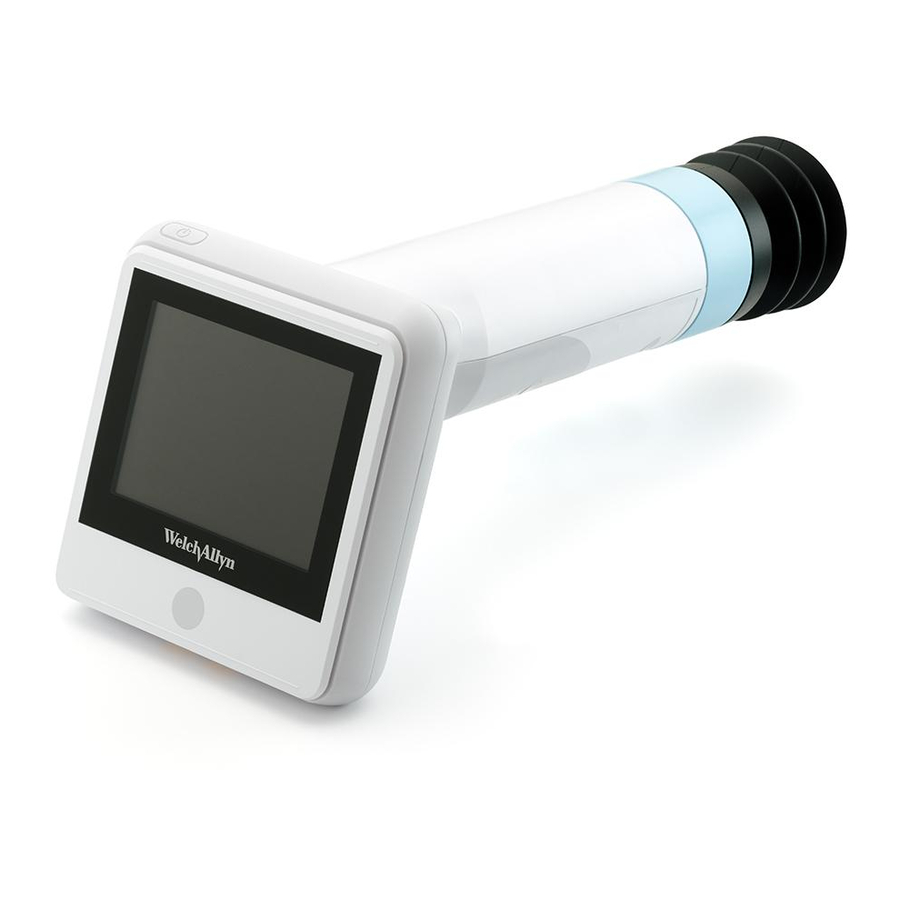
- Page 1 Welch Allyn RetinaVue™ 100 Imager Pro Directions for use Software version 6.XX...
- Page 2 © 2018 Welch Allyn. All rights are reserved. To support the intended use of the product described in this publication, the purchaser of the product is permitted to copy this publication, for internal distribution only, from the media provided by Welch Allyn. No other use, reproduction, or distribution of this publication, or any part of it, is permitted without written permission from Welch Allyn.
-
Page 3: Table Of Contents
Perform a manual image capture while in Manual exam mode ......36 Review patient exams on the RetinaVue 100 Imager Pro ......... 37 Transfer patient exams from the RetinaVue 100 Imager Pro to a computer ..39 Use the RetinaVue 100 Imager Pro SD Card to transfer patient exams to a computer ...................... - Page 4 Image Pre-acquisition controls (Auto mode) ............. 71 Controls (Post-acquisition) ................71 Exam summary controls (Post-acquisition and Review modes) ....... 73 Update the RetinaVue 100 Imager Pro software to version 6.XX and above ...................... 75 RetinaVue 100 and 100 Imager Pro Accessories ....... 77...
-
Page 5: Symbols
Symbols Documentation symbols For information on the origin of these symbols, visit http://www.welchallyn.com/ symbolsglossary for the Welch Allyn symbols glossary. WARNING The warning statements in Caution The caution statements in this this manual identify conditions or manual identify conditions or practices... - Page 6 2 Symbols Welch Allyn RetinaVue™ 100 Imager Pro Connectivity symbols Wireless radio symbols Non-ionizing electromagnetic radiation Australian Communications and Media Authority (ACMA) Radio Compliance Mark (RCM) FCC ID IC ID The identification number assigned by Industry Canada identification number. the Federal Communication Commission...
- Page 7 Directions for use Symbols 3 Global Trade Item Number For indoor use only Type BF applied part Prescription only or "For Use by or on the order of a licensed medical professional" Clock; time switch; timer Serial Number Authorized Representative in the European Community Battery charge level indicators Device is running on battery and charge...
- Page 8 4 Symbols Welch Allyn RetinaVue™ 100 Imager Pro...
-
Page 9: Introduction
For information on configuring the RetinaVue 100 Imager Pro device to connect to the RetinaVue Network system, contact Welch Allyn support to discuss setting up a RetinaVue Network account. -
Page 10: General Warnings, Cautions, And Notes
CAUTION Do not sterilize the device. CAUTION All servicing of this equipment is to be performed by Welch Allyn, Inc. or by a center approved by Welch Allyn, Inc. CAUTION This device needs to be installed and put into service according to the EMC information provided herein. - Page 11 Directions for use Introduction 7 CAUTION Within the patient environment, only connect the equipment (the RetinaVue 100 Imager) to computers or laptops that have passed the safety standard for information technology equipment IEC 60601-1, EN 60601-1, ANSI/AAMI ES 60601-1 to ensure the safety of the USB electrical connection.
-
Page 12: Controls And Connectors
Controls and connectors No. Feature Description Docking station Charges the RetinaVue 100 Imager Pro and enables data transfer to a computer. Connect to an electrical outlet or to the “Always On” USB port of a computer. Note USB ports supply power only when the computer is on. - Page 13 Directions for use Introduction 9 No. Feature Description Cancel ○ Power indicator • When the LED light is green, it indicates that the device is docked and is fully powered. • When the LED light is amber, it indicates that the device is docked and is in the process of charging.
- Page 14 10 Introduction Welch Allyn RetinaVue™ 100 Imager Pro...
-
Page 15: Using The Retinavue 100 Imager Pro
Using the RetinaVue 100 Imager Pro View images saved to the RetinaVue 100 Imager Pro on the LCD touchscreen. The images saved on the SD card are in unencrypted (.jpg) format and a DICOM (.dcm) format. To view images on a computer, use photo viewer software. - Page 16 Not shown Lens cloth RetinaVue 100 Imager lens cleaning cloth If any item is missing, contact Welch Allyn Technical Support: www.welchallyn.com/ service. We recommend that you save the shipping box and packing materials in case you need to store or ship the system.
- Page 17 Directions for use Using the RetinaVue 100 Imager Pro 13 4. For first-time setup of the RetinaVue 100 Imager, insert the battery into the battery compartment. For battery replacement, remove the existing battery and then insert the new replacement battery into the battery compartment.
- Page 18 14 Using the RetinaVue 100 Imager Pro Welch Allyn RetinaVue™ 100 Imager Pro Note Do not over-tighten the screws. Eye cup The eye cup blocks ambient light during testing and covers the patient's eye socket to allow them to best focus on the green fixation lights. The eye cup works on the patient's left and right eye.
- Page 19 Directions for use Using the RetinaVue 100 Imager Pro 15 Hold the RetinaVue 100 Imager for a patient exam The RetinaVue 100 Imager must be held level and in line with your patient’s eye. There are two recommended techniques to properly hold the RetinaVue 100 Imager for a...
- Page 20 16 Using the RetinaVue 100 Imager Pro Welch Allyn RetinaVue™ 100 Imager Pro Smart phone Grip Make micro adjustments with your guide hand to fine tune the focus of the RetinaVue 100 Imager. Guide (Patient End) Hand Hold the patient end of the RetinaVue 100 Imager with just the thumb and forefinger.
-
Page 21: Docking Station
Directions for use Using the RetinaVue 100 Imager Pro 17 Docking station Place the device into the docking station to charge the device or to connect and transfer data to a computer or laptop. Set up the docking station for charging 1. -
Page 22: First Time Set Up Of The Retinavue 100 Imager Pro
First time set up of the RetinaVue 100 Imager Pro The RetinaVue 100 Imager Pro runs a brief diagnostic self-test each time it powers up. CAUTION Always use the RetinaVue 100 Imager Pro with an adequately... - Page 23 Using the RetinaVue 100 Imager Pro 19 1. Press to power up the RetinaVue 100 Imager Pro. As the device is powering up, the RetinaVue 100 Imager Pro displays the Welch Allyn logo and the model number. After powering up, the Home screen appears. Note If the battery is in a discharged state, the time and date need to be set.
-
Page 24: Retinavue 100 Imager Pro Home Screen
Touching one of the five buttons navigates to the next screen associated with that workflow or training. • Patients: Presents a list of patients created on the RetinaVue 100 Imager Pro until the exams are completed. • Exam: The Exam workflow provides a guided approach to image capture. To... - Page 25 Software version ○ Regulatory Information • Training: Provides demonstrations and interactive training exercises on the RetinaVue 100 Imager Pro. Short video clips and interactive training help you practice the three key steps necessary to master the RetinaVue 100 Imager Pro.
-
Page 26: Create A New Patient On The Retinavue 100 Imager Pro Camera
22 Using the RetinaVue 100 Imager Pro Welch Allyn RetinaVue™ 100 Imager Pro Create a new patient on the RetinaVue 100 Imager Pro camera 1. From the Home screen, touch Patients. 2. After the Patients screen appears, touch (New patient). - Page 27 Directions for use Using the RetinaVue 100 Imager Pro 23 The Patient ID field is the only Required field and is noted with a red asterisk. Once added, the required Patient ID will appear in the top left of the Pre-acquisition screen as the camera enters the Pre-acquisition mode.
- Page 28 24 Using the RetinaVue 100 Imager Pro Welch Allyn RetinaVue™ 100 Imager Pro Note The Patient ID appears in the top left of the Pre-acquisition screen. 8. Refer to the topic Perform an eye exam using the Auto exam mode for instructions...
-
Page 29: About The Auto And Manual Exam Modes
Directions for use Using the RetinaVue 100 Imager Pro 25 About the Auto and Manual Exam modes Auto Mode Auto Mode is the default image capture mode. Available automatic features include: • Image capture • Focus • Flash brightness •... - Page 30 26 Using the RetinaVue 100 Imager Pro Welch Allyn RetinaVue™ 100 Imager Pro Manual mode contains advanced image capture options. Note A manual touch of the capture button is required to obtain an image. Available manual features include: • Focus adjustment (values range from -1 to +1) •...
-
Page 31: Adaptive Software In The Auto Exam Mode For Software 6.10.02 And Higher
Directions for use Using the RetinaVue 100 Imager Pro 27 Adaptive software in the Auto exam mode for software 6.10.02 and higher Auto exam mode Once the view is in-fundus, the adaptive software will enlarge the on-screen diamond at specific first stage time intervals. -
Page 32: Perform An Eye Exam Using The Auto Exam Mode
While the RetinaVue 100 Imager Pro can be used on patients with Note cataracts and other eye opacities, the use of the RetinaVue 100 Imager Pro may result in a lower quality image due to the increased reflection of the flash off the patient's intraocular lens. - Page 33 • Make slight, micro adjustments with your guide hand to fine tune the position of the RetinaVue 100 Imager Pro. Do not use your hand on the LCD side to make minor adjustments. For additional information about techniques to capture the highest quality...
- Page 34 (R1). The Exam acquisition screen appears. 5. Hold the patient end of the RetinaVue 100 Imager Pro two to three inches directly in front of the patient's examined eye. Continue forward to compress the eye cup against the examined eye.
- Page 35 7. Look for a white circular reflection at the top of the eye's image on the LCD touchscreen. This is your initial target. 8. Guide the green circle on the RetinaVue 100 Imager Pro LCD touchscreen towards the initial target by slowly moving the RetinaVue 100 Imager Pro towards the eye.
- Page 36 9. Once the reflection has filled the screen, push slightly forward until a “bubble” appears. 10. Keep the RetinaVue 100 Imager Pro in line. Slightly adjust the RetinaVue 100 Imager Pro away from any shadows that appear. 11. Move the patient end of the RetinaVue 100 Imager Pro toward the bubble.
- Page 37 Directions for use Using the RetinaVue 100 Imager Pro 33 13. An audible tone alerts you that the image has been captured. The acquired image appears on the LCD touchscreen for review in about five seconds. 14. Touch (Accept) to begin the second exam of the patient's left eye (L1) and wait at least 1 minute before repeating the steps until the second image is automatically captured.
-
Page 38: Perform A Manual Image Capture While In Auto Exam Mode
34 Using the RetinaVue 100 Imager Pro Welch Allyn RetinaVue™ 100 Imager Pro Note Touch to review the current image. Images with a red ) denote low quality images. Touch (navigates to the Acquisition screen) or touch (navigates to the... -
Page 39: Skip An Image Capture While In Auto Exam Mode
Directions for use Using the RetinaVue 100 Imager Pro 35 Skip an image capture while in Auto exam mode 1. From the Home screen, touch Exam. The Pre-acquisition screen appears. 2. Touch (Next) or touch , or , or (Image Order) to skip to the next image in the sequence. -
Page 40: Perform A Manual Image Capture While In Manual Exam Mode
36 Using the RetinaVue 100 Imager Pro Welch Allyn RetinaVue™ 100 Imager Pro Perform a manual image capture while in Manual exam mode 1. From the Home screen, touch Exam. The Pre-acquisition screen appears. 2. Touch MANUAL to enter Image acquisition mode and begin the exam of the patient's eye. -
Page 41: Review Patient Exams On The Retinavue 100 Imager Pro
An audible tone alerts you that the image has been captured. The acquired image appears on the LCD touchscreen for review in about five seconds. Review patient exams on the RetinaVue 100 Imager Pro 1. From the Home screen, touch Review. The Review screen appears. - Page 42 38 Using the RetinaVue 100 Imager Pro Welch Allyn RetinaVue™ 100 Imager Pro 2. Touch on a patient's ID to review the patient demographics (Patient summary screen) and to view images associated with a patient. 3. Any saved images appear on the Exam summary screen.
-
Page 43: Transfer Patient Exams From The Retinavue 100 Imager Pro To A Computer
Transfer patient exams from the RetinaVue 100 Imager Pro to a computer 1. Place the RetinaVue 100 Imager Pro into the cradle and ensure that the cradle is connected to a computer by the USB cable. 2. Power on the computer and the RetinaVue 100 Imager Pro. -
Page 44: Use The Retinavue 100 Imager Pro Sd Card To Transfer Patient Exams To A Computer
Use the RetinaVue 100 Imager Pro SD Card to transfer patient exams to a computer 1. Power down the RetinaVue 100 Imager Pro and remove the SD Card. 2. Insert the SD Card into an open SD Card reader port on the computer. -
Page 45: Troubleshooting
CAUTION A defective device should not be used. A device with parts which may be broken or missing, visibly worn, distorted, or contaminated should be replaced immediately. To correct an error, follow these instructions or contact Welch Allyn Technical Support: www.welchallyn.com/service. Troubleshooting image quality... - Page 46 42 Troubleshooting Welch Allyn RetinaVue™ 100 Imager Pro Problem Solution Dark semi-circle on top Move the patient side of the RetinaVue 100 Imager down and away from dark semi-circle. Dirty lens Clean the lens with an appropriate cleaning cloth. Error messages...
- Page 47 Directions for use Troubleshooting 43 Error message/problem Solution Camera is docked. Remove camera from docking station to access Remove the camera from the docking station. camera functions. The battery is running low. Please recharge. When the battery charge level is below 25 percent, the low battery error message appears.
- Page 48 Click Reset the codes and data Problem Solution Locked out of the RetinaVue 100 Imager Pro. CAUTION Resetting the codes Cannot recall the Device access code or the Advanced settings will result in a loss of any images code.
- Page 49 Directions for use Troubleshooting 45 Problem Solution Note The reset process typically takes a few minutes to cycle through the complete reset. During the reset process, it is normal for the Confirm button to remain active before the reset confirmation dialogue screen appears.
- Page 50 46 Troubleshooting Welch Allyn RetinaVue™ 100 Imager Pro...
-
Page 51: Maintenance
Maintenance Clean and disinfect CAUTION Never submerge the RetinaVue 100 Imager in water or any other liquid. CAUTION Never use abrasive cleaning agents, thinners or benzene for cleaning and never immerse the instrument in water or other cleaning liquids. CAUTION Never insert a sharp object into the device or any open surface on the RetinaVue 100 Imager. - Page 52 48 Maintenance Welch Allyn RetinaVue™ 100 Imager Pro Cleaning the docking station charger Use a pre-moistened wipe or soft cloth slightly moistened with an approved cleaner to gently clean the docking station charger. Disinfecting the RetinaVue 100 Imager, eye cup, and docking station...
-
Page 53: Retinavue 100 Imager Pro Specifications
RetinaVue 100 Imager Pro Specifications Specifications View Angle 45 Degree (Typical) Diopter -20 ~ +20D (Typical) Dimensions L 8.8 inches (224.2 mm) × W 4.2 inches (106.7 mm) × H 4.1 inches (105.2 mm) Weight 565 Grams ±5% Search Fundus... - Page 54 Firmware updates and support may require an annual subscription service after the initial one (1) year warranty period. The expected battery life is at least one (1) year. If the RetinaVue 100 Imager Pro device fails to hold a charge, a new battery can be ordered.
-
Page 55: Enable The Retinavue Network
USB or wireless connection to the Welch Allyn RetinaVue Network: • In North America, please call the following number: 865.622.8380 from 8:00 AM – 5 PM EST to create an account with the Welch Allyn RetinaVue Network. For additional inquires use the following link: www.welchallyn.com/support. •... -
Page 56: To Change The Camera Configuration From The Rv100 (Usb Or Wireless) To The Rv100 Pro
Note The RetinaVue 100 Imager Pro camera provide a means to revert back to the RetinaVue 100 Imager Pro model at this point in the configuration. 4. Touch RV100 Pro to convert the RV100 to the RV100 Pro and to use the RetinaVue... -
Page 57: Viewing Or Changing The Retinavue 100 Imager Pro Settings
Viewing or changing the RetinaVue 100 Imager Pro settings To view or change the settings Touch Settings. Modify the settings as desired. • Touch Volume. Touch (up) or (down) to adjust the device sound volume. Touch (Back) to return to the Settings screen. •... -
Page 58: Power Down The Retinavue 100 Imager
54 Viewing or changing the RetinaVue 100 Imager Pro settings Welch Allyn RetinaVue™ 100 Imager Pro • Camera configuration. Touch Camera configuration. Touch RV100 Pro to use the RetinaVue 100 Pro Imager with unencrypted images only without the RetinaVue Network. See the topic Enable the device with the RetinaVue Network for further instructions on configuring the device. -
Page 59: Sleep Mode
Directions for use Viewing or changing the RetinaVue 100 Imager Pro settings 55 3. Touch one of the options. The RetinaVue 100 Imager will power off, go into Sleep mode, or return to the prior screen, depending on the option you choose. - Page 60 56 Viewing or changing the RetinaVue 100 Imager Pro settings Welch Allyn RetinaVue™ 100 Imager Pro 2. A dialogue box appears with three options: • Power Off • Sleep • Cancel 3. Touch Sleep. The RetinaVue 100 Imager enters Sleep mode.
-
Page 61: Set The Date And Time
Directions for use Viewing or changing the RetinaVue 100 Imager Pro settings 57 Note Lifting or moving the RetinaVue 100 Imager also brings the RetinaVue 100 Imager out of Sleep mode. 2. After performing one of the options, the RetinaVue 100 Imager will awaken from Sleep mode, or return to the prior screen. -
Page 62: Set The Device Access Code
1. Follow the steps in the Battery installation and replacement section to install the battery and then press and hold the power button to turn the device on. 2. Remove the RetinaVue 100 Imager Pro from the docking station charger. 3. Touch Settings on the RetinaVue 100 Imager Pro Home screen. - Page 63 Imager Pro access code and need to erase the access code. 1. Remove the RetinaVue 100 Imager Pro from the docking station charger. 2. If you are not already logged in, enter the existing access code for the RetinaVue 100 Imager Pro.
- Page 64 1. Remove the RetinaVue 100 Imager Pro from the docking station charger. 2. If the RetinaVue 100 Imager Pro is set with a Device access code (in addition to the Advanced settings code) and you are not already logged in, enter the existing Device access code.
- Page 65 Imager Pro Home screen without using an Advanced setting code. 9. Touch OK to accept the code and touch OK again at the confirmation screen. 10. Touch (Back) to return to the Settings screen. 11. Touch (Home) to return to the RetinaVue 100 Imager Pro Home screen.
- Page 66 62 Viewing or changing the RetinaVue 100 Imager Pro settings Welch Allyn RetinaVue™ 100 Imager Pro...
-
Page 67: General Compliance And Standards
Electrical Equipment (WEEE). If this product is contaminated, this directive does not apply. For more specific disposal or compliance information, see www.welchallyn.com/weee, or contact Welch Allyn Customer Service at +44 207 365 6780. EMC compliance Special precautions concerning electromagnetic compatibility (EMC) must be taken for all medical electrical equipment. -
Page 68: Emissions And Immunity Information
64 General compliance and standards Welch Allyn RetinaVue™ 100 Imager Pro • However, it is good practice to avoid using the 901103 Imager in extremely close proximity to other equipment. • It is not safe to operate the 901103 Imager in the presence of high-frequency surgical equipment. - Page 69 Directions for use General compliance and standards 65 Electromagnetic immunity IEC 61000-4-5 ± 2 kV common mode ± 2 kV common mode Voltage dips, short Mains power quality should be that of a typical 100% dip in 0.5 cycle 100% dip in 0.5 cycle interruptions and commercial or hospital environment.
- Page 70 66 General compliance and standards Welch Allyn RetinaVue™ 100 Imager Pro Electromagnetic immunity compliance level above, the 901103 should be observed to verify normal operation. If abnormal performance is observed, additional measures may be necessary, such as reorienting or relocating the 901103.
-
Page 71: Navigation Controls
Navigation controls Navigation controls in the Training mode From the Home screen touch Training. The RetinaVue 100 Imager Interactive Training Video screen appears. Note Navigation controls change with each mode. Touch anywhere within the RetinaVue 100 Imager touchscreen to display the training navigation controls. -
Page 72: Navigation Controls In The Exam Mode
68 Navigation controls Welch Allyn RetinaVue™ 100 Imager Pro Navigation controls in the Exam mode The Navigation area is located at the bottom of the RetinaVue 100 Imager screen. Navigation controls change with the mode. The navigation controls for Pre-, post-, and... -
Page 73: Navigation Controls In The Settings Mode
Directions for use Navigation controls 69 Accept image: Navigates to the Exam summary screen when the last exam in the sequence has been accepted. Also navigates to Pre-acquisition screen if there are more images to be captured. Image inspection: Navigates to the Image inspection screen. Add image: Navigates to the Acquisition screen Navigation controls in the Settings mode... - Page 74 70 Navigation controls Welch Allyn RetinaVue™ 100 Imager Pro Unacceptable quality red: From the Exam summary screen, touch the unacceptable quality icon to navigate to the image on the Post-acquisition screen.
-
Page 75: Image Pre-Acquisition Controls (Auto Mode)
Directions for use Navigation controls 71 Image Pre-acquisition controls (Auto mode) From the Home screen touch Exam. The Exam Pre-acquisition screen appears. No. Feature No. Feature START enters automatic image acquisition mode. Navigates to the Home screen. (Image Acquisition Settings) navigates to MANUAL switches to advanced image capture the Capture settings screen. - Page 76 72 Navigation controls Welch Allyn RetinaVue™ 100 Imager Pro Use the RetinaVue 100 Imager touchscreen inspection control to navigate to the Inspection screen, then zoom in or out with a pinch or pull. Touch (Back) to navigate to the Post-acquisition screen. Or, touch...
-
Page 77: Exam Summary Controls (Post-Acquisition And Review Modes)
Directions for use Navigation controls 73 Exam summary controls (Post-acquisition and Review modes) Exam summary from the Post-acquisition screen From the Post-acquisition screen, touch (Accept) to navigate to the Exam summary screen. Each image on the Exam summary screen contains a quality score and status. Touch (Good quality green) to view that image. - Page 78 74 Navigation controls Welch Allyn RetinaVue™ 100 Imager Pro If an image is missing touch Override to access the Save button and to save a single image in the 1-image, Macula-centered Exam setup, or touch Override to save multiple images in the 2-image, Macula + Optic Disc-centered Exam setup.
-
Page 79: Update The Retinavue 100 Imager Pro Software To Version 6.Xx And Above
The docking station charger with a USB cable connected to the power source. • The RetinaVue 100 Imager Pro containing the SD card that you plan to update. (Alternatively, you can use a blank, formatted, 8GB to 32GB SD Card to transfer the downloaded software update to the RetinaVue 100 Imager Pro). - Page 80 RetinaVue 100 Imager Pro automatically reboots. 12. After the RetinaVue 100 Imager Pro boots up to the Home screen, confirm the software update. a. Touch Settings.
-
Page 81: Retinavue 100 And 100 Imager Pro Accessories
RetinaVue 100 Imager with lithium-ion battery RV100-6 RetinaVue 100 Imager with lithium-ion battery and Australian plug RV100PRO-6 RetinaVue 100 Imager Pro with lithium-ion battery and Australian plug 106401 Charging Dock for Welch Allyn RetinaVue 100 Imager; 100-240 V, 50-60 Hz 106405 Battery for Welch Allyn RetinaVue 100 Imager;... - Page 82 723671 Lens cloth Applied parts Part number Description 106404 Reusable Eye Cups for Welch Allyn RetinaVue 100 Imager: Qty. 5 Service Part number Description S1-RV100-1 Welch Allyn Partners in Care Comprehensive Partnership Program Service for RetinaVue 100 Imager; 1 year...
- Page 83 Directions for use RetinaVue 100 and 100 Imager Pro Accessories Part number Description 724146 RetinaVue 100 Imager Technique guide...
- Page 84 Material No. 727803...
Need help?
Do you have a question about the RetinaVue 100 Imager Pro and is the answer not in the manual?
Questions and answers