Table of Contents
Advertisement
Quick Links
Download this manual
See also:
Installation Manual
Advertisement
Table of Contents

Subscribe to Our Youtube Channel
Related Manuals for Barco ImagePRO


Summary of Contents for Barco ImagePRO
- Page 1 ImagePRO–4K Video Processor User’s Guide ENABLING BRIGHT OUTCOMES...
- Page 2 Barco Inc, Image Processing 3078 Prospect Park Drive, Rancho Cordova, CA , 95670, USA www.barco.com/en/support www.barco.com Registered address: Barco NV President Kennedypark 35, 8500 Kortrijk, Belgium www.barco.com/en/support www.barco.com...
-
Page 3: Software License Agreement
Barco. If the purchaser or a third party carries out modifications or repairs on goods delivered by Barco, or if the goods are handled incorrectly, in particular if the systems are operated incorrectly or if, after the transfer of risks, the goods are subject to influences not agreed upon in the contract, all guarantee claims of the purchaser will be rendered invalid. -
Page 4: Federal Communications Commission (Fcc) Statement
Changes or modifications not expressly approved by the party responsible for compliance could void the user's authority to operate the equipment FCC responsible: Barco Inc. 3059 Premiere Parkway Suite 400 30097 Duluth GA, United States Tel: +1 678 475 8000... - Page 5 Introduction Overview • About this guide • Record of changes • Symbols, pictures and fonts R5906167 /00 ImagePRO–4K Video Processor...
-
Page 6: About This Guide
Safety Guide R5906169 A printed copy of the safety guide and the quick start guide is included in the shipping box of the ImagePRO– 4K video processor. Please check online for the other documents. Always check for the latest version of all documents on www.barco.com. - Page 7 Images and pictures given in the manual are used as illustration. The content of the images can be slightly different from the reality, e.g. version numbers, device types, installed modules, and the form and position of software windows on screen. R5906167 /00 ImagePRO–4K Video Processor...
- Page 8 Introduction R5906167 /00 ImagePRO–4K Video Processor...
- Page 9 Please read this chapter carefully. It contains important information to prevent personal injury while installing and operating ImagePRO–4K video processor. Furthermore, it includes several cautions to prevent damage to the device. Ensure that you understand and follow all safety guidelines, safety instructions and warnings mentioned in this chapter before you begin installation.
-
Page 10: General Considerations
Image 2-2: KCC mark 2.3 Important safety instructions To prevent risk, personal injury, and ImagePRO–4K video processor damage Please read this chapter carefully. It includes several cautions to prevent damage to Event Master devices. Ensure that you understand and follow all safety guidelines, safety instructions and warnings mentioned in this chapter before installing Event Master devices. - Page 11 Refer cord and connector changes to qualified service personnel. • Replace spare parts only with the same parts supplied by Barco. • Save the original shipping carton and packing material. They will come in handy if you ever have to ship your equipment.
- Page 12 Safety R5906167 /00 ImagePRO–4K Video Processor...
-
Page 13: About This Chapter
General About this chapter This chapter is designed to introduce you to the ImagePRO–4K video processor. Overview • ImagePRO–4K video processor overview • ImagePRO–4K video processor features • Terms and definitions • Unpacking and inspection • Installation requirements R5906167 /00... - Page 14 Like all Barco image processing products, the ImagePRO–4K is built for life on the road. Assembled and tested for extreme use and abuse, the ImagePRO–4K performs just as well at the gig as it does in the shop. The live-source view on the front panel provides you with a clear view of the incoming signal giving you the confidence you need to execute your event.
-
Page 15: Terms And Definitions
A standard for encryption, defined by Intel Corporation to prevent copying of encrypted digital audio and video content. Logo A full-screen still image that you can capture, import, and store for subsequent display by the ImagePRO–4K video processor. R5906167 /00... -
Page 16: Unpacking And Inspection
For maximum protection, repack your device as it was originally packed at the factory. Box content After unpacking an ImagePRO–4K device, it is recommended that it be checked to see if all accessories were included. The following accessories should be included. R5906167 /00... -
Page 17: Installation Requirements
Control GUI) Mechanical check This check should confirm that there are no broken parts and the unit is free of dents or scratches. Your Barco Sales representative should be notified as soon as possible if this is not the case. -
Page 18: Rack Mount Installation
ImagePRO– 4K units are shipped with side rails included in the shipping case and not installed onto the chassis. These side rails, when they are properly installed and adjusted, assist with the distribution of chassis (and cable) weight within your rack. -
Page 19: Power Cord And Line Voltage Selection
• Power Consumption: 2A maximum The ImagePRO– 4K performs line voltage selection automatically. No user controls are required. The AC power cords must be accessible so that they can be removed during field servicing. WARNING: When used above 230 volts, a UL listed line cord rated for 250 volts at 15 amps must be used and must conform to IEC-227 and IEC-245 standards. - Page 20 General R5906167 /00 ImagePRO–4K Video Processor...
-
Page 21: Hardware Orientation
Hardware Orientation About this chapter This chapter explains the ImagePRO–4K video processor’s hardware in detail. Overview • Front panel • Rear panel R5906167 /00 ImagePRO–4K Video Processor... -
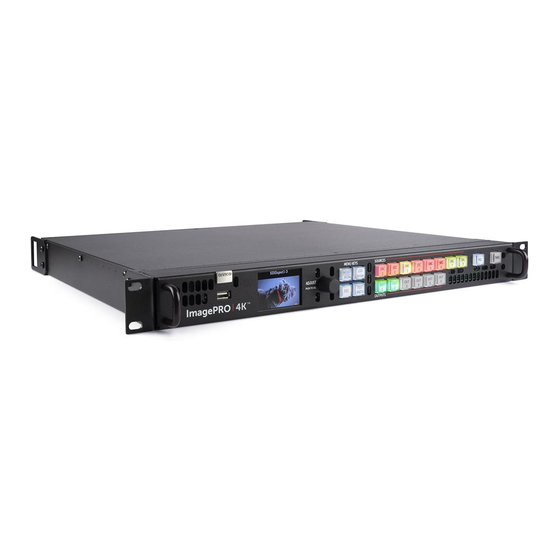
Page 22: About The Front Panel
The USB port supports uploading and downloading system configurations and upgrading ImagePRO–4K firmware. Display screen The LCD color video display shows all ImagePRO-4K menus, sub-menus, and messages. The display can be toggled between Menu mode and Monitor mode. Adjust knob •... -
Page 23: About The Rear Panel
Following are descriptions of each rear-panel control feature: AC power A single AC connector with a power switch connects the ImagePRO–4K to your facility’s AC power source through the supplied power cord. The integral switch turns the unit on and off. - Page 24 3840x2400/ 50/59.94/60 input via 1x HDMI ◦ 4096x2160/ 50/59.94/60 input via 1x HDMI ◦ 3840x2160/ 50/59.94/60 input via 1x HDMI • EDID version 1.3 compatible • HDCP version 1.4 and version 2.2 compatible SDI specifications • Supported formats: R5906167 /00 ImagePRO–4K Video Processor...
-
Page 25: Genlock Input Connector
SMPTE 274M and SMPTE 296M. When the ImagePRO– 4K is genlocked and the lock source is lost for some reason, the output of the unit automatically switches to a “coasting” state without any discernible “glitching” on the output display device. - Page 26 Hardware Orientation R5906167 /00 ImagePRO–4K Video Processor...
-
Page 27: Setup And Operation
This chapter describes how to quickly set up and begin operating your system, follow the steps in this section. Links are provided to the appropriate sections in this guide, if you require more information. Overview • Rear-panel connections • Front-panel operation • Factory reset R5906167 /00 ImagePRO–4K Video Processor... -
Page 28: Rear Panel Connections
Connect inputs—Connect all input sources to the ImagePRO–4K. Connect outputs—Connect the output(s) on the ImagePRO–4K to your projector(s) or other target devices. Turn on power—Turn on power to the ImagePRO–4K, your connected display devices, and to all peripheral equipment. 5.2 Front-panel operation Front-panel features Refer to “Front panel”, page 22 for the location and description of the front-panel features. - Page 29 The system has two types of monitor: it can monitor the output, or it can monitor the input. If an output button is amber, the system is monitoring that output. If the output buttons are green, the system is monitoring input. R5906167 /00 ImagePRO–4K Video Processor...
- Page 30 75% Color Bars • 50% Gray • Horizontal Steps • Vertical Steps • White • Black • SMPTE Bars • H Alignment • V Alignment • HV Alignment • Circle Alignment • • Green • Blue R5906167 /00 ImagePRO–4K Video Processor...
- Page 31 Press the Adjust knob to enter the Setup menu. Factory reset—If you are using the ImagePRO–4K for the first time, or if you are using an ImagePRO–4K that has just returned from another event, perform a full factory reset to restore default system configurations.
-
Page 32: Perform A Factory Reset
Perform a factory reset If you are using the ImagePRO– 4K for the first time, or if you are using an ImagePRO– 4K that has just returned from an event, perform a full factory reset (Reset / Factory) to restore default system configurations. -
Page 33: Menu Orientation
Menu orientation About this chapter This chapter describes the ImagePRO–4K system menus, including how they are accessed and the functions or parameters that are available. The principal menu trees are presented in block diagram format throughout the chapter. Overview •... -
Page 34: Power-Up Initialization
How to power up the ImagePRO–4K Connect power to the ImagePRO– 4K, then locate the power switch on the rear panel and turn power On. While the system is initializing, the front-panel buttons light up, and the Barco logo and the following messages are displayed. - Page 35 Genlock status. The status screen also displays a message telling the user to push the Adjust knob to access the menus. 6.2 ImagePRO–4K menus ImagePRO–4K menu tree The diagram on the following pages illustrates the entire ImagePRO– 4K menu tree. Use this diagram for reference as you learn how to operate the system. R5906167 /00 ImagePRO–4K Video Processor...
- Page 36 Menu orientation Image 6-4: Menu tree R5906167 /00 ImagePRO–4K Video Processor...
-
Page 37: Input Menu Tree
Use the Input Menu to adjust all parameters relating to inputs. Using this menu, you can set all of the configuration options for the selected input. Input menu tree Refer to Image 6-7 and Image 6-8 for an illustration of the Input menu tree. R5906167 /00 ImagePRO–4K Video Processor... - Page 38 Menu orientation Image 6-7: Input menu tree R5906167 /00 ImagePRO–4K Video Processor...
-
Page 39: Input Configuration
Once Input is selected, the highlight bar turns from gray to cyan. Turning the adjust knob scrolls through the available inputs. Scroll to and select the input to be configured. Image 6-9: Input selection Input Configuration Scroll to and select Input Configuration. R5906167 /00 ImagePRO–4K Video Processor... - Page 40 V Active: The vertical size of the output active area • V Sync: V sync width in lines • V Rate: Vertical frame rate in frames per second These are status and informational menus. No adjustments can be made on the Detailed Timing screen. R5906167 /00 ImagePRO–4K Video Processor...
-
Page 41: Source Configuration
The Input Source menu allows users to select from available source configurations for an input. Image 6-12: Input Source Source Configuration Scroll to and select Source Configuration on the Input menu to adjust the aspect ratio, sizing, and color of the input source. R5906167 /00 ImagePRO–4K Video Processor... - Page 42 Scroll to and select Color Adjustment to adjust the following color aspects of the input source: • Overall contrast – Range: 50 to 150; Default: 100 • Red contrast – Range: 50 to 150; Default: 100 • Green contrast – Range: 50 to 150; Default: 100 R5906167 /00 ImagePRO–4K Video Processor...
-
Page 43: Sdi Setup
Scroll to and select SDI Setup on the Input menu to set up the SDI inputs. Image 6-15: Input menu: SDI Setup SDI may be set up in two configurations: • Four separate SDI inputs. • A single Quad SDI input. Image 6-16: SDI Setup R5906167 /00 ImagePRO–4K Video Processor... - Page 44 Use the Output (Aux) Menu to adjust all parameters relating to outputs (Auxes). Using this menu, you can set all of the configuration options for the selected output (Aux). Output (Aux) menu tree Refer to Image 6-18 and Image 6-19 for illustrations of the Output (Aux) menu tree. R5906167 /00 ImagePRO–4K Video Processor...
- Page 45 Menu orientation Image 6-18: Output (Aux) menu tree R5906167 /00 ImagePRO–4K Video Processor...
- Page 46 Menu orientation Image 6-19: Output (Aux) menu tree (Continued) Select Aux Select Select Aux on the Output (Aux) menu. R5906167 /00 ImagePRO–4K Video Processor...
- Page 47 (AOI), adjust the color, to pan or zoom the window, create a mask, adjust the matte color, make timing adjustments, and select HDCP settings. Scroll to and select Format to adjust the resolution and refresh rate. R5906167 /00 ImagePRO–4K Video Processor...
- Page 48 Red brightness – Range: 25 to 150; Default: 100 • Green brightness – Range: 25 to 150; Default: 100 • Blue brightness – Range: 25 to 150; Default: 100 • Hue – Range: –90 to 90; Default: 0 R5906167 /00 ImagePRO–4K Video Processor...
- Page 49 Scroll to and select HDCP to set up and apply HDCP settings for the input. The default HDCP mode setting for DisplayPort, DVI, and HDMI is Off. HDCP Mode is not applicable to SDI inputs. R5906167 /00 ImagePRO–4K Video Processor...
-
Page 50: Output Mapping
Scroll to and select Output Mapping to view and adjust the output channel (A or B) for any output. Scroll to and select an output, for example HDMIOutput1. Once the output is selected, the highlight bar turns from gray to cyan. R5906167 /00 ImagePRO–4K Video Processor... - Page 51 Level B. • A single Quad SDI output. If a single quad SDI output is created, that output can be configured to either Level A or Level B. Scroll to and select Make Separate SDI Outputs. R5906167 /00 ImagePRO–4K Video Processor...
-
Page 52: Still Menu
Use the adjust knob to scroll through the levels (A and B) and to select the desired level. 6.5 Still menu General This section provides information about capturing and using stills. To enter the Still menu from the Setup menu, scroll to and select Still. R5906167 /00 ImagePRO–4K Video Processor... - Page 53 Refer to Image 6-30 for an illustration of the Still menu tree. Image 6-30: Still menu tree Capture New Still Select Capture New Still on the Still menu. Image 6-31: Setup menu: Still The system displays a progress screen. R5906167 /00 ImagePRO–4K Video Processor...
- Page 54 Once the still has been captured, the system displays a message that includes the name of the still. Image 6-33: New Still captured Select Still Select Select Still on the Still menu. Once the Select Still is selected, the highlight bar turns from gray to cyan. R5906167 /00 ImagePRO–4K Video Processor...
- Page 55 Image 6-35: Still menu: Still Set as Logo Delete Selected Select the still to be deleted. Select Delete Selected on the Still menu. The system displays a message that asks if you really want to delete the still. R5906167 /00 ImagePRO–4K Video Processor...
-
Page 56: Preset Menu
Any configuration — different input sources, mapped output channels, masks, etc.—can be saved as a preset and recalled. To enter the Preset menu from the Setup menu, scroll to and select Preset. R5906167 /00 ImagePRO–4K Video Processor... - Page 57 Once Input is selected, the highlight bar turns from gray to cyan. Turning the adjust knob scrolls through the available inputs. Scroll to and select the input to be configured. Image 6-40: Preset: Save New Preset R5906167 /00 ImagePRO–4K Video Processor...
- Page 58 Preset overwrites Preset 1.00 with Preset 2.00. Preset 1.00 is not renumbered, but the properties of Preset 1.00 are overwritten with the properties of Preset 2.00, so that the two presets now have the same effect. Recall Preset Select Recall Preset to recall the currently selected preset and make it active. R5906167 /00 ImagePRO–4K Video Processor...
-
Page 59: Delete Preset
Once the preset has been deleted, the system displays a message that says that the preset has been removed. Image 6-44: Preset menu: Preset removed Button Mapping Select Button Mapping to map and unmap source and output buttons. R5906167 /00 ImagePRO–4K Video Processor... -
Page 60: Button Mapping Menu
Use the Button Mapping menu to map the front-panel buttons to sources (input, still, and logo) and outputs. Button Mapping menu tree Refer to Image 6-47 for an illustration of the Button Mapping menu tree. R5906167 /00 ImagePRO–4K Video Processor... -
Page 61: Source Buttons
Scroll to and select the input to be configured. Once the input to be configured is selected, the highlight bar turns from gray to cyan. Turning the adjust knob scrolls through the sources available to that button. R5906167 /00 ImagePRO–4K Video Processor... - Page 62 To unmap all of the source buttons, scroll to and select Unmap All Source Buttons. Image 6-50: Unmap All Source Buttons To automatically map all of the source buttons, scroll to and select Auto Map All Source Buttons. R5906167 /00 ImagePRO–4K Video Processor...
-
Page 63: Output Buttons
Image 6-52: All source buttons mapped message Select Yes to complete the auto-mapping of the source buttons. Output Buttons Select Output Buttons on the Button Mapping menu. R5906167 /00 ImagePRO–4K Video Processor... - Page 64 You may also select the option “Not Mapped.” Repeat steps 2 and 3 for each button that is to be mapped. To automatically map all of the output buttons, scroll to and select Auto Map All Output Buttons. R5906167 /00 ImagePRO–4K Video Processor...
- Page 65 Image 6-56: All output buttons mapped message Select Yes to complete the auto-mapping of the output buttons. To unmap all of the output buttons, scroll to and select Unmap All Output Buttons. R5906167 /00 ImagePRO–4K Video Processor...
- Page 66 Select Auto Map All Buttons on the Button Mapping menu. Image 6-58: Auto Map All Buttons The system unmaps all currently mapped source and output buttons and automatically remaps them. When the remapping is finished, the system displays the message “All buttons mapped.” R5906167 /00 ImagePRO–4K Video Processor...
-
Page 67: Button States
Green: Button is mapped to an Aux. Amber: Aux is selected to view in the front-panel monitor. Blue: Aux is frozen. • Dimly lit—Source is mapped but not active. • Not lit—Button is not mapped. R5906167 /00 ImagePRO–4K Video Processor... -
Page 68: System Menu
To enter the System menu from the Setup menu, scroll to and select System. Image 6-63: Setup menu: System Use the System menu to control system settings, such as Unit Mode, Native Rate, Genlock, Ethernet, Display and Button Brightness and to access the System Diagnostics. R5906167 /00 ImagePRO–4K Video Processor... -
Page 69: System Menu Tree
• In Matrix Preview mode the ImagePRO–4K video processor acts as if it were a scaling matrix switcher. Matrix Preview mode may be selected from the front panel of the unit, but it must be used through the EMTS GUI. - Page 70 The default setting is On. Select Black on Invalid Video on the System menu. Once Black on Invalid Video is selected, the highlight bar turns from gray to cyan. Image 6-67: System menu: Black on Invalid Video R5906167 /00 ImagePRO–4K Video Processor...
- Page 71 The native rate must match the general frame rate in the event where the unit is used. Genlock Genlock allows the operator to adjust the Genlock parameters of the system. Select Genlock on the System menu. R5906167 /00 ImagePRO–4K Video Processor...
-
Page 72: Reference Output
Once Format is selected, the highlight bar turns from gray to cyan. Image 6-70: Reference Output menu: Format Scroll through and select the desired reference-output format. Status displays whether the selected reference-output format is valid or invalid. R5906167 /00 ImagePRO–4K Video Processor... -
Page 73: Usb Backup/Restore
Select Backup Config on the USB Backup/Restore menu. Once Backup Config is selected, the highlight bar turns from gray to cyan, and the first character of the backup config file name is highlighted in green. R5906167 /00 ImagePRO–4K Video Processor... - Page 74 Select Restore Config on the USB Backup/Restore menu. Once Restore Config is selected, the highlight bar turns from gray to cyan. Image 6-74: USB Backup/Restore: Restore Config Use the adjust knob to scroll through and select the desired backup config file. R5906167 /00 ImagePRO–4K Video Processor...
- Page 75 Image 6-75: Backup In Progress message When the restore operation is finished, the system then displays a message that asks, “Restart Unit Now?” Image 6-76: Restore Done Restart message Select Yes. The system displays a resetting message. R5906167 /00 ImagePRO–4K Video Processor...
- Page 76 When DHCP is set to On, a device can have a different IP address every time it connects to the network. • IP reports the current IP address of the system. • MAC reports the current MAC address of the system. R5906167 /00 ImagePRO–4K Video Processor...
-
Page 77: Display Brightness
Repeat Step 8 for each portion of the Gateway Mask. Display Brightness Select Display Brightness on the System menu to adjust the brightness of the display screen. Image 6-80: System menu: Display Brightness R5906167 /00 ImagePRO–4K Video Processor... -
Page 78: Button Brightness
Select Lock Front Panel on the System menu to lock the front-panel buttons. Image 6-82: System menu: Lock Front Panel Once Lock Front Panel is selected, the system displays the following message, “Front Panel Locked Press and hold ‘Menu/Mon’ and ‘ESC’ buttons to unlock.” R5906167 /00 ImagePRO–4K Video Processor... -
Page 79: Flash Display
When Flash Display is set to On, the display flashes from dark, to dim, to bright. Diagnostics The Diagnostics menu allows an operator to check if the ImagePRO– 4K unit is functioning normally. Front panel and card operations can be checked. Various system temperatures can be monitored and backup log files can be saved for customer service troubleshooting. -
Page 80: Front-Panel Diagnostics
When Front Panel is selected, the system displays the message “Diagnostics in progress…,” and the display screen and the front-panel buttons flash red, then blue, then green. When the front-panel diagnostic is finished, the system displays a message. R5906167 /00 ImagePRO–4K Video Processor... - Page 81 Turn the adjust knob or press any front-panel button, for example the ESC button. Image 6-88: Exit front-panel diagnostics Press and hold the ESC button to return to the Diagnostics menu. Buttons/Encoder diagnostics Scroll to and select Buttons/Encoder from the Diagnostics menu. R5906167 /00 ImagePRO–4K Video Processor...
- Page 82 When Buttons/Encoder is selected, the system displays the message “Diagnostics in progress…Please press the button or turn the knob...” Image 6-90: Diagnostics in Progress Turn the adjust knob or press any front-panel button, for example the SRC 6 button. R5906167 /00 ImagePRO–4K Video Processor...
-
Page 83: Card Diagnostics
Scroll to and select Card Diagnostics from the Diagnostics menu. Image 6-92: Diagnostics menu: Card Diagnostics Select Slot from the Card Diagnostics menu. Once Slot is selected, the highlight bar turns from gray to cyan. R5906167 /00 ImagePRO–4K Video Processor... - Page 84 Select Yes to perform the card diagnostics. • If No is selected, the system returns to the Card Diagnostics menu. • If Yes is selected, the system performs the diagnostics and displays a progress screen. R5906167 /00 ImagePRO–4K Video Processor...
-
Page 85: Temperature Diagnostics
Image 6-96: Board diagnostics results Press the ESC key to return to the Card Diagnostics menu. Temperature diagnostics Scroll to and select Temperature from the Diagnostics menu. The system performs the temperature diagnostics and displays the results. R5906167 /00 ImagePRO–4K Video Processor... -
Page 86: Backup Log Files
“USB drive not found. Please check USB connection and retry.” Scroll to and select Backup Log Files from the Diagnostics menu. Image 6-98: Diagnostics menu: Backup Log Files The system displays a progress screen. R5906167 /00 ImagePRO–4K Video Processor... -
Page 87: Custom Formats
The system stores the backup file—IP4KLogFiles.tar.gz—in the EM folder on the USB drive. 6.9 Custom Formats General This section provides information on creating and selecting custom formats. To enter the Custom formats menu from the Setup menu, scroll to and select Custom formats. R5906167 /00 ImagePRO–4K Video Processor... -
Page 88: Custom Formats Menu Tree
Refer to Image 6– 103 for an illustration of the Custom Formats menu tree that reflects how the Custom Formats menu appears on the display screen, after one or more custom formats have been created. R5906167 /00 ImagePRO–4K Video Processor... - Page 89 The user should use a timing calculator to determine the correct numbers for timing. Incorrect settings can cause unstable or asynchronous video output. Select Create New Format on the Custom Formats menu. Image 6-104: Custom Formats menu: Create New Format R5906167 /00 ImagePRO–4K Video Processor...
-
Page 90: Select Format
Select Format To select a format… Scroll to and select Select Format. Once Select Format is selected, the highlight bar turns from gray to cyan. Turning the adjust knob scrolls through the available custom formats. R5906167 /00 ImagePRO–4K Video Processor... - Page 91 Scroll through and select the desired custom format, for example CustomFormat 4. Delete Scroll to and select Delete, to delete the selected format. Image 6-107: Custom Formats menu: Delete The system displays a message that asks if you really want to delete the custom format. R5906167 /00 ImagePRO–4K Video Processor...
- Page 92 To select a base format… Scroll to and select Selected Base Format. Once Select Format is selected, the highlight bar turns from gray to cyan. Turning the adjust knob scrolls through the available custom formats. R5906167 /00 ImagePRO–4K Video Processor...
- Page 93 After adjusting the properties of a custom format… Scroll to and select Save As. Once Save As is selected, the highlight bar turns from gray to cyan, and the first character of the custom format name is highlighted in green. R5906167 /00 ImagePRO–4K Video Processor...
- Page 94 Scroll through, select, and adjust the desired format properties, for example H Active and V Active. If you do not wish to overwrite the currently selected format, scroll to and select Save As, and give the adjusted format a new name. R5906167 /00 ImagePRO–4K Video Processor...
-
Page 95: Reset Menu
Use the Reset menu to perform a factory reset. Reset menu tree Refer to Image 6-115 for an illustration of the Reset menu tree. Image 6-115: Reset menu tree Factory reset Press the adjust knob to select Reset. R5906167 /00 ImagePRO–4K Video Processor... - Page 96 The system displays a screen that asks you to confirm that you want to clear all configurations and formats. Image 6-117: Reset confirmation Select Yes. The system resets, and while resetting it displays a progress bar. R5906167 /00 ImagePRO–4K Video Processor...
-
Page 97: Firmware Upgrade Menu
Refer to “Upgrading firmware”, page 111 for instructions on performing a firmware upgrade. To enter the Firmware upgrade menu from the Setup menu, scroll to and select Firmware upgrade. Firmware upgrade menu tree Refer to Image 6-120 for an illustration of the Firmware upgrade menu tree. R5906167 /00 ImagePRO–4K Video Processor... -
Page 98: Tech Support Menu
6.12 Tech Support menu General The Tech Support menu shows software version and operating system version for your ImagePRO– 4K and provides Customer Support contact information. To enter the Tech Support menu from the Setup menu, scroll to and select Tech Support. - Page 99 Image 6-123: Setup menu: Save All Use the Save All menu to save all of the system settings. Save All Scroll to and select Save All. The system displays the message “Saved settings file successfully.” R5906167 /00 ImagePRO–4K Video Processor...
- Page 100 Menu orientation Image 6-124: Saved settings message Click on OK. The system saves the settings file and returns to the Setup menu. R5906167 /00 ImagePRO–4K Video Processor...
- Page 101 (EMTS), starting with version 6.1. This toolset software release adds control for the ImagePRO–4K. Starting with version 6.2 and higher, EMTS can be used to control all Event Master processors, in addition to ImagePRO– 4K. Until version 6.2 is released, E2, S3, and Ex should continue to remain on version 6.0, or earlier, firmware.
- Page 102 7.1 EMTS GUI: Configuration menu Description The Configuration menu, shown in the following illustration, is the first page you see when you access the ImagePRO–4K from the EMTS GUI. Image 7-1: EMTS GUI orientation Menu navigation bar – The menu navigation Diagram area –...
- Page 103 Info; the subtabs of an output Adjust tab are representation of the selected device, in this Main, Format, and Connector Settings. case an ImagePRO–4K video processor. To Selection tabs — These tabs allow users to select the entire unit, click on the name of the select different parts of a system to adjust.
- Page 104 Most of the controls available through the EMTS GUI may be used with any Event Master or Image PRO–4K video processor, but some controls are specific to certain models. Controls specific to the ImagePRO– 4K video processor can be found in the Configuration menu and in the Programming menu.
- Page 105 Event Master Toolset Image 7-4: ImagePRO–4K-specific configuration controls Configuration menu Graphic representation of the ImagePRO–4K unit Adjust tab Setup tab R5906167 /00 ImagePRO–4K Video Processor...
- Page 106 Product Support page at http://www.barco.com/td/R9004698). ImagePRO–4K-specific programming controls The Resources area of the Programming menu has ImagePRO–4K-specific controls on the IP4K tab. From this tab the operator can assign a matte or a logo to an Output (Aux) channel. R5906167 /00...
- Page 107 Event Master Toolset Image 7-5: ImagePRO–4K-specific programming controls Programming menu Matte IP4K tab All Trans and Cut keys Logo Programming menu: IP4K Logo and Matte To assign a Logo to an Output (Aux) channel… Select Logo from the IP4K tab.
- Page 108 Event Master Toolset R5906167 /00 ImagePRO–4K Video Processor...
-
Page 109: Specifications
Specifications About this annex This annex gives an overview of the specifications of the ImagePRO–4K video processor. R5906167 /00 ImagePRO–4K Video Processor... - Page 110 Specifications A.1 Specifications of ImagePRO–4K ImagePRO–4K specifications Live effects canvas N/A. Video Input Factory-loaded with a Tri-Combo input card -supports 1x HDMI 2.0 4K60p 4:4:4 8bit, 4:2:2 10 bit, 1x DisplayPort 1.2 4K 60p 4:4:4 10bit, and 4x 12G SDI 4K 60p 4:2:2 10bit or 4x 3G SDI 1200p@60p 4:2:2 10bit.
-
Page 111: Upgrading Firmware
Upgrading firmware About this annex This annex provides information regarding the upgrading of firmware on the ImagePRO–4K. R5906167 /00 ImagePRO–4K Video Processor... -
Page 112: Upgrading Firmware Using The Usb Port
B.1 Upgrading firmware using the USB port Necessary tools USB drive (Not supplied by Barco) formatted in FAT32. How to upgrade firmware Ensure that your flash drive is formatted to use the FAT32 file system. If necessary, reformat the drive as described in the following section “Formatting the flash drive”. - Page 113 Event Master series processor software. It is not necessary to install any other software. Unzip directly the software upgrade downloaded from the Barco website to the USB drive. This operation automatically creates a directory named EM with the upgrade file inside (em_update_vp.xx.xx.tar.gz).
- Page 114 Select the upgrade file. Image B-4: USB Upgrade: Select File Scroll to and select Update. The system displays an “In Progress” screen and a warning to NOT power cycle the unit. Image B-5: Firmware Upgrade: “In Progress” screen R5906167 /00 ImagePRO–4K Video Processor...
- Page 115 When the firmware upgrade is finished, the system displays a post-upgrade status screen. Image B-7: Post-upgrade status screen CAUTION: Do not remove the flash drive or power down the unit until the firmware file is uploaded. R5906167 /00 ImagePRO–4K Video Processor...
- Page 116 Upgrading firmware R5906167 /00 ImagePRO–4K Video Processor...
-
Page 117: Environmental Information
Environmental information Overview • Disposal information • RoHS compliance • Contact information R5906167 /00 ImagePRO–4K Video Processor... -
Page 118: Disposal Information
Electronic Products” (Also called RoHS of Chinese Mainland), the table below lists the names and contents of toxic and/or hazardous substances that Barco’s product may contain. The RoHS of Chinese Mainland is included in the MCV standard of the Ministry of Information Industry of China, in the section “Limit Requirements of toxic substances in Electronic Information Products”. -
Page 119: Contact Information
C.3 Contact information Sales and importers To find your local Barco Sales representative or your local importer, contact Barco directly, or contact one of Barco's regional offices via the contact information given on the Barco web site, www.barco.com. R5906167 /00... -
Page 120: Production Date
Environmental information Factories Barco Inc. 3000 Technology Road Angleton, TX 77515 Production date The month and year of production is indicated on the product ID label on the product itself. R5906167 /00 ImagePRO–4K Video Processor... -
Page 121: Third Party Software Acknowledgements
This chapter lists the third-party software components. The third-party software components are reusable software components developed to be either freely distributed or sold by an entity other than the original vendor of the development platform. Overview • Third Party Software list R5906167 /00 ImagePRO–4K Video Processor... - Page 122 SEMICONDUCTORS USA, INC. that permit redistribution in binary form without fee as part of supporting software for products using devices manufactured by NXP. The source code for the components of the Software and Separate Files are available from NXP and can be obtained from http://www.lpcware.com/lpcxpresso/downloads/source. R5906167 /00 ImagePRO–4K Video Processor...
-
Page 123: Warranty
Warranty About this annex This chapter gives an overview of Warranty and conditions of RMA concerning the Event Master devices. R5906167 /00 ImagePRO–4K Video Processor... -
Page 124: About Warranty And Rma
(drop/crush), and/or other unusual damages. The customer shall pay shipping charges when unit is returned for repair. Barco will cover shipping charges for return shipments to customers. - Page 125 Warranty R5906167 /00 ImagePRO–4K Video Processor...
- Page 126 R5906167 /00 | 2018-11-30 Barco Inc, Image Processing | 3078 Prospect Park Drive, Rancho Cordova, CA , 95670, USA Registered address: Barco NV | President Kennedypark 35, 8500 Kortrijk, Belgium www.barco.com...
Need help?
Do you have a question about the ImagePRO and is the answer not in the manual?
Questions and answers