
Related Manuals for Barco NGS-D320 Lite


Summary of Contents for Barco NGS-D320 Lite
-
Page 1: User Guide
NGS-D320 User Guide NGS-D320 Lite NGS-D320 Pro Applicable for software versions V2.1.0 and higher K5903129/00 29/09/2016... - Page 2 Barco NV President Kennedypark 35, 8500 Kortrijk, Belgium Phone: +32 56.23.32.11 Fax: +32 56.26.22.62 Support: www.barco.com/en/support Visit us at the web: www.barco.com Printed in Belgium...
-
Page 3: Table Of Contents
4.3.2 Barco Device Discovery Tool................ - Page 4 Legal disclaimer ....................55 Technical Specifications NGS-D320 Lite ..............55 Technical Specifications NGS-D320 Pro ..
-
Page 5: Welcome
• Performance - NGS-D320 Lite: The NGS-D320 Lite used as an encoder comes with a dual link DVI, a HDMI and a DisplayPort 1.1a input. All inputs support resolutions up to 4096x2160(DCI) and feature active pass-through connectivity. Although encoding in full frame rate by default, the device also supports lower frame rates. -
Page 6: About This Manual
1. Welcome! About this manual User Guide This User Guide describes how to install and use the Barco device NGS-D320. What’s in the box NGS-D320 box content Your Barco NGS-D320 comes with: • Quick Start Guide • mains cable (EU) •... -
Page 7: Product Information
2. Product information 2. PRODUCT INFORMATION Use cases An NGS-D320 device enables hardware-accelerated KVMA-over-IP, using standard 1G IPv4 networks. It is connected to the network for transporting Audio, Video and control. 2.1.1 Media modes Different media modes The device can stream media in 3 different media modes, to support various use cases. These 3 media modes are supported: •... - Page 8 The corresponding encoder can be: • Another NGS-D320 device • Another Barco device, compatible with the NGS-D320 Refer to the specific Barco Systems with NGS-D320 devices for compatible products. Image 2-2 Decoder installation NGS-D320 (encoder) Barco device or PC/server Switch...
-
Page 9: Control Modes
2. Product information Image 2-3 Encoder and decoder installation Screen, headset/speaker/microphone, keyboard or mouse NGS-D320 (local) Barco device or PC/server Switch Data (network) Audio signal Video signal USB HID Keyboard local settings: To make sure all keys are operable, the physical keyboard layout at decoder side should match the keyboard configuration at encoder side (on... -
Page 10: Models
The main difference between the 2 models is the number of simultaneous video streams and display heads that they support. Refer to "Technical Specifications NGS-D320 Lite", page 55 and "Technical Specifications NGS-D320 Pro", page 57 for more details of the specifications. -
Page 11: Resources
2. Product information 2.3.1 Resources Device behaviour Depending on the model, an NGS-D320 has limited audio & video encoding and decoding resources. A resource utilization algorithm is present on the NGS-D320 that ensures that the device will always behave in the same way, when it is configured in the same way. Priority principle Resources are not granted on a “first come first serve”... - Page 12 2. Product information 1. Default 4 timings will be supported on the source PC, with 1920x1200p60 as preferred timing: 1920x1200p60 1920x1080p60 2560x1600p60 3840x2160p30 2. Specific In this setting, only one specific timing will be provided. The specific timing can be selected out of a list of 46 timings: 640x480p50 1176x664p50 1280x960p50...
-
Page 13: Network
2. Product information • 0.5 seconds after the input is connected • 2 seconds after the decoding is disabled 2.3.3 Network Discovery NGS-D320 devices can be discovered on the network using the mDNS protocol. Refer to "Discovery", page 23 on how to discover an NGS-D320. IP addressing The NGS-D320 supports IPv4 addressing. -
Page 14: Video
2. Product information Each encoded stream can have 2 destination addresses/ports. Device type Number of H.264 streams Destination addresses/ports NGS-D320 Lite 1 stream Stream can have 2 destinations: • Two unicasts negotiated through RTSP, or • One fixed multicast/unicast or AND one... - Page 15 2. Product information 1. Stream Profile A profile defines a set of capabilities, targeting a specific class of applications. 3 stream profiles are supported on NGS-D320: Stream profile Characteristics Target decoding platform BASE Supports a limited subset of techniques, simpler to Low power, mobile design, less code, less processing power.
- Page 16 2. Product information 6. Auto profile By default, the NGS-D320 encoder profile is set to “auto”. In this option, the device will automatically select a profile based on the input resolution it detects. The table shows the auto-selected profile: Resolution Profile <= 1920x1200 main_8m_2mp_60...
-
Page 17: Audio
The keyboard and mouse can be disabled, refer to "Encoder settings", page 35. Software decoding When having a setup between an NGS-D320 encoder and another Barco software decoder, refer to the user manual of this specific system. When having a setup between an NGS-D320 encoder and a 3rd party software decoder, then keyboard and mouse can function by running a VNC client on the software decoder. - Page 18 2. Product information K5903129 NGS-D320 29/09/2016...
-
Page 19: Installation
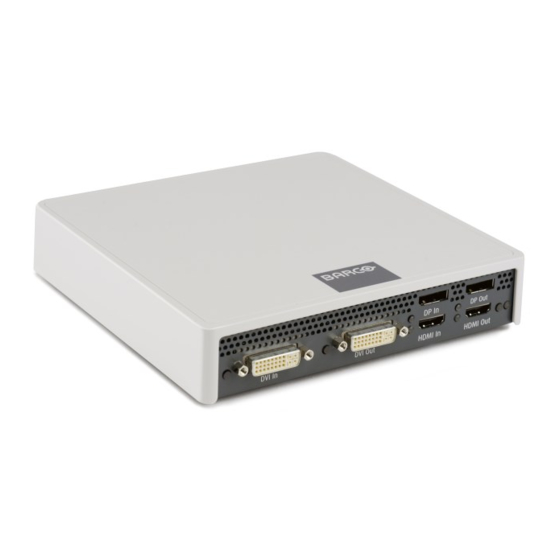
3. Installation 3. INSTALLATION Diagrams Below is an overview of how to connect the signal cables of the NGS-D320 with other devices. Connect the unit as shown in the following diagrams. AUTION Keep the space around the fans free, so that the ventilation air is not ob- structed. - Page 20 3. Installation 9 10 Image 3-2 Front connections of the NGS-D320 Connector/part Connecting device/use DVI In LED Orange: There is no DVI In signal Green: There is valid DVI In signal Video Input DVI-D DVI-D input (dual link) DVI Out LED Orange: No display attached to DVI out Green: Display attached to DVI out Video Output DVI-D...
-
Page 21: Rear View
3. Installation Rear view Illustration The rear view of the NGS-D320 is illustrated below. Image 3-3 Rear view of the NGS-D320 Connection details The NGS-D320 provides the connections as shown below. Image 3-4 Rear connections of the NGS-D320 Connector/part Connecting device/use Power input Power source (12V DC) Power LED... -
Page 22: Start Up
3. Installation Connector/part Connecting device/use Identification LED Blue On: Upgrading the device firmware (do NOT cut power from the device) Blue Blinking: Identification 3D input Stereo (3D) Headset in/out Headset Audio line out Audio device (e.g. PC, LS) Audio line in Audio device (e.g. -
Page 23: Operation
4. Operation 4. OPERATION Introduction Unmanaged mode This section explains how to discover, configure & operate your NGS-D320 device when being used in Unmanaged control mode (refer to "Control modes", page 7 vfor an overview of the Control Modes). Web interface 4.2.1 Introduction Unmanaged mode... -
Page 24: Login
4. Operation Main Menu Submenu Description Settings Network settings Network configuration Encoder settings Configure & use as encoder Decoder settings Configure & use as decoder Power settings Configure DPMS settings Discovery Discover all NGS-D320 devices in the network If you change a setting, the Apply button appears , press this button to con- firm the change. -
Page 25: Discovery
4. Operation A pop-up dialog will appear where one can set the administrator password. Image 4-3 New password Fill in the new administrator password, confirm and press Set password. Login After initial login, there are 2 access levels for the webUI: •... -
Page 26: Barco Device Discovery Tool
Refer to the sections below for more details. 4.3.2 Barco Device Discovery Tool Procedure The Barco Device Discovery Tool is available at http://www.barco.com/networktools. Image 4-4 Barco Device Discovery Tool 1. Select NGS-D320 2. Choose the device serial number from the list or enter the serial number in the space below to quickly find the device. -
Page 27: Web Interface Discovery
4. Operation Image 4-5 OSD display output 4.3.4 Web Interface Discovery WebUI procedure To be able to discover other NGS-D320 devices from the web UI of one NGS-D320 device, you must first log in to this device. 1. Login ("Login", page 22). 2. -
Page 28: Identification Button
4. Operation 4.3.5 Identification button Identification of a device 1. Press the identification button on a device: The device is put in Identification mode. The blue light bulbs in the table above (image 4-6) will be blue for all devices currently in Identification mode. Tip: You might need to refresh the table by pressing , to update the data to the current status. -
Page 29: Info
4. Operation 4.4.2 Info Overview 1. Select the tab Info. Image 4-8 Device Info _ Info The Info page provides the information on the device listed below. Name The host name of the device is shown here. Change the name here and give it a meaningful name. Model The device model is shown here. -
Page 30: Diagnostics
2. Open the “log.txt” file. It provides a detailed technical status log of the device. The information in this log can be useful for troubleshooting, or can be requested by Barco personnel during support. Log files are reset after a reboot. -
Page 31: Administration
4. Operation DPIn status of the DisplayPort input DPOut status of the DisplayPort output DVIIn status of the DVI input DVIOut status of the DVI output HDMIIn status of the HDMI input HDMIOut status of the HDMI output AudioIn status of the analog audio input AudioOut status of the analog audio output VNCClient... - Page 32 - When unchecked, the user account cannot access the webUI. 2. Allow Barco service access - When checked, the user can have ssh (secure shell) access to the device. - When unchecked, ssh access is disabled (default).
-
Page 33: Software Upgrade
4. Operation 1. Reboot Press Reboot to perform an immediate device soft reboot. 2. Save / Restore - Press Backup configuration to download the complete device configuration in a human readable format. Open the file. Note: The device configuration file does not contain any static IP configured settings, nor the ad- ministrator password - Press Restore configuration to upload a specific device configuration file. -
Page 34: Settings
4. Operation Image 4-13 Device Info _ Help The Help page provides a link to the mybarco website where the product documentation can be found. Settings 4.5.1 Introduction Settings menu In this menu you can configure the device’s operational behavior on the network. 1. -
Page 35: Ip Settings
4. Operation Image 4-15 Settings _ Network settings IP Settings Managed Mode SNMP settings Here you can configure your device on the network. The NGS-D320 is designed to operate on standard IPv4 networks. The device can be added to any IPv4 network, following standard network setup practices. -
Page 36: Managed Mode
first having to go to each box individually to enable managed mode, hereby defeating the concept of having a system. Refer to the applicable Barco Management System Installation Guide to operate the device in this mode. Select Managed Mode (slide the bullet to the right) to enable the device to be managed by the system. -
Page 37: Unmanaged Mode
4. Operation 4.5.2.3 Unmanaged mode How to switch to Unmanged Mode To use the device only in Unmanaged Mode, and prohibit the use of Managed Mode, switch off (slide the bullet to the left). Press Apply to save the settings. Unmanaged control mode is described in "Control modes", page 7 . -
Page 38: Dvi In/Dp In/Hdmi In
Image 4-18 Encoder settings DVI In / DP In / HDMI In On NGS-D320 Lite devices, only Stream 0 can be configured On NGS-D320 Pro devices, Stream 0 & 1 can be configured independently. 2. The Encoding profile is by default set to “auto”. Select the desired Encoding profile. -
Page 39: Hdmi Audio In
4. Operation - Associated audio By default, the audio stream is Associated with the video stream. This also means the RTSP url of the video stream, will provide both the audio & video stream (via a combined SDP). This association can also be disabled. This means audio & video streams are sent separately. - Associated USB By default, the USB HID stream is Associated with the video stream. -
Page 40: Decoder Settings
4. Operation 4.5.4 Decoder settings 4.5.4.1 Overview Decoder settings tab 1. Select the tab Decoder Settings Image 4-21 Settings _ Decoder Settings The Decoder Settings page allows to set up the device for decoding & streaming media. 2. Press the Refresh button to ensure you have the latest device status displayed correctly before mak- ing any changes. -
Page 41: Hdmi Audio Out
4. Operation - Standby - EDID preferred timing - One of the specific timings (listed in the drop down box) Image 4-23 Decoder settings DVI Out / DP Out/ HDMI Out 2. The Content field is set to loop through by default. The drop down box will list any available video stream on the network. -
Page 42: Usb Peripherals
4. Operation 4.5.4.5 USB Peripherals Association 1. A connected keyboard and mouse can only be associated with one video output. By default, this is set to auto, and association will be made with first connected output. Image 4-25 Decoder settings USB Peripherals You can also force association to a video output, by selecting the appropriate output in the drop down box.. -
Page 43: Cleaning Your Device
5. Cleaning your device 5. CLEANING YOUR DEVICE Cleaning procedure Before cleaning 1. Switch off the device. 2. Remove the power cord from the device. Cleaning the device 1. Clean the cabinet using a soft cleaning cloth. Caution: Do not apply or spray liquid directly to the cabinet as excess liquid may cause damage to internal electronics. - Page 44 5. Cleaning your device K5903129 NGS-D320 29/09/2016...
-
Page 45: Repackaging Instructions
6. Repackaging instructions 6. REPACKAGING INSTRUCTIONS Device repacking How to repack the NGS-D320 1. Open the box and remove the upper foam. Image 6-1 Repacking 2. Place the NGS-D320 in the left whole of the foam. 3. You may also put the cables back at the right side. 4. - Page 46 6. Repackaging instructions K5903129 NGS-D320 29/09/2016...
-
Page 47: Service Activities
7. Service activities 7. SERVICE ACTIVITIES Reaching the local Barco helpdesk and online support How to reach 1. Go to Barco’s website, www.barco.com. Image 7-1 Website Barco 2. Click on the drop down next to Training & Support and select Support. -
Page 48: Online Product Support
7. Service activities The local service contact page is displayed. Image 7-3 Local service contact page 5. Click Log in (you may first need to Sign up) and the SalesForce.com page appears (https://emea.sales- force.com/). Online product support Contents The online product support provides: •... - Page 49 7. Service activities Image 7-4 Swap / part delivery request 3. Fill out the service request form Image 7-5 Service request form 4. Click Submit & Add Attachment. 5. Click Choose File and browse to the file to attach. 6. Click Attach file. 7.
- Page 50 7. Service activities Image 7-6 Attach file(s) An overview will be displayed. Extra information can be added. Your service request is logged. K5903129 NGS-D320 29/09/2016...
-
Page 51: Important Information
8. Important information 8. IMPORTANT INFORMATION Safety information General recommendations Read the safety and operating instructions before operating the device. Retain safety and operating instructions for future reference. Adhere to all warnings on the device and in the operating instructions manual. Follow all instructions for operation and use. -
Page 52: Environmental Information
8. Important information Power cords : • Utilize a UL-listed detachable power cord, 3-wire, type SJ or equivalent, 18 AWG min., rated 250 V min. • Do not overload wall outlets and extension cords as this may result in fire or electric shock. •... - Page 53 Electronic Products” (Also called RoHS of Chinese Mainland), the table below lists the names and contents of toxic and/or hazardous substances that Barco’s product may contain. The RoHS of Chinese Mainland is included in the MCV standard of the Ministry of Information Industry of China, in the section “Limit Requirements of toxic substances in Electronic Information Products”.
-
Page 54: Regulatory Compliance Information
Mainland, marked with the Environmental Friendly Use Period (EFUP) logo. The number inside the EFUP logo that Barco uses (please refer to the photo) is based on the “General guidelines of environ- ment-friendly use period of electronic information products” of Chinese Mainland. -
Page 55: Emc Notice
This product is in conformity with the protection requirements of EU Council Directive 2004/108/EC on the approximation of the laws of the Member States relating to electromagnetic compatibility. Barco cannot accept responsibility for any failure to satisfy the protection requirements resulting from a nonrecommended modification of the product. - Page 56 8. Important information Indicates the device is approved according to the BSMI regulations Indicates the device is approved according to the PSE regulations Indicates the device is approved according to the BIS regulations Indicates the device is approved according to the RCM mark (regulatory compliance mark) for Australia and New-Sealand Indicates the USB connectors on the device Indicates the DisplayPort connectors on the device...
-
Page 57: Legal Disclaimer
Barco software products are the property of Barco. They are distributed under copyright by Barco NV or Barco Inc., for use only under the specific terms of a software license agreement between Barco NV or Barco Inc. and the licensee. No other use, duplication, or disclosure of a Barco software product, in any form, is authorized. - Page 58 8. Important information Remote keyboard and Supported (Native keymap) mouse Safety UL/ cUL/ EN/ IEC 60950-1 CB report CE, FCC Part 15 Class A, CISPR 22, ICES003 Dimensions 44 mm H x 170 mm W x 170 mm D (1.73” H x 6.7” W x 6.7”) Weight 1 ±...
-
Page 59: Technical Specifications Ngs-D320 Pro
8. Important information Dimensions packaged 382mmx273mmx85mm | 15,04"x10,75"x3,35" Weight packaged 2.2 kg | 4.8 lbs Technical Specifications NGS-D320 Pro NGS-D320 Pro Image processing Color space conversion, scaling, frame rate reduction Automatic downscaling Y (Adjust to profile) Remote keyboard and Supported (native keymap) mouse Safety UL/ cUL/ EN/ IEC 60950-1 CB report... -
Page 60: Open Source License Information
Barco whatsoever. You further acknowledge that any such additions, changes or modifications may impair the ability of Barco – at Barco’s sole discretion - to continue to provide ser- vice, warranties, software updates, fixes, maintenance, access or such similar abilities, without any recourse or claim towards Barco whatsoever.
Need help?
Do you have a question about the NGS-D320 Lite and is the answer not in the manual?
Questions and answers