Table of Contents
Advertisement
Quick Links
Advertisement
Table of Contents

Related Manuals for Barco NGS-D200


Summary of Contents for Barco NGS-D200
-
Page 1: User Guide
NGS-D200 User Guide K5903085 25-Feb-15... - Page 3 Barco Inc. The information in this manual is subject to change without notice. Barco assumes no responsibility for damages resulting from the misuse of this product or document, including, but not limited to, lost revenue, lost data, claims by third parties, or other damages.
-
Page 5: Table Of Contents
4.1 Mounting the NGS-D200 4.2 Installation Diagram 4.3 Overview of Encoder/Decoder Dataflow 4.4 Connections for 3D/Stereoscopic Video Chapter 5: Discovering the NGS-D200 and Accessing the Web UI 5.1 Powering on the NGS-D200 5.2 Locate the Device 5.3 Configuration Wizard 5.4 Accessing the Web UI Chapter 6: Web UI Overview 6.1 General Functionality... - Page 6 Chapter 14: Administration 14.1 Administration 14.2 Management Settings Appendix I: Supported Encoding/Decoding Resolutions Appendix II: Making a Simple Connection Between an NGS-D200 Encoder and Decoder II.1 Prerequisites II.2 Encoder Setup II.3 Decoder (client) Setup II.4 Get Information about the Connection...
- Page 7 VII.2 General Considerations VII.3 Important safety instructions Appendix VIII: Environmental Statements VIII.1 Disposal of the Product (Waste Electrical and Electronic Equipment) VIII.2 Turkey RoHS compliance VIII.3 Chinese Mainland RoHS Appendix IX: BARCO, INC. END USER LICENSE AGREEMENT NGS-D200 User Guide...
-
Page 9: Chapter 1: How To Use This Manual
See the document "Installation and Configuration of TransForm N (R591408_00_Installation.pdf) Replacement for the V2D XP line of encoders for users of the 4.x Barco Collaboration Suite. When used with the 4.x Collaboration Suite, the NGS-D200 enables recording and playback of DVI sources See the document "4.x Admin UI Setup Guide (922-10060)"... -
Page 11: Chapter 2: Product Overview
The NGS-D200 leverages the power of the Barco's V2D (Video-to-data) codec. The Video-to-Data (V2D) codec is optimized for collaboration and transmitting ultra HD computer graphics and data across networks. V2D is architected for very high image quality, accurate color representation and sharp resolution of details and fine lines. -
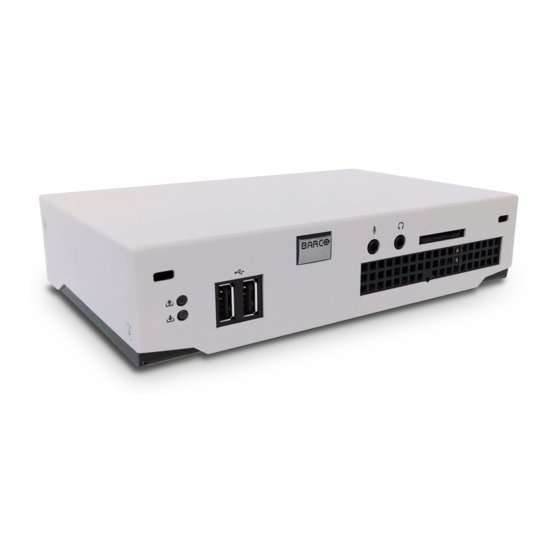
Page 12: Front Panel Overview
2. Press the button for eight seconds 3. The front panel LEDs will flash and the system will reset 2.4.2 Front panel LEDs The NGS-D200 features has two LEDs on the front panel that are used to identify the connection status of the device. K5903085... -
Page 13: Rear Panel Overview
OTE: End-to-end sync is not currently available. 2.5.1 Rear Panel LEDs The NGS-D200 has two LEDs on the back panel that can be used to identify the configuration and status of the device: Table 2-3: Video In Indicator Overview Color... -
Page 14: Video Connection And Sync Specifications
Monitor is detected, but the NGS-D200 is unable to read its EDID Blinking Monitor is detected, but the NGS-D200 is unable to display the video because the output signal is unsupported by the monitor Solid Green Monitor is detected, and the video output is supported by the monitor... -
Page 15: Audio Connection Specifications
Chapter 2: Product Overview Table 2-5: Video Specifications Function: NGS-D200 Lite NGS-D200 Pro NGS-D200 Pro 3D Digital: 800 x 600 Digital: 800 x 600 Digital: 800 x 600 to to 1920 x 1200 to 2560 x 1600 2560 x 1600... -
Page 16: Device Defaults
If using the NGS-D200 as a Transform-N DVI input node, then use the device in Standalone Mode. Please see "Installation and Configuration of TransForm N" for more on using the NGS-200 as part of the TransForm N environment 2.9.2.1 Standalone Mode Requirements... - Page 17 Chapter 2: Product Overview Decoders: Establish connections with the encoder (via Connection Manager Table) For more information, see "Connection Manager Table" on page 35 NGS-D200 User Guide...
-
Page 19: Chapter 3: Unpacking The System
OTE: *The SD card contains all necessary licensing information. If you have purchased the NGS-D200 Pro or NGS-D200 Pro 3D, you will receive an additional SD card that will enable additional functionality beyond what is supported by the NGS-D200 Lite. The NGS-D200 Pro 3D also comes with the 3D stereo kit (part # C9826147). NGS-D200 User Guide... -
Page 20: Unpacking The System
IP: You can access the Quick Start Guide and NGS-D200 HW Guide through the Web UI. 3.2 Unpacking the System 3.2.1 Unpacking the unit You should unpack and check the pieces of the NGS-D200 unit as soon as the system arrives. 3.2.2 Procedure 1. Carefully open the box 2. -
Page 21: Chapter 4: Installation And Connections
The NGS-D200 is designed to function as a desktop model. It is equipped with rubber feet to prevent scratching the surface it is placed on. Additionally, two units can be mounted within a 1U rack space using the NGS-D200 rack mount kit (part number C9826136 - not included ). - Page 22 Chapter 4: Installation and Connections K5903085...
-
Page 23: Overview Of Encoder/Decoder Dataflow
After making a connection, the decoder side will see, hear, and control encoder-side source by default. On the encoder side, the NGS-D200 loopback feature allows video, audio, and peripheral (USB) signals and data to pass through for connection to a monitor, speakers and the source. This enables collaboration between the two sites as the user at the encoder side can continue to operate their workstation as it is being shared with the decoder side. - Page 24 Chapter 4: Installation and Connections 4.3.1.1 Encoder to Hardware Decoder Figure 4-1: Typical dataflow between the encoder and hardware decoder 4.3.1.2 Encoder to Software Decoder K5903085...
-
Page 25: Connections For 3D/Stereoscopic Video
Keyboard/Mouse Parameters" on page 56 4.4 Connections for 3D/Stereoscopic Video OTE: 3D/Stereoscopic video is only supported on the NGS-D200 Pro 3D. For information on upgrading to the Pro 3D, please contact Barco Sales. This outlines a simple setup in which a single stereo source will be transmitted to the remote side. - Page 26 Chapter 4: Installation and Connections Stereoscopic goggles or viewing device 3d stereo kit (part # C9826147) Female BNC-to-male RCA adapters (2 included with NGS-D200 Pro 3D) BNC cables OTE: The encoder requires active L/R sync input to detect stereoscopic video. 4.4.2 Configuration 1.
-
Page 27: Chapter 5: Discovering The Ngs-D200 And Accessing The Web Ui
Chapter 5: Discovering the NGS-D200 and Accessing the Web UI Chapter 5: Discovering the NGS-D200 and Accessing the Web UI This chapter discusses how to discover the NGS-D200 on your network, and how to access the Web UI to configure device settings. 5.1 Powering on the NGS-D200 Now that the unit is connected, it is ready to be powered up. -
Page 28: Configuration Wizard
ARNING: Make sure to document the configured device name and password. You will have to revert the system to factory defaults if this is lost or forgotten. For more information, see "Reset the NGS-D200 to Factory Defaults" on page 4 Management Server IP/DNS name (if using the device in Managed Mode as part of the 4.x Collaboration Suite) -
Page 29: Accessing The Web Ui
Chapter 5: Discovering the NGS-D200 and Accessing the Web UI OTE: If setting up encoder for streaming using Multicast mode, make sure that no two enocders have the same mutlicast address. This can be achieved by either using Standalone mode and setting a unique mutlicast address on each encoder. -
Page 31: Chapter 6: Web Ui Overview
Administration: allows you to configure device management and administration settings Discovery: shows other devices on your network. This is helpful for finding other clients and servers that you can connect to Documentation: provides links to the product documentation NGS-D200 User Guide... -
Page 32: Chapter 6: System Information
Chapter 6: System Information Chapter 6: System Information The System Information page provides the following system status and access to system settings System Status Software Information: provides build version number, date, serial number, model type and license type for the device. -
Page 33: Chapter 7: Network Configuration
You can specify the DNS server and the device host name. 7.2.2.1 Notes You must have preconfigured your DNS server If using the device in Managed mode, DNS must already be configured on the Management Server. See the 4.x Admin UI Setup Guide NGS-D200 User Guide... - Page 34 Local Domain Name: Enter the local domain name for you network OTE: If using the device in Managed mode, enter the domain name of the Management Server (e.g barco.com) DNS Server IP Address: Enter the IP address of your deployment's DNS server OTE: When you have finished making changes, click "Apply" at the bottom of the page. Click "Save Settings" to permanently save your changes to the device.
-
Page 35: Chapter 8: Streaming
Local Video Output: Indicates if the encoder is displaying its encoded video source out via the DVI-D OUT port Reverse Audio Bytes: Displays the number of bytes currently consumed by reverse (bidirectional) audio 8.1.2 Streaming Statistics (Decoder) Server: Displays the IP address of the currently connected encoder server Status: Displays the connection status of the decoder NGS-D200 User Guide... -
Page 36: Streaming Settings
Chapter 8: Streaming Remote LUT: Displays the name field of the LUT used to process video on the V2D encoder Display LUT: The name field of the LUT the decoder is using to override the Remote LUT if Override is enabled OTE: The 'Display LUT' field will show "????"... - Page 37 8.2.2 Encoder Splash Parameters The encoder will display a splash screen when there is no local input video detected. You can configure the settings of the splash screen or force the splash screen to always display with this menu. NGS-D200 User Guide...
- Page 38 Chapter 8: Streaming OTE: You will see the encoder splash screen if you connect an idle encoder to an decoder on the decoder output. Table 8-2: Default/Valid Splash Parameters Field Default Value Valid Entries Splash Screen Blue Screen Blue Screen, Grid Lines Splash B/W 1.00 M 0-supported bandwidth of device...
- Page 39 Vert. Sync: Allows you to adjust the number of lines of vertical synchronization (lines) OTE: When you have finished making changes, click "Apply" at the bottom of the page. Click "Save Settings" to permanently save your changes to the device. NGS-D200 User Guide...
- Page 40 Chapter 8: Streaming 8.2.4 Force Splash Screen (Encoder) You can choose to always display the splash screen, even if the encoder is actively encoding video. This is helpful if you are having trouble displaying a video source and need to ensure the problem is not related to a network connection to the decoder.
- Page 41 1. IP Address: 10.1.0.0, Netmask: 255.255.0.0, Bandwidth: 10M 2. IP Address: 10.1.5.50, Netmask: 255.255.255.255, Bandwidth: 10 M 3. IP Address: 10.1.5.50, Netmask: 255.255.255.255, Bandwidth: 20 M Entry #2 will be solely enforced because it is higher in the list than Entry #3 NGS-D200 User Guide...
- Page 42 Chapter 8: Streaming IP: See Appendix II for additional instructions on making connections between units. 8.2.10 Procedure 1. Click "Add" to add a new entry 2. Configure the following: Table 8-4: Default/Valid Authorization Parameters Field Default Value Valid Entries Host/Network IP 0.0.0.0 Netmask 0.0.0.0...
- Page 43 8.2.11 Connection Manager Table The Connection Manager Table is used to connect an NGS-D200 decoder directly to an encoder. The decoder can switch connections to different encoders by selecting different entries from this menu.
- Page 44 Chapter 8: Streaming OTE: You can choose which audio input (Mic in or Line In ) will be used for reverse audio. For more information, see "Audio Mixer Configuration" on page 51 OTE: Reverse (bidirectional) Audio must be enabled on both the encoder and decoder through the Streaming Configuration Menu.
-
Page 45: Chapter 9: Encoding
(8-10) are recommended for networks with bandwidth constraints Min/Max Refresh: The encoder continuously sends updated video information to connected clients. Only small sections of the screen are sent for every video frame, and over a period of time, the whole screen is completely NGS-D200 User Guide... - Page 46 Chapter 9: Encoding refreshed. This mechanism compensates for lost packets on the network and allows the client to always be in sync with the latest video data. The rate of these continuous updates can be configured using Min and Max Refresh Min Refresh: Setting high values for Min Refresh gives better error resiliency on a lossy network at the cost of higher bandwidth usage.
- Page 47 Chapter 9: Encoding OTE: When you have finished making changes, click "Apply" at the bottom of the page. Click "Save Settings" to permanently save your changes to the device. NGS-D200 User Guide...
-
Page 49: Chapter 10: Decoding Settings
Horiz Offset: When Horiz Position is set to 'Offset,' specifies the horizontal location of your video in relation to the left edge of the display Vert Location: When Vert Position is set to 'Location,' specifies the vertical location of your video NGS-D200 User Guide... - Page 50 Chapter 10: Decoding Settings Vert Offset: When Vert Position is set to 'Offset,' specifies the horizontal location of your video in relation to the top edge of the display OTE: If the horizontal or vertical pixel offset is out of the range of your monitor, the system will automatically adjust the video to fit your monitor.
-
Page 51: Chapter 11: Video
IP: If you wish to connect a monitor to the NGS-D200 simply to get the EDID for image capture, then do the following: from the Video section of the Web UI, you must first delete the “List of Preferred Timings in EDID to Source”... - Page 52 It makes the operation in DVI mode easier. User does not need to create look up tables (LUTs) manually for input video timing detection. NGS-D200 can automatically create a video LUT from input video timings. When this option is enabled, other LUTs created in the system are ignored for video detection and the auto created LUT takes precedence.
- Page 53 (video card, cables, etc.) and video resolution. Ideally, this field should be set to a level that minimizes bandwidth usage. You can check the bandwidth usage from Display Connection Information to find a sampling phase that works best for your deployment. For more information, see "Streaming Statistics NGS-D200 User Guide...
- Page 54 Chapter 11: Video (Decoder)" on page 27 Horiz Position: Allows you to move the horizontal edge of your video in relation to the left corner of the display by the specified number of pixels Vert Position: Allows you to move the vertical edge of your video in relation to the top corner of the display by the specified number of pixels OTE: Horiz/Vert Position always apply to analog video.
- Page 55 Vert. Resolution: Specify the vertical resolution of the video (e.g. Refresh Rate: Specify the vertical refresh rate of the video OTE: See your video adaptor's documentation to obtain the proper horizontal and vertical timing parameters. Pixel Clock Rate: Enter the pixel clock of the video NGS-D200 User Guide...
- Page 56 Chapter 11: Video Horiz. Front Porch: Specify the number of columns of horizontal front porch Vert. Front Porch: Specify the number of lines of vertical front porch Horiz. Back Porch: Specify the number of columns of horizontal back porch Vert. Back Porch: Specify the number of lines of vertical back porch Horiz.
- Page 57 "List of Video LUTs" on page 46 3. Select a descriptor number OTE: When you have finished making changes, click "Apply" at the bottom of the page. Click "Save Settings" to permanently save your changes to the device. NGS-D200 User Guide...
-
Page 59: Chapter 12: Audio
IP: The Mic input ( )is located on the front of the unit and the Line input ( ) is located on the rear. OTE: For encoders, Remote Audio changes the volume of reverse (bidirectional) audio coming from the decoder. NGS-D200 User Guide... -
Page 61: Chapter 13: Keyboard/Mouse (Kbm)
2. Over RFB, where the host PC is running an instance of an RFB server and the encoder is configured as an RFB client 13.2 Overview of Keyboard/Mouse (KbM) Modes There are several different KbM modes that can be set for connected keyboard and mice. 13.2.1 Decoder NGS-D200 User Guide... -
Page 62: Making Physical Connections
Chapter 13: Keyboard/Mouse (KbM) Figure 13-1: Overview of Decoder KbM Modes 13.2.1.1 Local Mode When set to “Local” Mode, the unit will only transmit KbM bytes through the HOST port (USB Type B) to the local PC. KbM bytes will not be sent over the network. 13.2.1.2 Remote Mode When set to “Remote”... -
Page 63: Making Rfb Connections
13.4 Making RFB Connections The NGS-D200 encoder can run an instance of RFB client. This enables the system to be controlled by a source PC that is running an instance of RFB server. When the encoder connects to a decoder, any keyboard/mouse data from the decoder will be forwarded to the encoder (RFB client) which will in turn forward this to the source PC (RFB server). -
Page 64: Kb/M Settings
Chapter 13: Keyboard/Mouse (KbM) This setting must be configured on both the connected encoder and decoder Only the same keyboard type can be used on both ends of the connection (e.g.if encoder is get to German and decoder/software client should also be set to German) OTE: When you have finished making changes, click "Apply"... -
Page 65: Chapter 14: Administration
Prerequisites - a webserver needs to be installed (if not already, a webserver like WampServer can be installed http://www.wampserver.com/en/ ) 1. Untar the NGS-D200 Firmware upgrade package into a directory. It will create a directory called IMAGES 2. Place the IMAGES folder in root folder of webserver (normally a directory on webserver like www) -
Page 66: Management Settings
14.2.3 Standalone Mode This allows you to change the device from Managed to Standalone Modes. In Managed Mode, the device is used as part of networked, centrally managed, collaboration solution under the control of the 4.x Barco Management Server. For more K5903085... - Page 67 "Modes of Operation" on page 8 Standalone: Sets the device to be used in Standalone Mode OTE: When you have finished making changes, click "Apply" at the bottom of the page. Click "Save Settings" to permanently save your changes to the device. NGS-D200 User Guide...
-
Page 69: Appendix I: Supported Encoding/Decoding Resolutions
Appendix I: Supported Encoding/Decoding Resolutions Appendix I: Supported Encoding/Decoding Resolutions The NGS-D200 Lite can support the following resolutions: Horiz Horiz Refresh Horiz Vert Front Vert Vert Back Pixel Clock Format Resolution Front Back Rate (Hz) Sync Porch Sync Porch (MHz) - Page 70 1152x900 59.9 85.00 1200x1600 59.9 162.25 1600x1200 75.0 204.75 1776x1056 59.9 155.00 The NGS-D200 Pro and NGS-D200 Pro 3D can support additional dual-link resolutions: Horiz Horiz Refresh Horiz Vert Front Vert Vert Back Pixel Clock Format Resolution Front Back Rate (Hz)
-
Page 71: Appendix Ii: Making A Simple Connection Between An Ngs-D200 Encoder And Decoder
II.2 Encoder Setup 1. Launch a web browser. In the address bar, enter the IP address/domain name of the NGS-D200 unit (e.g. 10.1.5.50) 2. Ensure the device is configured as an encoder and in "Standalone" mode. You will see this information on the top of the Web UI. -
Page 72: Ii.4 Get Information About The Connection
Appendix II: Making a Simple Connection Between an NGS-D200 Encoder and Decoder If not a decoder: Under the System Control section, click "Encoder/Decoder." The system will reboot and come up as a decoder. OTE: After the system boots and you log back in, make sure to click "Save Settings" to ensure the device will continue to come up as an decoder after any subsequent reboots. -
Page 73: Appendix Iii: Stereo Emitter Cable Specifications
Appendix III: Stereo Emitter Cable Specifications OTE: 3D/Stereoscopic video is only supported on the NGS-D200 Pro 3D. For information on upgrading to the Pro 3D, please contact Barco Sales. OTE: The 3D stereo kit (part number C9826147) is included with the NGS-D200 Pro 3D. -
Page 75: Appendix Iv: Required Settings To Use Kbm In 4.X Collaboration Suite
Profiles Tab > Add Profile/Edit Profile > Config Tab > Keyboard Mouse Settings > Enable Keyboard/Mouse This Profile must be applied using the appropriately configured Route TTENTION: See the 4.x Admin UI Setup Guide for more on Policy Configuration. NGS-D200 User Guide... -
Page 77: Appendix V: Settings To Allow Remote Keyboard & Mouse (Kbm) Control On Linux Systems
5. Enable the following check boxes: "Allow other users to view your desktop" "Allow other users to control your desktop" 6. (Optional) Configure Security settings Figure V-1: Remote Desktop Preferences V.2 Enable KbM on a openSUSE System From the main Suse Desktop: NGS-D200 User Guide... - Page 78 Appendix V: Settings to Allow Remote Keyboard & Mouse (KbM) Control on Linux Systems 1. Click on Computer 2. Select Control Center 3. Select Remote Desktop 4. Enable the following check boxes: "Allow other users to view your desktop" "Allow other users to control your desktop" 5.
-
Page 79: Appendix Vi: Rfb Keyboard Ascii Guide
When the encoder is configured as an RFB client to the host PC (RFB server) certain keystrokes are sent as follows: LGUI (L Windows key): 0x1f/0xffe7 RGUI (R Windows key): 0x27/0xffe8 Application: 0x2f/0xff20 Print Screen/System Rq: 0xff15/0xff15 Scroll Lock: 0xff13/0xff13 Pause/Break: 0xff14/0xff14 NGS-D200 User Guide... -
Page 81: Appendix Vii: Safety And Compliance Statements
Barco is not responsible for any radio or television interference caused by unauthorized changes or modifications to this equipment. Unauthorized changes or modifications could void the user’s authority to operate the equipment. -
Page 82: Vii.2 General Considerations
General safety instructions Before operating this equipment please read this manual thoroughly and retain it for future reference Installation and preliminary adjustments should be performed by qualified Barco personnel or by authorized Barco service dealers All warnings on the device and in the documentation manuals should be adhered to... - Page 83 Do not place flammable or combustible materials near the device! Barco products are designed and manufactured to meet the most stringent safety regulations. This device radiates heat on its external surfaces and from ventilation ducts during normal operation, which is both normal and safe.
- Page 84 If the product exhibits a distinct change in performance, indicating a need for service Replacement parts: When replacement parts are required, be sure the service technician has used original Barco replacement parts or authorized replacement parts which have the same characteristics as the Barco original part.
-
Page 85: Appendix Viii: Environmental Statements
根 据 中 国 大 陆 《 电 子 信 息 产 品 污 染 控 制 管 理 办 法 》 ( 也 称 为 中 国 大 陆 RoHS) ,以 下 部 分 列 出 了 Barco产 品 中... - Page 86 环 保 使 用 期 限 ( EFUP) 标 签 。 Barco产 品 所 采 用 的 EFUP标 签 ( 请 参 阅 实 例 , 徽 标 内 部 的 编 号 使 用 于 制 定 产 品...
-
Page 87: Appendix Ix: Barco, Inc. End User License Agreement
SOFTWARE; (iii) decompile, disassemble, reverse engineer or otherwise derive source code, or attempt to derive source code, from the SOFTWARE except to the extent Barco may, in certain jurisdictions, be required by law to permit reverse engineering and provided that the provisions of such law may not be waived or conditioned on prior request for information regarding interoperability;... - Page 88 This Agreement does not entitle You to any support, upgrades, patches, enhancements, or fixes (collectively, "Support") for the Technology. Any such Support for the Technology that may be made available by Barco, in its sole discretion, shall become part of the Technology and subject to this Agreement.
- Page 89 You acknowledge living up to the conditions of each separate Open Source Software license. For the complete list of open source software and private licenses used in the system, please contact Barco. TRADEMARK Brand and product names mentioned in this manual may be trademarks, registered trademarks or copyrights of their respective holders. All brand and product names mentioned in this manual serve as comments or examples and are not to be understood as advertising for the products or their manufacturers.
Need help?
Do you have a question about the NGS-D200 and is the answer not in the manual?
Questions and answers